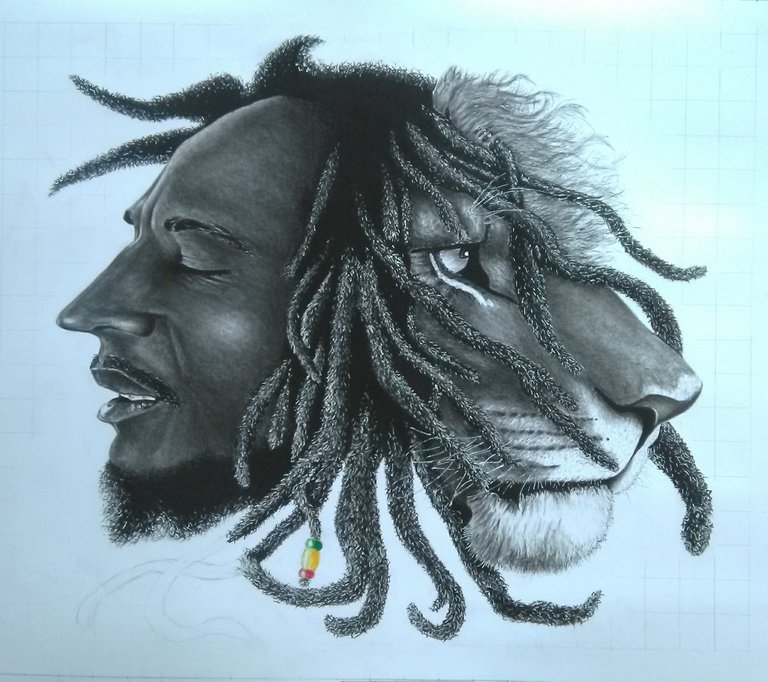
Step by step review on how I make my artworks, MODEL:- BOB MARLEY ARTWORK.
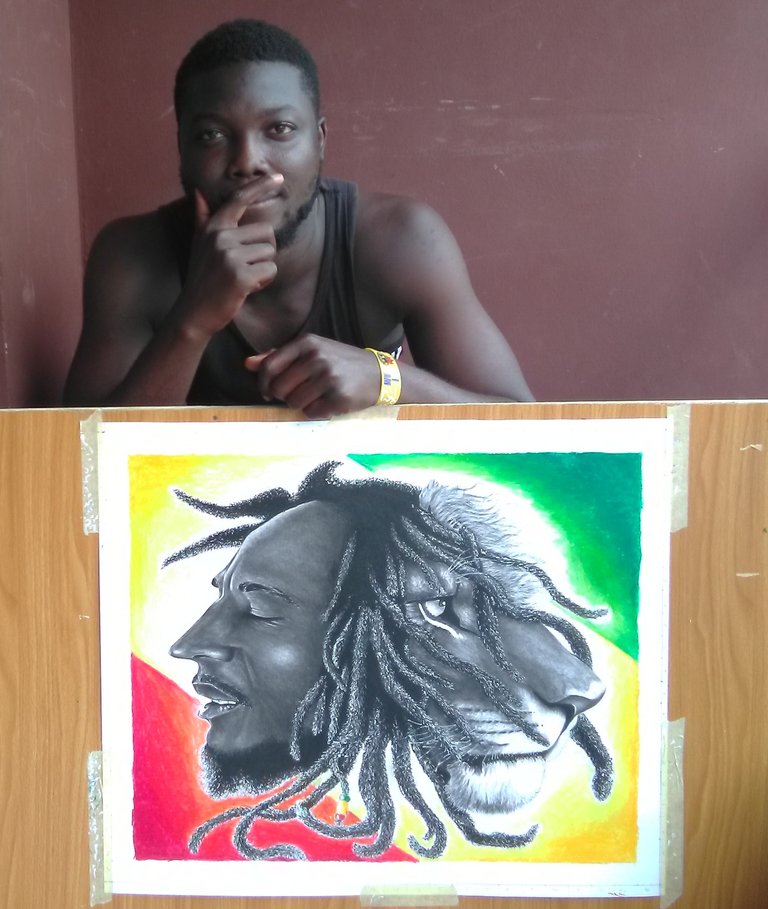
Hello everyone, hope you're all enjoying your day. On this post, I will be taking about the steps, and guidelines I followed to make a 20by24 framed pencil work of Bob Marley's picture in the "Iron lion Zion music cover". I would also be talking about some martial I used and where I applied them.
This post was motivated when I posted about PERSISTENCE on the @pob-wotw last 2 weeks, I spoke on how persistence improved my artworks. In the comment section, I told @calumam that I would be talking about the steps I follow in making my artworks, here we are.
Materials used.
- White cardboard
- Ruler
- Graphite pencil (H series)
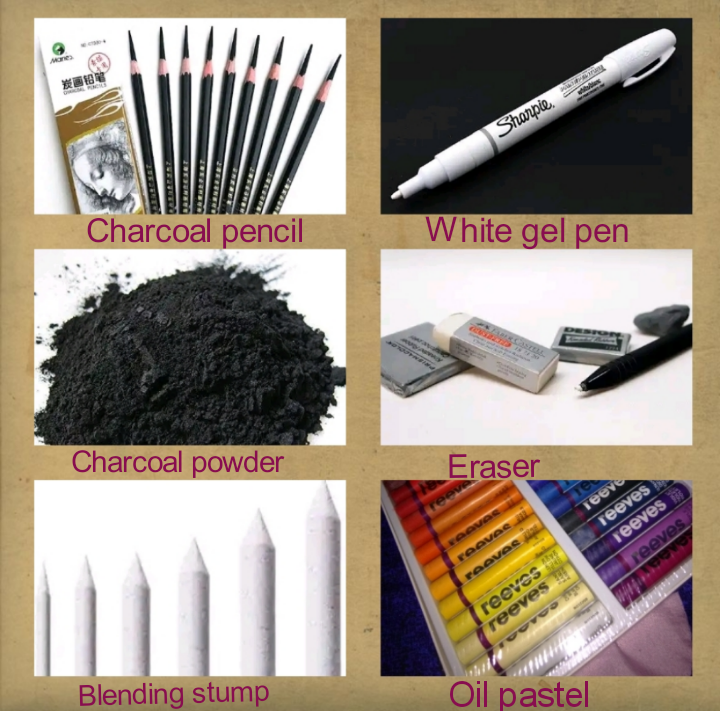
- Charcoal pencil (soft and medium)
- Eraser (kneaded and stick eraser)
- White gel pen
- Charcoal powder
- Blending stump
- Drawing board
- Oil pastel
STEPS
The first step is to place your white cardboard on your drawing board. After the cardboard has been taped round on the board, the next thing is to grid the particular picture you are about to draw.
What is GRID
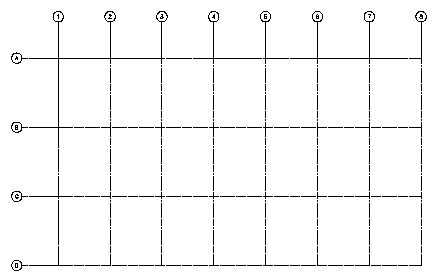
Grid is one of the reproduction methods under design, a method that helps to reproduce a particular shape on another surface in ratio.
No matter the frame size, grid helps to get an accurate reproduction of the particular shapes.
Visit here to learn more about grid lines 👇👇
After square gridding the picture in roles and columns, I make the same number of roles and columns on the white cardboard representing each box by one inch or more depending o how big I want the artwork to be. Note that while constructing the grid lines on your piece of paper with a pencil and ruler, make sure that you make the lines as faint as possible so that they can be easily erased off after the tracing and shading has been completed.
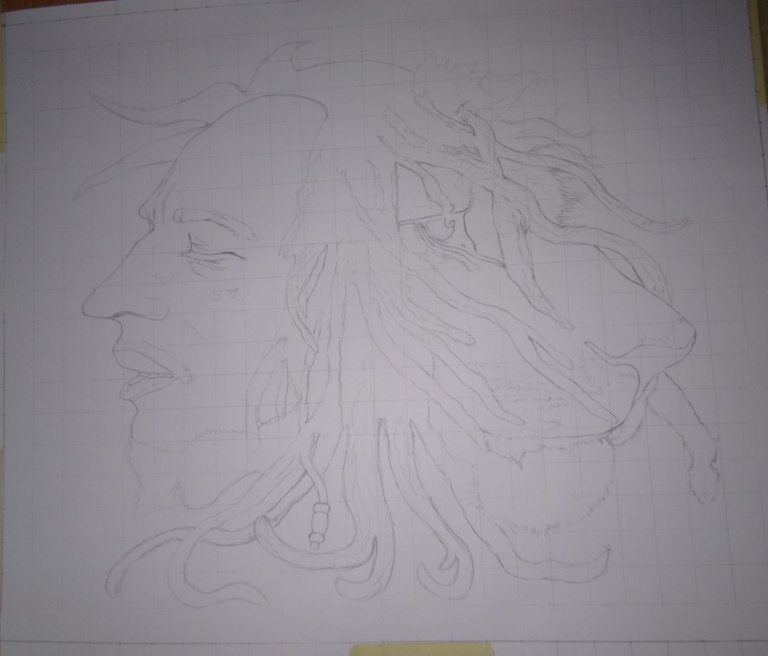
After that, I start tracing the outline on the white cardboard exactly the way they connect in the picture. After tracing the outline, then I start with the shading.
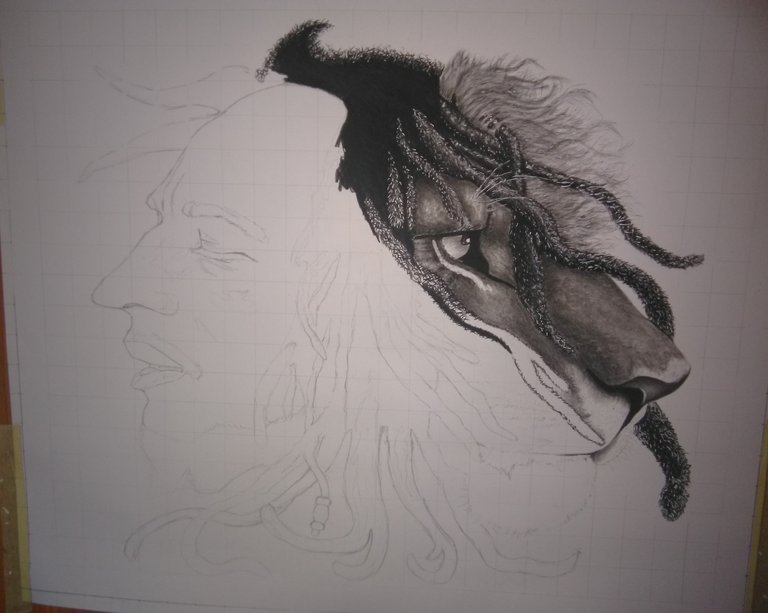

I usually start my shading from the right top corner of my work gradually till I finish up at the left bottom corner, this is because I am left handed. In these way I don't get to touch any part that I have already worked on/painted by accident.

So basically, I use the blending stump to blend out charcoal powder on the cardboard to create different shades of skin tone, how much charcoal powder I apply determines how dark the particular area would be.
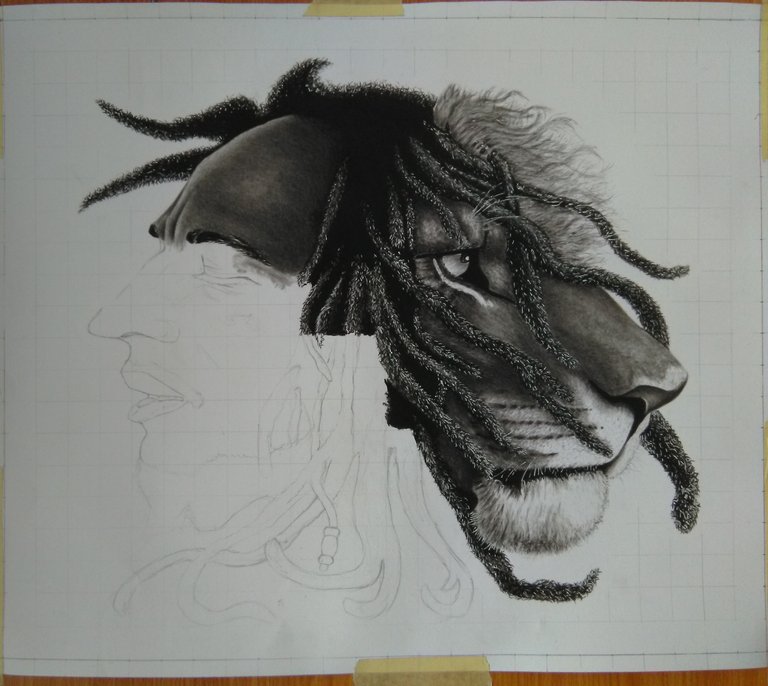
I use the charcoal pencil to shade the hair pattern respective of how it looks in the picture, I use the charcoal pencil to faintly overlay some area where I feel I want to achieve more darker shades and blend it out using the blending stump. I also use the charcoal pencil where I want to achieve sharp and dark edges, like the eyes and other parts that need defined contrast.
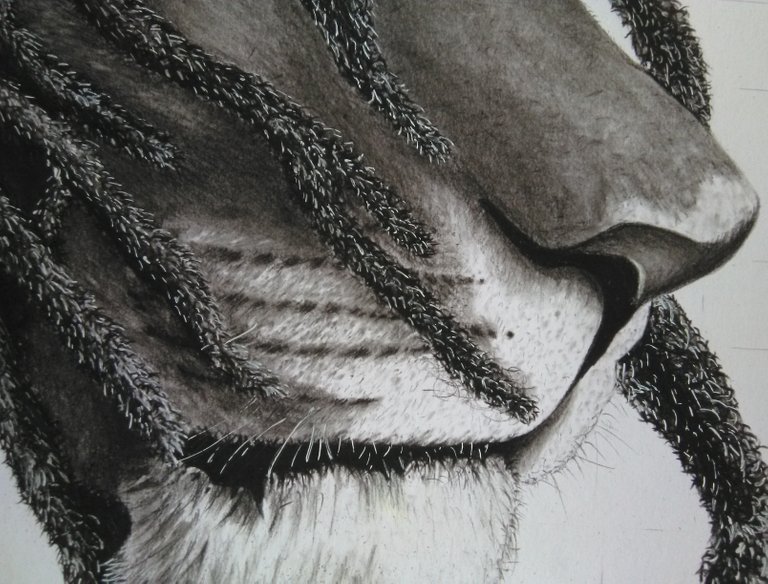
I use the white get pen in areas where I want to achieve a white refined highlight, spot, or line for example the white flyover on Bob Marley's dreadlocks and the highlight on the lions eyeball.

After the drawing had been completed, I thought of adding the known Jamaica colors to further beautiful the piece of artwork, I used the oil pastel to achieve that, and it came out well, though it was my first time using the oil pastel, I did have some issues blending the colours but with slow and steadily application of the pastel, I was able to get what I wanted out of it.
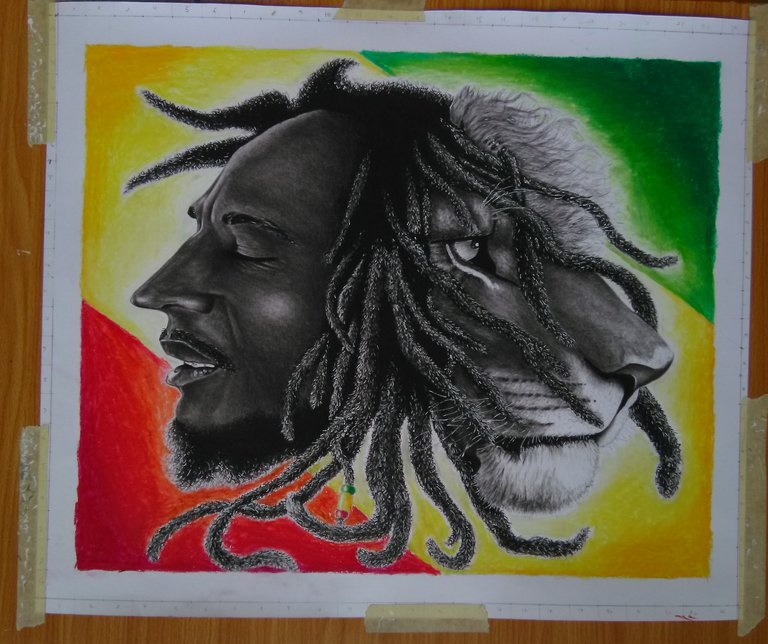
I hope the write up and pictures were able to illustrate how I went about the artwork from the start till the end.
If you have passion for artwork, or know someone who likes to draw and is finding some difficulties in improving, I would strongly advise that you keep checking tutorials to see how things are been done by other professional artists on the internet and try to follow up everything they do.
Your own unique style comes when you understand other's style, bring them together and form your own out of everything. By this way your style has a bit of everyone's unique style while retaining your personal style. Be persistent, that is the main drive to improving.
Thanks for reading this till this point, I hope you enjoyed the post, if there is any questions, please do not hesitate to drop them at the comments section.
Congratulations @corporateay! You have completed the following achievement on the Hive blockchain and have been rewarded with new badge(s) :
Your next target is to reach 4000 upvotes.
You can view your badges on your board and compare yourself to others in the Ranking
If you no longer want to receive notifications, reply to this comment with the word
STOPCheck out the last post from @hivebuzz:
Support the HiveBuzz project. Vote for our proposal!
Wow! This beautiful and unique. I am blown away already.
Love the combination of art work.
Please do keep it up
Thank you very much @esther-emmanuel, I am happy that you like it, I also appreciate you for dropping a comment.
Means a lot to me 😊😊
This is the good stuff right here @corporateay. Very pleased to see you followed up on this.
I really like your technique with the white gel pen against the charcoal, it really pops. The texture and depth in the image that you've managed to achieve is fantastic too. Keep em coming, this is high-quality content.
Thank you very much for your comment @calumam, I really appreciate you.
I love working with the white get pen, it brings out a fine detailed hair on artworks.
Thanks for the upvote too, I appreciate you.
Sick!
Nice work, you such a raw talent brother
Thanks brother, I really appreciate you
Man these are crazy details. You are so talented!
Such a mind-blowing piece of artwork.
Tripping on this now:
Thank you very much. I am happy that you like it
Don't stop bro. Keep posting. 🚀
Thanks brother, I'll make another post soon as I keep making new artworks with step by step progress shot pictures
Awesome bro. Looking forward to seeing them. ✌️
You're are a genus and talented bro @corporateay, nice illustrations, brilliant artwork, i wish i can do this to average. Well done and please, keep it up. Hope to see more of this kind of post.
Thank you very much @daniky, I appreciate you, I'll keep drawing and promise to share with you from time to time.
you're welcome sir. Ok bro😊
Wow. This is really great stuff. Such raw talent. Keep it up
Thank you very much, I appreciate you
Your work is breathtaking. Upvoted and Promoted.
Thanks so so so much, I appreciate you