[ESP-ENG] Un hermoso barco tejido ❣ A beautiful woven boat
Hello dear family of Hive, this time I made a woven art, hoping it will be to your liking. It is an activity that I had to motivate me to remember how it was done, since in my youth I did it and well as always one has help, what more help than that of my husband, if more preamble, let's start.
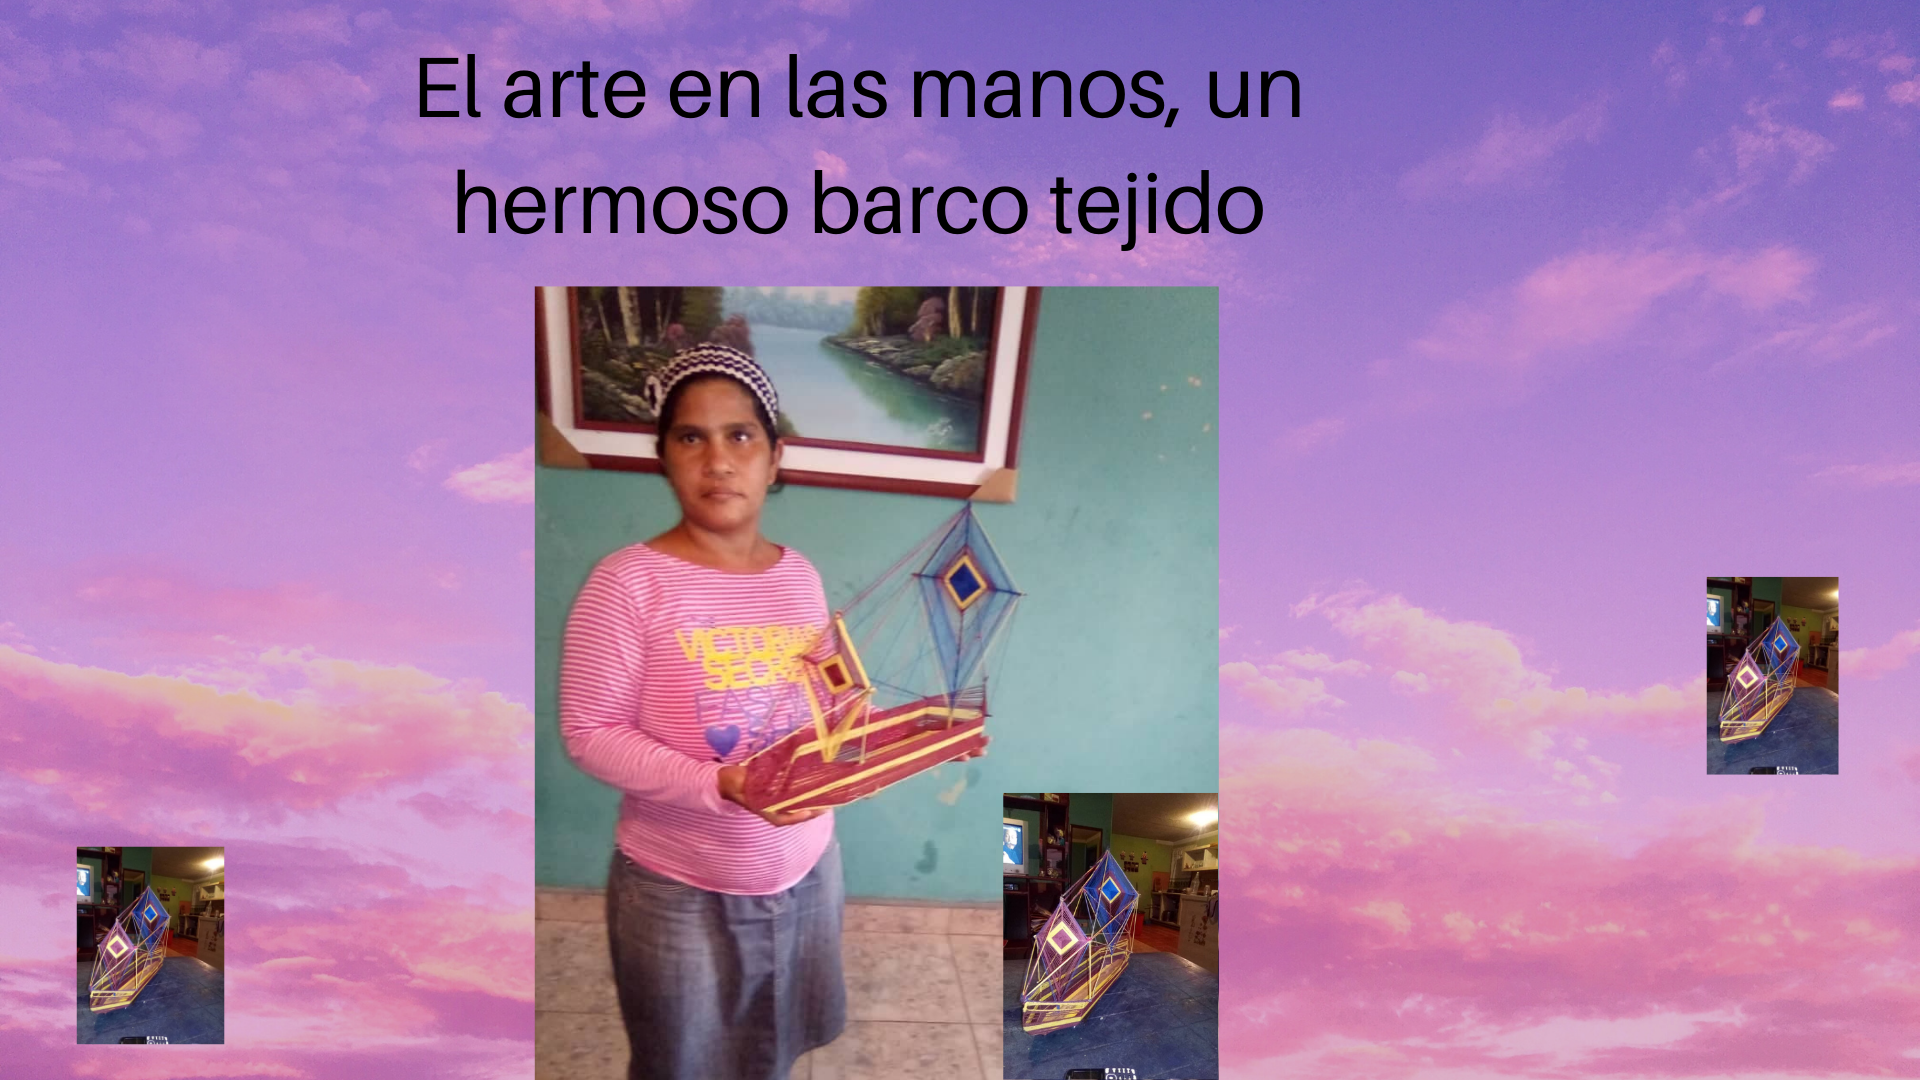
Foto tomada con mi teléfono inteligente y edición de canva
A través del tejido, podemos diseñar hermosas cosas, desde un lindo cuadro, un osito, una gallinita tejida, pulsera, siendo un arte creativo, demostrando las habilidades que tenemos. Es por eso, que veremos el paso a paso de un barco tejido realizado con materiales de provecho.
Through weaving, we can design beautiful things, from a nice picture, a teddy bear, a knitted hen, a bracelet, being a creative art, demonstrating the skills we have. That's why, we will see the step by step of a woven boat made with useful materials.

.png)
Foto tomada con mi teléfono inteligente y ediccion de canva
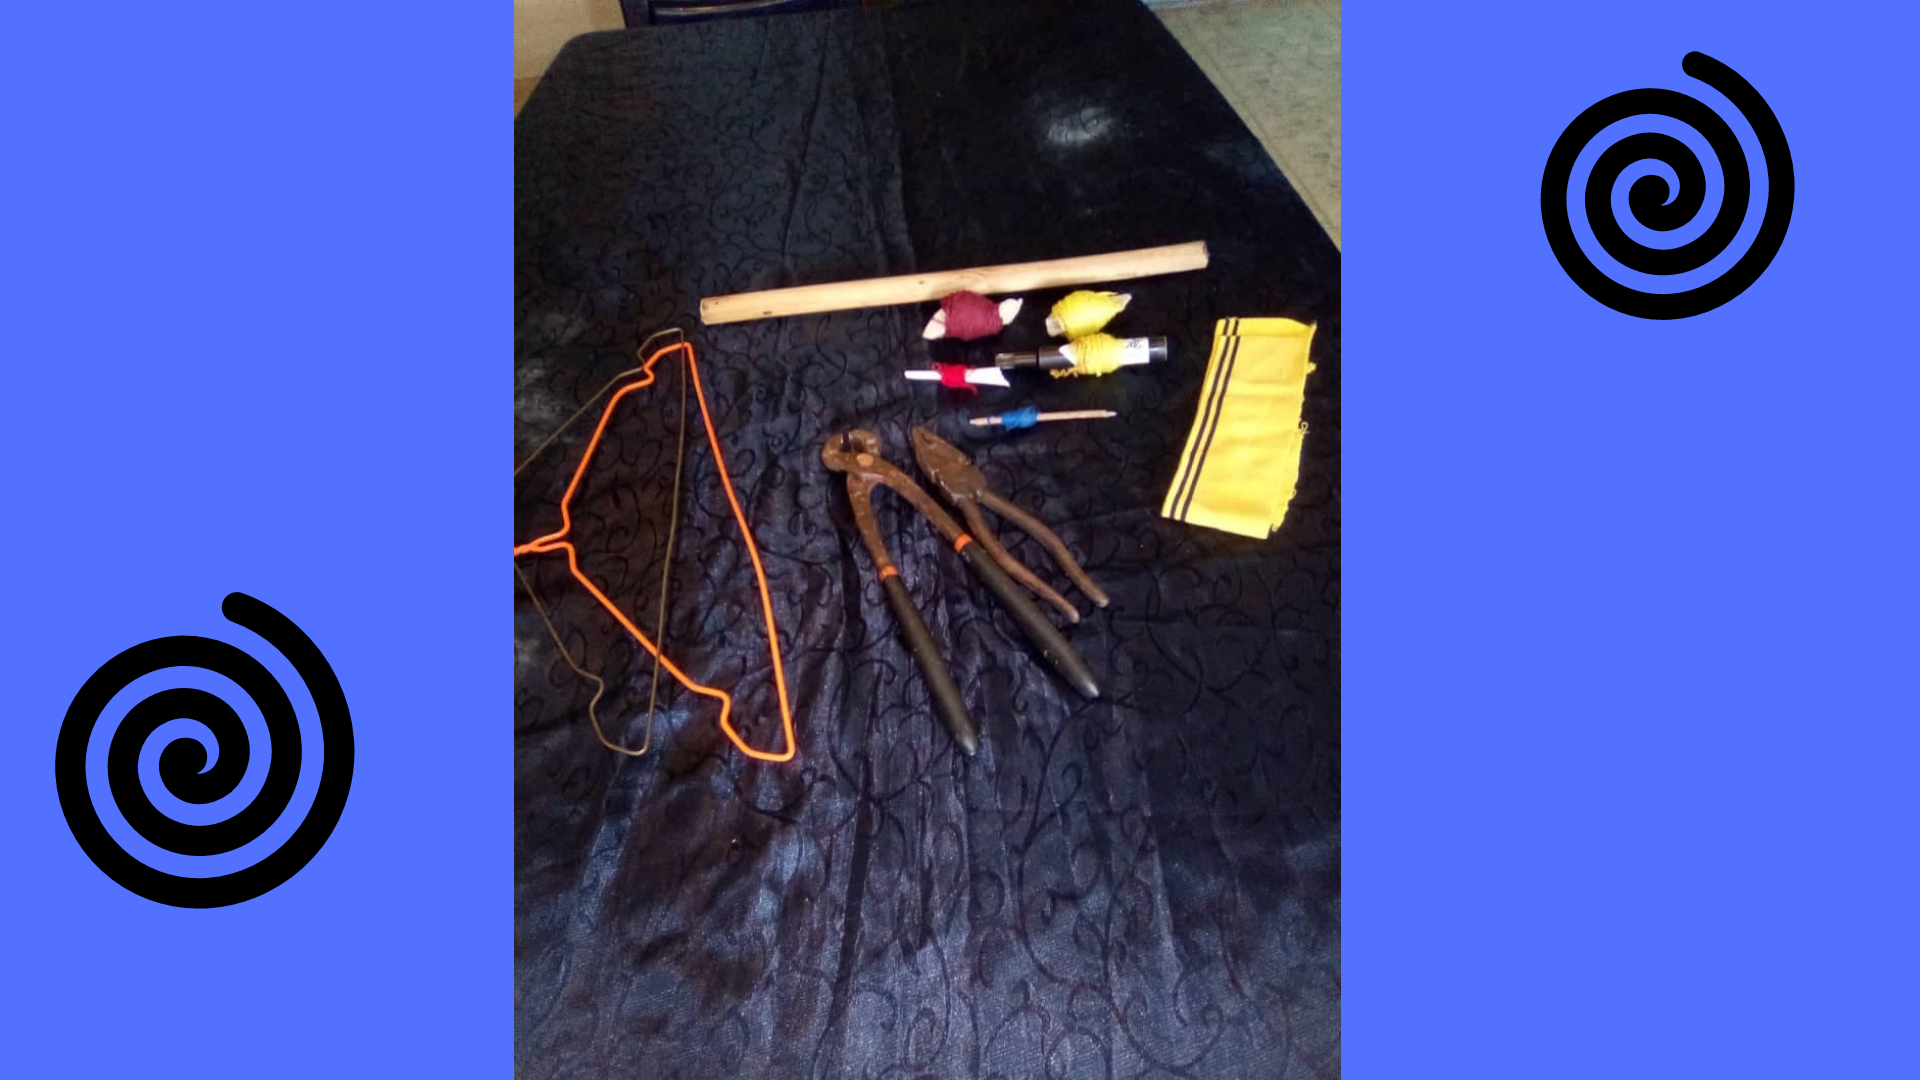
Para elaborar este lindo arte, un barco tejido, necesitaremos los siguientes materiales de provecho
- Dos gancho de ropa.
- Cuello de una chemise amarilla (hilo).
- Hilo vinotinto.
- Hilo rojo.
- hilo azul.
- Tenaza.
- Alicate.
- Un palo de escoba de 50 centímetro.
To make this beautiful craft, a woven boat, we will need the following useful materials
- Two clothes hooks.
- Collar of a yellow chemise (yarn).
- Vinotint thread.
- Red thread.
- blue thread.
- Pliers.
- Pliers.
- A 50 centimeter broomstick.
.png)
Foto tomada con mi teléfono inteligente y edición de canva
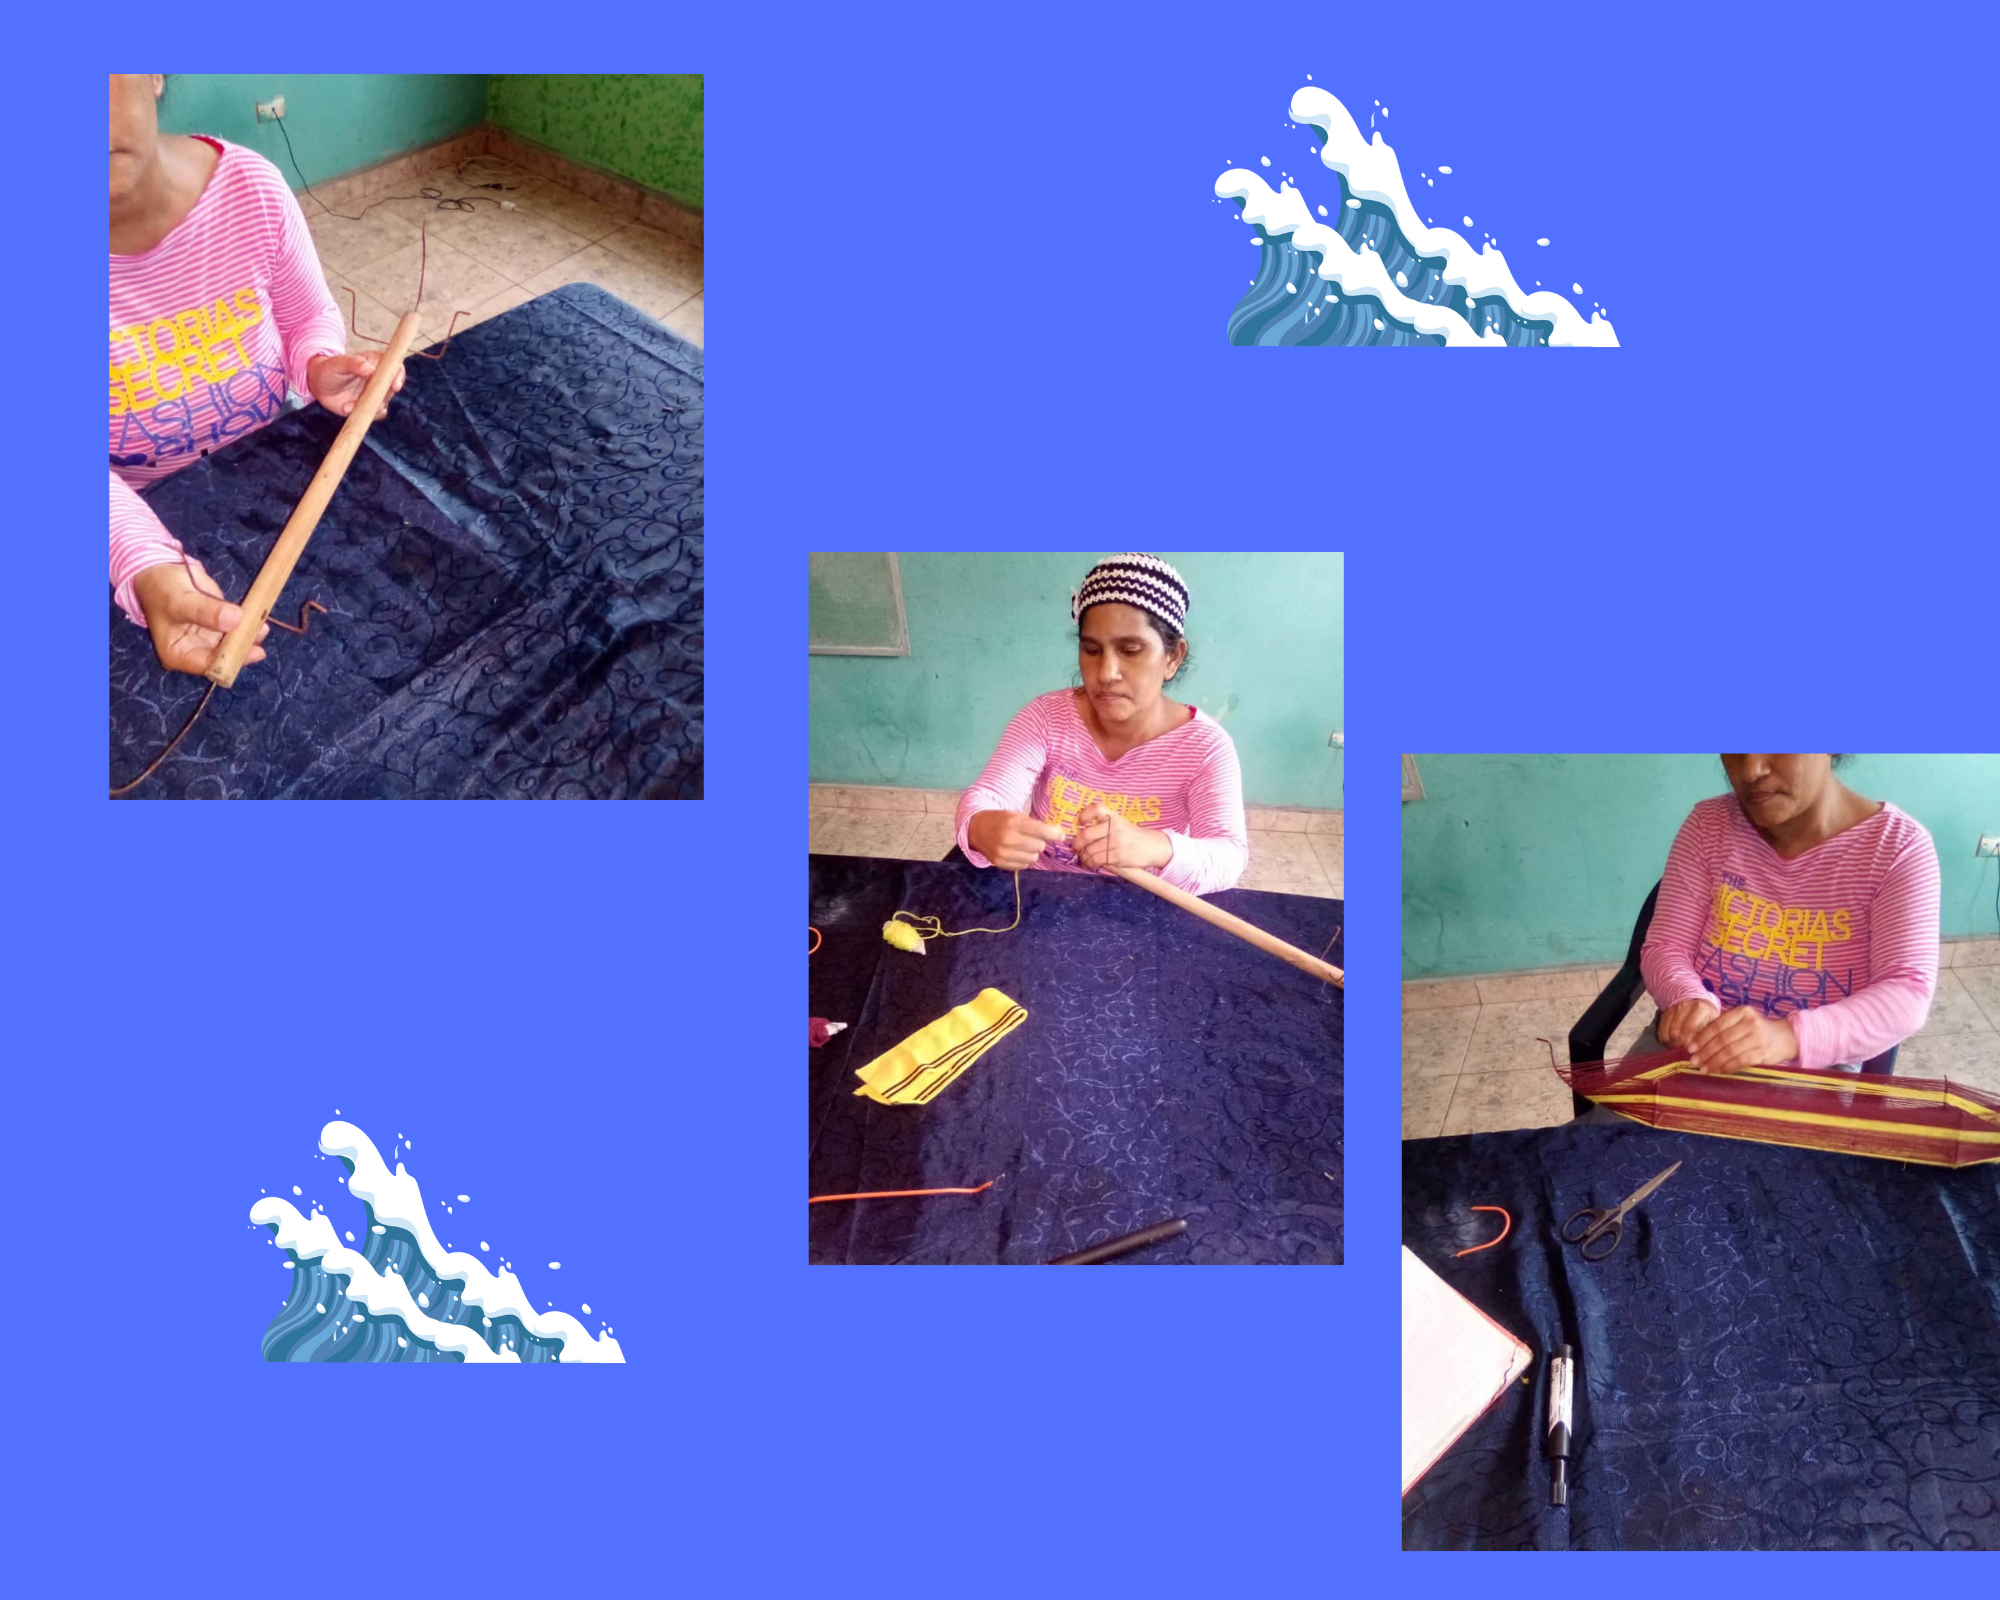
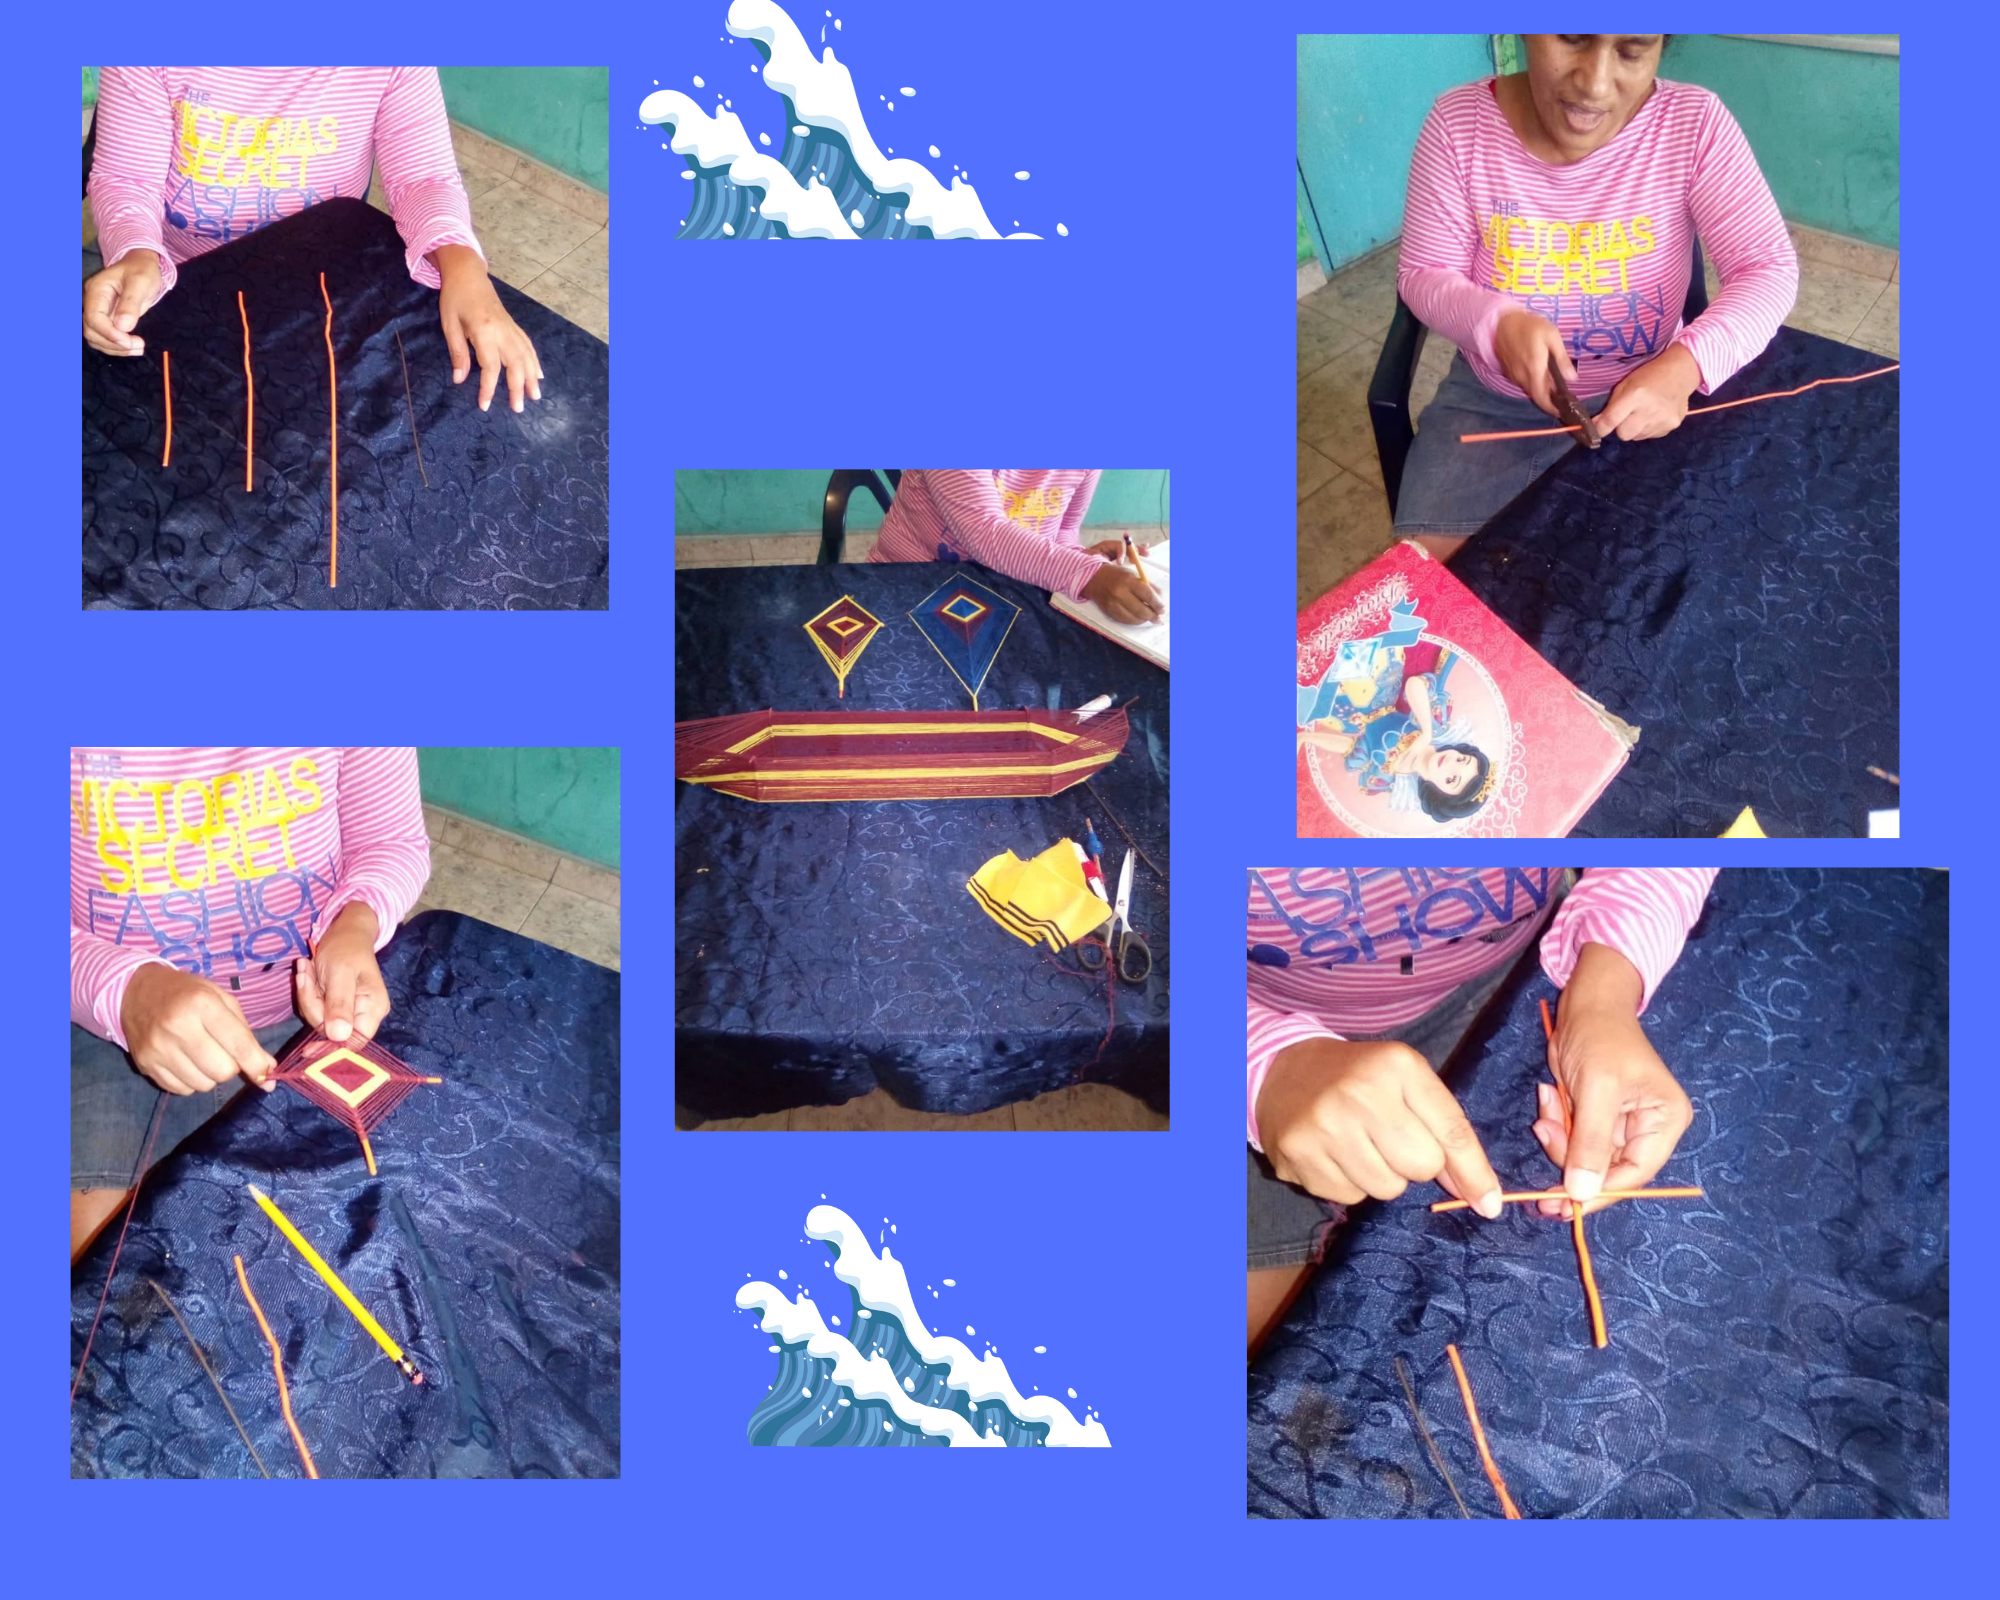
Paso 1
Tomamos el gancho de ropa y lo desamarramos con un alicate y lo abrimos. Una vez estirado el gancho, se pica con el alicate dos trozos de alambre de 15 centímetros.
Step 1
We take the clothes hanger and untie it with pliers and open it. Once the hook is stretched, we chop with the pliers two 15-centimeter pieces of wire.
.png)
Foto tomada con mi teléfono inteligente y edicción de canva
Paso 2 y 3
Con ayuda de mi esposo, se pico los dos trozos de alambre de 15 centímetros, se elaboro la parte delantera y trasera del barco. Luego se abrió dos orificio en el palo de escoba, a los lados, para colocar los dos pedazos de alambre que sera la parte delantera y trasera del barco.
Step 2 and 3
With my husband's help, I cut the two 15 centimeter pieces of wire and made the front and back of the boat. Then we made two holes in the broomstick, on the sides, to place the two pieces of wire that will be the front and back of the boat.
.png)
Foto tomada con mi teléfono inteligente y edición de canva
Paso 4 y 5
Seguimos picando con la tenaza 4 trozos de alambre de 10 centímetros, que sera los costados del barco, (aquí le pide ayuda a mi esposo para darle la curva al alambre). Luego se coloca a los lados de la base del barco, abriendo 4 orificios poco a poco, con una distancia de 5 centímetros.
Step 4 and 5
We continue chopping with the pliers 4 pieces of wire of 10 centimeters, which will be the sides of the boat, (here he asks my husband for help to give the curve to the wire). Then we place it on the sides of the base of the boat, opening 4 holes little by little, with a distance of 5 centimeters.
.png)
Foto tomada con mi teléfono inteligente y edición de canva
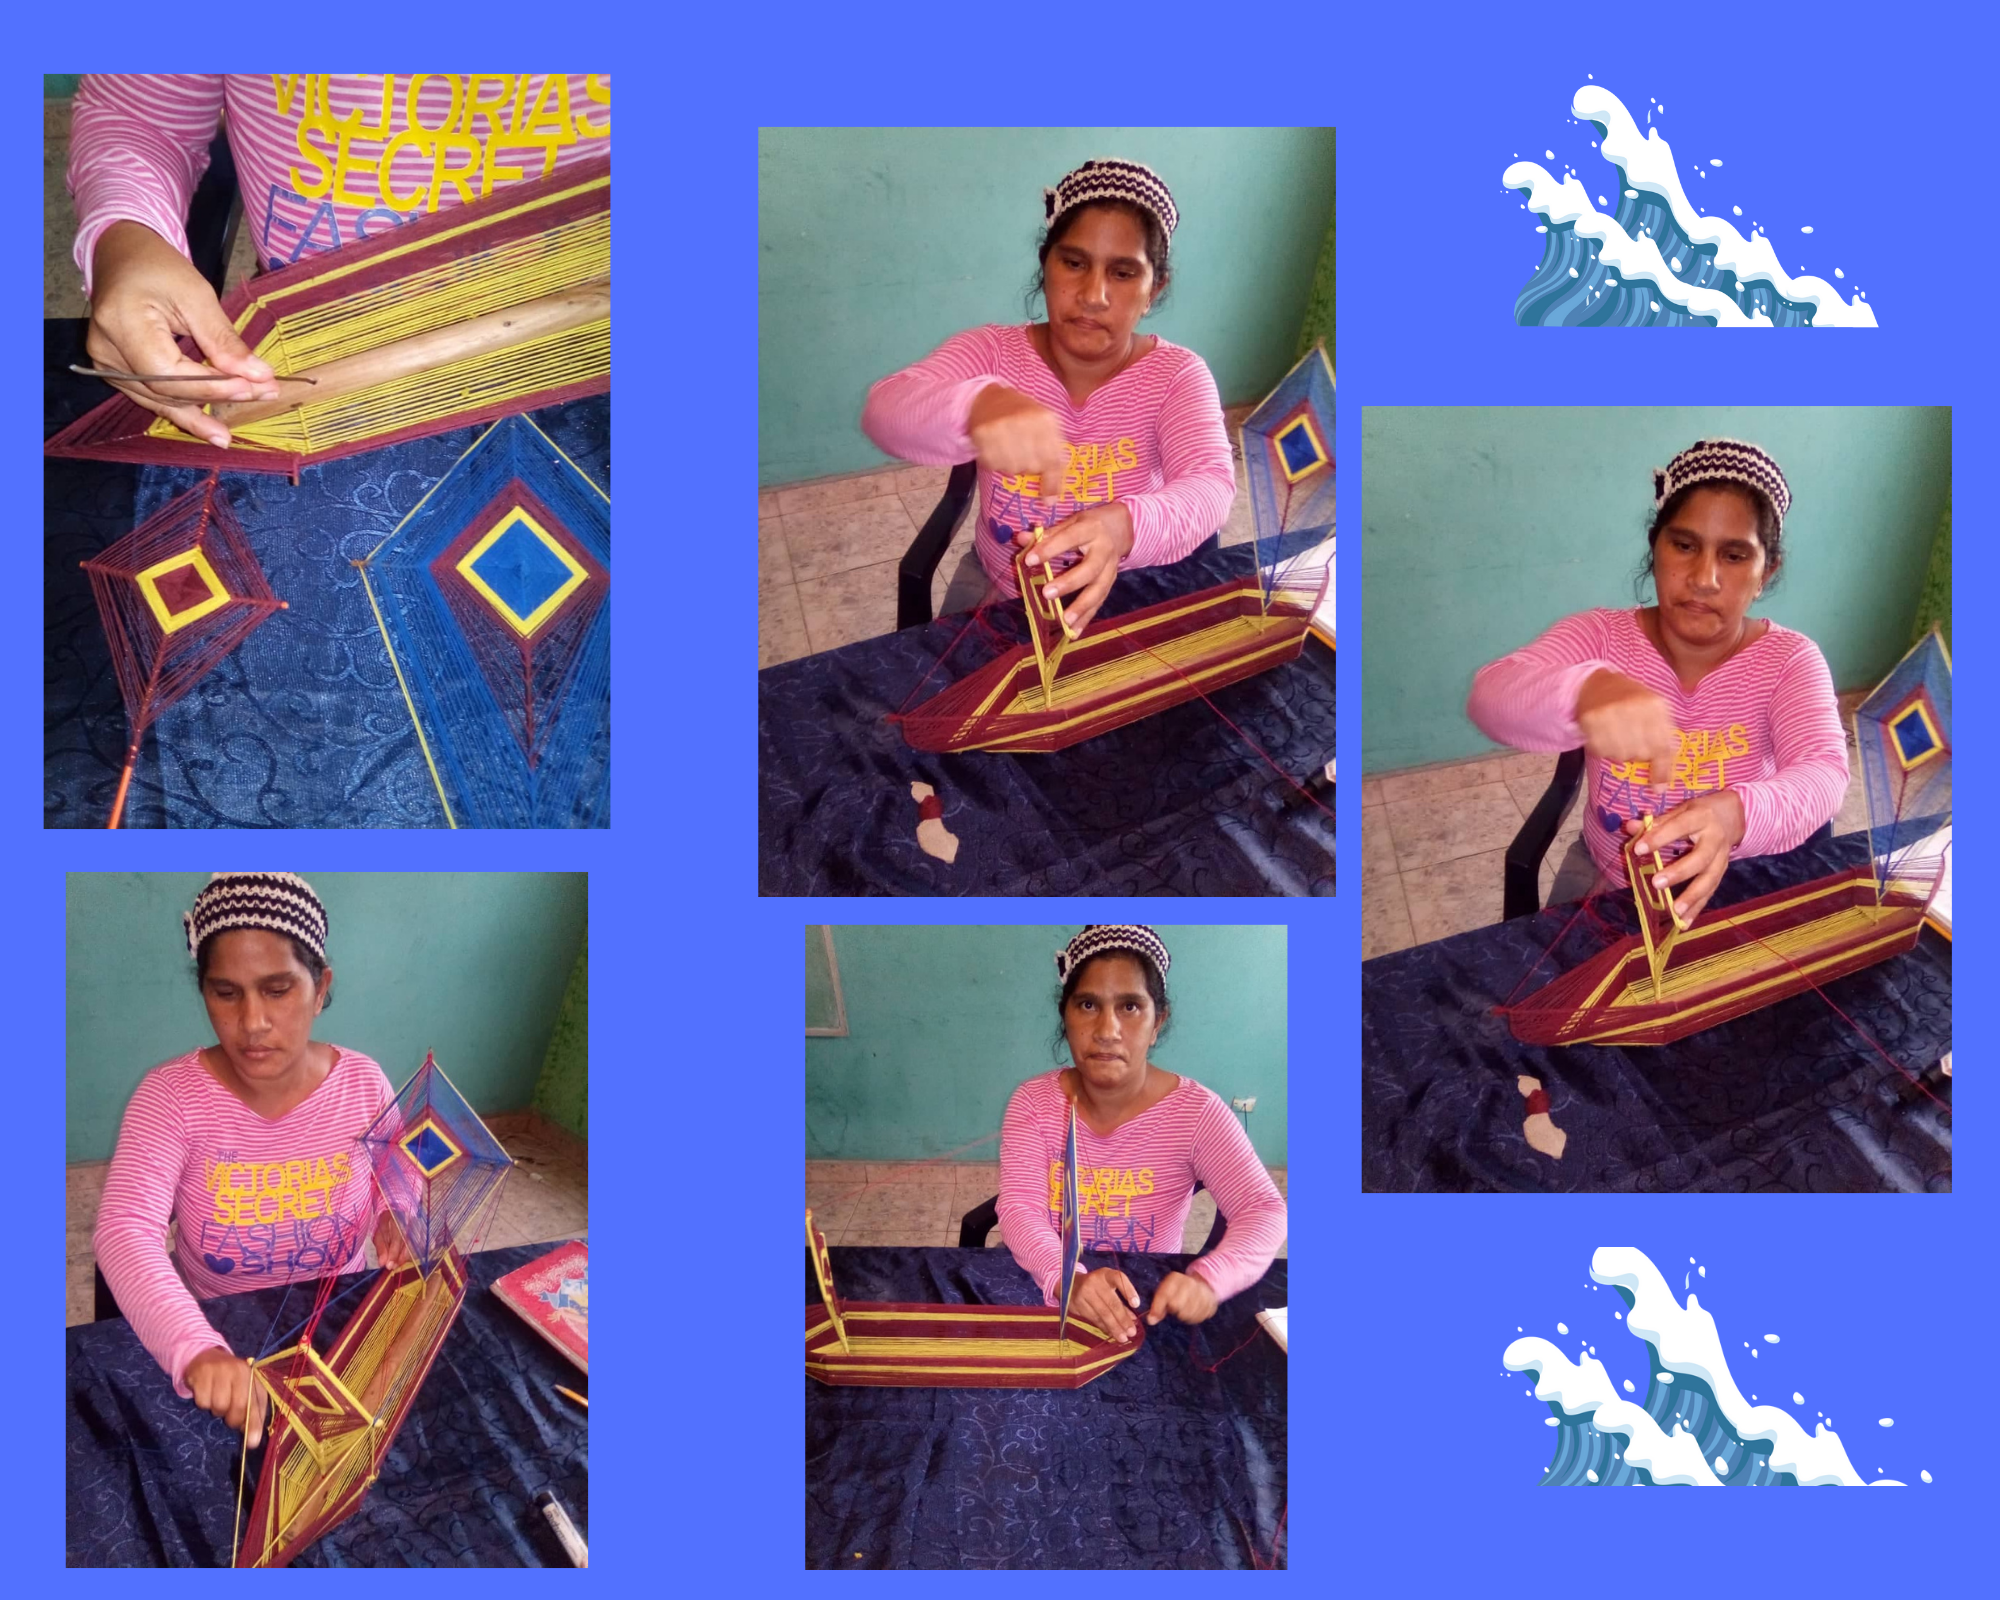
Paso 6 y 7
Empezamos a ser el tejido con el hilo amarillo que fue tomado de la chemise, colocamos el hilo amarillo en la punta del barco, le damos dos vuelta y le damos un nudo de seguridad, vamos al costado del barco dando una vuelta y así seguimos el tejido, por todo el alrededor del barco, cambiamos de color de hilo, en este caso hilo vinotinto y seguimos intercalando colores con los hilos.
Step 6 and 7
We start the weaving with the yellow thread that was taken from the chemise, we place the yellow thread at the tip of the boat, we give it two turns and we give it a security knot, we go to the side of the boat giving a turn and so we continue the weaving, all around the boat, we change the color of thread, in this case vinotint thread and we continue intercalating colors with the threads.
.png)
Foto tomada con mi teléfono inteligente y edición de canva
Paso 8 y 9
Para armar las velas del barco, que serán dos velas, se picara 4 trozos de alambre, para la vela pequeña la medida de (10 cm, 20 cm) y la grande de (30 cm, 15 cm). Unimos la vela pequeña (formando una cruz), tejiendo con el hilo vinotinto, desde el principio, dando una vuelta y nos vamos al otro extremo de la vela y así vamos tejiendo e incorporamos el hilo amarillo y seguimos tejiendo. Con el hilo vinotinto en este caso se les dio 4 vueltas, para así rendir el hilo y culminamos con el hilo amarillo. Con este mismo procedimiento se realiza la vela grande, colocando el hilo azul y se va tejiendo con paciencia
Step 8 and 9
To assemble the sails of the boat, which will be two sails, we chop 4 pieces of wire, for the small sail the measure of (10 cm, 20 cm) and the big one of (30 cm, 15 cm). We join the small candle (forming a cross), weaving with the vinotint thread, from the beginning, giving a turn and we go to the other end of the candle and so we are weaving and we incorporate the yellow thread and we continue weaving. With the vinotint thread in this case we gave them 4 turns, in order to yield the thread and we finish with the yellow thread. With this same procedure the big candle is made, placing the blue thread and we weaving with patience.
.png)
Foto tomada con mi teléfono inteligente y edición de canva
Paso 10 y 11
Una vez , ya terminado las velas del barco tejido, procedemos abrir dos orificios en lo que sera la base del barco, se procede a fijar las vela grande, con el hilo rojo desde la punta del barco, le damos 3 vueltas y aseguramos, nos vamos a la vela pequeña y le damos 3 vueltas para fijarla. Seguimos dando vueltas alrededor del barco, dando 3 vueltas por cada extremos del barco, intercalando colores de hilos variados, para así sujetar bien el barco, que quede firme.
Step 10 and 11
Once, already finished the sails of the woven boat, we proceed to open two holes in what will be the base of the boat, we proceed to fix the big sail, with the red thread from the tip of the boat, we make 3 turns and secure it, we go to the small sail and we make 3 turns to fix it. We continue circling around the boat, giving 3 turns at each end of the boat, interspersed with different colors of thread, so as to hold the boat well, so that it is firm.
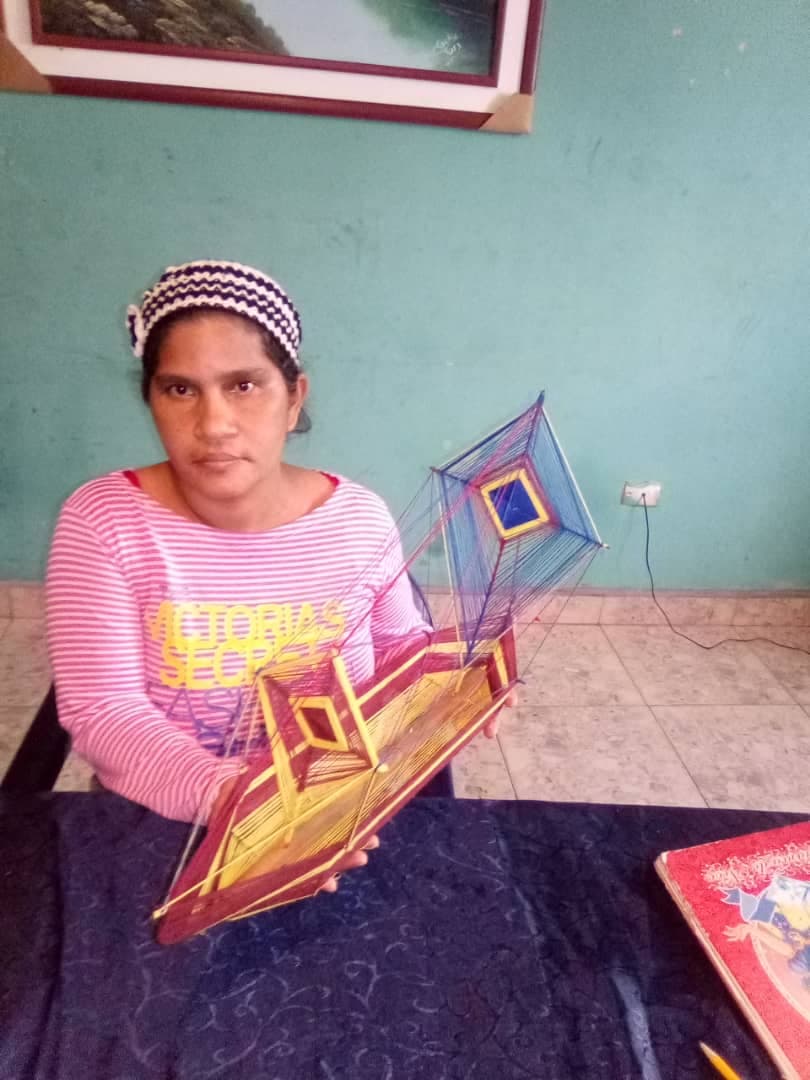
Foto tomada con mi teléfono inteligente
Paso 12
Y aquí esta el barco tejido ya terminado, es una verdadera obra de arte. Lleva tiempo pero satisfactorio el resultado.
Step 12
And here is the finished woven boat, it is a true work of art. It takes time but the result is satisfactory.