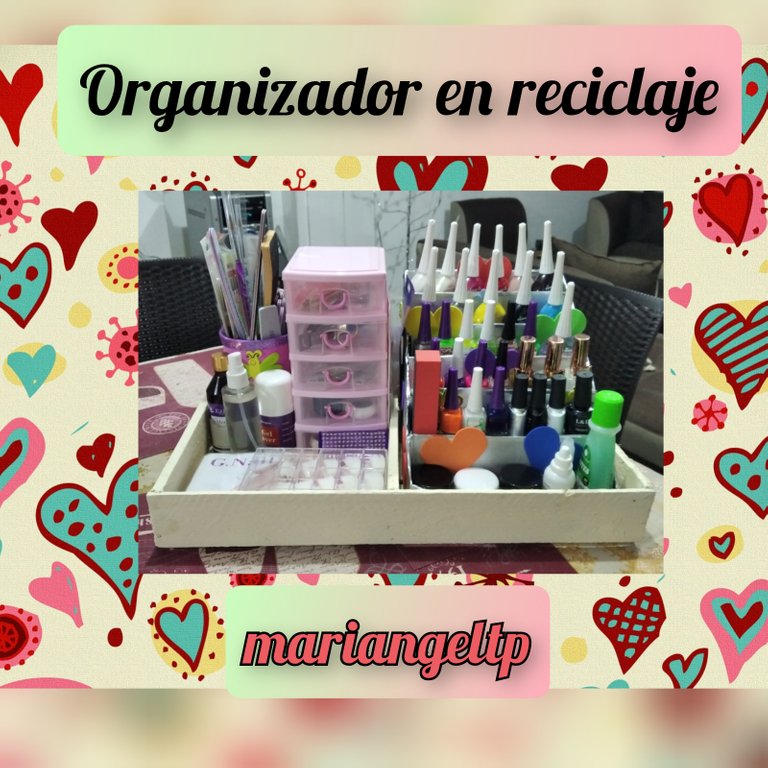
Organizador en reciclaje /organizer in recycling

📝Caja de madera (palet vieja)
📝Pintura ocre
📝Brocha
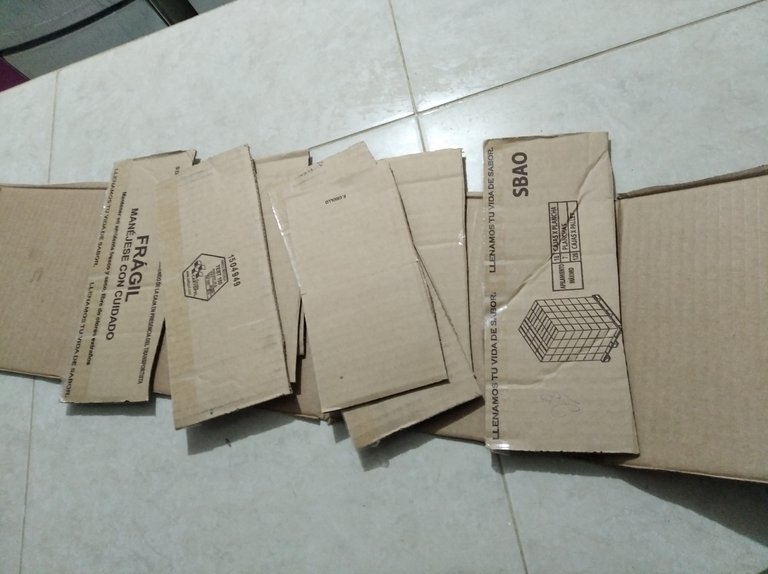
📝Cajas de cartón
📝Silicón caliente
📝Tijeras
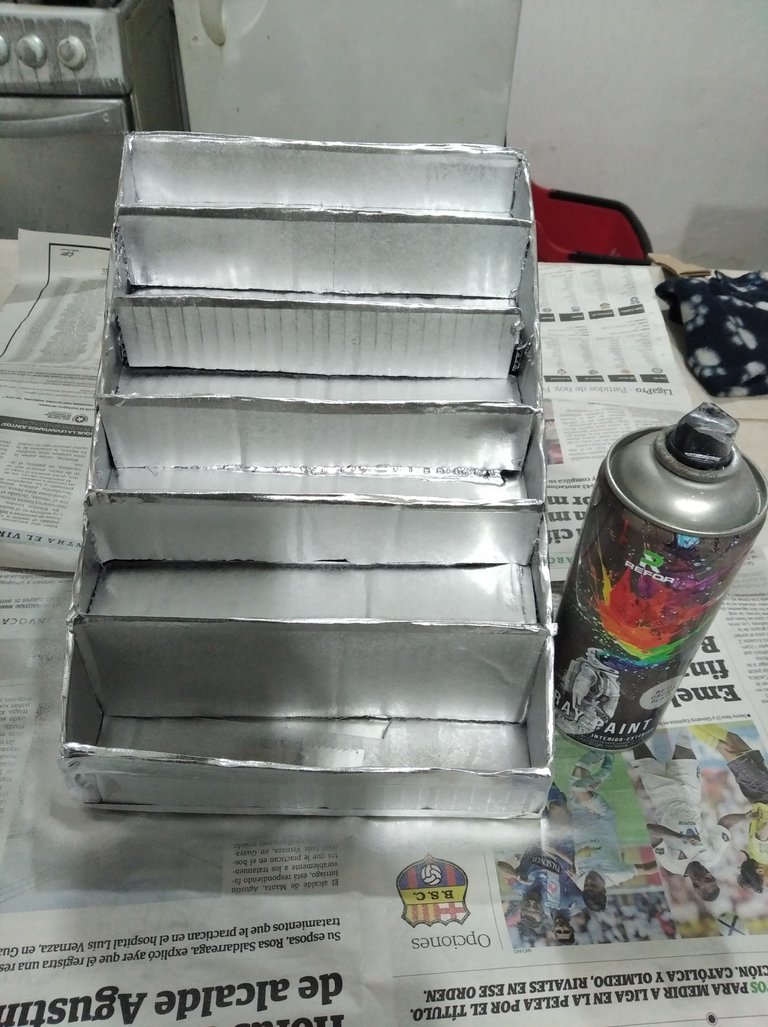
📝Espray plata
📝Apliques en foami

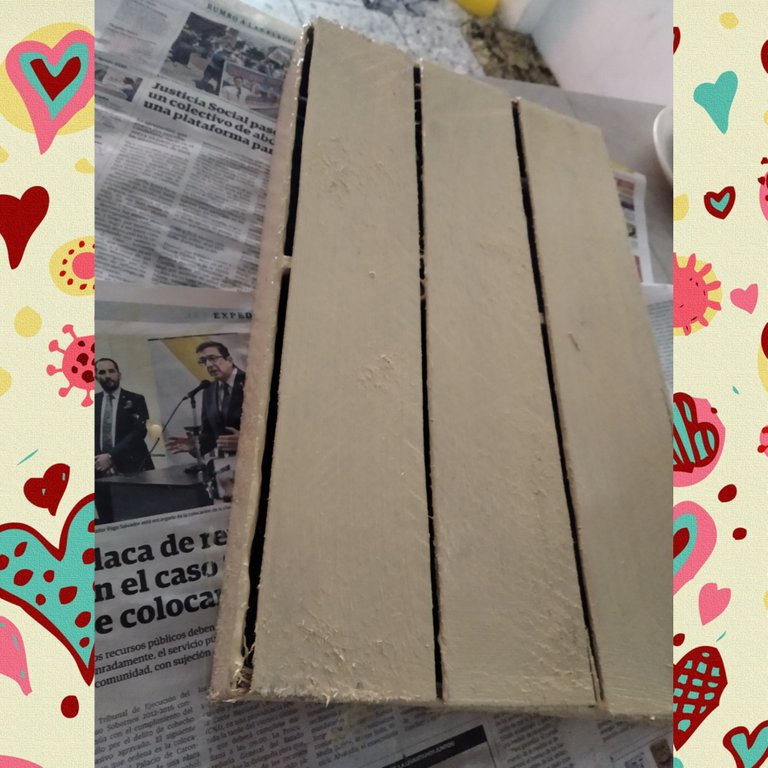
⭐ Primeramente para la base del organizador, tomamos la caja de madera que estaba vieja, la pinté con pintura color ocre, dejé secar mientras comenzaba lo demás


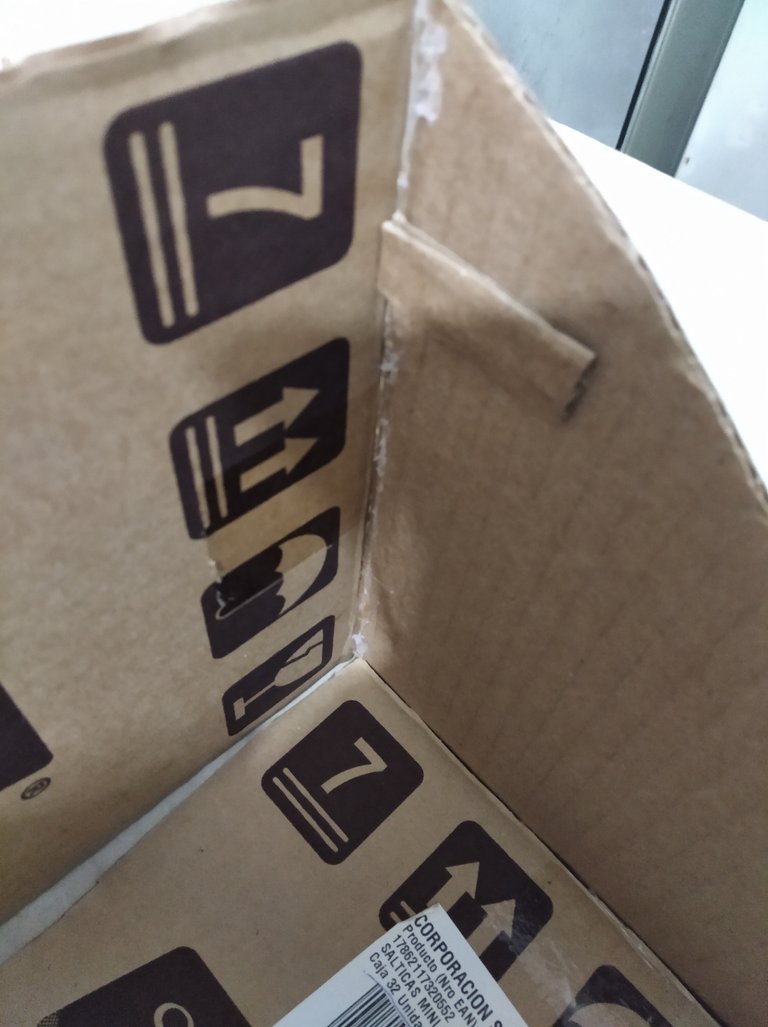
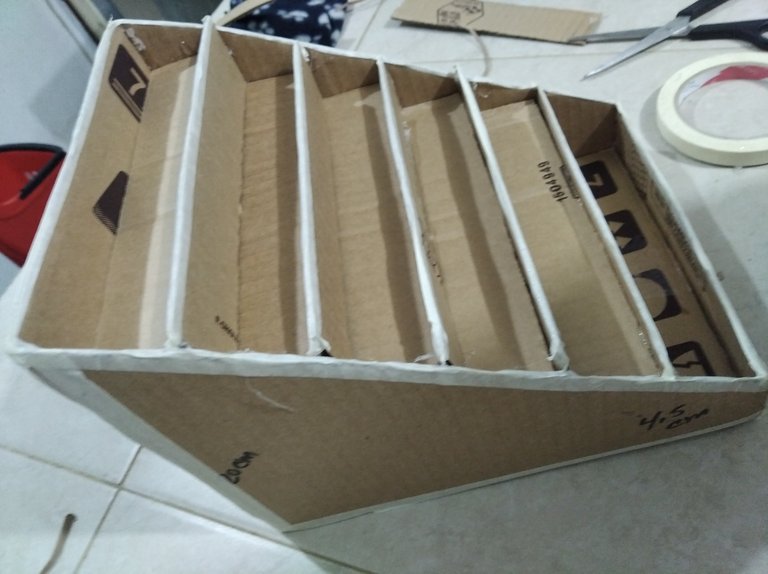
⭐ Busque una caja de cartón pequeña para sacar las piezas del organizador
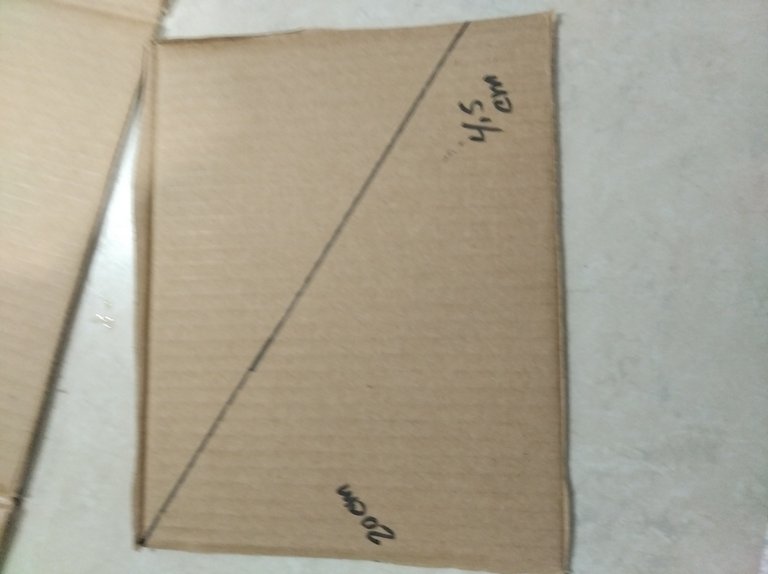
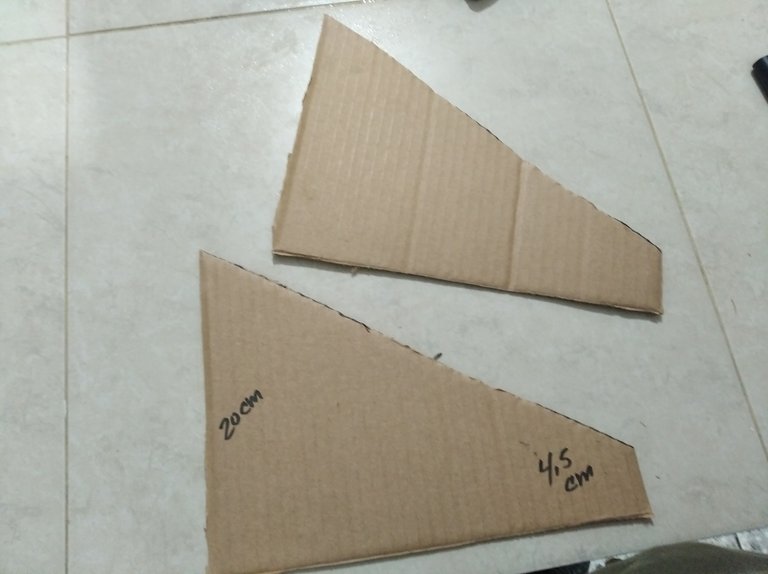
⭐Sacamos dos piezas de cartón, de alto 20cm por 4.5 cm de forma inclinada
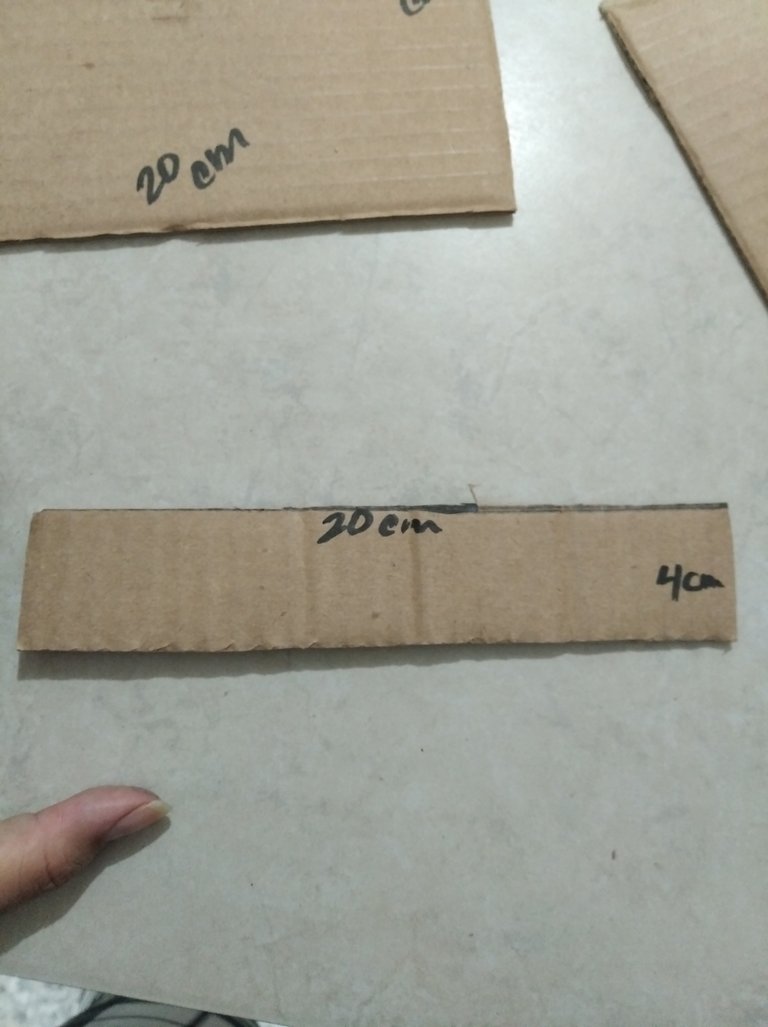
⭐Para la parte frontal, una pieza de cartón de 20cm de largo, por 4cm ancho
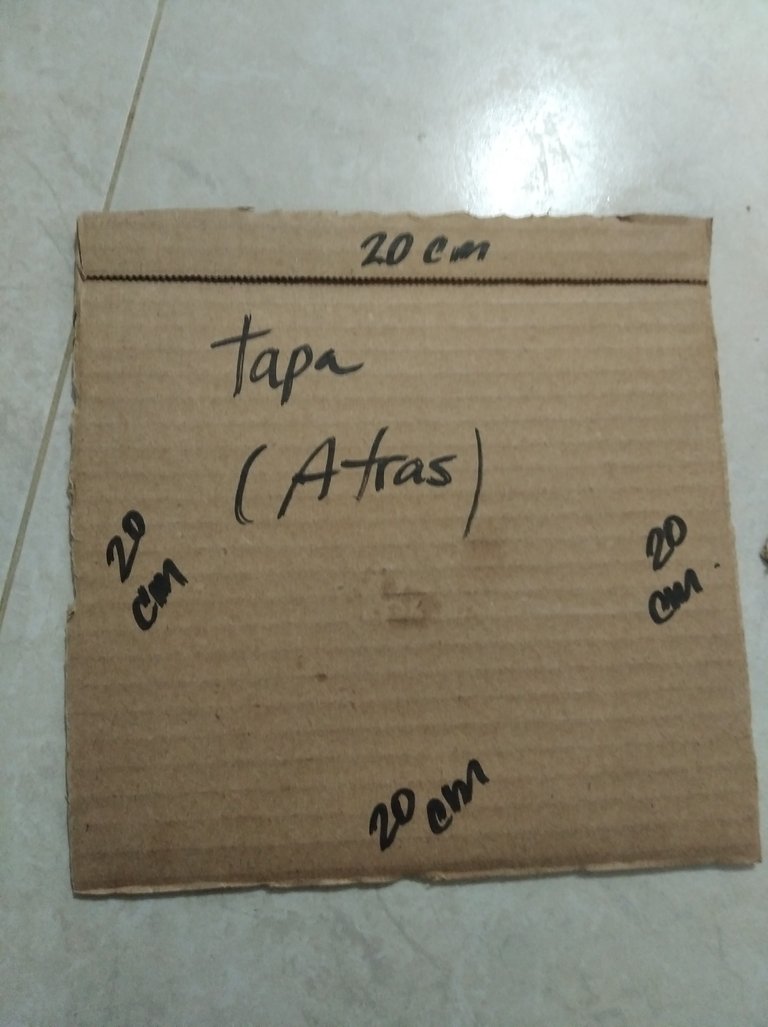
⭐Para la tapa trasera una pieza de 20cm de los 4 lados
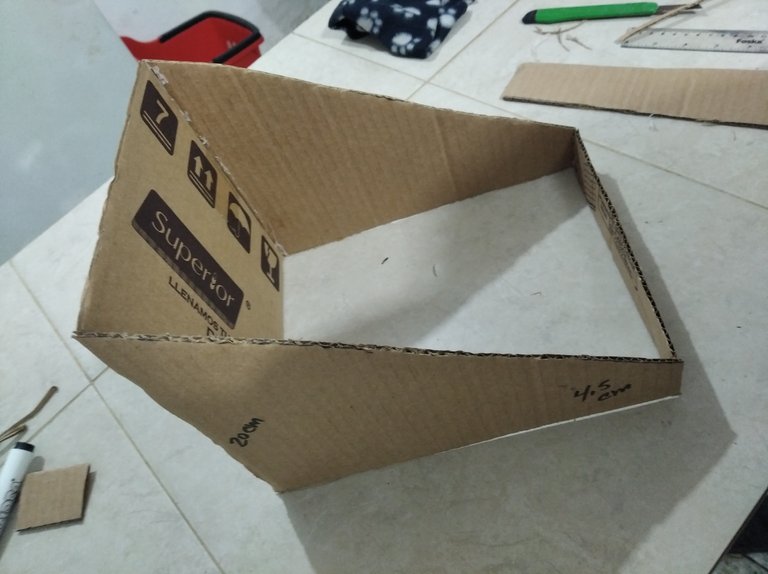
⭐ Armando el organizador, pegamos las 4 piezas para proceder a pegar los escalones
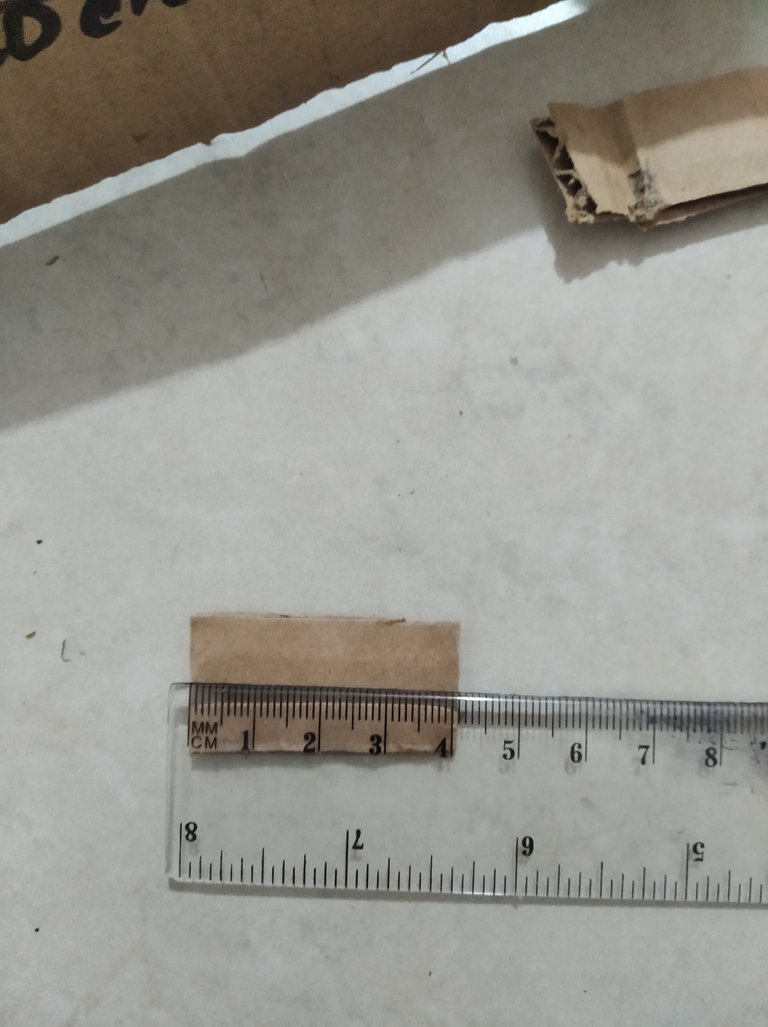
⭐Cortamos trocitos de cartón con medidas de 4cm aproximadamente para pegarlo a los laterales y así sostener el escalón
⭐Se cortan tiras de 20cm de largo por 4cm de ancho. 10 piezas
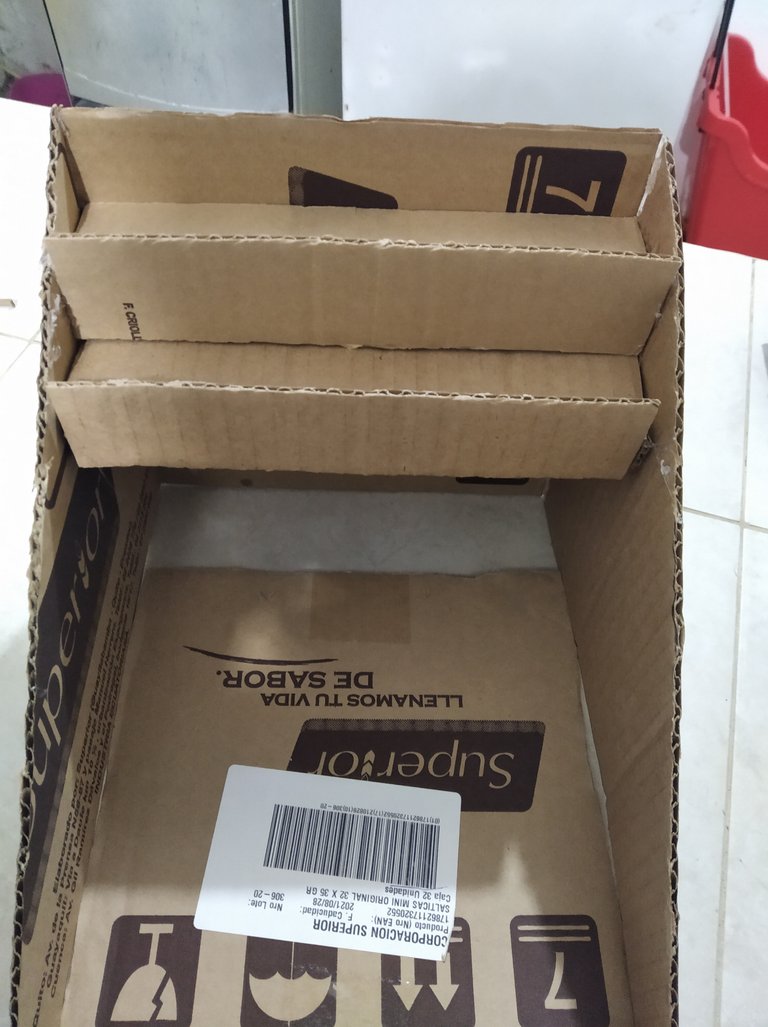
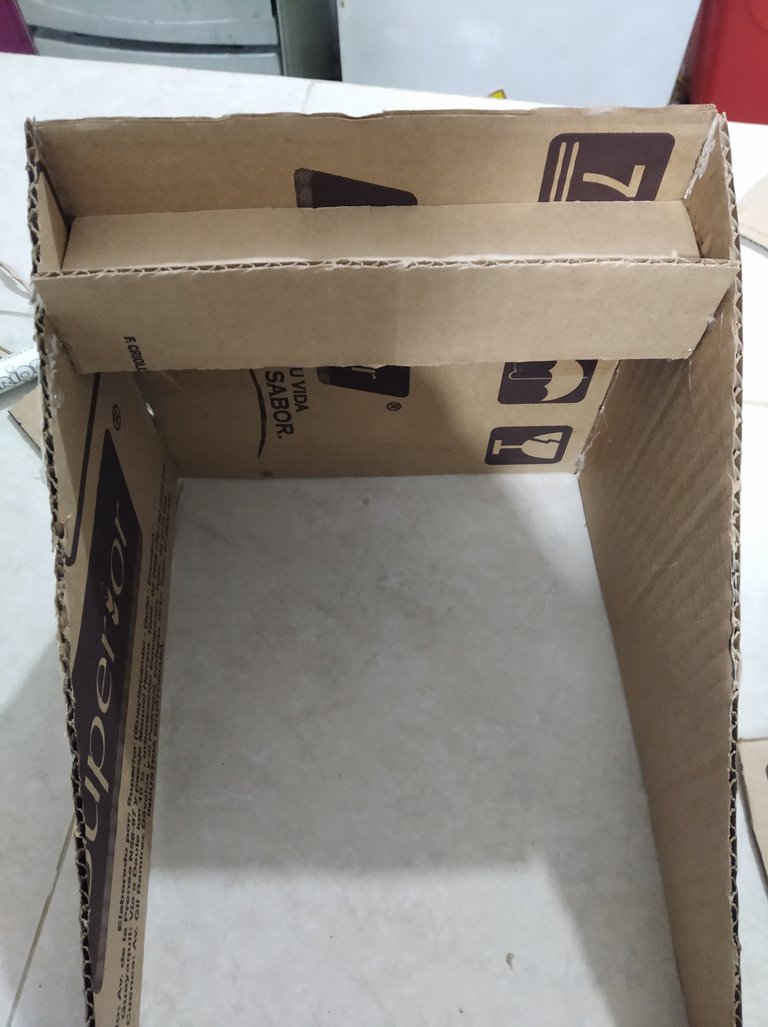
⭐Se pegan una acostada y la otra levantada así formando los escalones hasta llegar abajo.

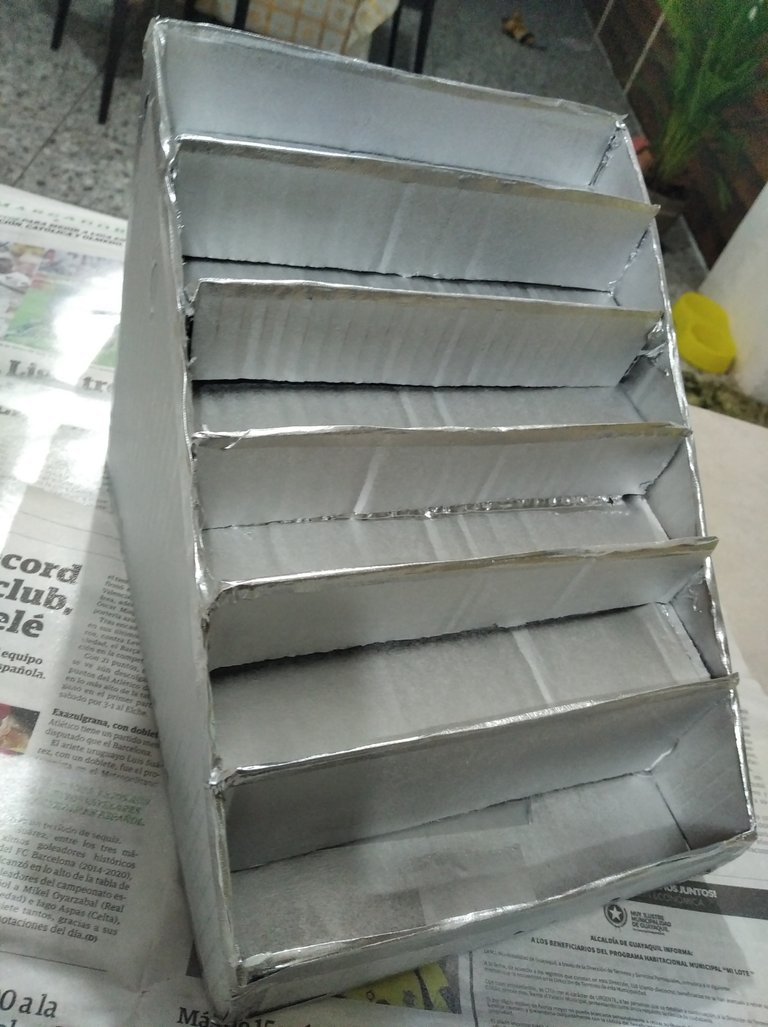
⭐ A todos los bordes le coloqué cinta adhesiva de papel
⭐ Luego pinté con spray plateado
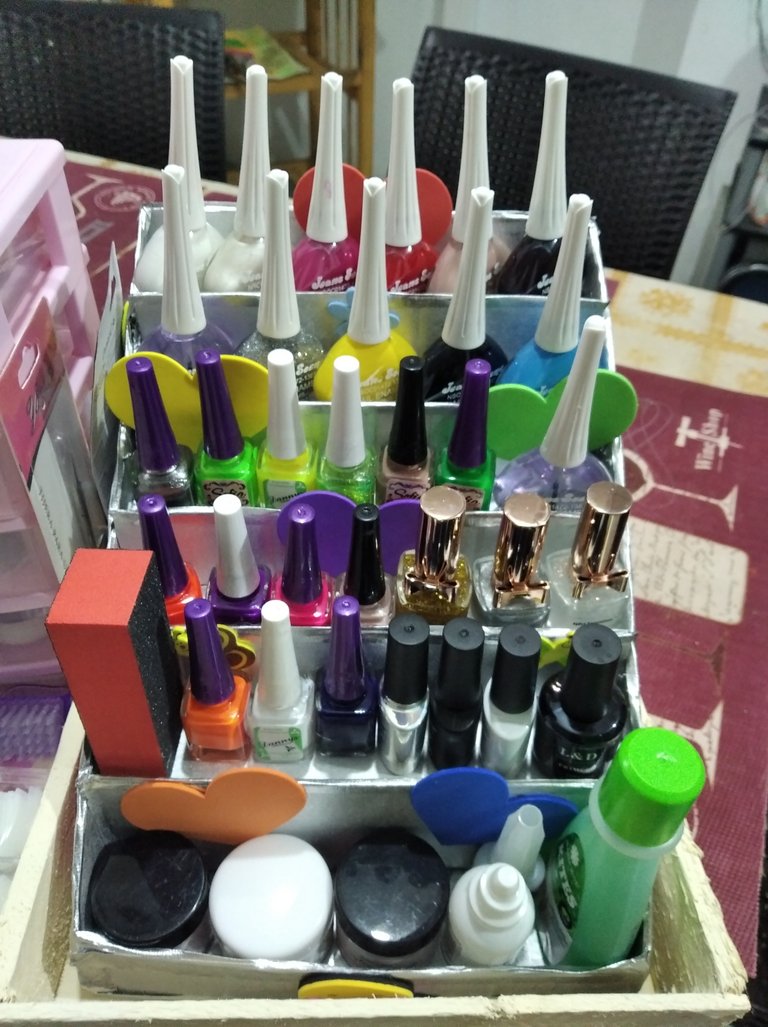
⭐Por último coloque unos apliques en foami
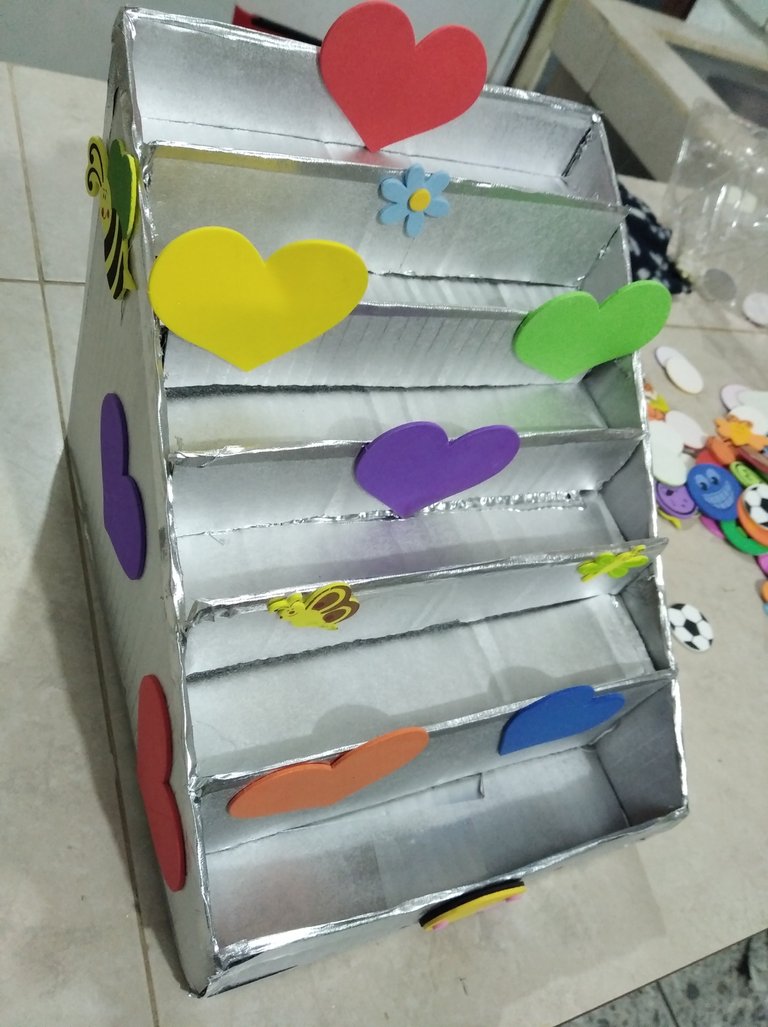
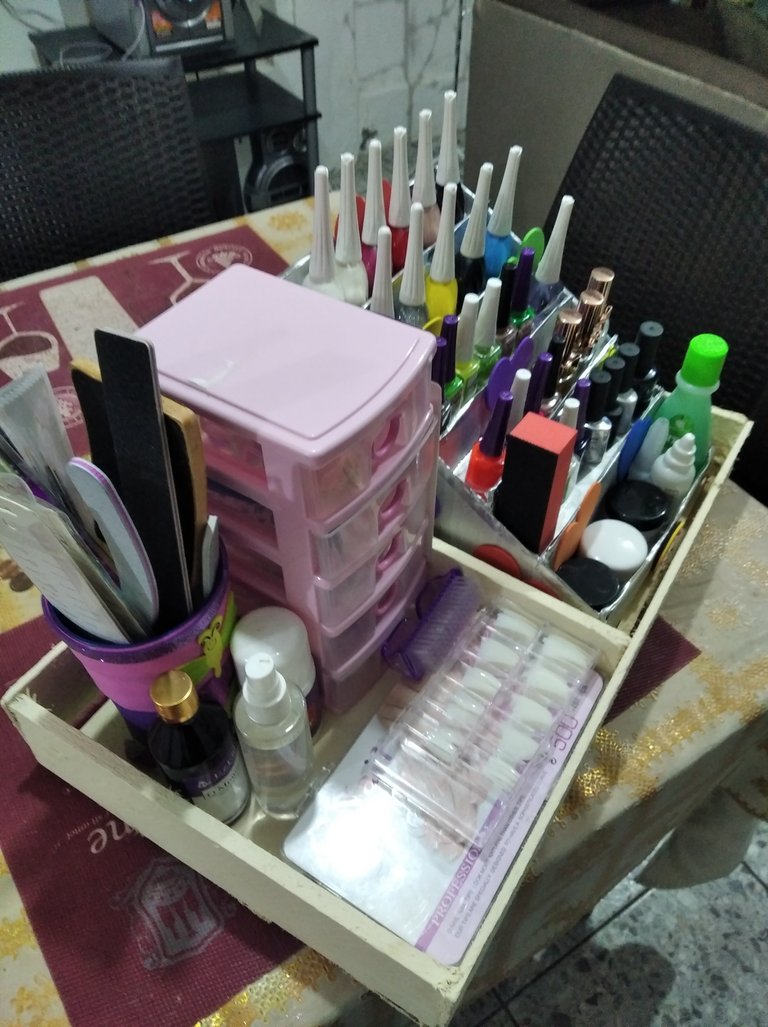
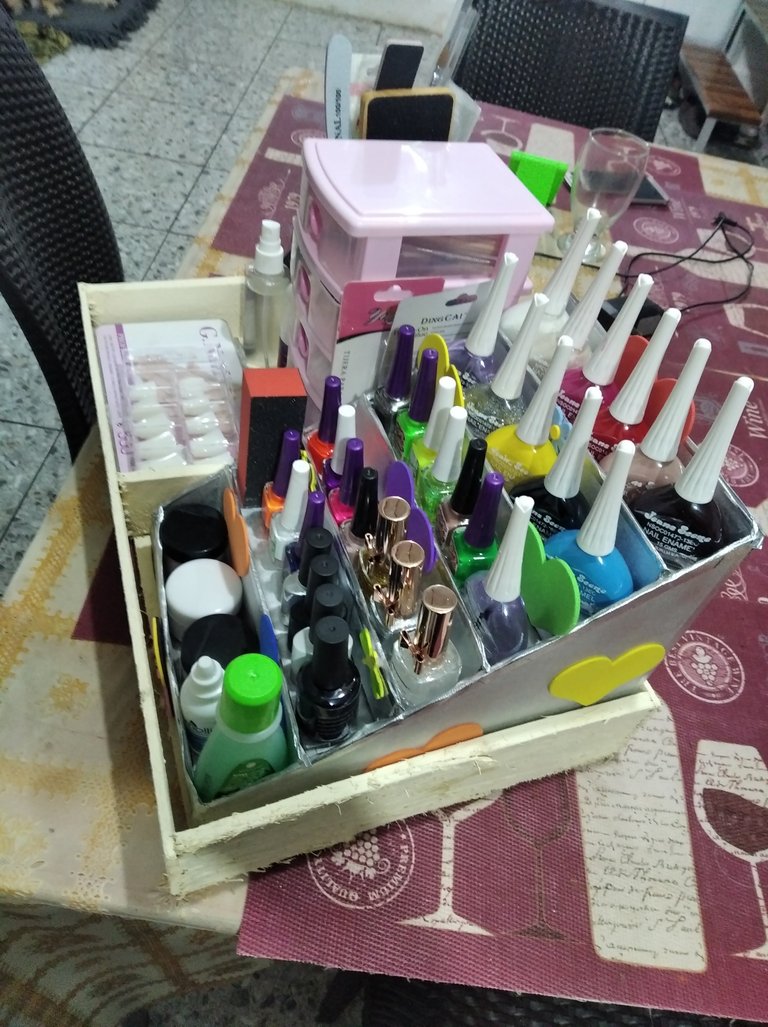
⭐Y organicé todo (materiales variados)
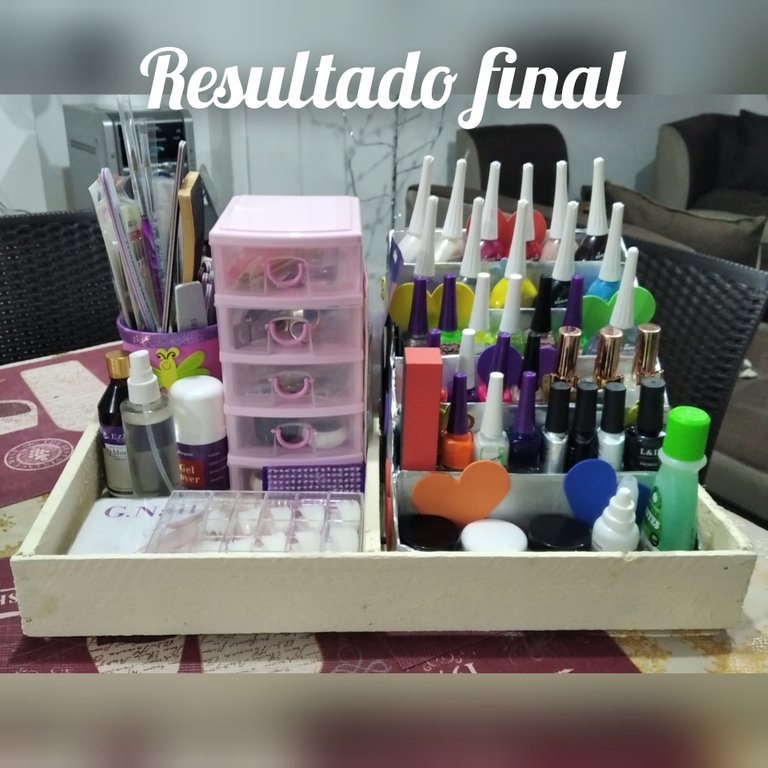
Espero les haya gustado muchísimo está idea económica y sencilla.
Helloooooo! Again for this community, contributing a little of what I like to do, this time I bring you a nice organizer of things for nails, totally in recycling, a very economical idea especially betting once again on creativity and if we want to, we can do what! Get to workmaterials 📝Wooden box (old pallet) 📝Ocher paint 📝brush 📝Cardboard boxes 📝Hot silicone 📝Scissors 📝Silver spray 📝Applications in foami Step by Step ⭐ First for the base of the organizer, we took the wooden box that was old, painted it with ocher paint, let it dry while I started the rest ⭐ Find a small cardboard box to remove the pieces from the organizer ⭐We take out two pieces of cardboard, 20cm high by 4.5 cm at an angle ⭐For the front, a piece of cardboard 20cm long and 4cm wide ⭐For the back cover a piece of 20cm from the 4 sides ⭐ Assembling the organizer, we glue the 4 pieces to proceed to glue the steps ⭐We cut pieces of cardboard with measures of approximately 4cm to stick it to the sides and thus support the step ⭐Strips 20cm long by 4cm wide are cut. 10 pieces ⭐Glue one lying down and the other raised thus forming the steps until reaching the bottom. ⭐ I attached paper tape to all edges ⭐ Then I spray painted silver ⭐Finally, place some appliques in foami ⭐And I organized everything (various materials)
I hope you liked this cheap and simple idea very much.
Congratulations @mariangeltp! You have completed the following achievement on the Hive blockchain and have been rewarded with new badge(s) :
You can view your badges on your board and compare yourself to others in the Ranking
If you no longer want to receive notifications, reply to this comment with the word
STOPCongratulations @mariangeltp!
You raised your level and are now a Minnow!