[ESP-ENG] Cuadro para decorar, Inspirado en una Novia de Bodas | Picture for Decoration, Inspired by a Wedding Bride
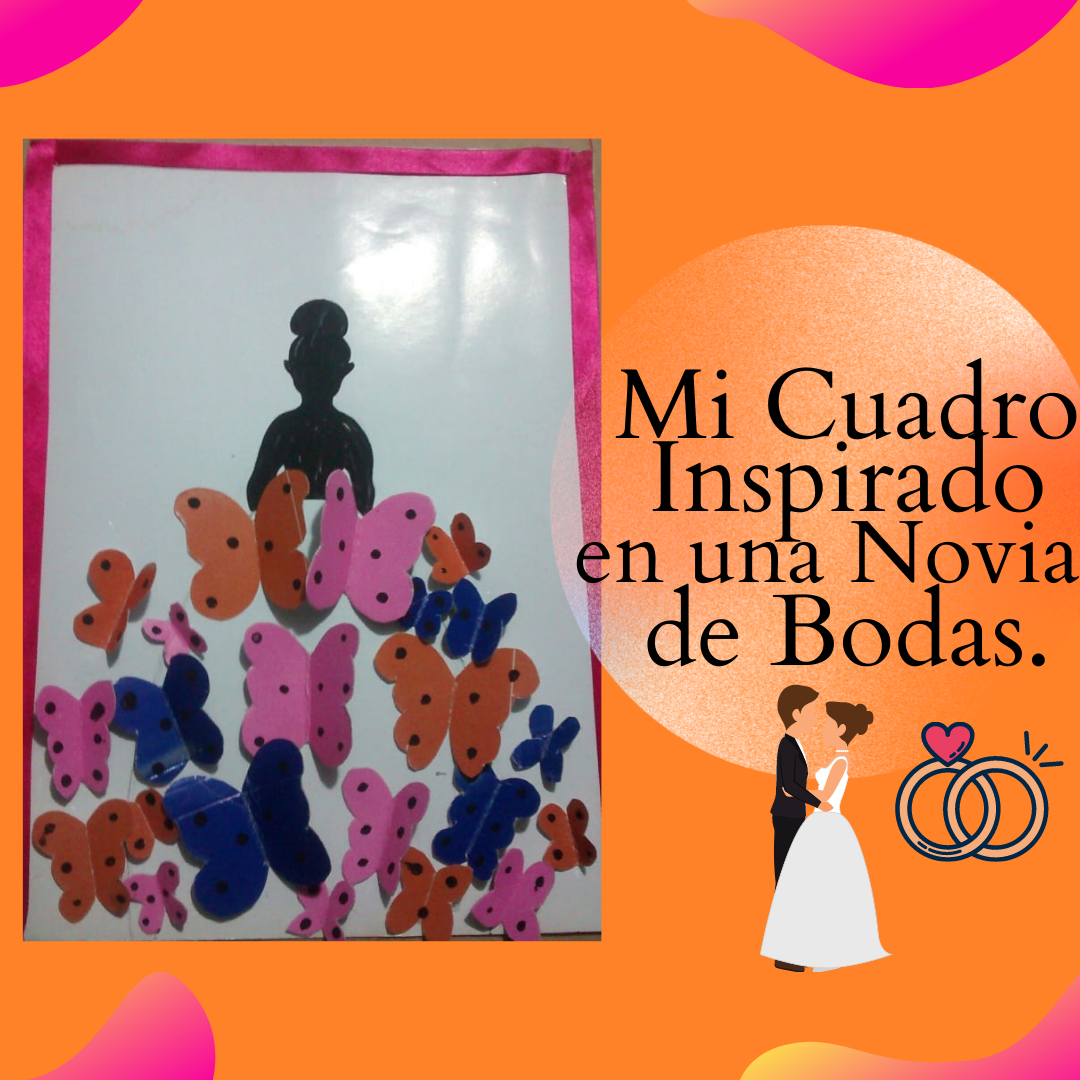
Greetings my beautiful family of Hive, it is a pleasure to be able to share with you these ideas that every day I can capture, I have seen your great support, your advice, and that drives me every day to move forward, and show what is part of me. Today I want to show you this great picture to decorate, super simple, I was inspired by a Wedding Bride, really wedding dresses are beautiful, depending on the model and color, today I was inspired by them, highlighting her dress in an artistic way, with Butterflies, something out of the ordinary, so let's start with the step by step:

-Materiales:
-Pega.
-Tijera.
-Cartulina de varios colores.
-Pintura negra.
-Lápiz.
-Una cartulina blanca para el fondo de nuestro cuadro.
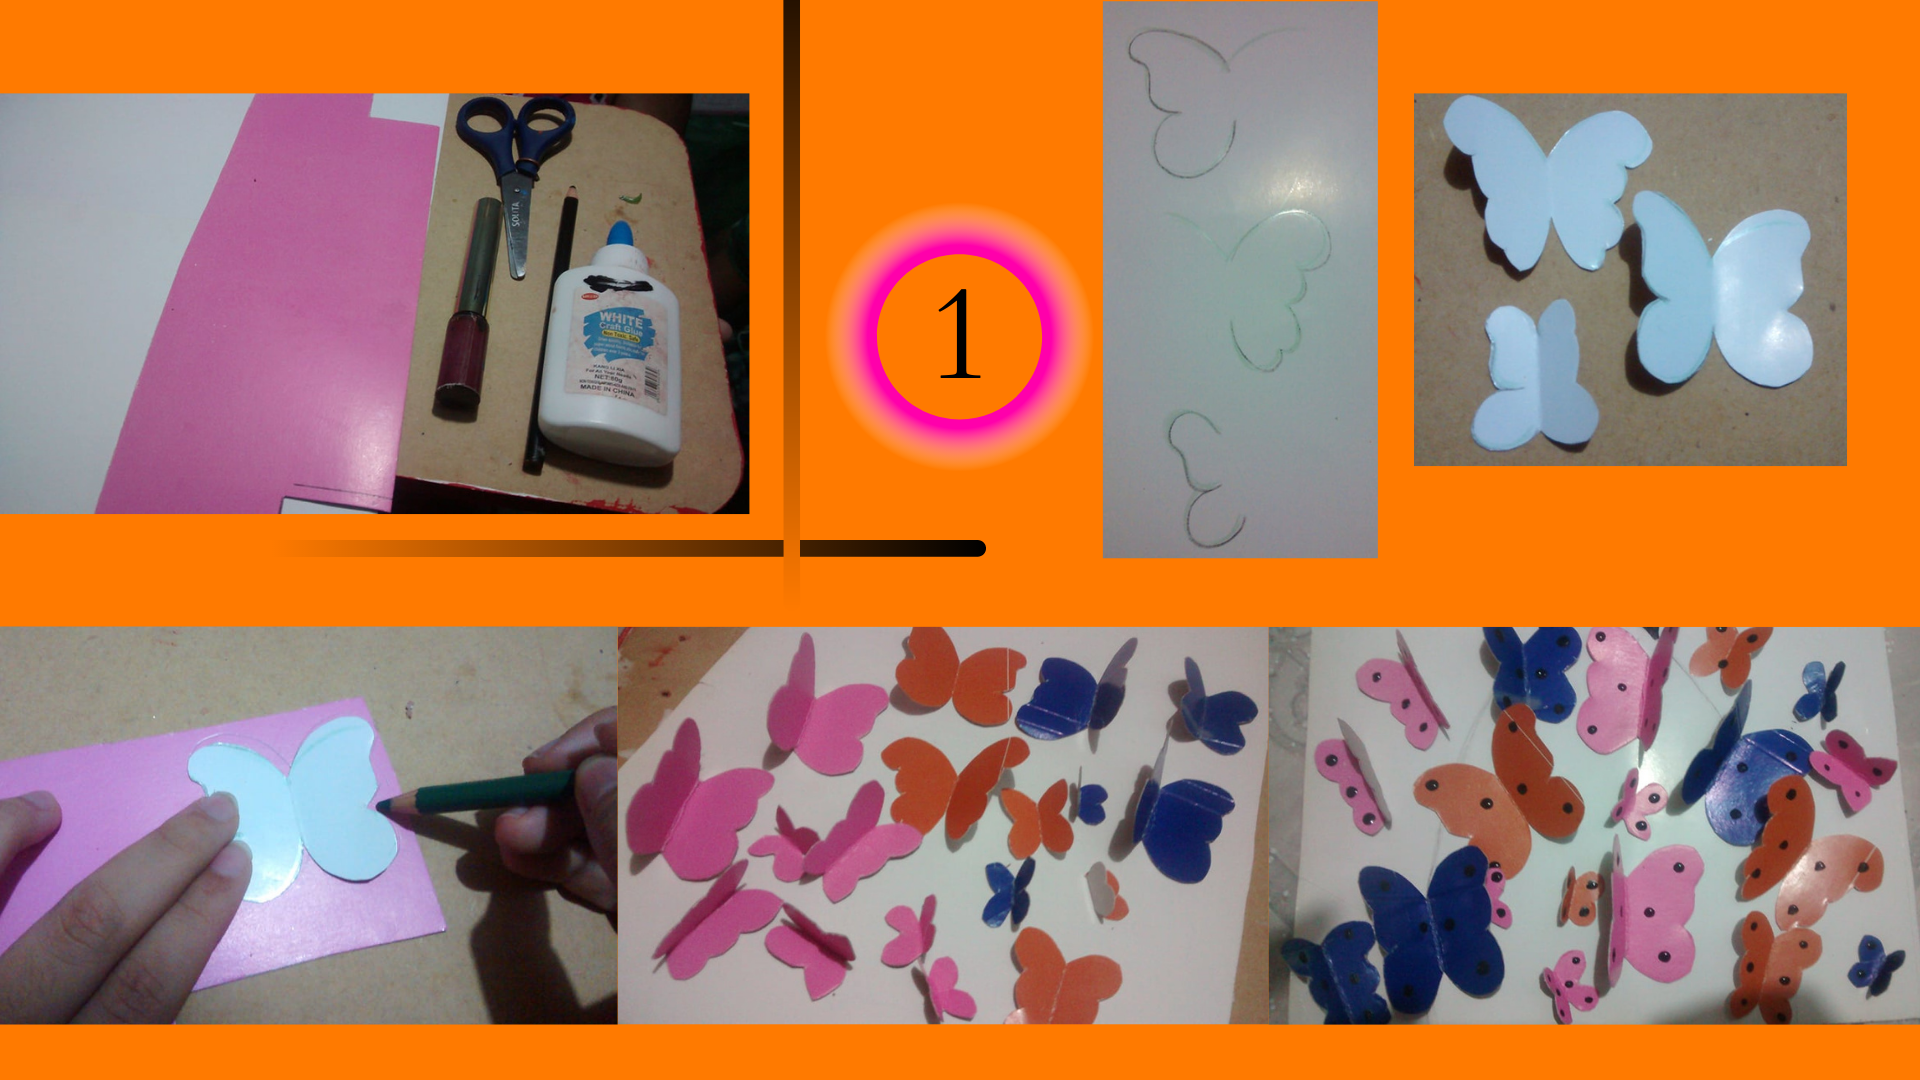
-Paso 1: en una cartulina blanca, a parte de la que usaremos para el fondo del cuadro, realizamos el patrón de las mariposas, de distintos tamaños, recortamos y marcamos en la cartulina de colores y las recortamos cuidadosamente, luego con pintura negra, realizamos una serie de puntos, en diferentes lugares de la mariposa, para dar un toque más lindo, la idea es jugar con nuestra imaginación.
-Materials:
-Paste.
-Scissors.
-Cardboard of various colors.
-Black paint.
-Pencil.
-A white cardboard for the background of our picture.
-Step 1: on a white cardboard, apart from the one we will use for the background of the picture, we make the pattern of the butterflies, of different sizes, we cut and mark on the colored cardboard and carefully cut them out, then with black paint, we make a series of dots, in different places of the butterfly, to give a nicer touch, the idea is to play with our imagination.
.png)
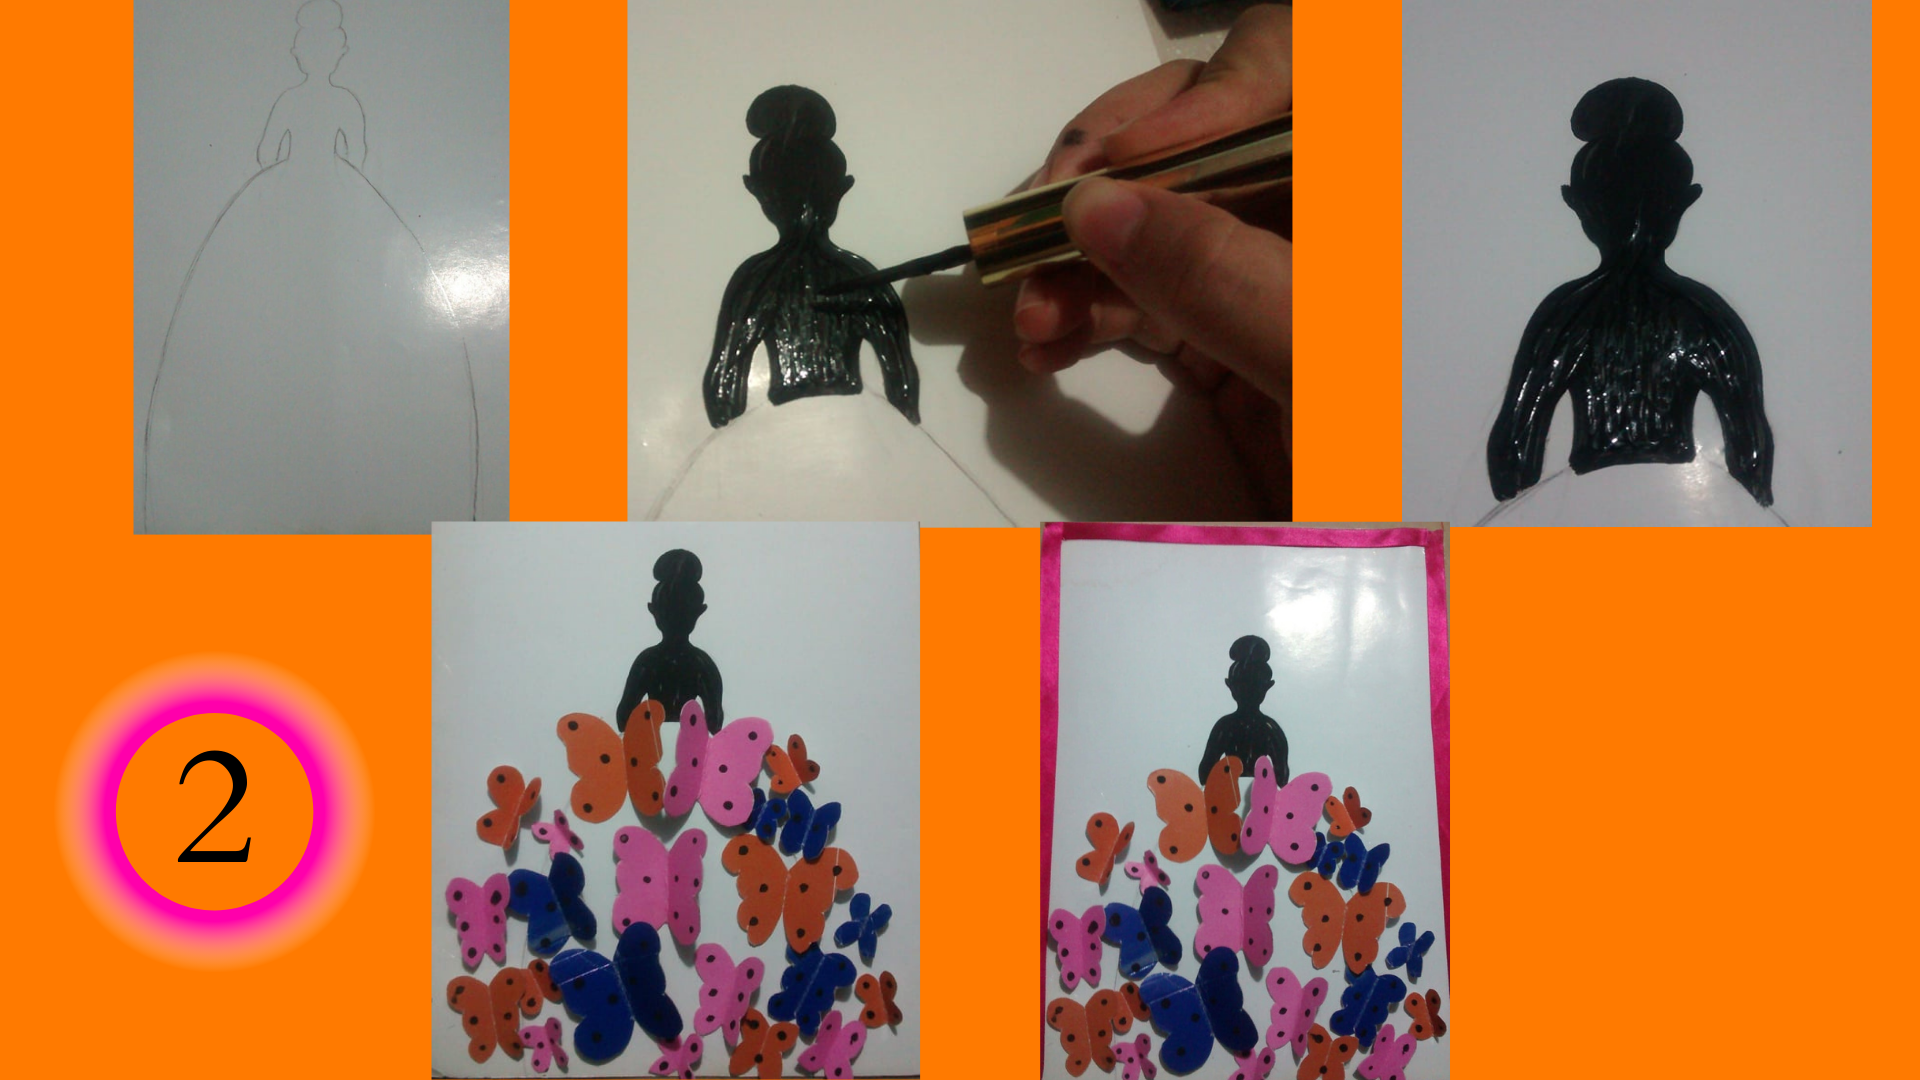
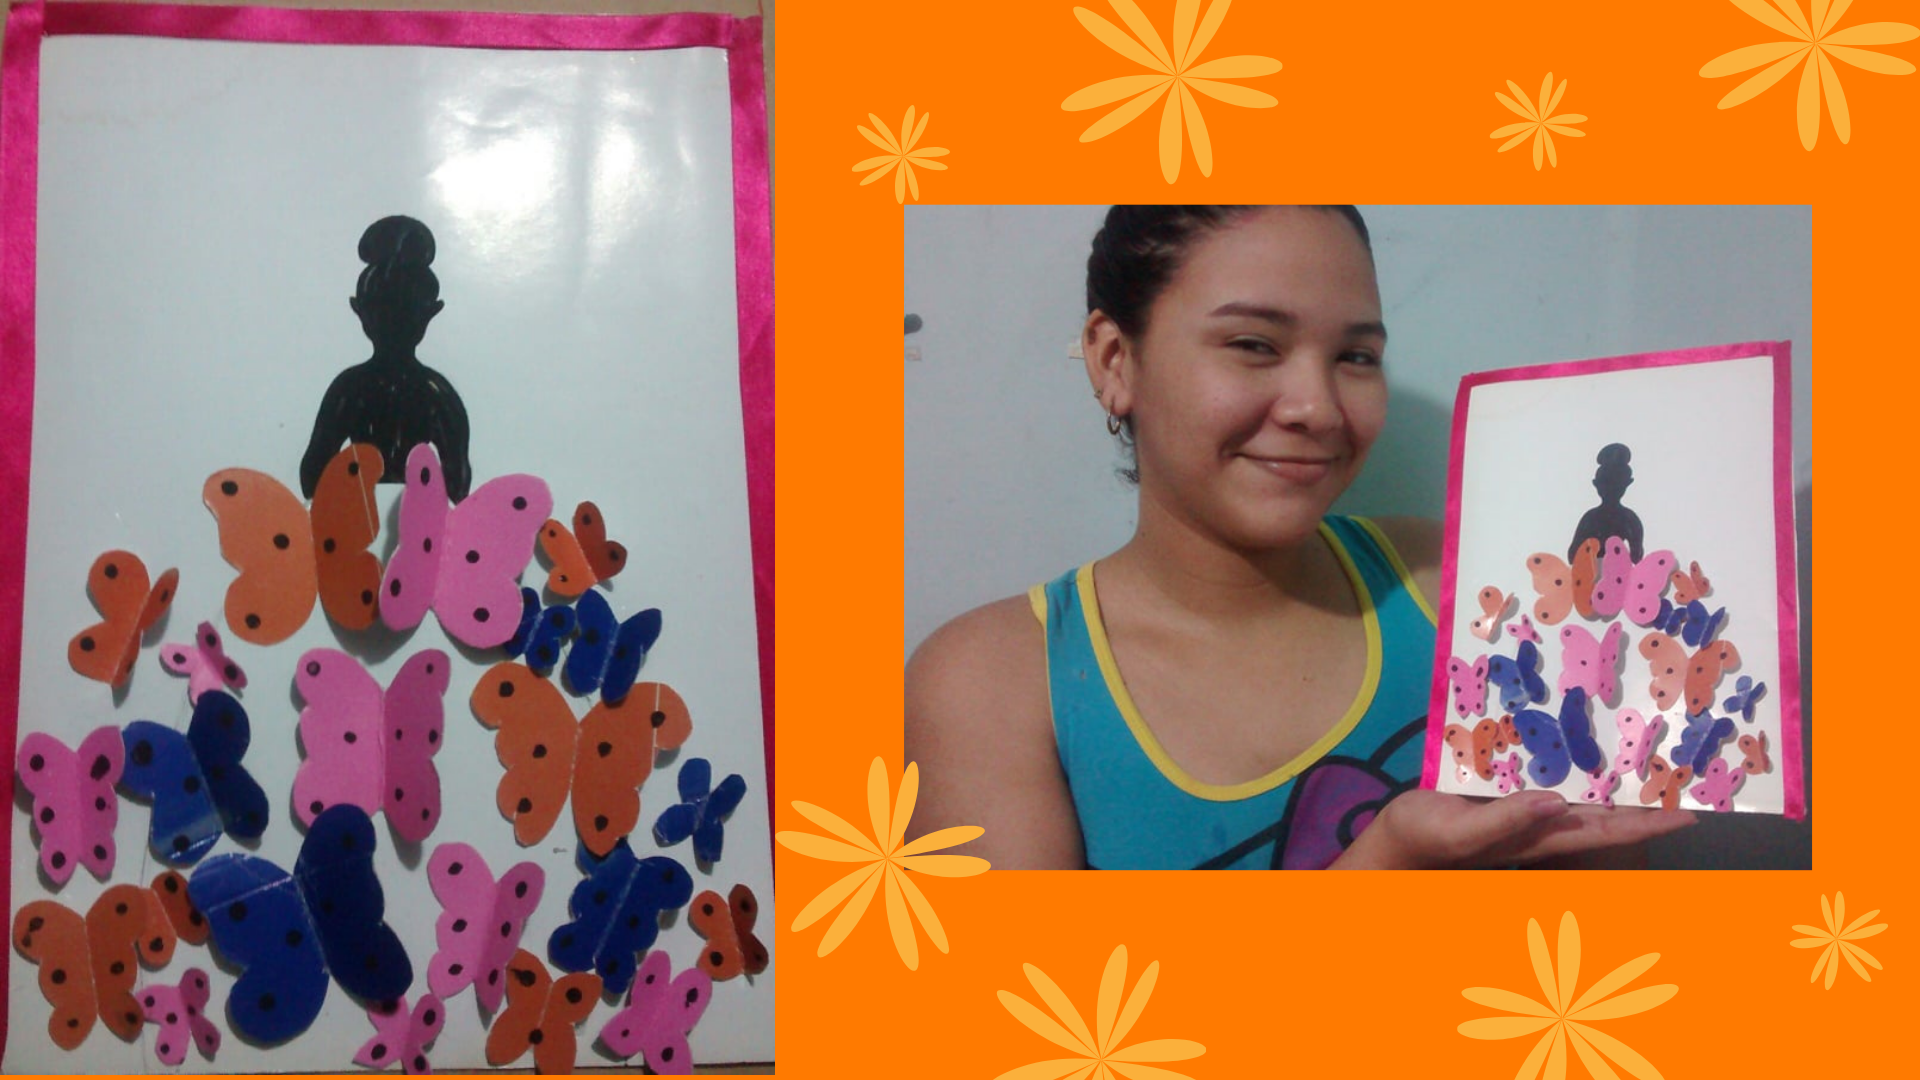
-Paso 2: En nuestra cartulina de fondo, dibujamos la silueta de nuestra novia de bodas, podemos buscar la silueta que más nos guste, luego, pintamos de negro solo la parte de arriba de la muñeca, ya que el hermoso vestido será forrado con mariposas, procedemos a pegar cada una de las mariposas en el orden deseado, y por último, a los bordes de la cartulina, pegamos una cinta color fucsia, para dar un toque mas femenino y lindo.
-Step 2: In our background cardboard, we draw the silhouette of our wedding bride, we can look for the silhouette that we like, then, we paint black only the top of the doll, as the beautiful dress will be lined with butterflies, we proceed to paste each of the butterflies in the desired order, and finally, at the edges of the cardboard, we glue a fuchsia ribbon, to give a more feminine and cute touch.
I loved the final result, I love doing this kind of crafts, creating is part of me, thank you for reading my post, I love you very much, greetings and blessings to all.
.png)
All photos are my Authored, and edited from canva.