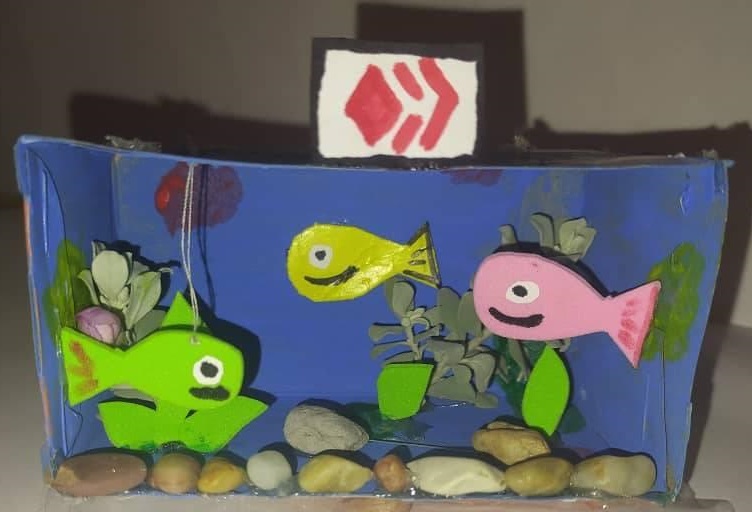
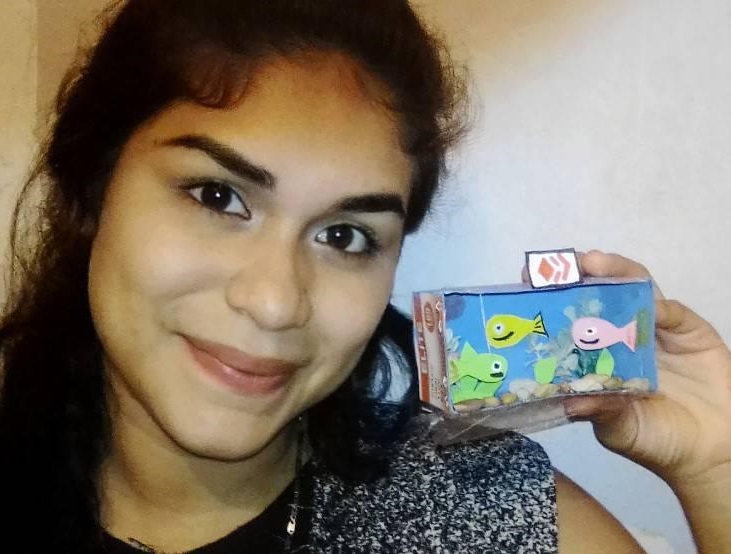
[ESP - ENG] Mini Pecera Hive | Hive Mini Fish Tank
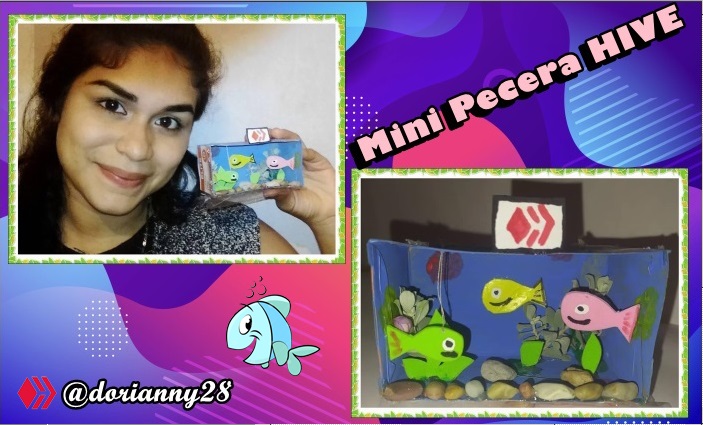
A continuación les estaré explicando paso a paso como realizar esta fabulosa Mini pecera Hive.
Next I will be explaining step by step how to make this fabulous Mini Hive fish tank.
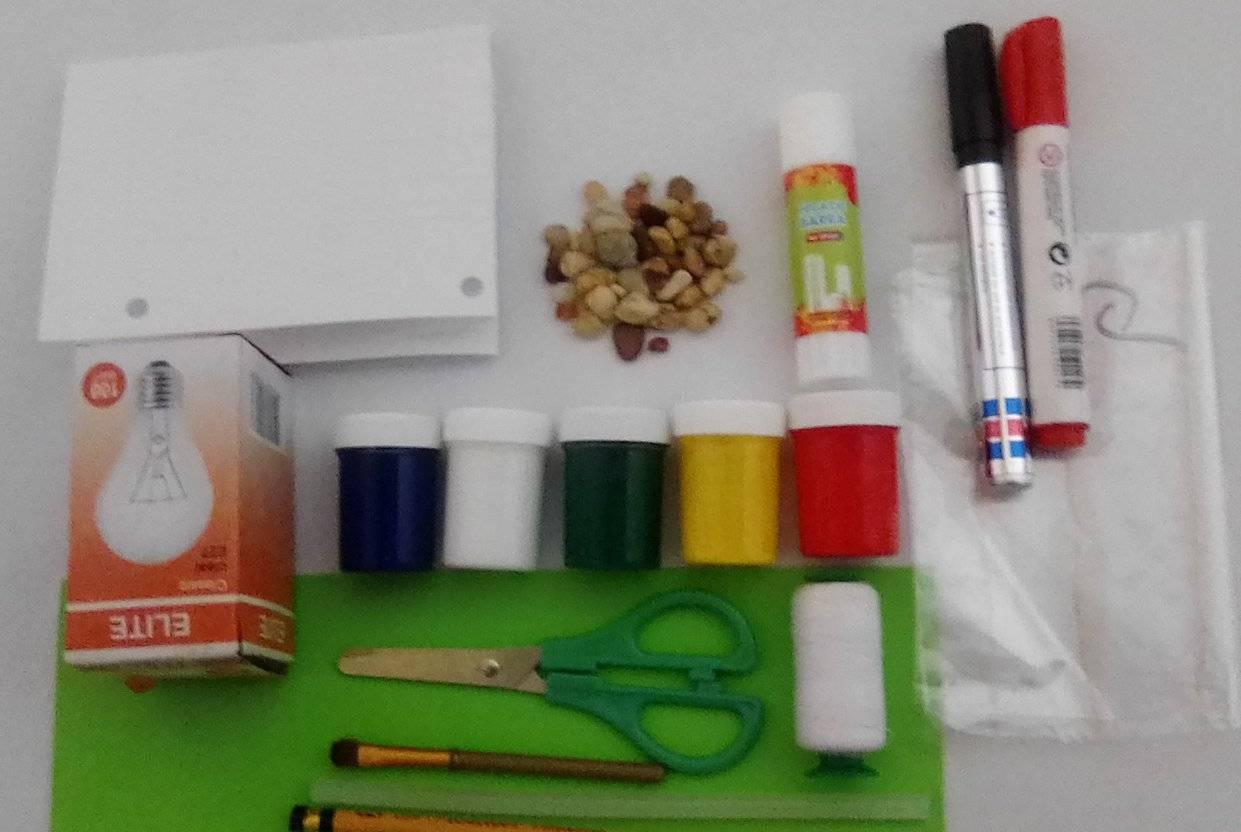
- Materiales:
• Una caja pequeña.
• Marcadores: Negro y Rojo.
• Pinturas: Azul , Amarillo, Rojo, Blanco, Verde.
• Foamis: Verde, Rosado y Amarillo.
• Pincel.
• Hilo de cocer.
• Plástico transparente.
• Silicon en barra.
• Pega en barra.
• Tijera.
• Piedras pequeñas.
• Hoja blanca.
• Lápiz crayon.
- Materials:
- Small box.
- Markers: Black and Red.
- Paints: Blue, Yellow, Red, White, Green.
- Foamis: Green, Pink and Yellow.
- Brush.
- Baking thread.
- Transparent plastic.
- Silicon stick.
- Glue stick.
- Scissors.
- Small stones.
- White sheet.
- Crayon pencil.
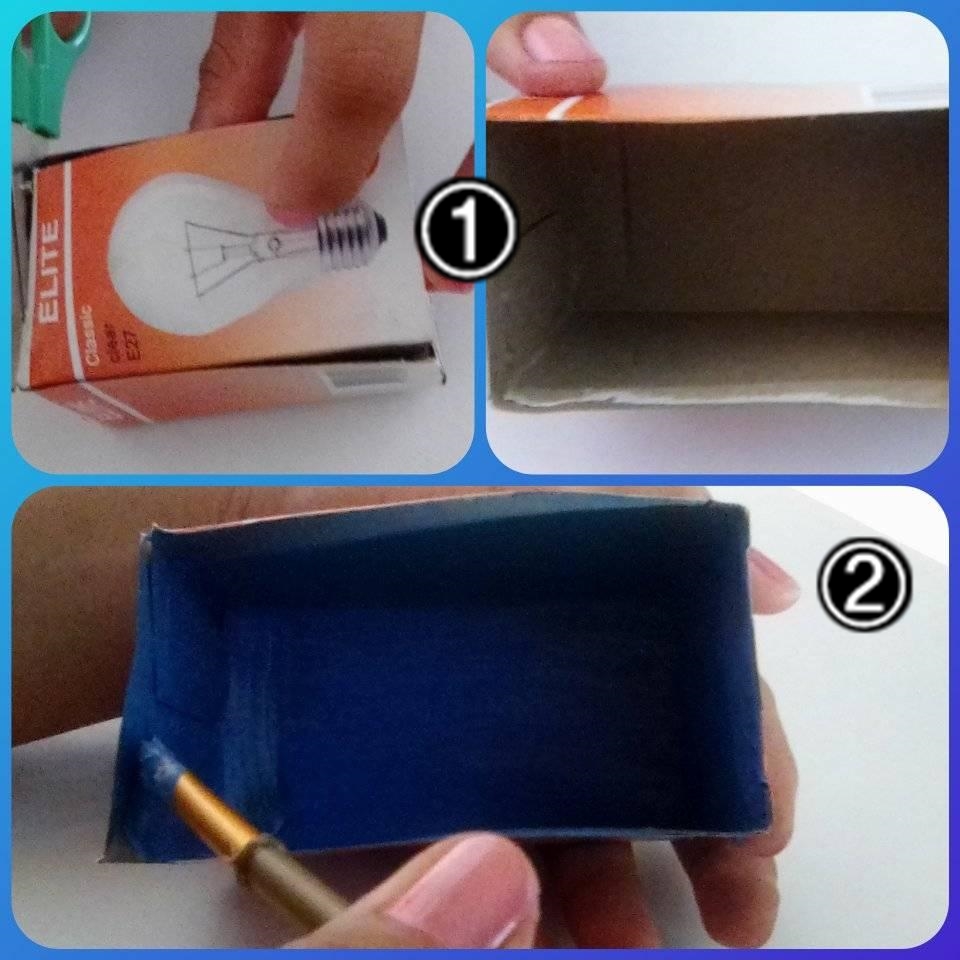
• Paso 1: Recortamos la caja con la tijera.
• Paso 2: Pintamos la caja de azul.
• Step 1: Cut out the box with the scissors.
• Step 2: Paint the box blue.
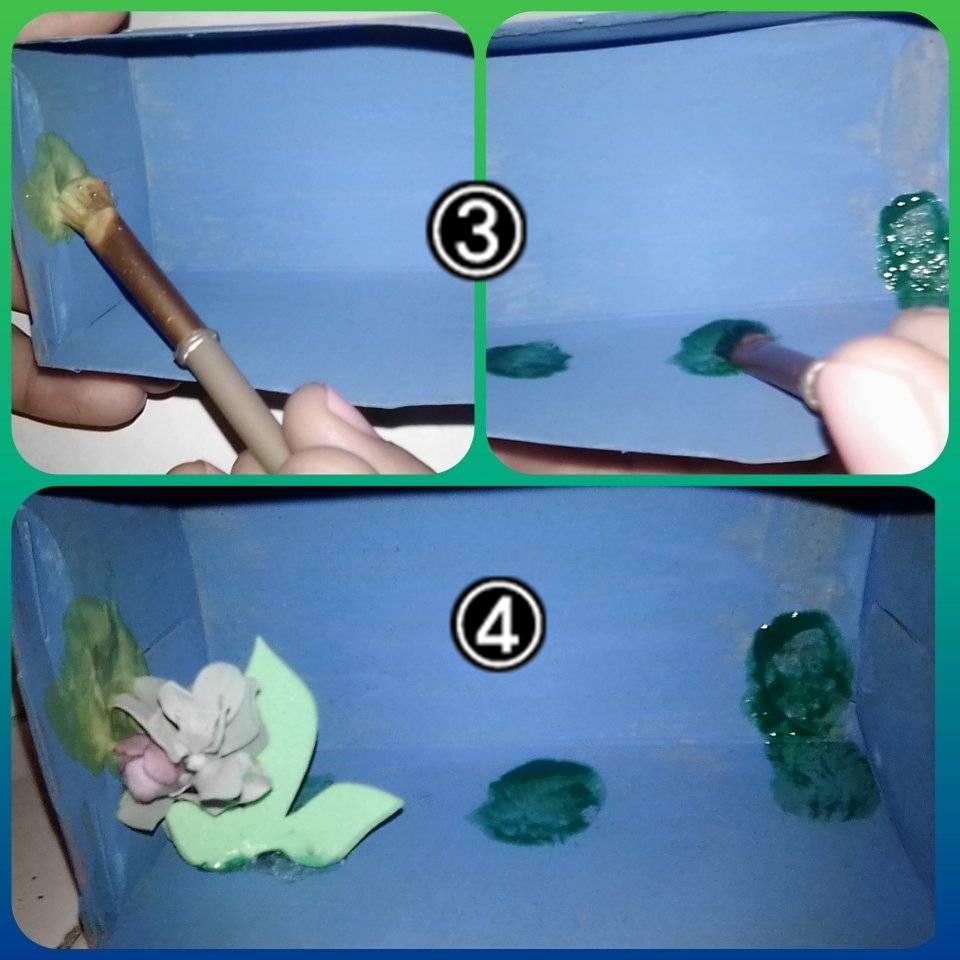
• Paso 3: Pintamos dentro de la caja manchas de varios colores
• Paso 4: Agregamos plantas dentro de la caja pegadas con silicon en barra.
- Step 3: Paint stains of various colors inside the box.
- Step 4: Add plants inside the box glued with silicon stick.
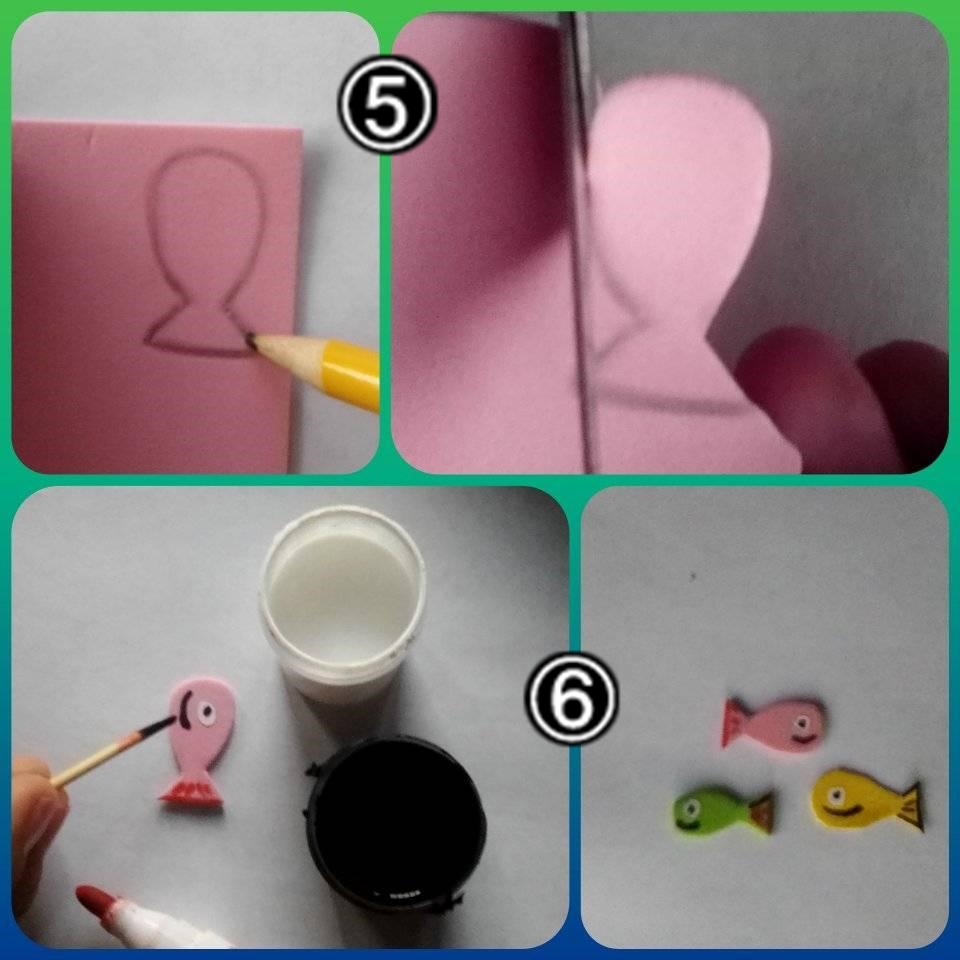
• Paso 5.Dibujamos con lápiz crayon los peces y recortamos.
• Paso 6:Pintamos los ojos a los peces con pintura blanca y negra
-Step 5: Draw the fishes with crayon and cut them out.
-Step 6: Paint the eyes of the fish with black and white paint.
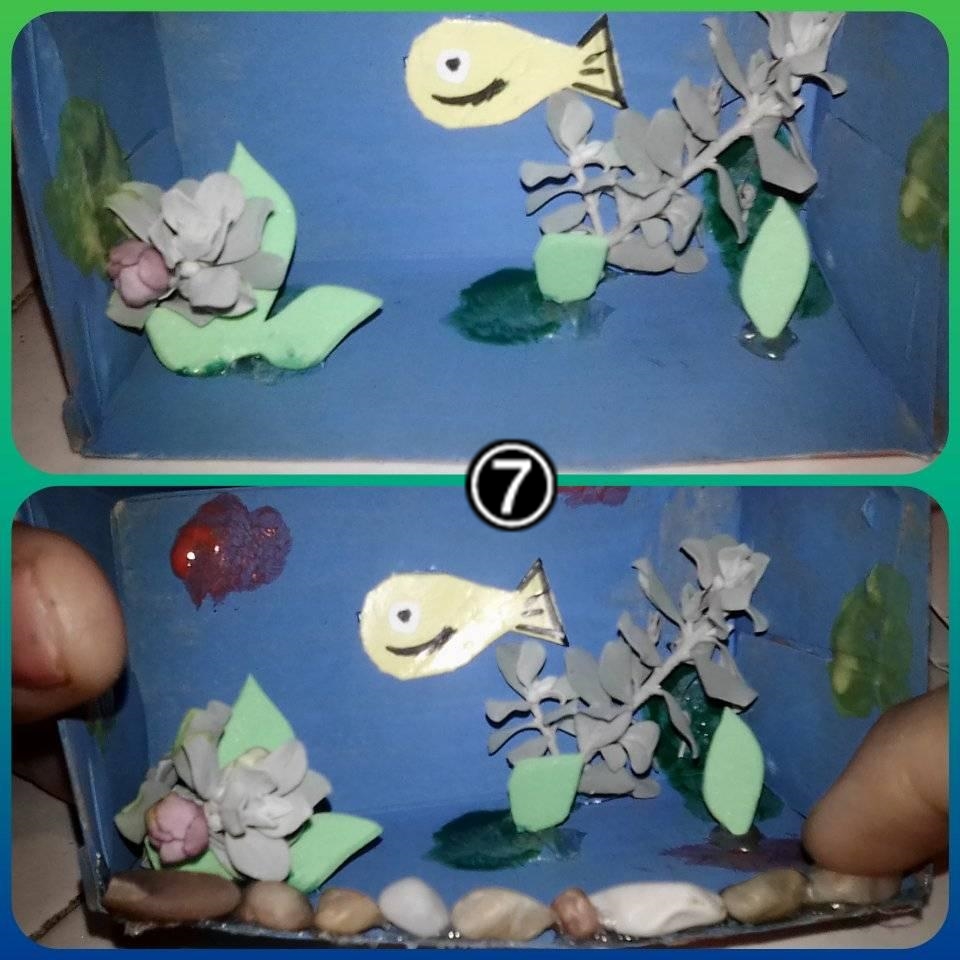
• Paso 7: Agregamos mas plantas y pegamos uno de los peces en el fondo de la pecera, luego procedemos a colocar con silicon cada una de las piedras alineadas.
- Step 7: Add more plants and glue one of the fish at the bottom of the tank, then proceed to place with silicone each of the stones aligned.
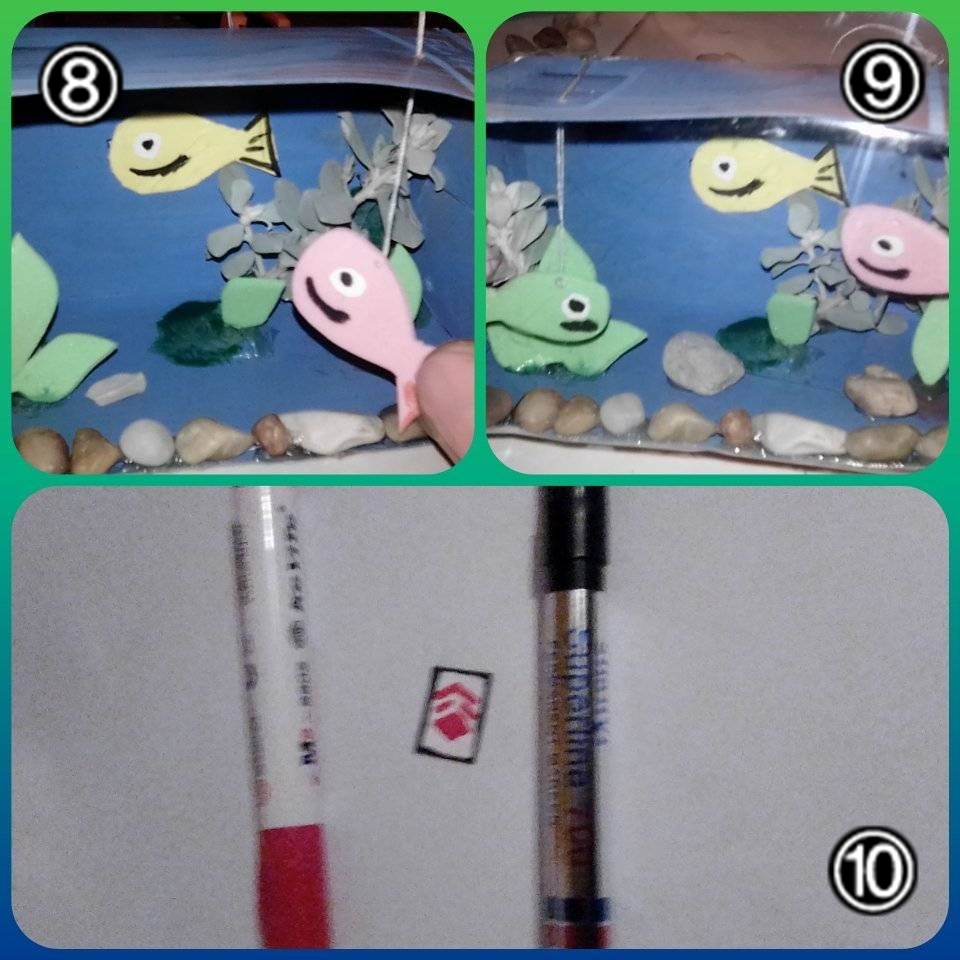
• Paso 8: Colocamos los demás peces con hilo de cocer en la parte superior de la pecera.
• Paso 9: Colocamos el plástico transparente con silicon.
• Paso 10: Con hoja blanca, marcadores negro y rojo realizamos el Logo de Hive.
- Step 8: Place the rest of the fish with baking thread on the top of the fish tank.
- Step 9: We place the transparent plastic with silicon.
- Step 10: With white paper, black and red markers we make the Hive Logo.

Hi dorianny28,
Visit curiehive.com or join the Curie Discord community to learn more.
Thank you for your support. I just added myself to the group on discord
Curador: @Mariale07
Te invitamos a visitar nuestro servidor en Discord
Muchas gracias por su apoyo.