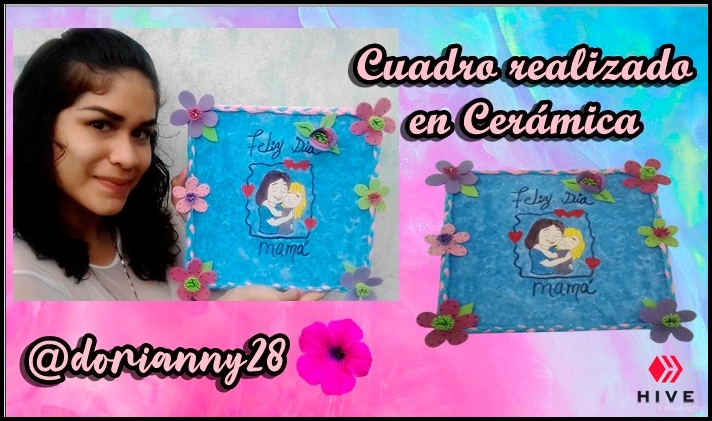
[ESP - ENG] Cuadro realizado en cerámica | Picture made of ceramic
Hello wonderful people of this beautiful HIVE community. A special day is approaching for all those women who gave us life, and this time I want to present this nice and simple detail that we can do to our mothers, with a material that we can find almost anywhere. This time I will use a ceramic as a base to make a nice picture that we can place in our living rooms.
A continuación les presento los pasos a seguir.
Here are the steps to follow.

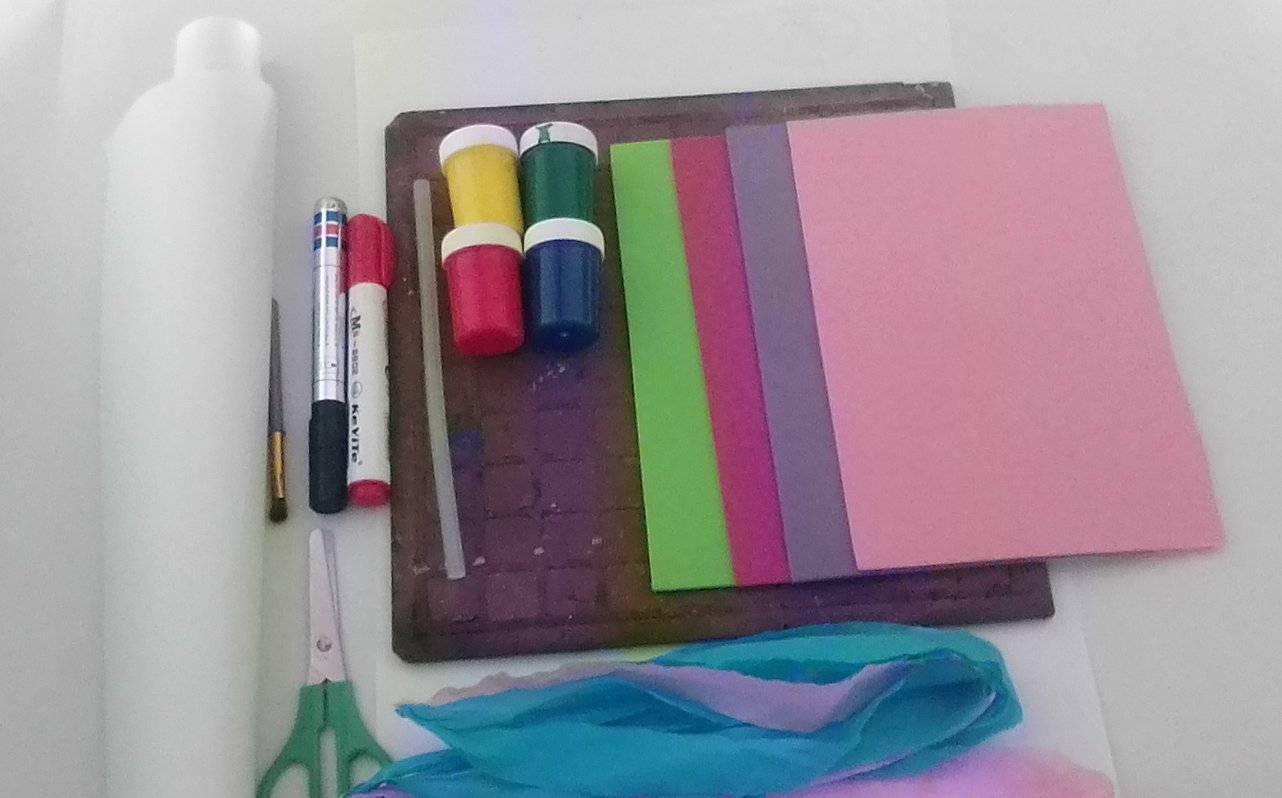
• 1 CERAMICA (MEDIDA STANDAR)
• PINTURAS: AMARILLO, ROJO, AZUL, VERDE
• FOAMI: VERDE, FUCSIA, MORADO, ROSA
• 1 SILICON EN BARRA
• 1 PINCEL PEQUEÑO
• MARCADORES: NEGRO Y ROJO
• 1 TIJERA
• PAPEL CREPE: AZUL Y ROSA
• 1 PAPEL BOND U HOJAS BLANCAS RECICLABLES.
• 1 CERAMIC (STANDARD SIZE)
• PAINTS: YELLOW, RED, BLUE, GREEN
• FOAMI: GREEN, FUCHSIA, PURPLE, PINK
• 1 SILICON STICK
• 1 SMALL BRUSH
• MARKERS: BLACK AND RED
• 1 SCISSORS
• CREPE PAPER: BLUE AND PINK
• 1 BOND PAPER OR RECYCLABLE WHITE SHEETS

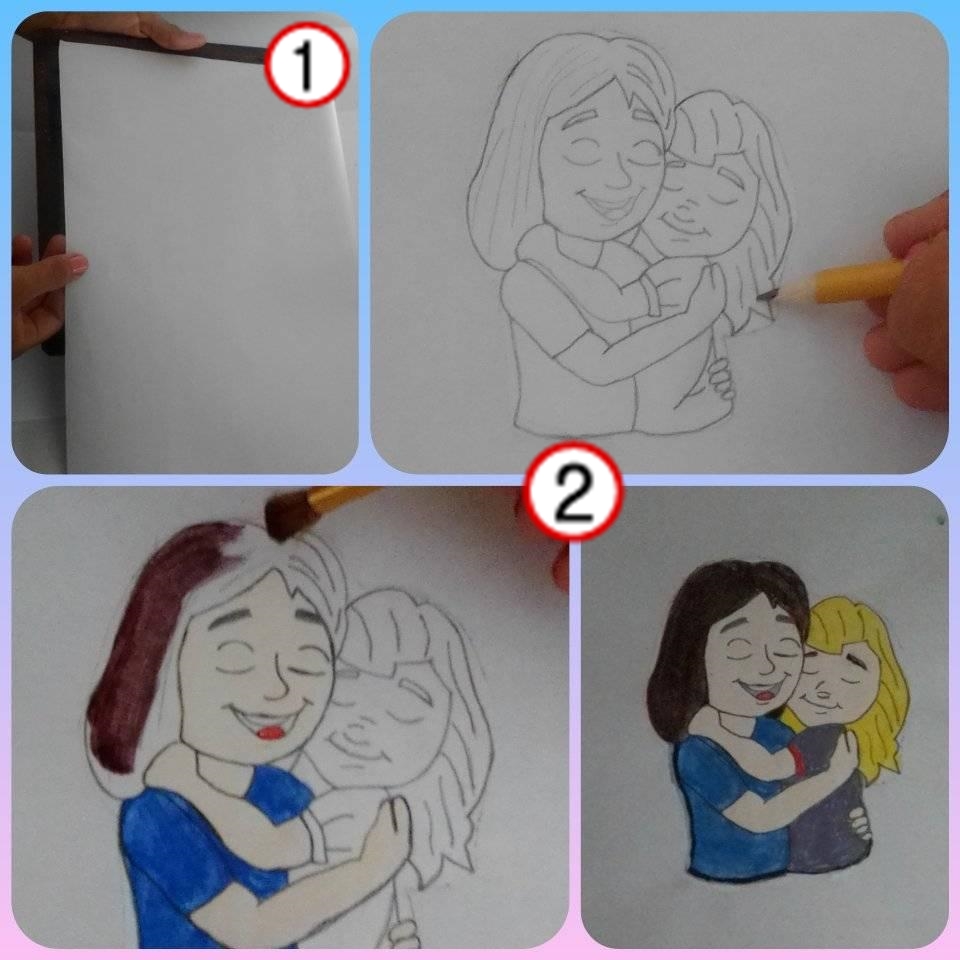
• Paso 1: Forrar hasta cubrir completa la cerámica con papel bond y silicón, antes de colocar cualquier pintura.
• Paso 2: Dibujar y pintar la imagen que desee en el centro de la cerámica ya forrada.
• Step 1: Line the ceramic completely with bond paper and silicone before applying any paint.
• Step 2: Draw and paint the image of your choice in the center of the lined ceramic.
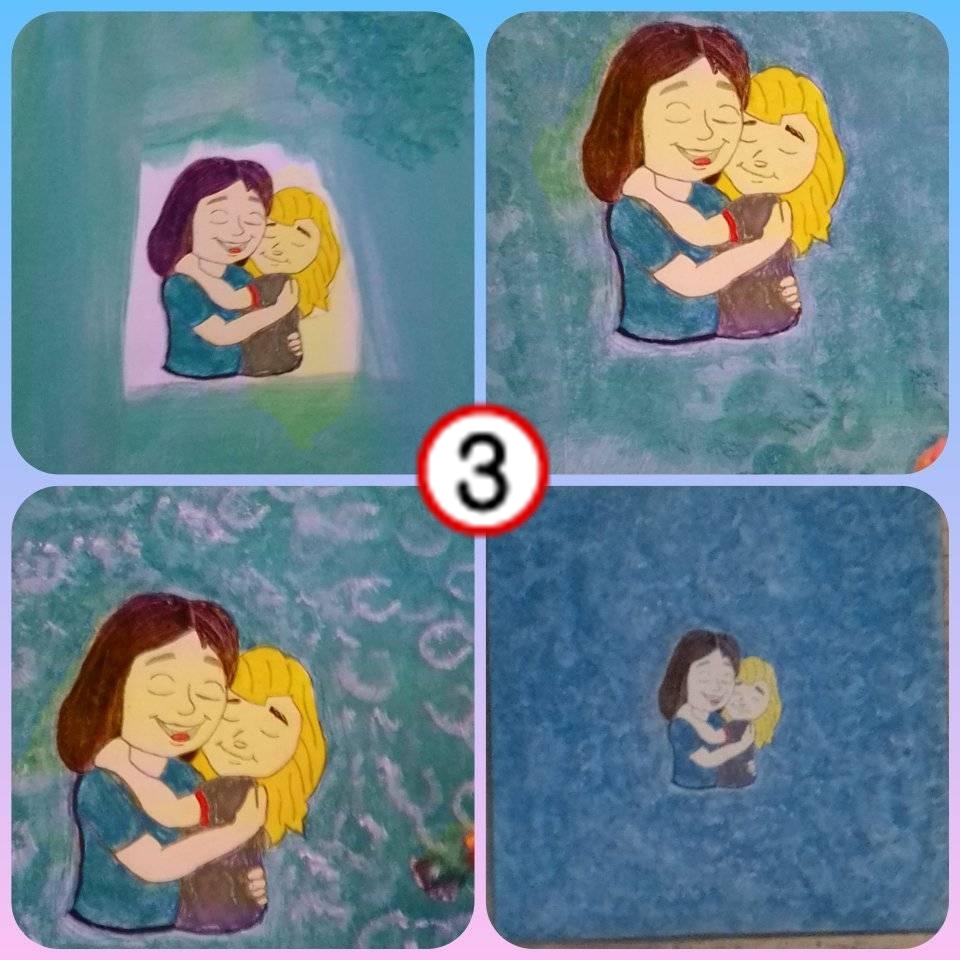
• Paso 3: Pintar la cerámica de azul y utilizar el arte del puntillismo.
• Step 3: Paint the ceramic blue and use the art of pointillism.
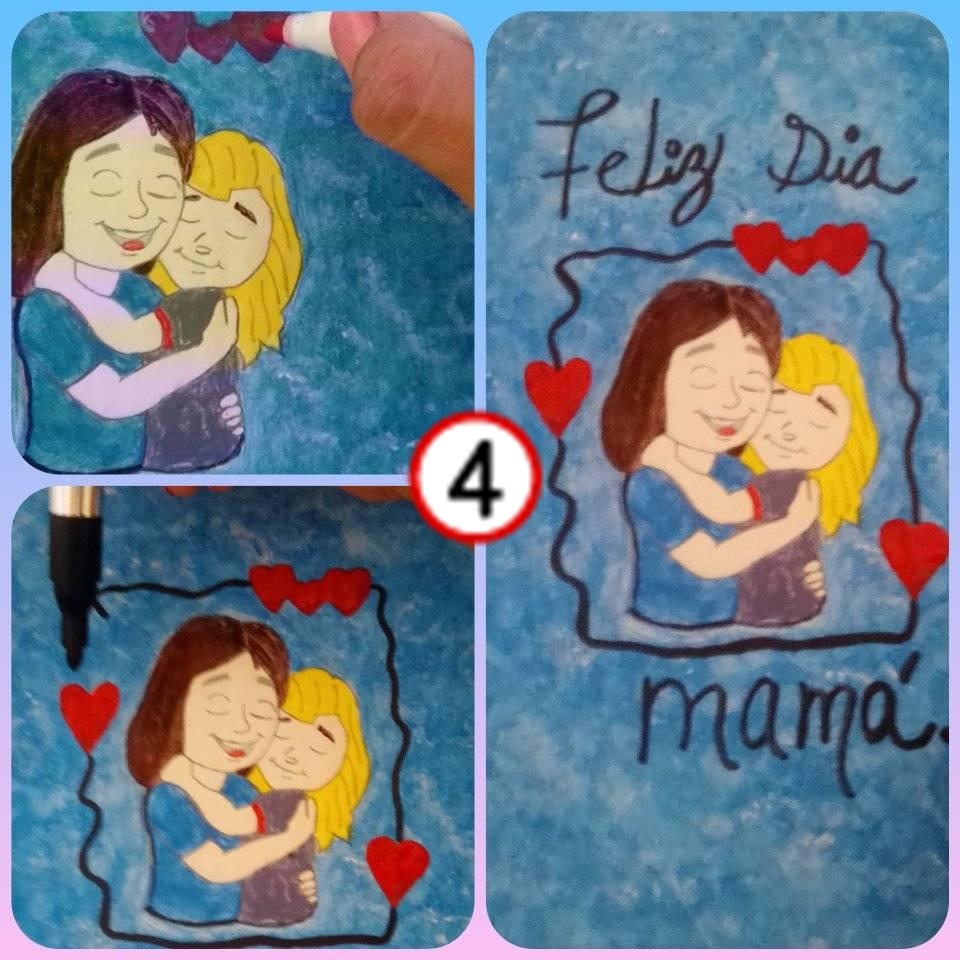
• Paso 4: Dibujar con marcador negro un marco alrededor de la imagen, luego procedemos a dibujar 3 corazones con marcador rojo en la parte superior derecha del marco y 2 a los laterales.
• Step 4: Draw with black marker a frame around the image, then proceed to draw 3 hearts with red marker on the upper right side of the frame and 2 on the sides.
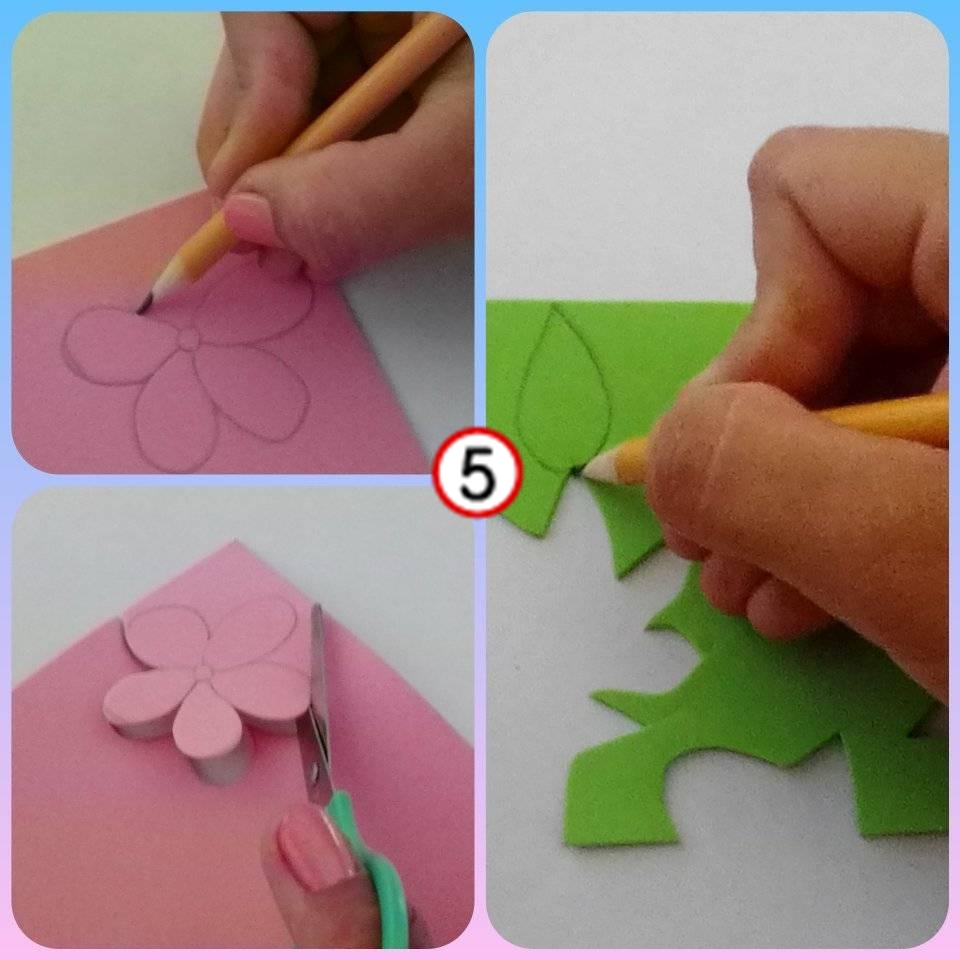
• Paso 5: Dibujar en foami 7 flores y 5 hojas con foami verde.
• Step 5: Drawing 7 flowers and 5 leaves on foami with green foami
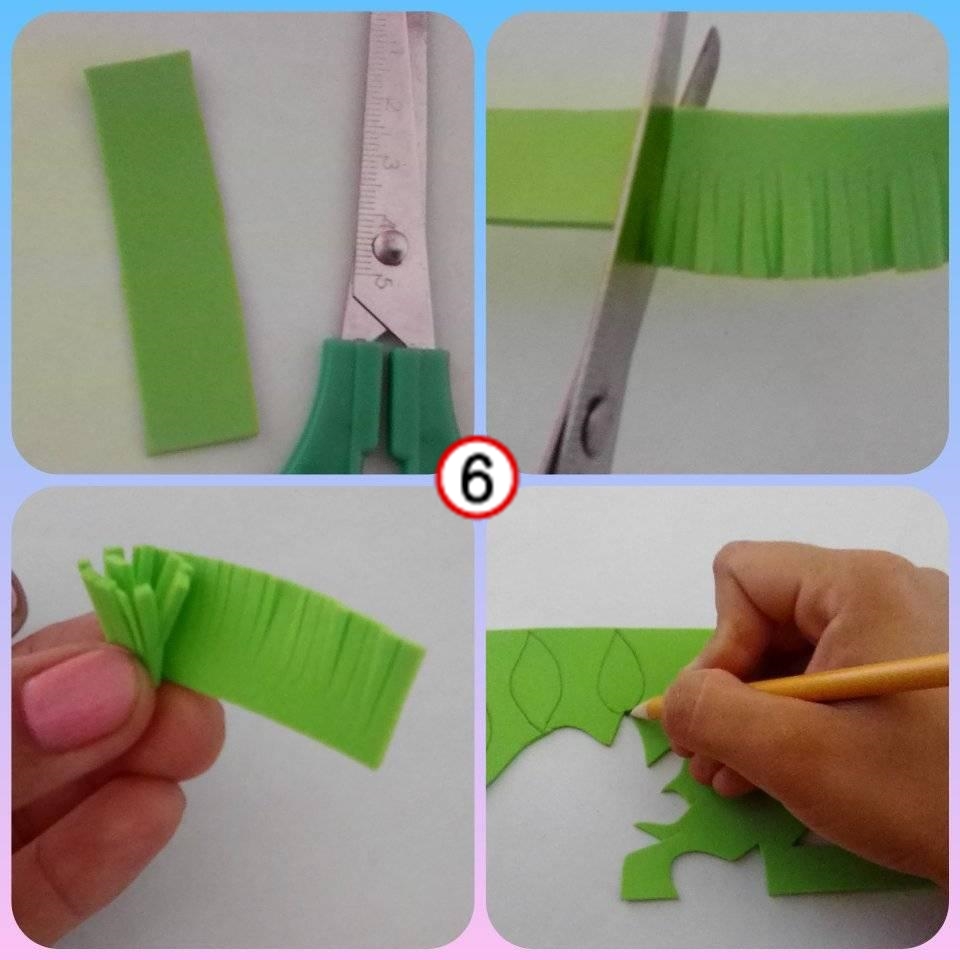
• Paso 6: Cortar 7 tiras de foami, con la ayuda de una tijera realizarle cortes en forma de tiras pequeñas.
• Step 6: Cut 7 strips of foami, with the help of a scissors make cuts in the form of small strips.
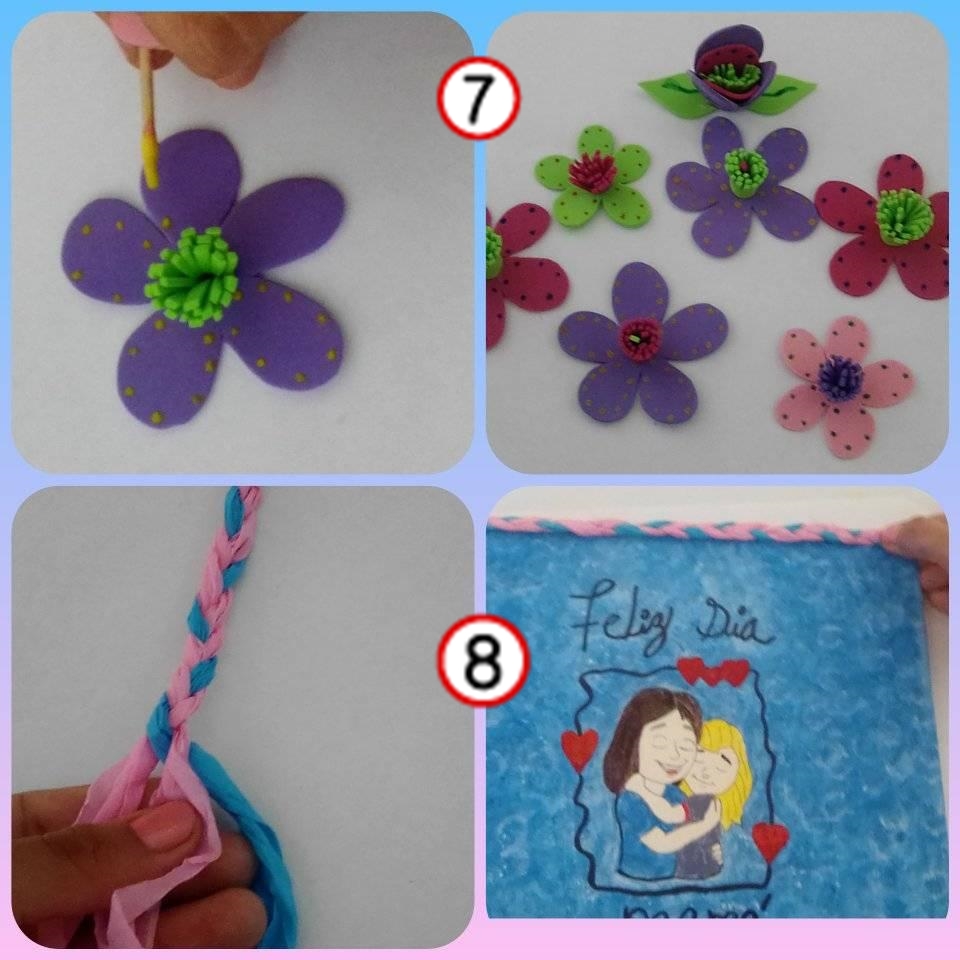
• Paso 7: Ya realizas nuestras flores procedemos a pintar en cada pétalo puntos de colores
• Paso 8: Trenzamos el papel crepe rosa y azul, luego lo pegamos alrededor de todo nuestro cuadro con la ayuda del silicón en barra.
• Step 7: Once our flowers are done, we proceed to paint colored dots on each petal.
• Step 8: We braid the pink and blue crepe paper, then we glue it around our picture with the help of silicone stick.
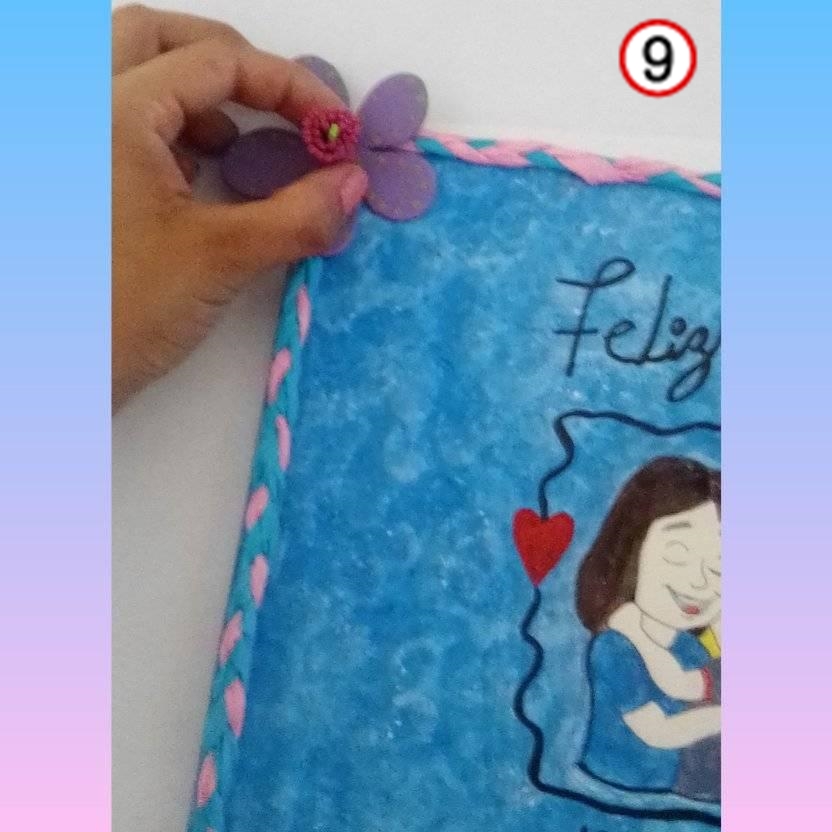
• Paso 9: Ahora procedemos a colocar cada una de nuestras flores ya listas en cada esquina de nuestro cuadro.
• Step 9: Now we proceed to place each of our ready-made flowers in each corner of our picture.


All images are my own / Edited with photoshop CS5
THANK YOU FOR COMING THIS FAR