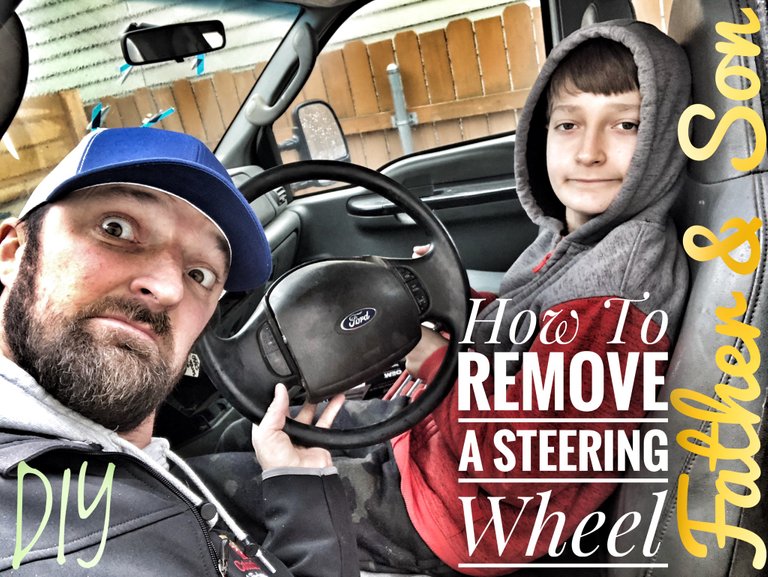
~DIY~ How to Remove a Steering Wheel ~ Father and Son DIY~
We are back at it again my fellow DIY'ers. Tearing stuff apart, putting stuff together, fixing things and breaking things.... well hopefully not the last bit. This time around my Son (@lil-Splatts) and I get into the 2005 Ford F-350 parts trucks a little more. This time we are going to remove the steering wheel for someone who is in need of one. I had never pulled one off and neither had @lil-Splatts. A little fog and some rain wasn’t stopping us today. We had actually completed 3 projects but that would turn this DIY post into an all night read-a-thon... basically it would be way way way too long and I wouldn’t be able to include all the details. Let’s just take this one quarter of a turn at a time and breakdown...
How to Remove a Steering Wheel
Parts are just flying off this truck!! The other night we pulled off the brushguard/winch holder off of the front of the 2005 Ford F-350 parts truck. Oh, you don’t know about the parts truck. Well here is a quick little background to tell you why I have it.
I purchased it because I want the axles out of it. I got a deal on the whole truck I couldn’t refuse. $500 for the whole thing. The axles, suspension and steering components would have cost me over $2,000. Those parts will eventually be swapped into my 1997 Ford F-350 for improved steering, Smoother ride, and disc brakes in the rear. Ok there is a little bit of a background on this project if you haven’t been following me on this adventure in learning and knuckle busting.
In a matter of weeks I have sold enough parts off this truck to get half of my money back. The parts come off relatively easy, so it isn’t too time consuming. As you can see, quite a few parts are missing from the front of the truck.
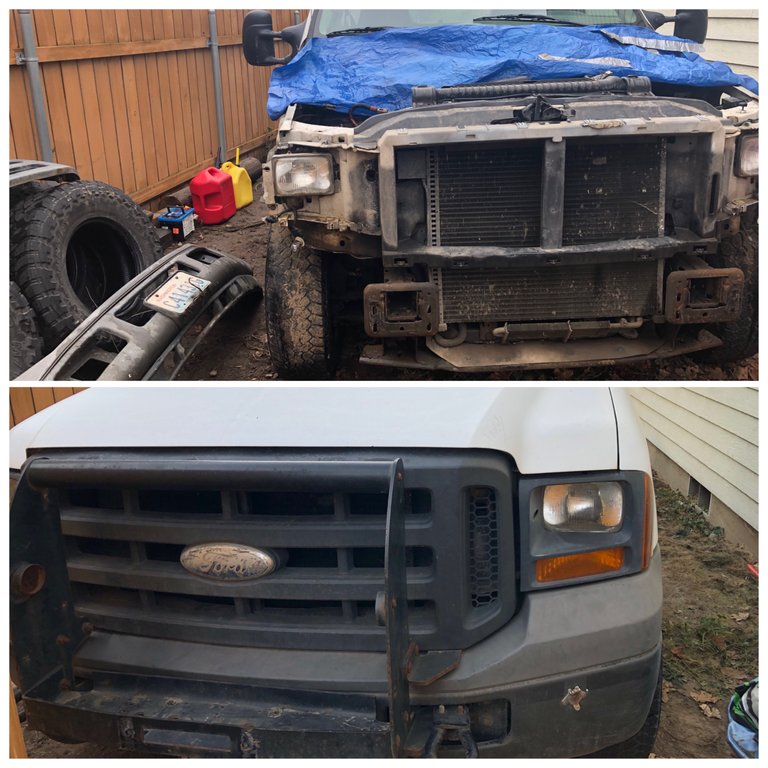
Now we need to get inside and pull off the steering wheel for the same guy that bought the front hood and fenders. You see the parts from this truck cover a good range of model years. From 1999 - 2007, pretty much all the parts are interchangeable which makes it pretty marketable. So who knows, this guy alone might pay for the whole truck. Hey, that wouldn’t hurt my feelings any. Just one part at a time.
In order to pull a Steering you don’t need very many tools but when airbags are involved there are some very important precautions to take.
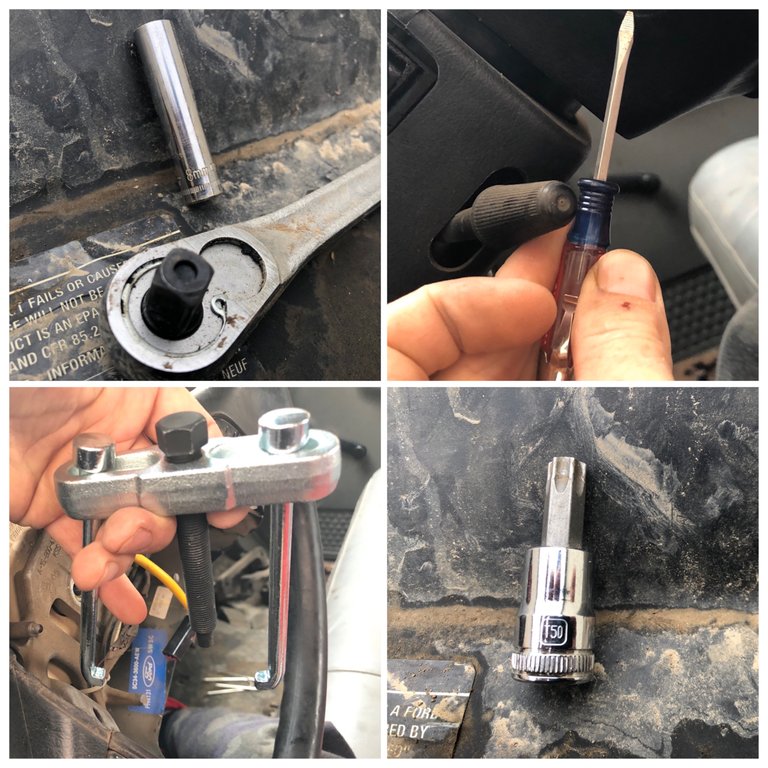
Tools
- 8mm socket
- Ratchet
- Small flathead Screwdriver
- Steering Wheel puller
- T-50 Torques socket (some call it a star)
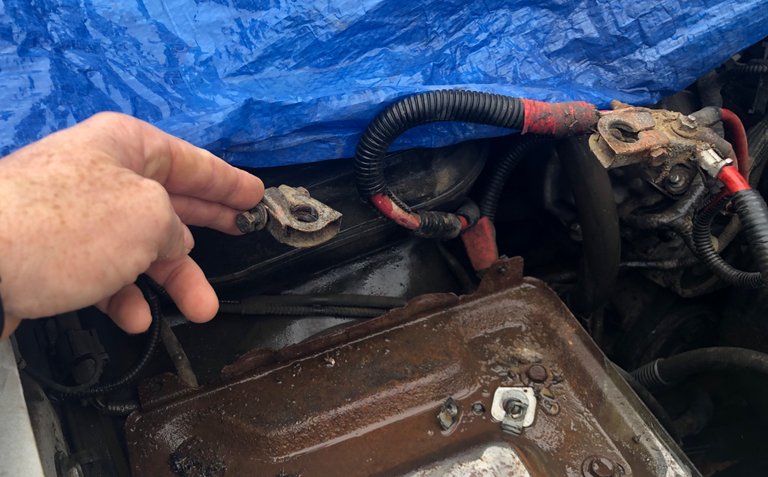
First thing we need to do is eliminate the possibility of the air bag going off. The airbag sits in the middle portion of the steering wheel and I don’t know about you but I wouldn’t want that thing going off on my face when it wasn’t necessary. We will be messing with the electrical wires and banging it around a bit. I mean haven’t you seen those videos where they prank people by putting airbag inside a couch or chair???
 OUCH
OUCHSafety first! We need to disconnect all power to the vehicle and bleed off any charge that could be held on the vehicle. To do this simply pop the hood and disconnect the battery. Then wait 10 minutes or just slap the positive and negative cables together. You will get a little spark when doing this so don’t be alarmed. We are in luck because this truck doesn’t have a battery in it anyway.
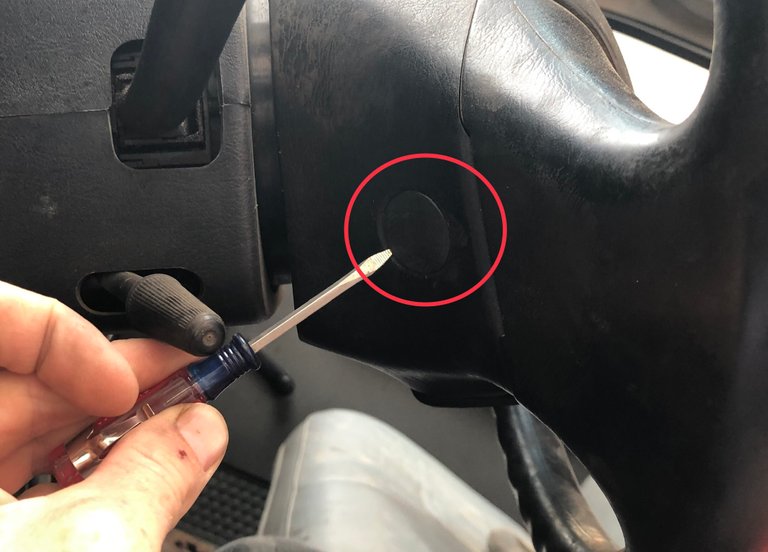
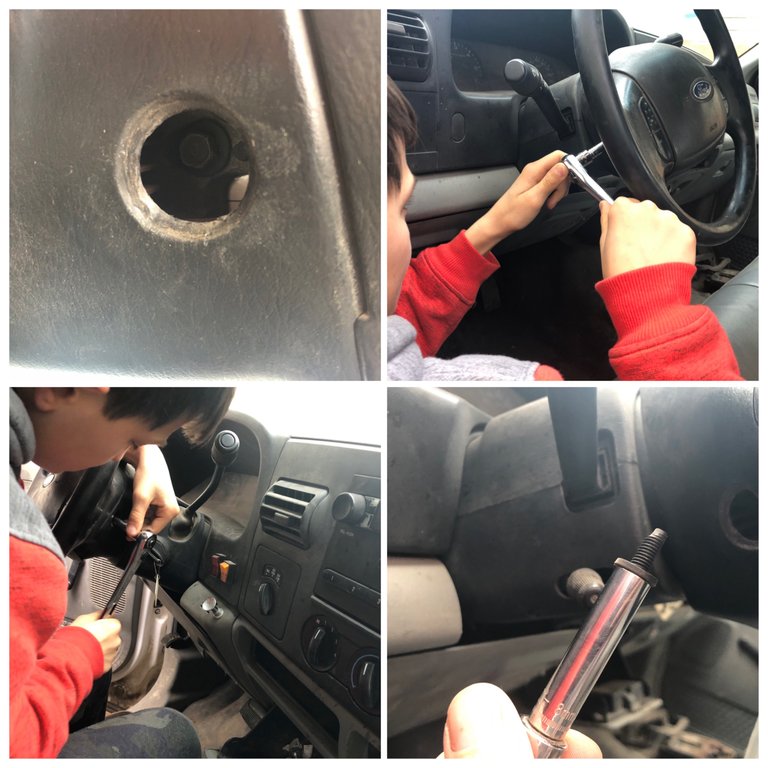
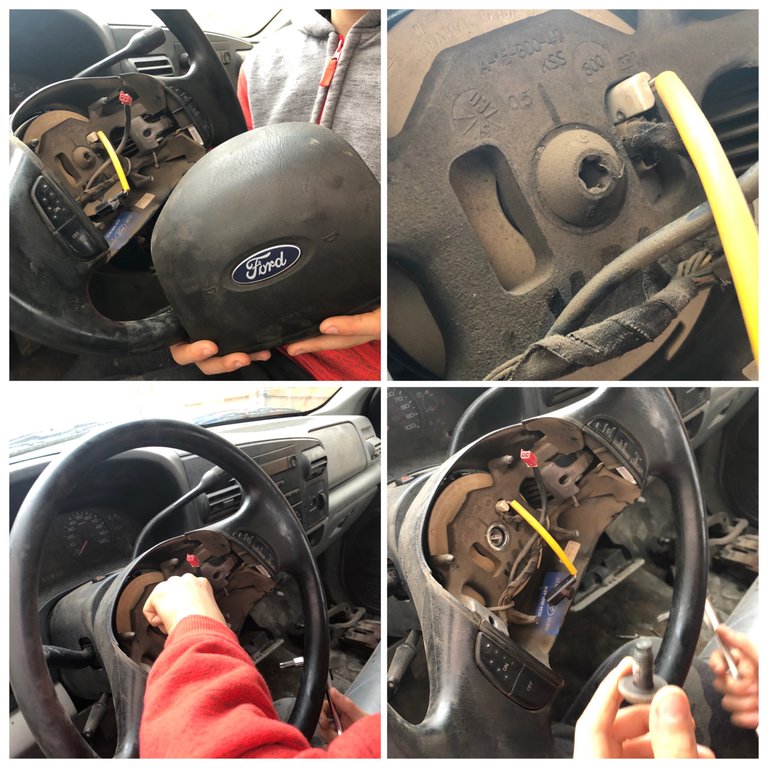
Once that is complete, we can start digging in and getting this steering wheel yanked outta here. The center of the steering wheel needs to be removed to gain access to the bolt that holds the whole steering wheel on. Located on the back of the steering wheel, on either side are these little plastic plugs that need to be popped out. Using the small flathead screwdriver pop those out without losing them or gouging the plastic.
This gives us access to the 2-8mm bolts that hold the airbag and whole middle of the steering wheel in place.
Now the center of the steering wheel basically falls into your lap. The only thing keeping it from doing so are the electrical connectors for the horn/airbag/cruise control.
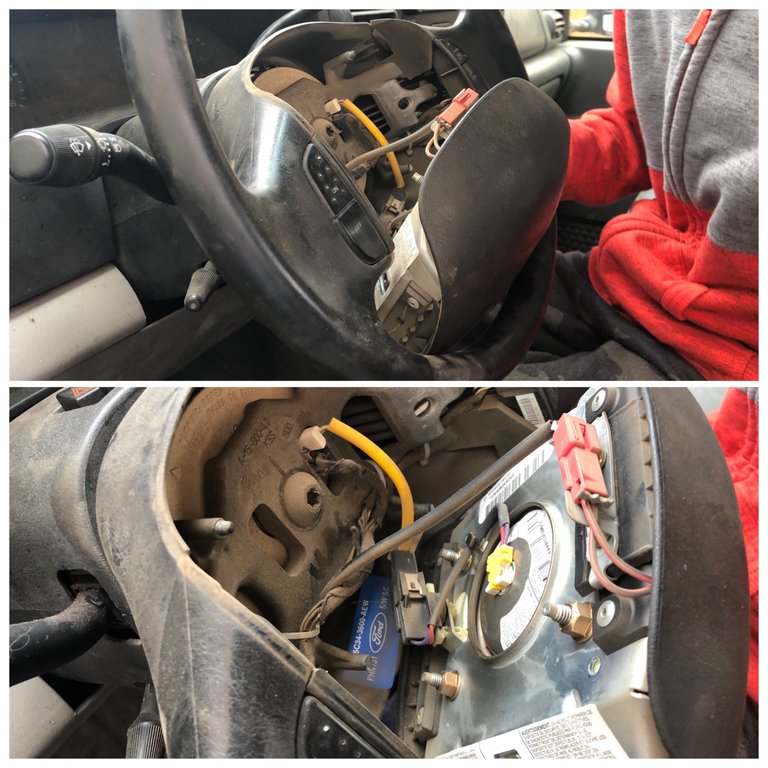
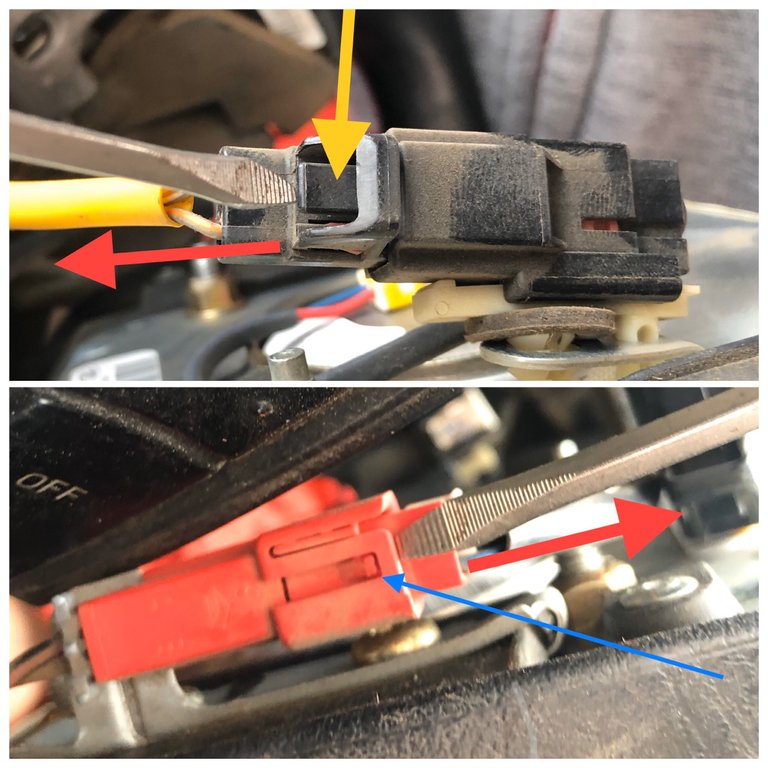
Now don’t go cutting wires and just yanking on these plugs. There are certain ways to “unlock” different kinds of these electrical connections. Some you simply depress a button and slide the connector apart. Others require you to pry up very gently to allow the connector to come apart. I have broke so many of these connectors I get very nervous when messing with them. When they get old, they get brittle and break super easy. I had to be extra careful since I was selling this steering wheel to someone.
With the center of the steering wheel removed we need to remove the retaining bolt using the T-50 socket. Surprisingly the boot wasn’t that tight @lil-splatts broke it loose no problem.
Using a rubber mallet I tried beating the steering wheel off by hitting it on the back and pulling it. Ya, it wasn’t budging!!! I was hitting it pretty hard and saw no signs of movement. I was hoping not to have to run to the parts store but sometimes things just don’t work the way you plan it. We are going to need a Steering Wheel Puller to get this thing off.
Now the next photo may look a bit confusing but I will do my best to explain the mechanics of it.
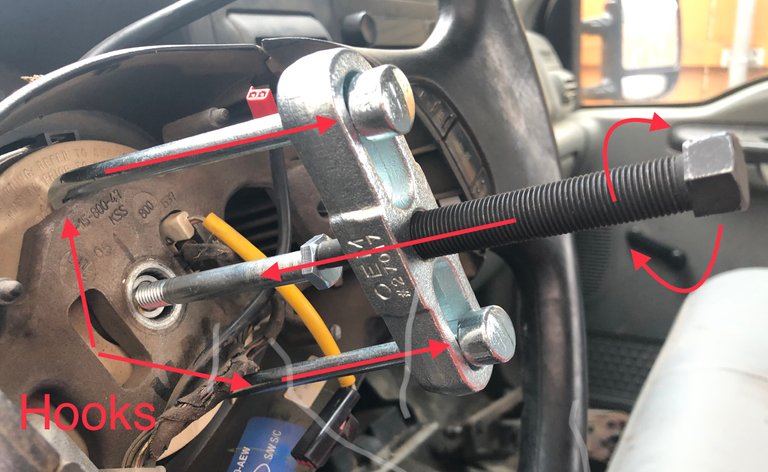
The 2 outside rods have hooks on the ends. These hooks grab each side of the center portion of the steering wheel. With a bolt provided in the puller kit, tighten it into the threaded hole that the steering wheel retaining bolt cane out of. Then by hand, tighten the black drive bolt of the puller onto the center bolt. Once you have the hooks good and secure continue to tighten the drive bolt using a 9/16 socket and ratchet. This will then apply an upward pulling force on the 2 outside rods that are hooked under the steering wheel. Keep a close eye on everything and try your best to keep everything inline and straight. The. I should just pop right off.
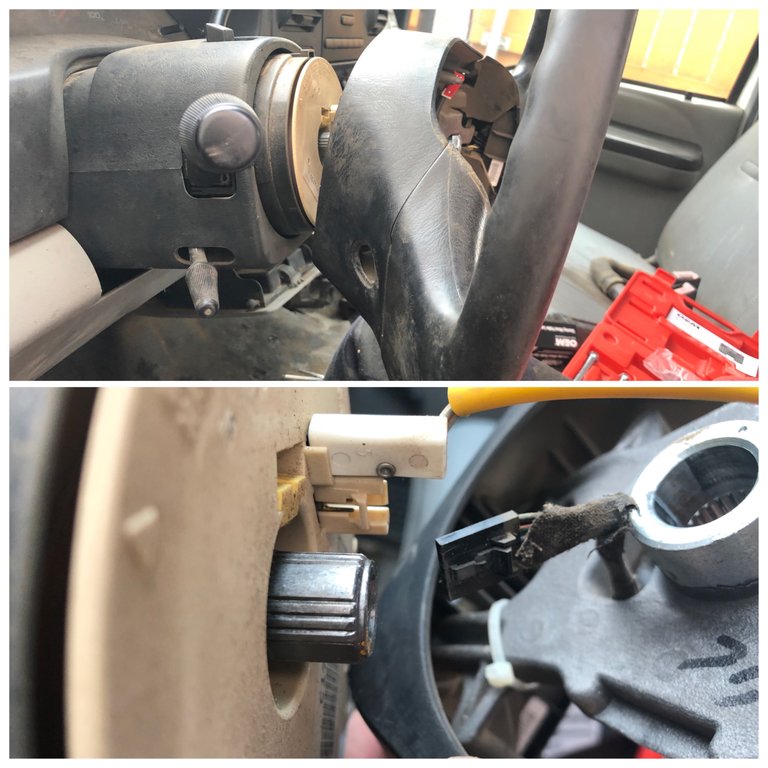
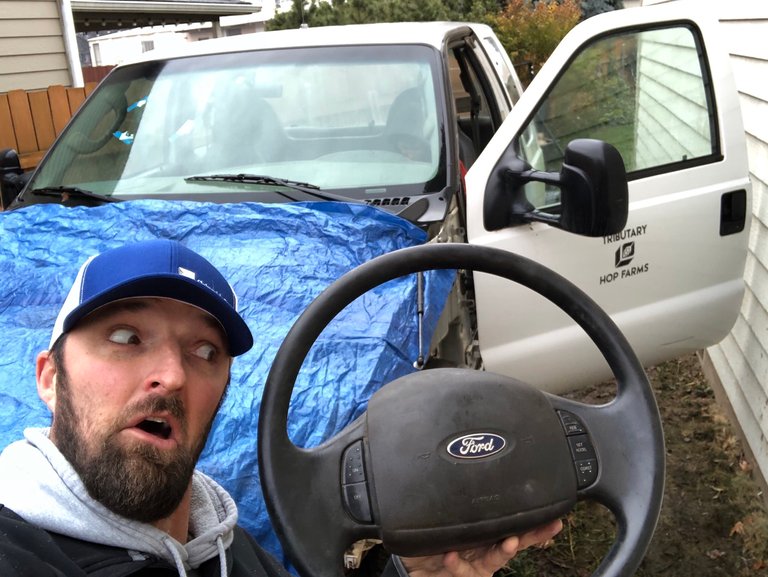
Then all there is to do is unplug one last electrical connector and the steering wheel is free from the truck. Remember to keep track of the few bolts and the plastic plugs that go on the backside of the steering wheel. In my case it is very important to give the buyer every piece needed. I am going to give it a little wash and meet up with the buyer and collect my $50... actually I am splitting it with @lil-Splatts since he did most of the work. Also he is set as a 50% beneficiary on this post. This was good experience for the both of us and @lil-Splatts has never used a puller before. Once I explained the mechanics of it he caught right on.
So there you have it, another DIY project done by your DIY Guy and his sidekick. Stay tuned for the next one when I show you how to diagnose and fix a awful squealing noise from under the hood of Mama-Splatts’ 2005 Lincoln Navigator...

Steem On
and
DIY
&
Save Time
&
Money


Don’t forget to mention @splatz
when you encounter a post that deserves a good Splattin’
by the @splatz trail

Join the @splatz trail
On Steemauto.com
Where we catch those
Splatworthy Posts
Hot off the Press
This post was shared in the Curation Collective Discord community for curators, and upvoted and resteemed by the @c-squared community account after manual review.
@c-squared runs a community witness. Please consider using one of your witness votes on us here
Thanks for noticing!! Glad to see you all stop by.
Cheers
Congratulations @jlsplatts! You have completed the following achievement on the Steem blockchain and have been rewarded with new badge(s) :
You can view your badges on your Steem Board and compare to others on the Steem Ranking
If you no longer want to receive notifications, reply to this comment with the word
STOPTo support your work, I also upvoted your post!
Vote for @Steemitboard as a witness to get one more award and increased upvotes!
Congratulations @jlsplatts! Your post was featured on our daily build newsletter! We've sent 100 liquid BUILD tokens to your wallet upon which you can sell, trade or buy on steem engine or SteemLeo.We've also shared your work on our Facebook and Twitter pages for more exposure.
Keep sharing your awesome DIY and How-to tutorials together with the recommended tags #diy, #build-it, #how-to, #doityourself, #build as well as posting from our website