Technical Bracelet Kumihimo Square

avatar

GridArt_20240220_225729198.jpg


Hello community of creative artisans, delighted to greet you and wish you much prosperity in everything you do and that you enjoy abundance of health. Today I want to share with you a bracelet with the square Kumihimo technique. This bracelet is very simple to make and looks very beautiful.


Hola comunidad de artesanos creativos, encantado en saludarles y desearles mucha prosperidad en todo lo que hagan y que gocen de abundancia de salud. El día de hoy deseo compartirles una pulsera con la técnica Kumihimo cuadrado. Esta pulsera es muy sencilla de elaborar y queda muy hermosa.

IMG_20240220_211147_044.jpg

IMG_20240220_210857_030.jpg

separador virgilio 1.gif


The materials I used to make this beautiful bracelet are as follows:

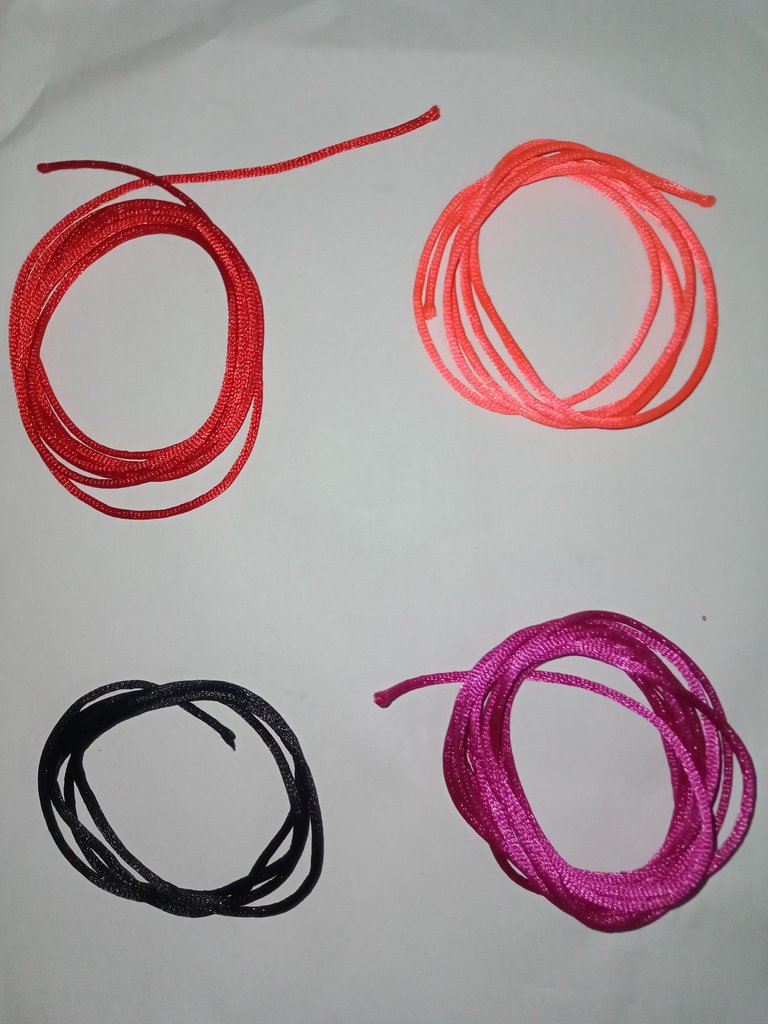
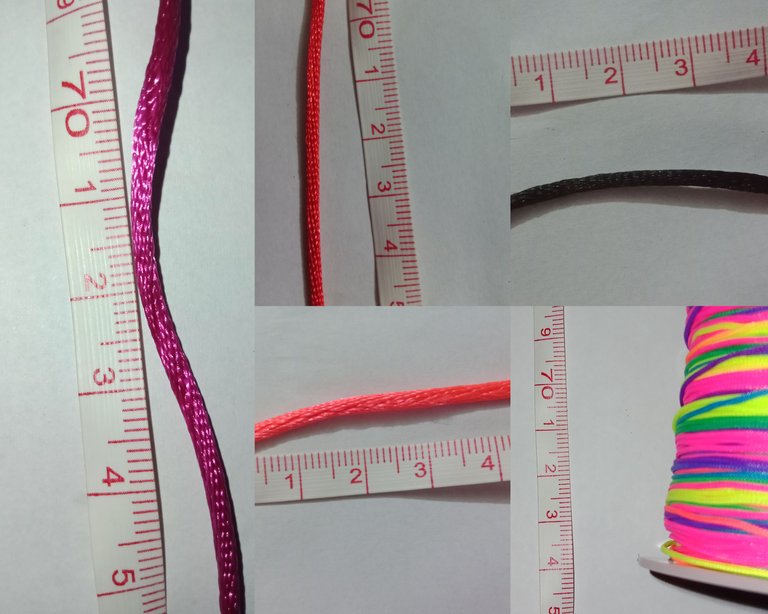
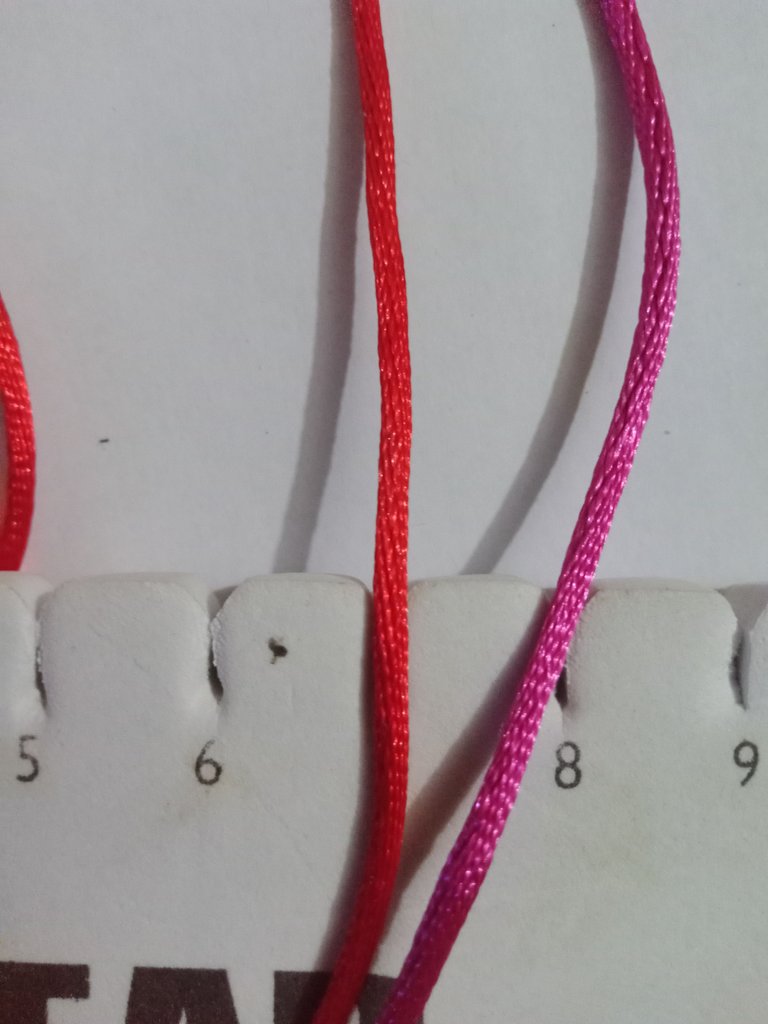
  • 6 strands of mouse tail yarn of 75 cm
  • 2 strands of 75 cm Chinese thread
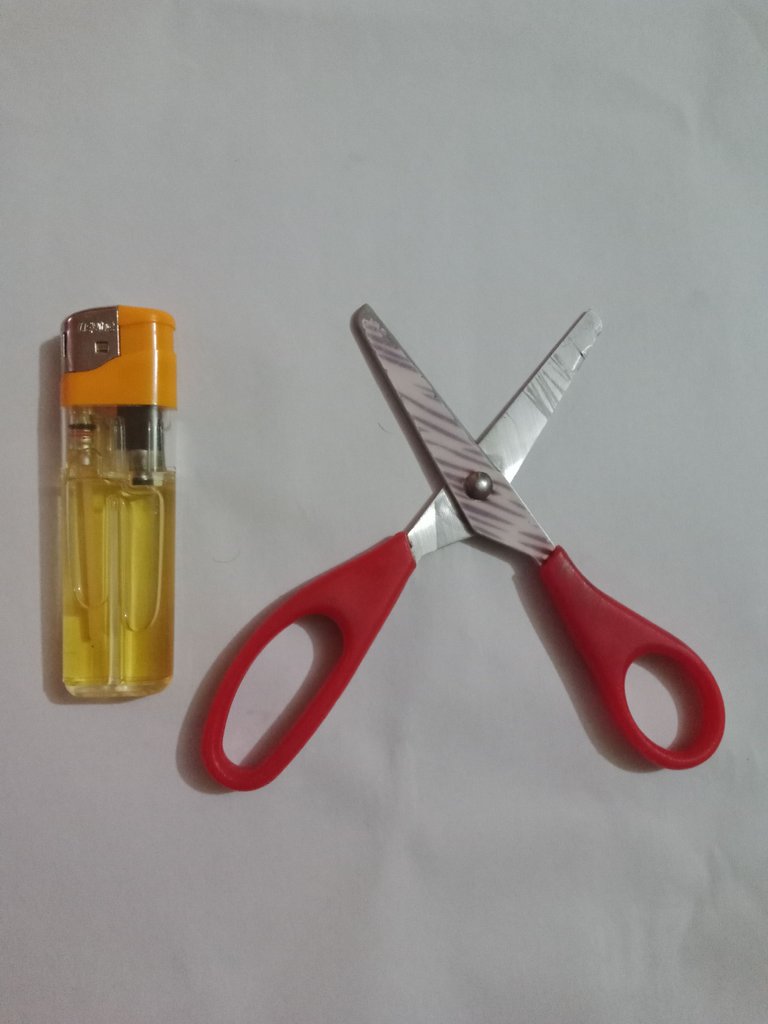
  • Tinder
  • Scissors
  • Tape measure
    Square Kumihimo

Los materiales que utilicé para realizar esta bonita pulsera son, a saber:

  • 6 hebras de hilo cola de ratón de 75 cm
  • 2 hebras de hilo chino de 75 cm
  • Yesquero
  • Tijera
  • Cinta métrica
    Kumihimo cuadrado

IMG_20240220_183726_715.jpg

IMG_20240220_183811_839.jpg

IMG_20240220_183505_177.jpg


We start by cutting 8 strands of yarn of different colors of 75 cm each. It is worth mentioning that the colors will depend on what you want. For example, if you only want it with two shades, you will have to cut four females of one color and four of another color. In my case I used several colors
Iniciamos recortando 8 hebras de hilo de diferentes colores de 75 cm cada una. Es de mencionar que los colores dependerá de lo que usted deseé. Por ejemplo, si sólo la quiere con dos tonalidades deberá cortar cuatro hembras de un color y cuatro de otro color. En mi caso utilicé varios colores

GridArt_20240220_214732061.jpg


Then we bring four female yarns to the kumihimo vertically. First we fold the thread in half and place it in the slit of the kumihimo. It is important to know that we are going to place these strands of thread leaving three spaces on both sides. As you can see in the image we place the first thread starting at number four, then the second at number five and so on until we place all four strands.

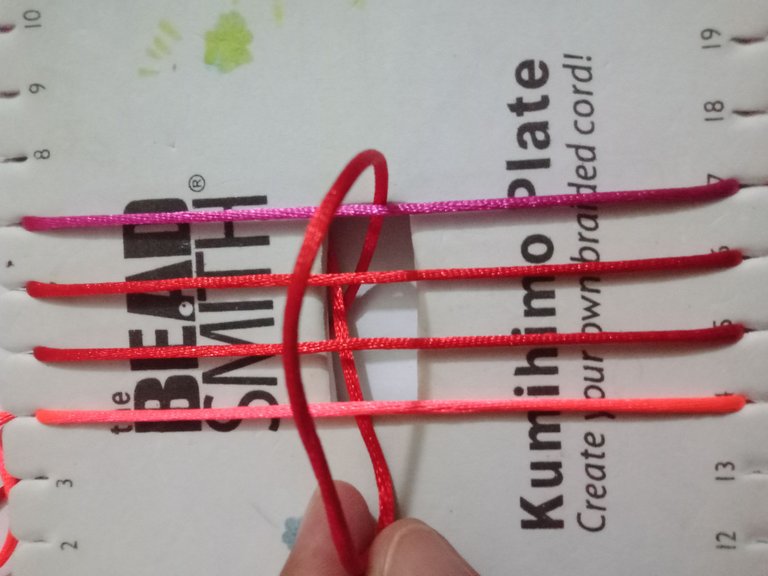
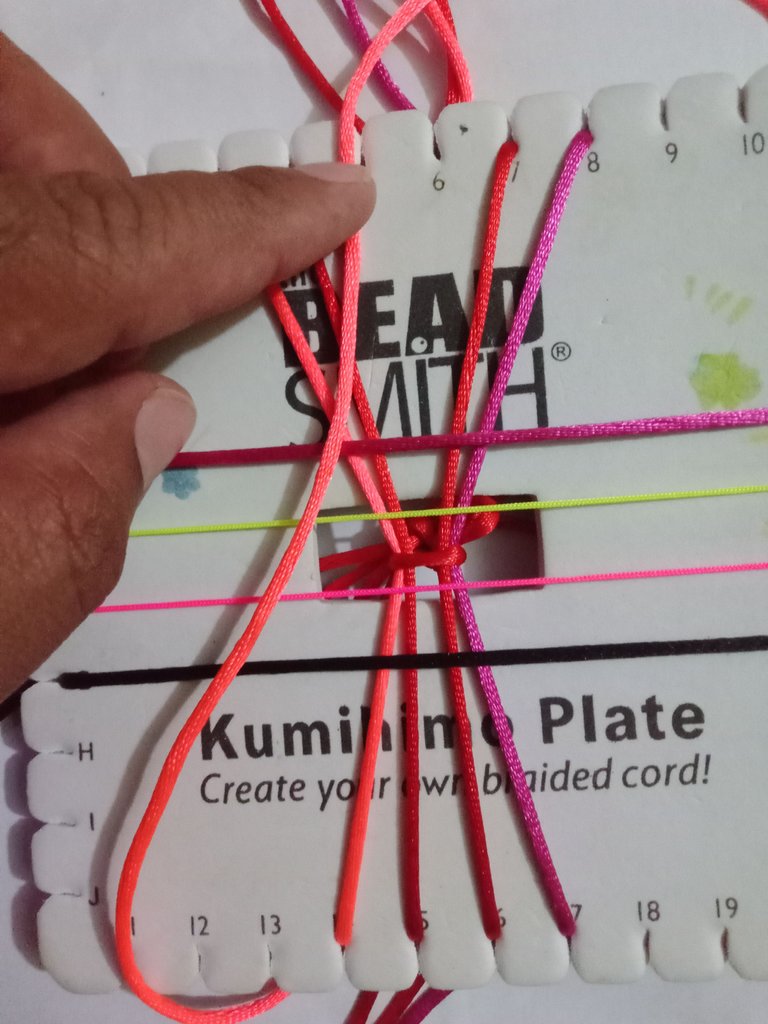
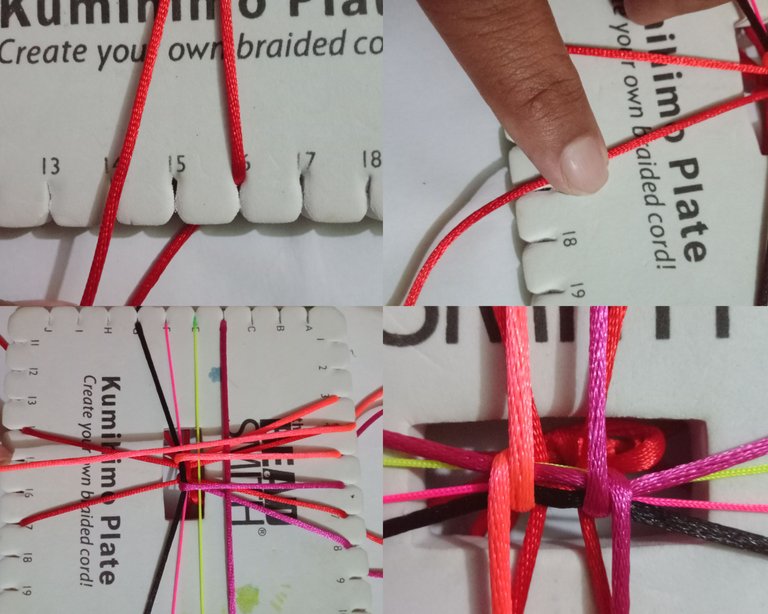
Luego llevamos cuatro hembras de hilo al kumihimo en forma vertical. Primero doblamos el hilo por la mitad y la colocamos en la hendidura del kumihimo. Es importante saber que éstas hebras de hilo vamos a colocarlas dejando tres espacios de ambos lados. Cómo podrán observar en la imagen colocamos el primer hilo a partir del número cuatro, luego el segundo en el número cinco y así sucesivamente hasta colocar las cuatro hebras.

IMG_20240220_190127_371.jpg
IMG_20240220_190346_331.jpg

IMG_20240220_191034_948.jpg

IMG_20240220_190505_955.jpg

separador virgilio.png


After placing the four vertical strands of thread, we take a thread and tie a knot in the center of them to hold them in order to perform the Kumihimo technique more easily.

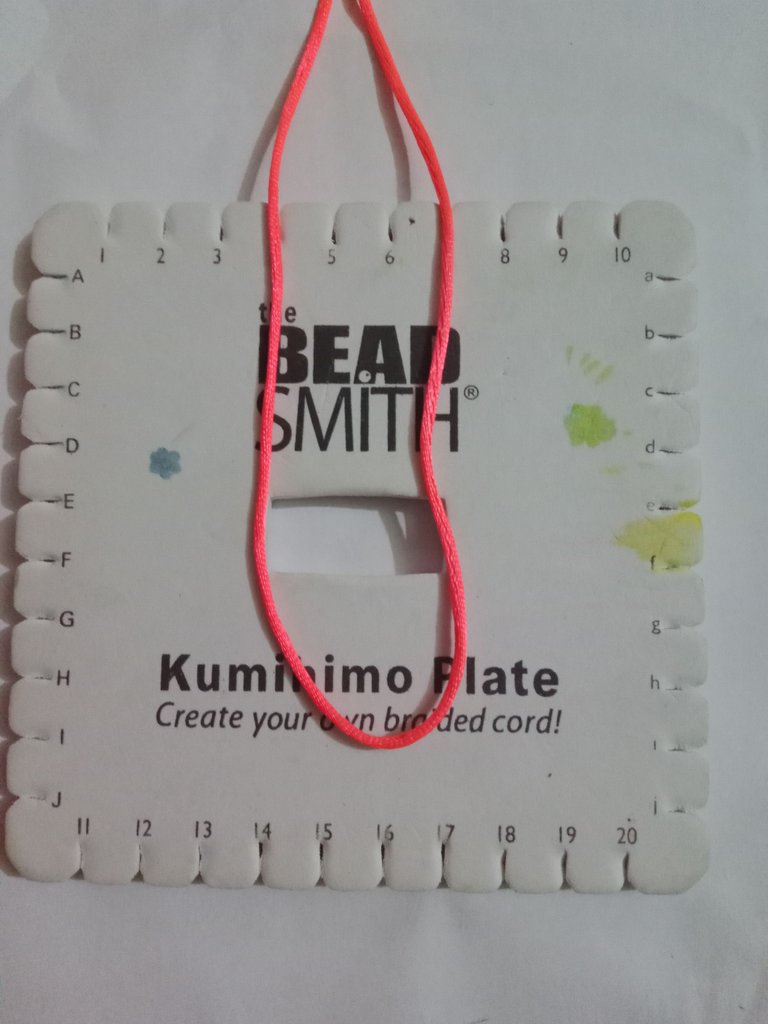
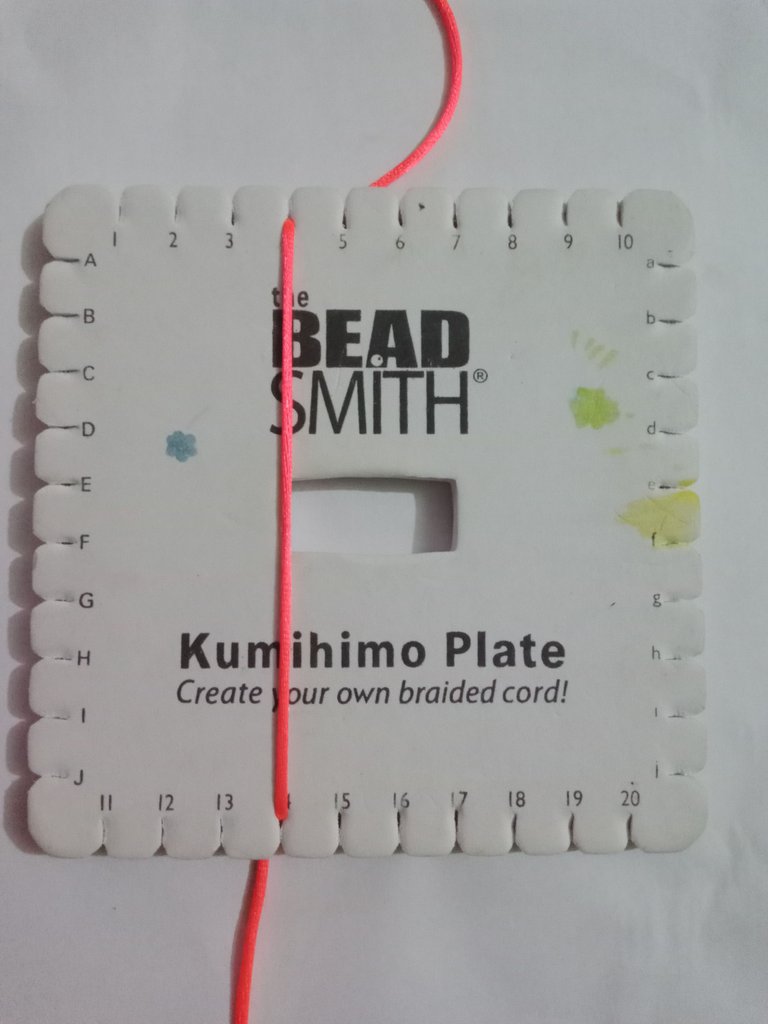
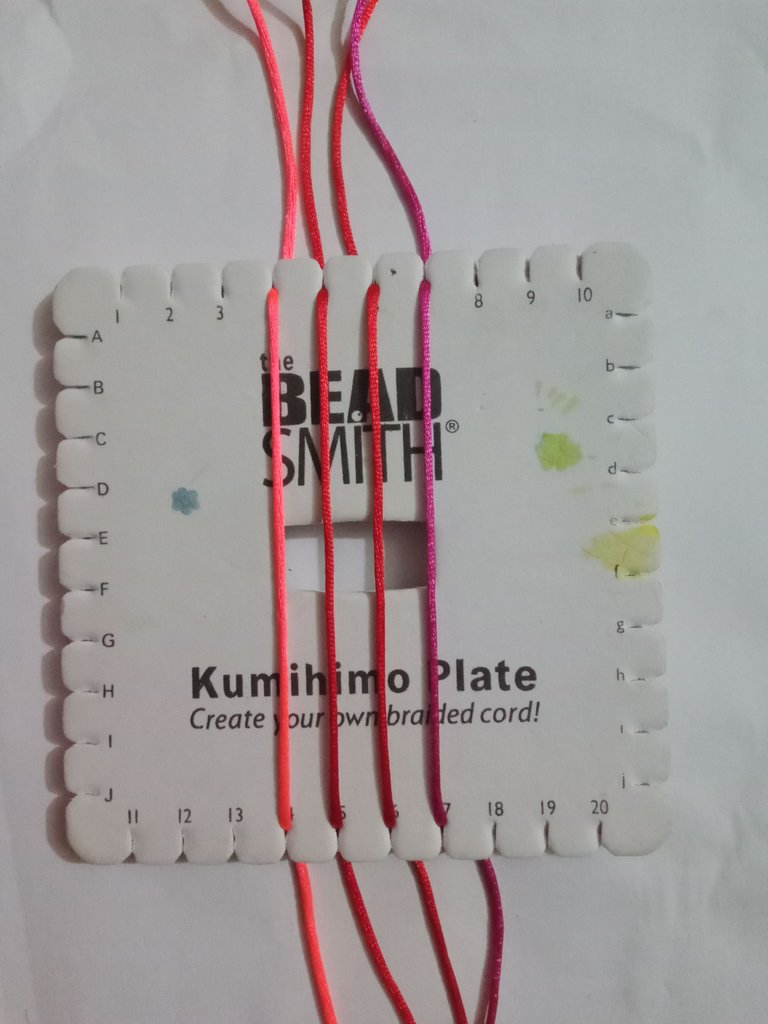
Después de colocar las cuatro hebras de hilo verticales tomamos un hilo y realizamos un nudo en el centro de éstos para sujetar con el propósito de realizar la técnica Kumihimo con mayor facilidad

IMG_20240220_191421_766.jpg

IMG_20240220_191316_648.jpg


Next, I placed the four missing strands of yarn horizontally. It should be noted that we must place them in the same way as the vertical strands. That is to say, we begin to place our thread from number four, leaving three spaces to the left and after number seven, three spaces to the right.
Seguidamente coloqué las cuatro hebras de hilos faltantes en forma horizontal. Cabe resaltar que la debemos colocar de la misma manera que las hebras verticales. Es decir, comenzamos a colocar nuestro hilo desde el número cuatro dejando tres espacio a la izquierda y después del número siete tres espacio a la derecha

IMG_20240220_193723_063.jpg

IMG_20240220_193247_878.jpg


Once the eight strands of yarn have been placed on the kumihimo, we begin our weaving as follows. First we start with the yarns that are vertical. We start by taking out the thread that is in position number four and take it to one number less, that is, to number three, and the number that was next to it (number 5) we take it to position number four.
Una vez colocadas las ocho hebras de hilo en el kumihimo comenzamos nuestro tejido de la siguiente forma. Primero comenzamos con los hilos que están en forma vertical. Iniciamos sacando el hilo que se encuentra en la posición número cuatro y lo llevamos a un número menos, es decir, al número tres, y el número que estaba al lado (número 5) lo llevamos a la posición número cuatro.

IMG_20240220_194228_507.jpg

IMG_20240220_194311_085.jpg


Then we move the yarns that were in position number seven to number eight and number six to number seven so that we have two spaces between the four strands of yarns. We should have free numbers five and six
Después movemos los hilos que se encontraba en la posición número siete y la llevamos al número ocho y el número seis la llevamos al número siete de modo que nos quede dos espacios entre las cuatro hebras de hilos. Nos debe quedar libre los números cinco y seis

IMG_20240220_194337_658.jpg

separador virgilio 1.gif


Then we move up the threads (vertical from below) which are in position number fourteen and seventeen to the space above in position five and six as shown in the picture below
Luego subimos los hilos (verticales de abajo) que se encuentra la posición número catorce y dicisiete al espacio de arriba en la posición cinco y seis como se nos muestra en la imagen

IMG_20240220_194524_593.jpg

IMG_20240220_194627_101.jpg

IMG_20240220_194553_067.jpg


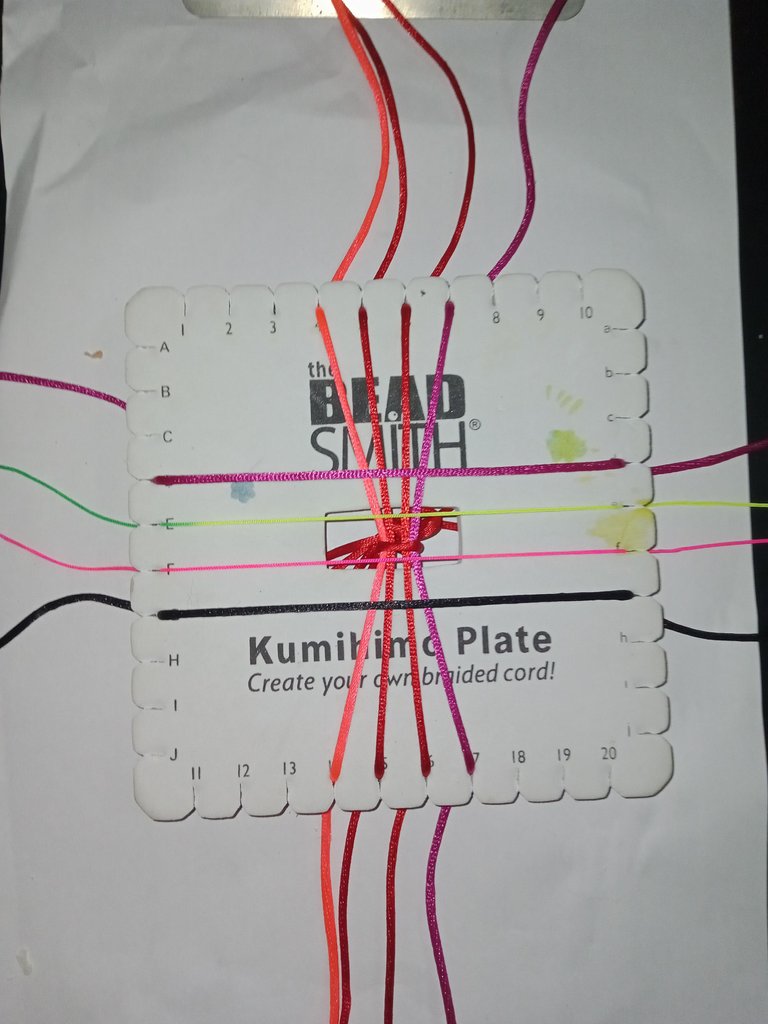
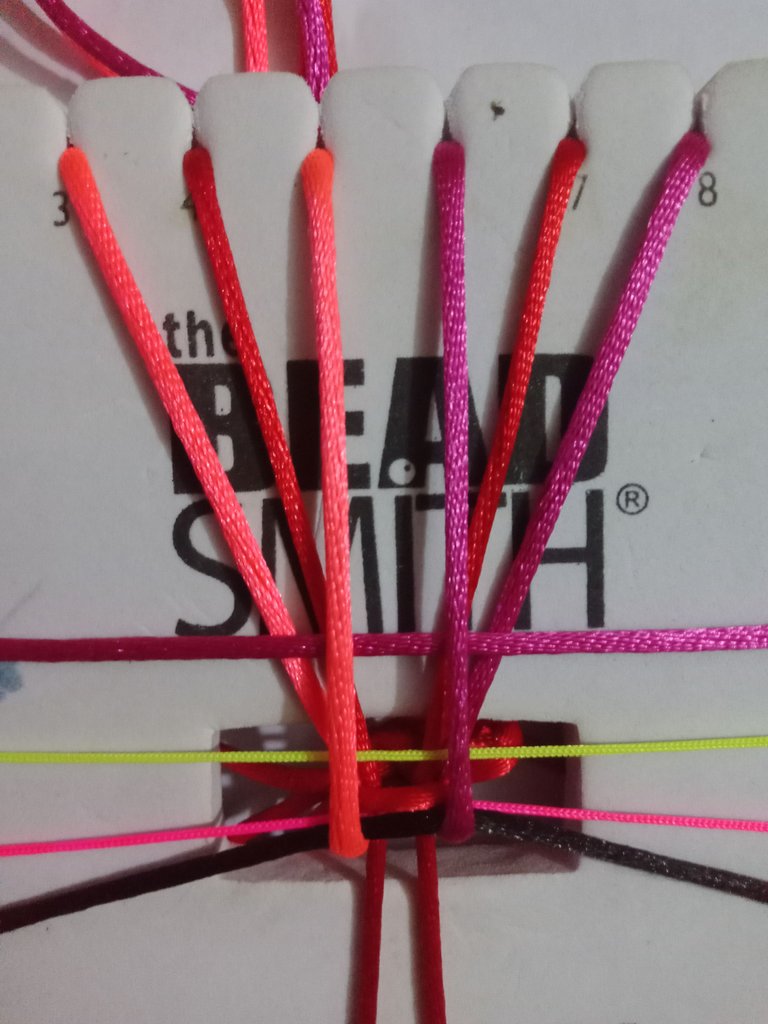
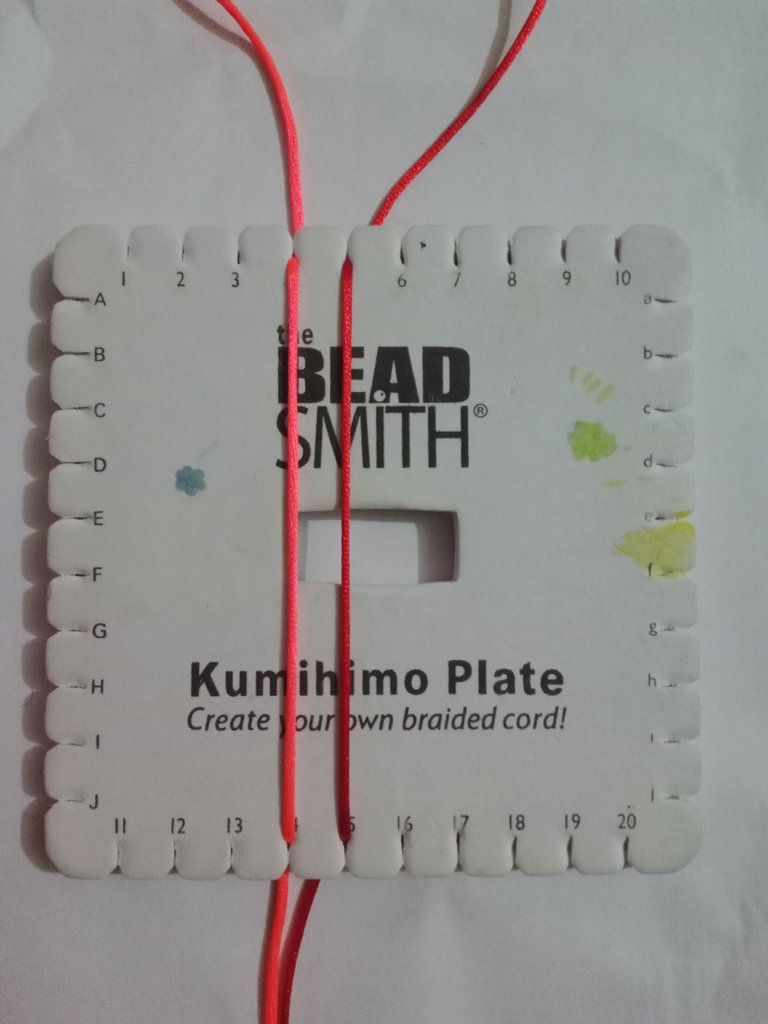
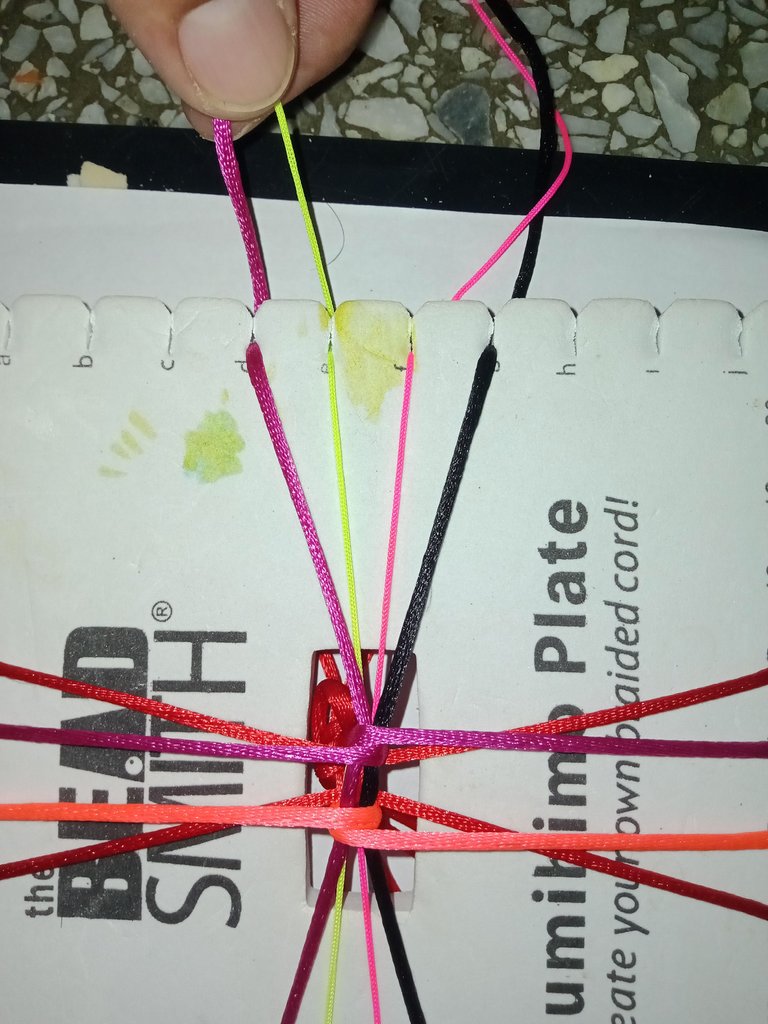
Now the thread that was at number fifteen I take it to number fourteen and number sixteen I take it to number seventeen. Then I lower the threads that were in position number three and eight and bring them to the intermediate space between fourteen and seventeen, as shown in the image below

Ahora el hilo que estaba en el número quince lo llevo al catorce y el número dieciséis lo llevo al número diecisiete. Después bajo los hilos que se encontraba en la posición número tres y ocho y lo llevo al espacio intermedio entre el catorce y el diecisiete así cómo lo muestro en la imagen

GridArt_20240220_223320628.jpg


After doing this procedure with the vertical threads, we turn the kumihimo to the right and perform the same technique with the horizontal threads. We start by running one space backwards and then one space forwards. Then we bring the yarns up towards the middle and the bottom yarns we run them in the same way one space backwards and one space forwards. Then we pull down the yarns at the ends and place them in the space in between.

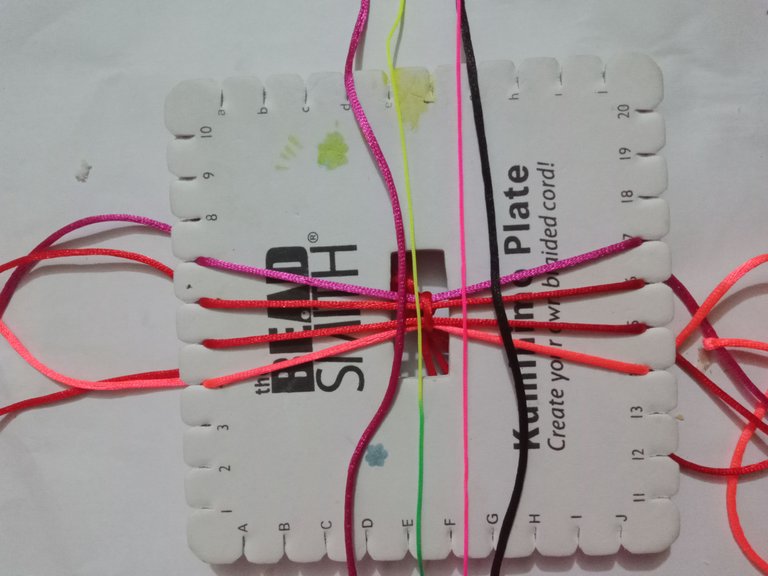
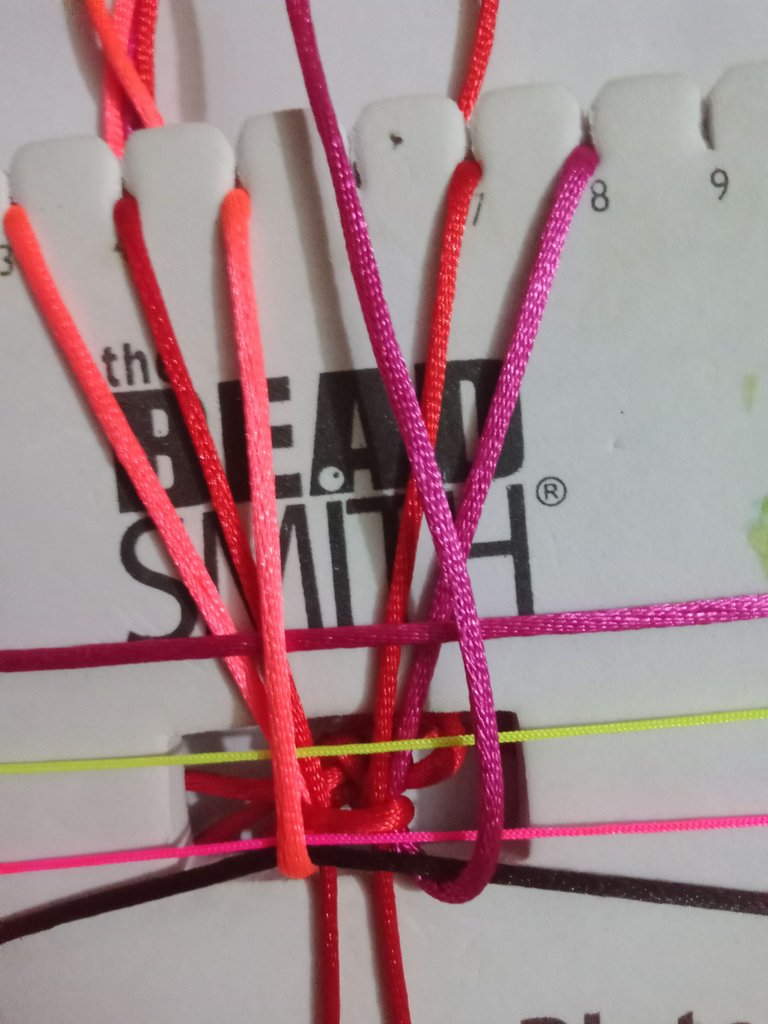
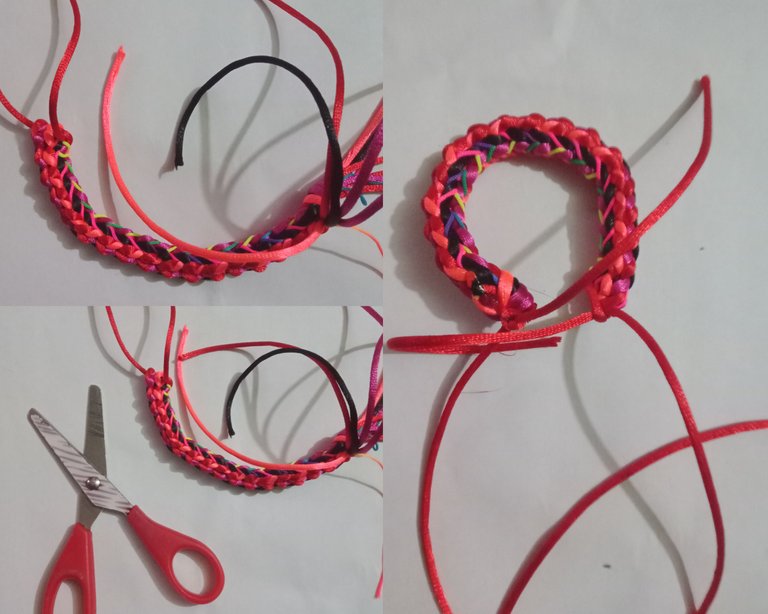
Then we turn the kumihimo and repeat the same procedure until the bracelet is finished.

Después de hacer todo ese procedimiento con los hilos verticales giramos el kumihimo hacia la derecha y realizamos la misma técnica con los hilos horizontales . Iniciamos corriendo un espacio hacia atrás y después un espacio hacia adelante . Luego subimos los hilos hacia el intermedio y los hilos de abajo lo corremos de la misma manera un espacio hacia atrás y un espacio hacia adelante. Después bajamos los hilos que se encuentran en los extremos y lo colocamos en el espacio intermedio.

Luego giramos el kumihimo y repartimos el mismo procedimiento hasta terminar la pulsera.

IMG_20240220_195020_809.jpg

separador virgilio.png


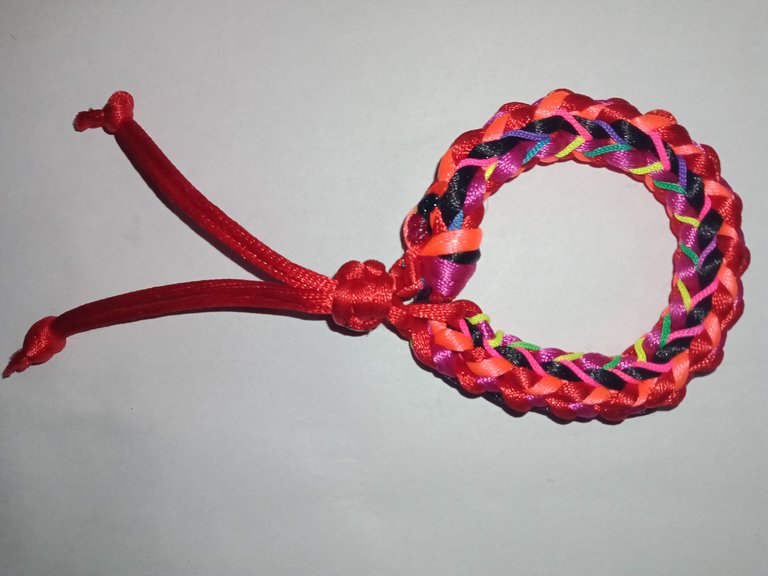
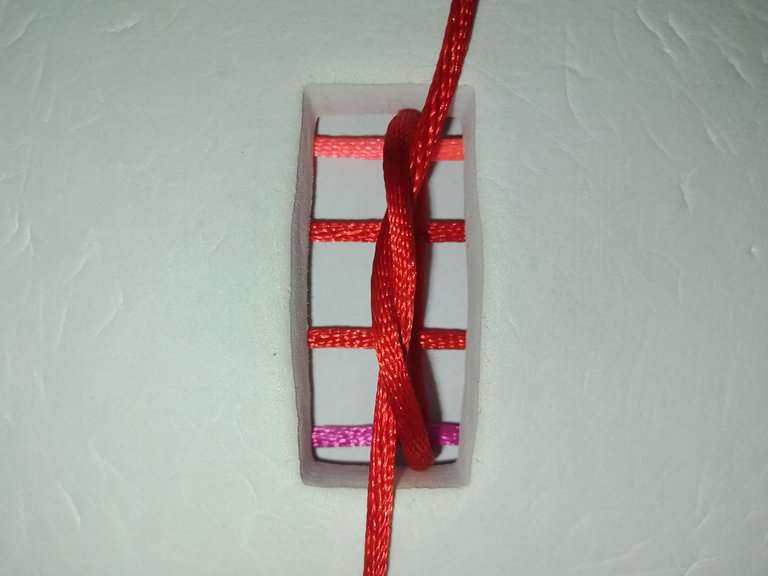
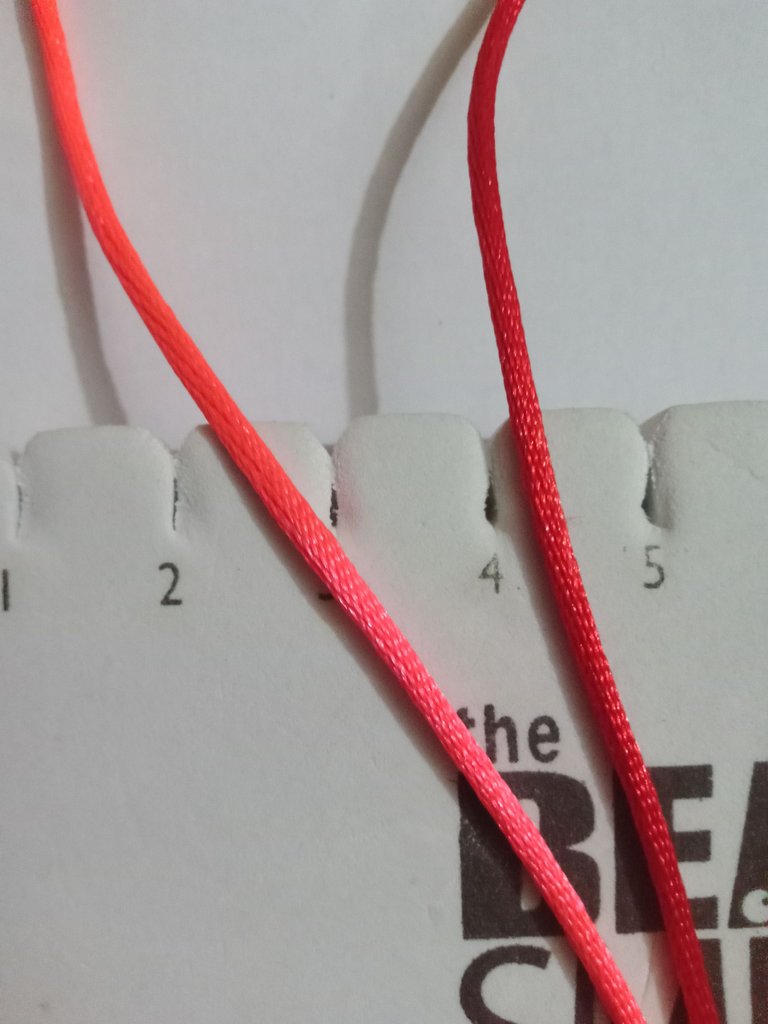
Once the weaving is finished, we cut the excess with scissors and seal with a tinder. Then we look for a 15cm thread, we tie a flat knot for the locking device.

Terminado el tejido con una tijera cortamos el sobrante y con un yesquero sellamos. Luego buscamos un hilo de 15cm, realizamos un nudo plano para el trancadero

GridArt_20240220_225021817.jpg


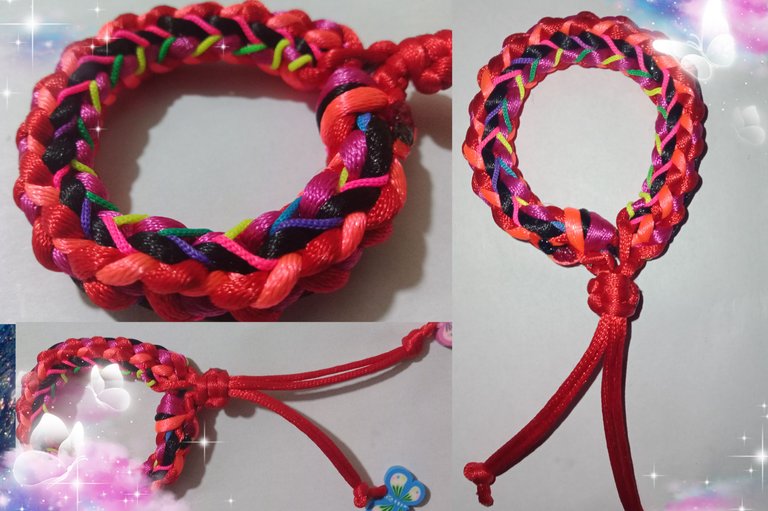
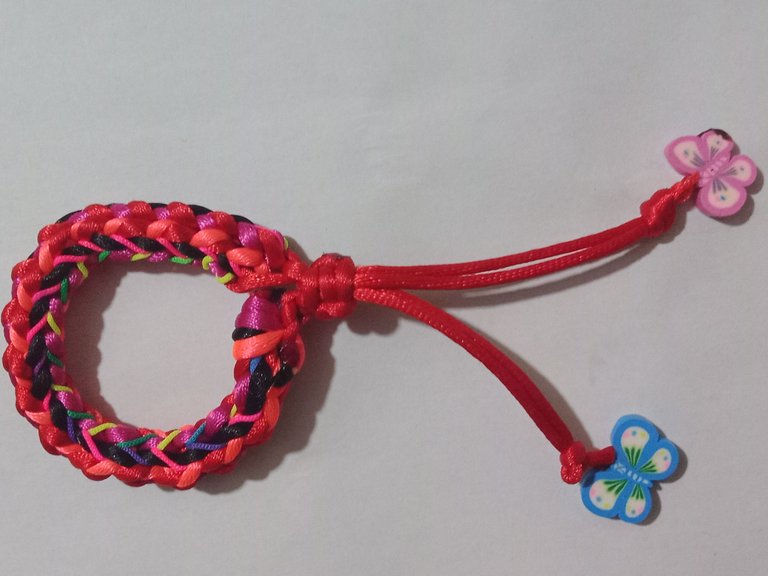
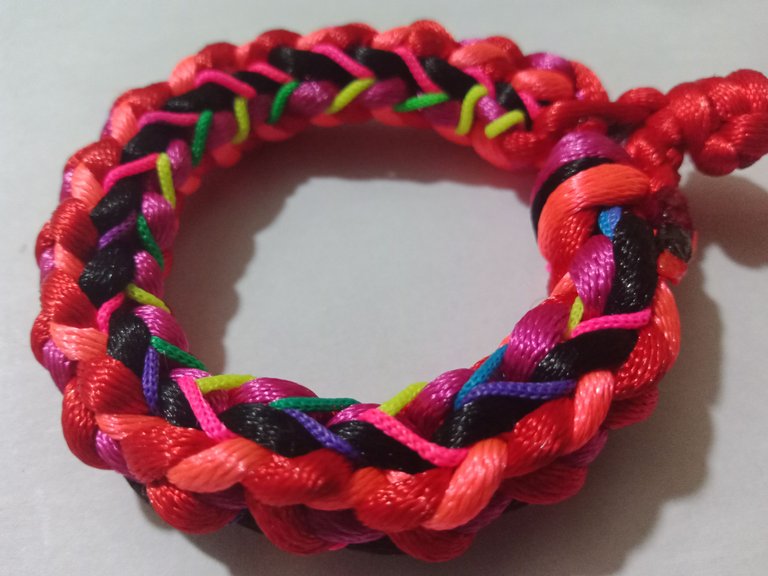
The bracelet with the square kumihimo technique was beautiful and delicate.

La pulsera con la técnica kumihimo cuadrado nos quedó hermosa y delicada.

IMG_20240220_211120_523.jpg

IMG_20240220_210857_030.jpg


Translated with https://www.deepl.com/translator
                  All images are my own, dividers courtesy of @kattycrochet.

                                                           
             Todas las imágenes son de mi autoría, divisores cortesía de @kattycrochet.


0
0
0.000
4 comments
avatar

Yay! 🤗
Your content has been boosted with Ecency Points, by @virgilio07.
Use Ecency daily to boost your growth on platform!

0
0
0.000