Tutorial - Wizard's Hat and Wand (ESP- ENG)🎩🔮✨

Hola comunidad espero que se encuentren bien👋❤️, vengo a mostrarles mi tutorial de como elaborar un sombrero y varita de mago con distintos materiales que encontré🎩✨… Hace unas semanas le hicimos una fiesta de disfraces a mi pareja por su cumpleaños, y por ello me disfrace de una maga para ir de acuerdo a la ocasión jajaja😁, recopile varias fotos del paso a paso para enseñárselos
Hello community I hope you are well👋❤️, I come to show you my tutorial on how to make a wizard hat and wand with different materials I found 🎩✨... A few weeks ago we did a costume party for my partner for his birthday, and so I dressed up as a magician to go according to the occasion hahaha😁, I collected several photos of the step by step to show you.
Para el Sombrero:
- Tela negra
- Cartón
- Regla
- Tijeras
- Grapas
- Silicón y pistola de silicón
*For the Hat: *
- Black cloth
- Cardboard
- Ruler
- Scissors
- Staples
- Silicone

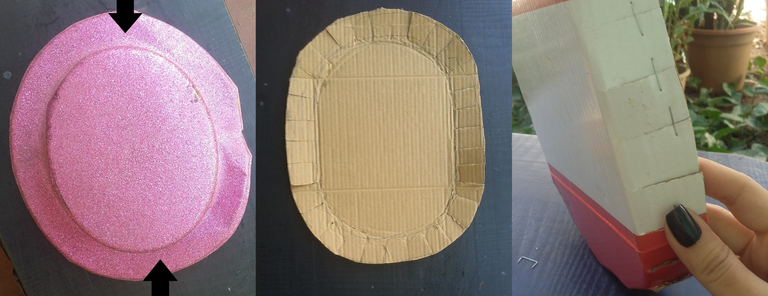
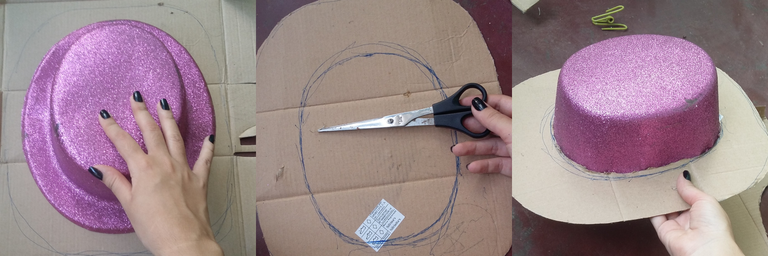
Comencé por hacer la parte superior del sombrero, guiándome de otro sombrero de fiesta, dibuje en el cartón dos óvalos, uno dentro de otro, ya que uno seria el borde que recortaría para hacer las solapas que luego pase a grapar una a una. El cartón que use era de una caja de zapatos que encontré en la casa pero si desean recrearlo pueden usar un cartón más delgado para que se les haga fácil cortar✂️.
I started by making the top of the hat, using another party hat as a guide, I drew two ovals on the cardboard, one inside the other, since one would be the edge that I would cut out to make the flaps that I would staple one by one. The cardboard I used was from a shoe box I found at home, but if you want to recreate it you can use a thinner cardboard to make it easier cortar✂️.
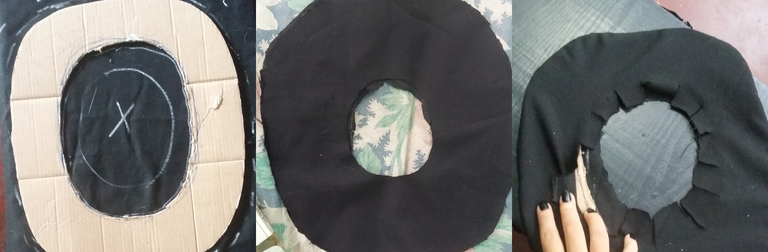
Una vez grapada todas las solapas, marque el óvalo en la tela. Utilice una tela de 145 cm x 65 cm que también tenía en casa pero que me sirvió para vestir todo el sombrero.
Once all the flaps were stapled, mark the oval on the fabric. I used a 145 cm x 65 cm fabric that I also had at home but that I used to dress the whole hat.
Luego corte el óvalo dejando un espacio para los bordes, y grape nuevamente. Tengo que decir que la grapadora agilizo mucho el proceso😄👍.
Then cut the oval leaving a space for the edges, and staple again. I have to say that the stapler made the process much faster😄👍.

Ya una vez lista la parte superior del sombreo, arme la copa usando una carpetas vieja, use ambas partes y recorte un rectángulo en ellas de 20 cm x 30 cm📏✏️.
Once the top of the shade is ready, assemble the cup using an old folder, use both parts and cut out a rectangle of 20 cm x 30 cm📏✏️.
Pd: lo alto de sombrero dependerá de esto por lo que las medidas pueden cambiar según lo que desean…
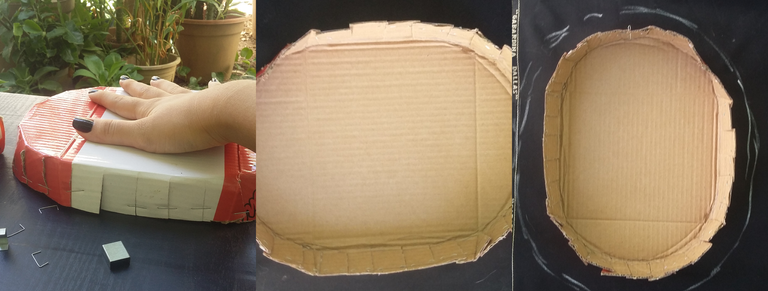
Luego de esto junte ambas partes con la grapadora.
*P.S.: the height of the hat will depend on this so the measurements can change according to what you want...*.
After this join both parts together with the stapler.
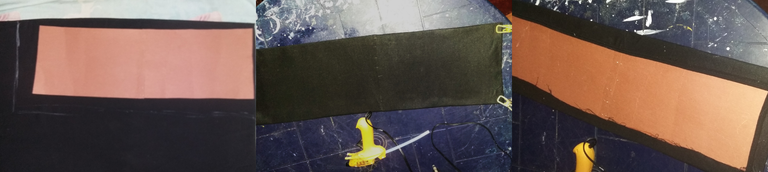
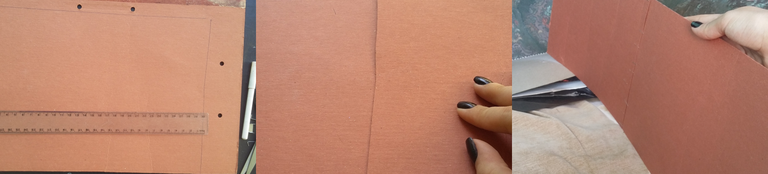
Ahora este rectángulo o tira hay que cubrirlo por lo que lo dibuje sombre la tela, dejando un espacio para los bordes, procedí a cortarlo y pegarlo al cartón con silicón caliente.También planche la tela encima del cartón pero se terminaron marcado las grapas, por lo que recomiendo hacerlo a parte y luego pegarlo😥.
Now this rectangle or strip needs to be covered so I drew it shading the fabric, leaving a space for the edges, I proceeded to cut it and glue it to the cardboard with hot silicone.I also ironed the fabric on top of the cardboard but the staples ended up marked, so I recommend doing it separately and then glue it😥.
Después de esto se pega la parte superior a la copa , use para ello el silicón, pero se puede incluso coser. Este paso es un poco difícil, yo incluso pedí ayuda para aguantarlo mientras se enfriaba el silicón.
After this, the upper part is glued to the cup, I used silicone for this, but you can even sew it. This step is a little difficult, I even asked for help to hold it while the silicone cooled.
La visera del sombrero la hice también guiándome del viejo sombrero de fiesta, que termine usando como base. En este caso las hice más grandes.
I also made the hat visor using the old party hat, which I ended up using as a base. In this case I made them bigger.
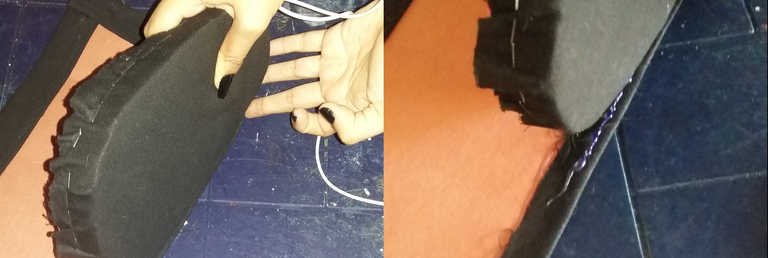
Marque la visera en la tela y corte. Pero esto haciéndolo doble, ya que así podría forrarla. El forrito lo cosí solo al alrededor ya que en el círculo del centro es donde encajaría el sombre de base.
Mark the visor on the fabric and cut. But I did this by making it double, since this way I could line it. I sewed the lining only around it, since the circle in the center is where the base shade would fit.
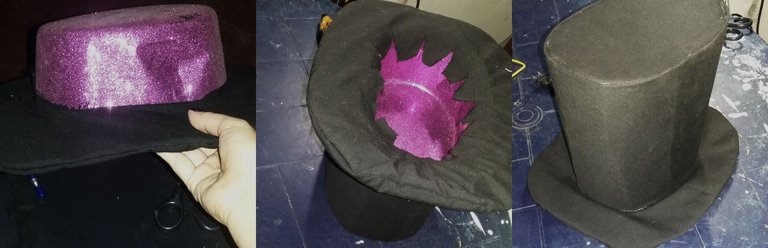
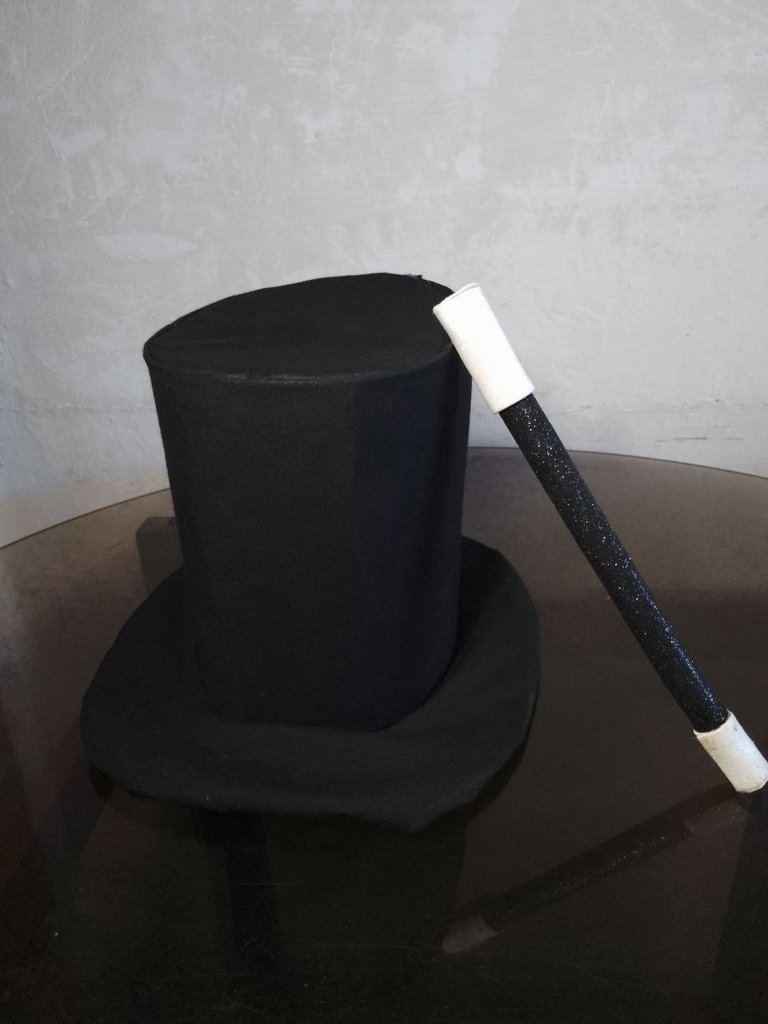
Y finalmente unimos la copa con la visera con silicón caliente. Aunque no era necesario usar el sombrero morado de base preferí hacerlo así porque como tenía poco tiempo para terminarlo me resultaba más cómodo pegar las dos partes sobre el, en vez de coserlas. Igualmente el resultado fue bueno.😄✨
And finally we joined the cup with the visor with hot silicone. Although it was not necessary to use the purple hat as a base, I preferred to do it this way because I had little time to finish it and it was more comfortable to glue the two parts on it, instead of sewing them together. The result was still good.😄✨

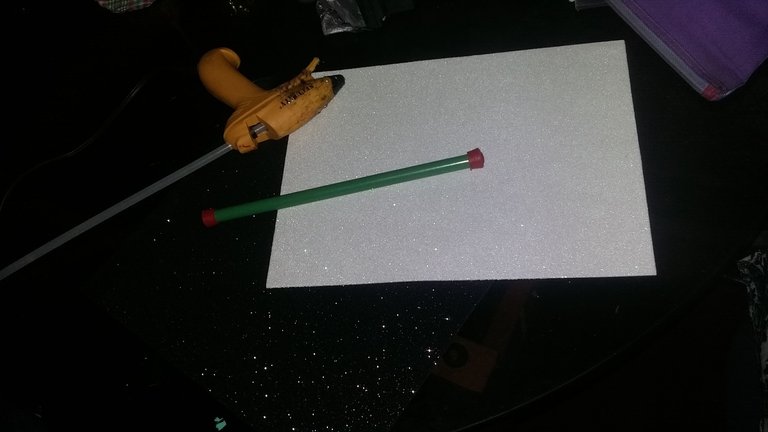
Para la varita utilice:
- Foami brillante blanco
- Foami brillante negro
- Silicón caliente
- Vara de plástico
- Tijeras
*For the wand use: *
- White shiny foami
- Black shiny foami
- Silicone
- Plastic wand
- Scissors
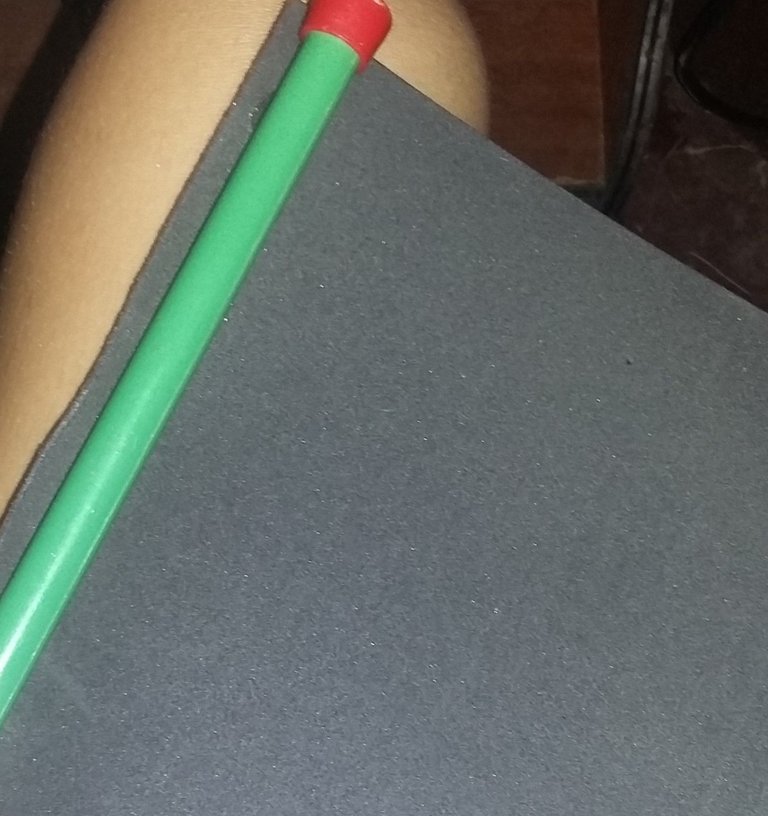
La vara de plástico la pegue por el lado mate del foami y comencé a enrollarlo hasta que conseguí el ancho perfecto. Corte y aplique silicón nuevamente en borde.
I glued the plastic rod on the matte side of the foami and started to roll it until I got the perfect width. Cut and apply silicone again on the edge.
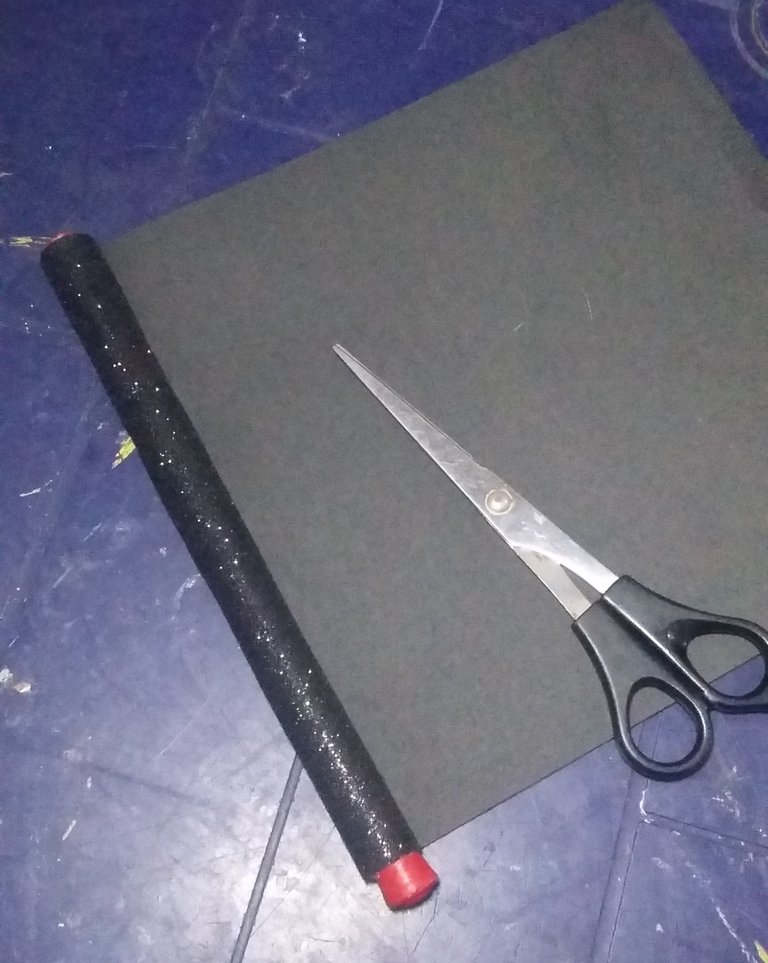
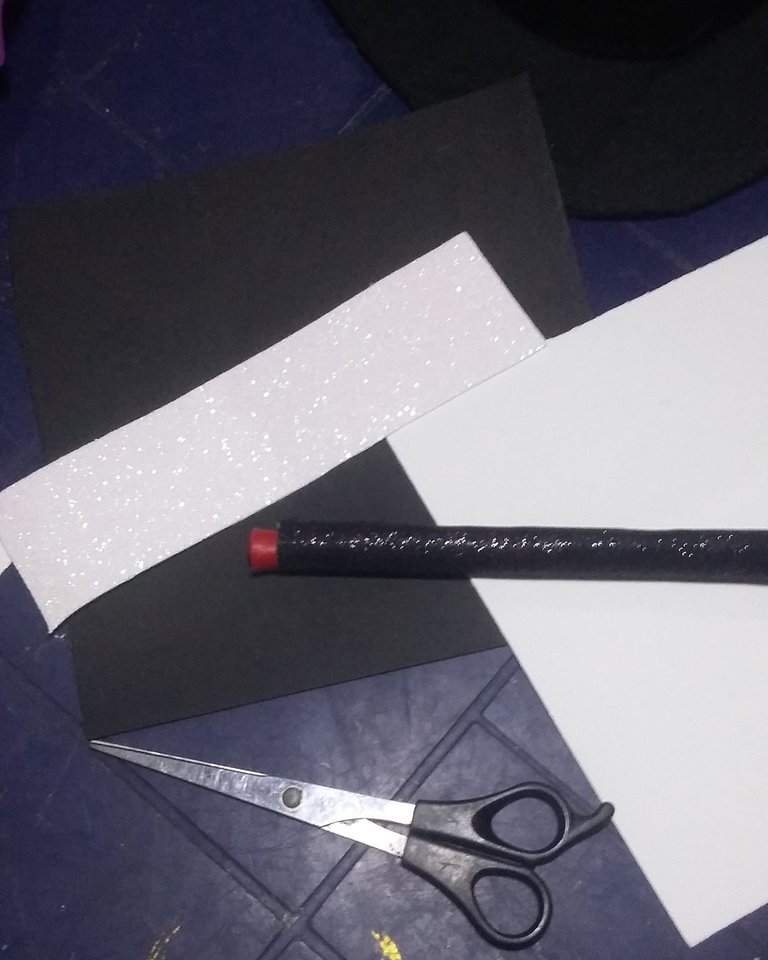
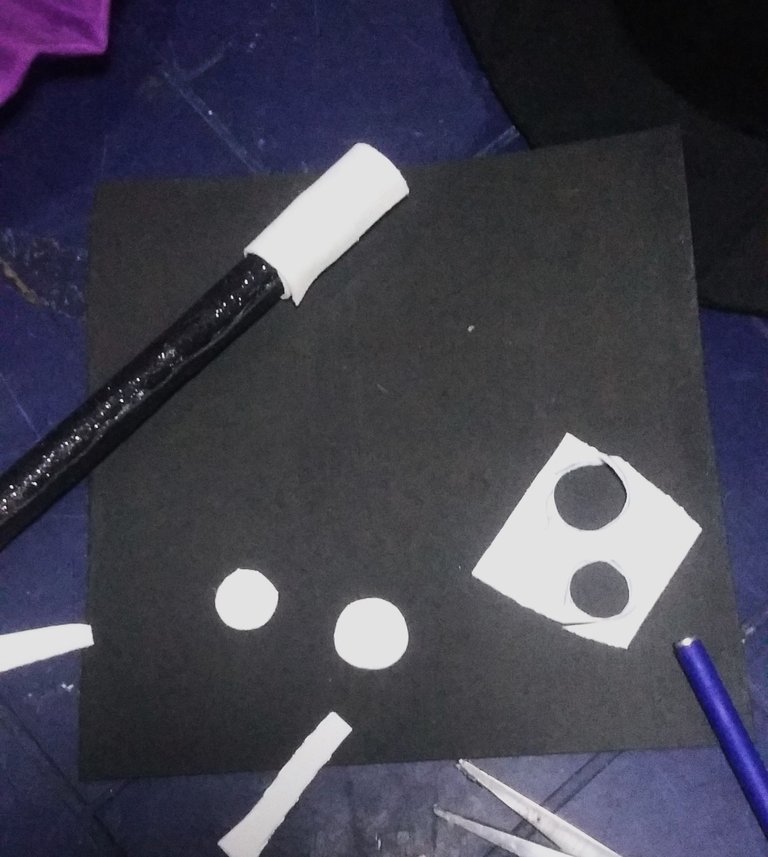
✂️Luego corte una tirita rectangular en el foami blanco y volví a realizar lo mismo pero esta vez en cada esquina de la vara. Por ultimo para sellarla, recorte dos redonditos blancos que también pegue con silicón.
✂️Luego cut a rectangular strip in the white foami and did the same thing again but this time in each corner of the rod. Finally, to seal it, I cut out two little white rounds that I also glued with silicone.
Así por fin tenemos nuestro sombrero de copa🎩 y varita mágica✨, perfecto para nuestros disfraces. Espero que les funcione o le sea útil en algún momento😉, de antemano muchas gracias por leer❤️✨. ¡Hasta la próxima!👋
So finally we have our top hat🎩 and magic wand✨, perfect for our costumes. I hope it works for you or will be useful at some point😉, thanks in advance for leer❤️✨ See you next time👋.


Great Job dear!
And by the way, you look very pretty in your costume❤
thank you very much 😁❤️✨
Beautiful hand made, so nice dear thank you for sharing
Congratulations @tifany! You have completed the following achievement on the Hive blockchain And have been rewarded with New badge(s)
Your next payout target is 1000 HP.
The unit is Hive Power equivalent because post and comment rewards can be split into HP and HBD
You can view your badges on your board and compare yourself to others in the Ranking
If you no longer want to receive notifications, reply to this comment with the word
STOPTo support your work, I also upvoted your post!
Very nice confection, congratulations. Thanks for giving us your creative process.
thanks for your support✨
¡Felicitaciones!
Estás participando para optar a la mención especial que se efectuará el domingo 26 de noviembre del 2023 a las 8:00 pm (hora de Venezuela), gracias a la cual el autor del artículo seleccionado recibirá la cantidad de 1 HIVE transferida a su cuenta.
¡También has recibido 1 ENTROKEN! El token del PROYECTO ENTROPÍA impulsado por la plataforma Steem-Engine.
1. Invierte en el PROYECTO ENTROPÍA y recibe ganancias semanalmente. Entra aquí para más información.
2. Contáctanos en Discord: https://discord.gg/hkCjFeb
3. Suscríbete a nuestra COMUNIDAD y apoya al trail de @Entropia y así podrás ganar recompensas de curación de forma automática. Entra aquí para más información sobre nuestro trail.
4. Visita nuestro canal de Youtube.
Atentamente
El equipo de curación del PROYECTO ENTROPÍA
That's great, I really love it