Tutorial de máscara para carnaval hecha en casa - Paso a paso 🎭✂️ | Te muestro como la elabore de una forma fácil y rápida✨💜 [ESP-ENG]
Greetings my creative family! Have one and all, a happy and blessed afternoon, I hope you are all well, healthy, joyful and never lack creativity, commitment, productivity, effort and dedication in your lives. I wish this month to be greatly productive for everyone and let's bring out our maximum potential to do everything with love.
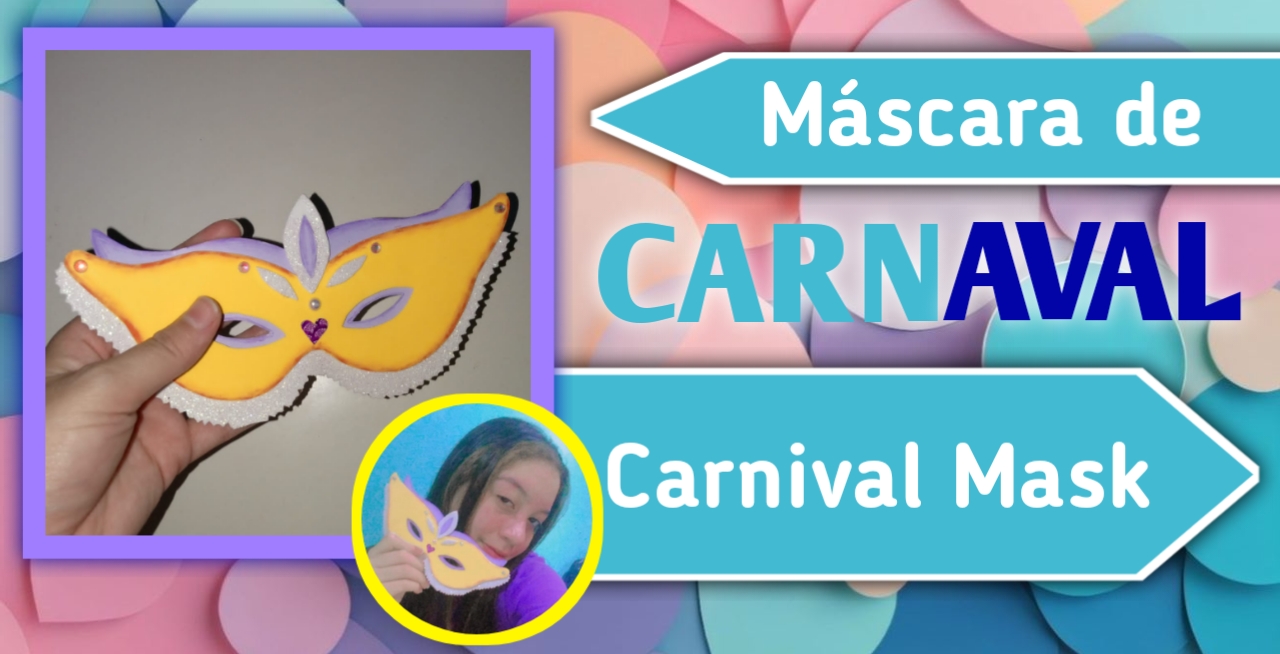
Estamos muy cerca de carnaval en estás fechas, por lo menos aquí en Venezuela, ya que las comparsas inician apartir de está semana, así es una temática bastante colorida y estás fechas se celebran con alegría. Por lo tanto les traigo una idea referente a está festividad celebrada en Venezuela, en está ocasión es una máscara que hice para formar parte de una decoración en la escuela dónde trabaja mi mamá, hice otras, pero está fue mi favorita, también se puede utilizar puesta, o para decorar cualquier cosa a su gusto.
We are very close to carnival in these dates, at least here in Venezuela, since the comparsas start from this week, so it is a very colorful theme and these dates are celebrated with joy. Therefore I bring you an idea related to this festivity celebrated in Venezuela, this time is a mask that I made to be part of a decoration in the school where my mom works, I made others, but this was my favorite, you can also use it on, or to decorate anything to your liking.
Este es un tutorial sencillo, dónde les comparto el paso a paso para realizar está hermosa máscara, algo fácil, rápido y práctico.
This is a simple tutorial, where I share with you the step by step to make this beautiful mask, something easy, fast and practical.
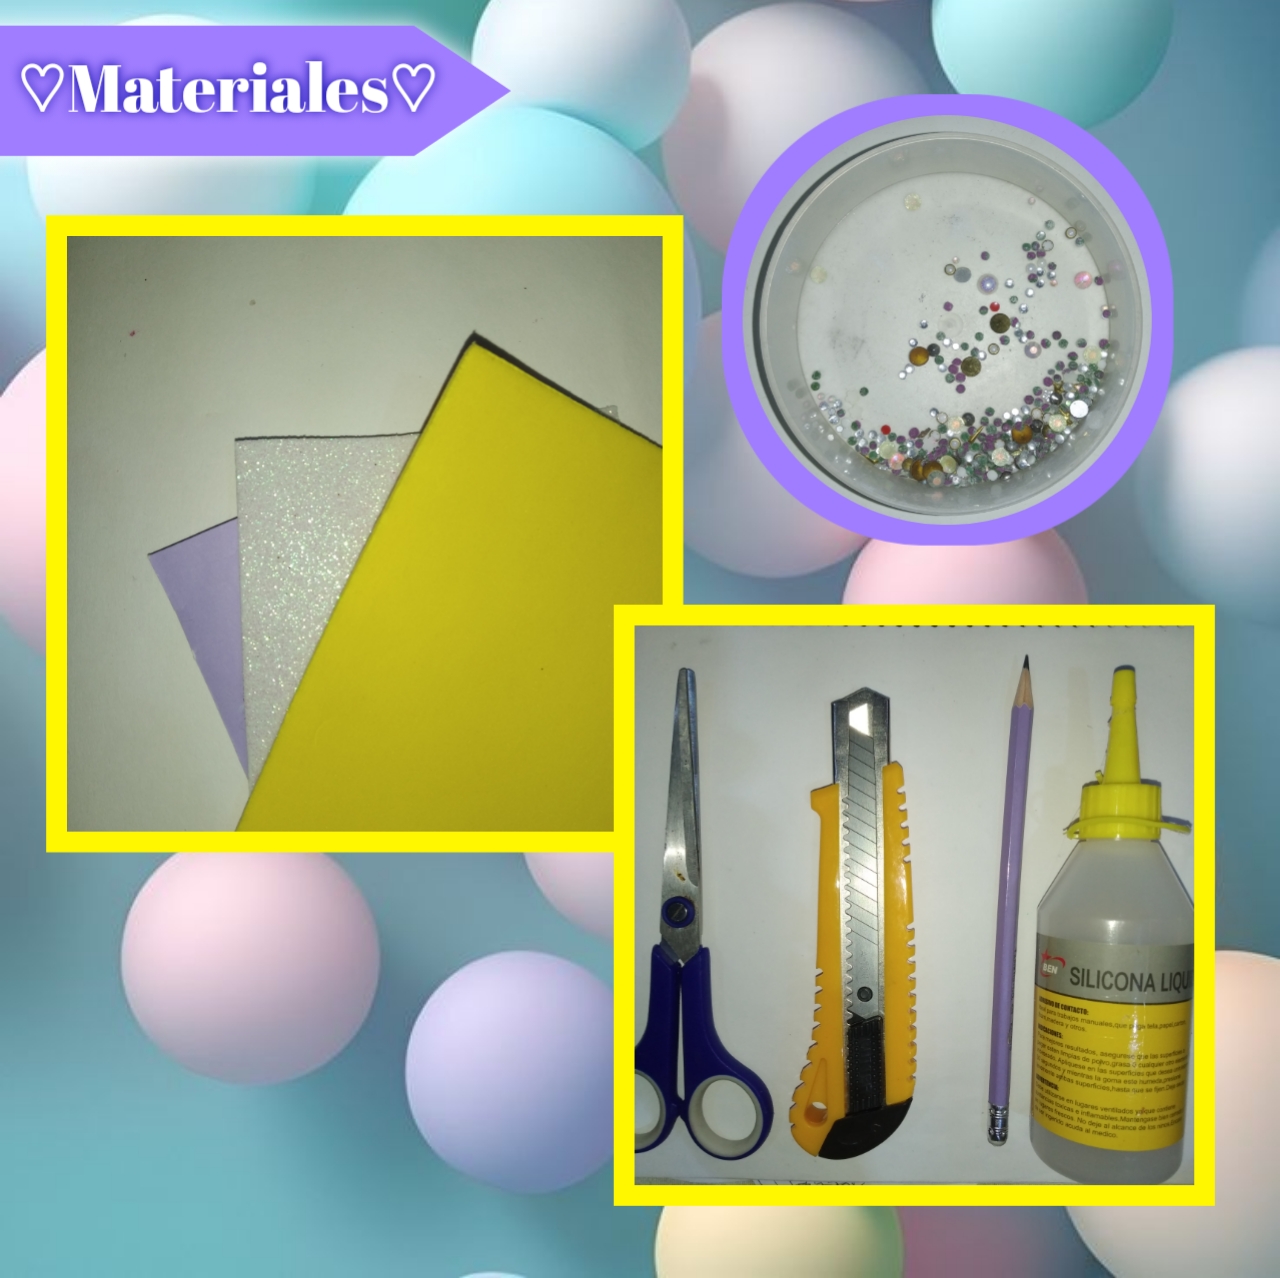
♡📑📎Materials📎📑♡
- Foami
- Cartulina
- Silicón
- Tijeras
- Cutter (exacto)
- Foami
- Cardboard
- Silicone
- Scissors
- Cutter (exact)
♡💜💙Step by Step💙💜♡
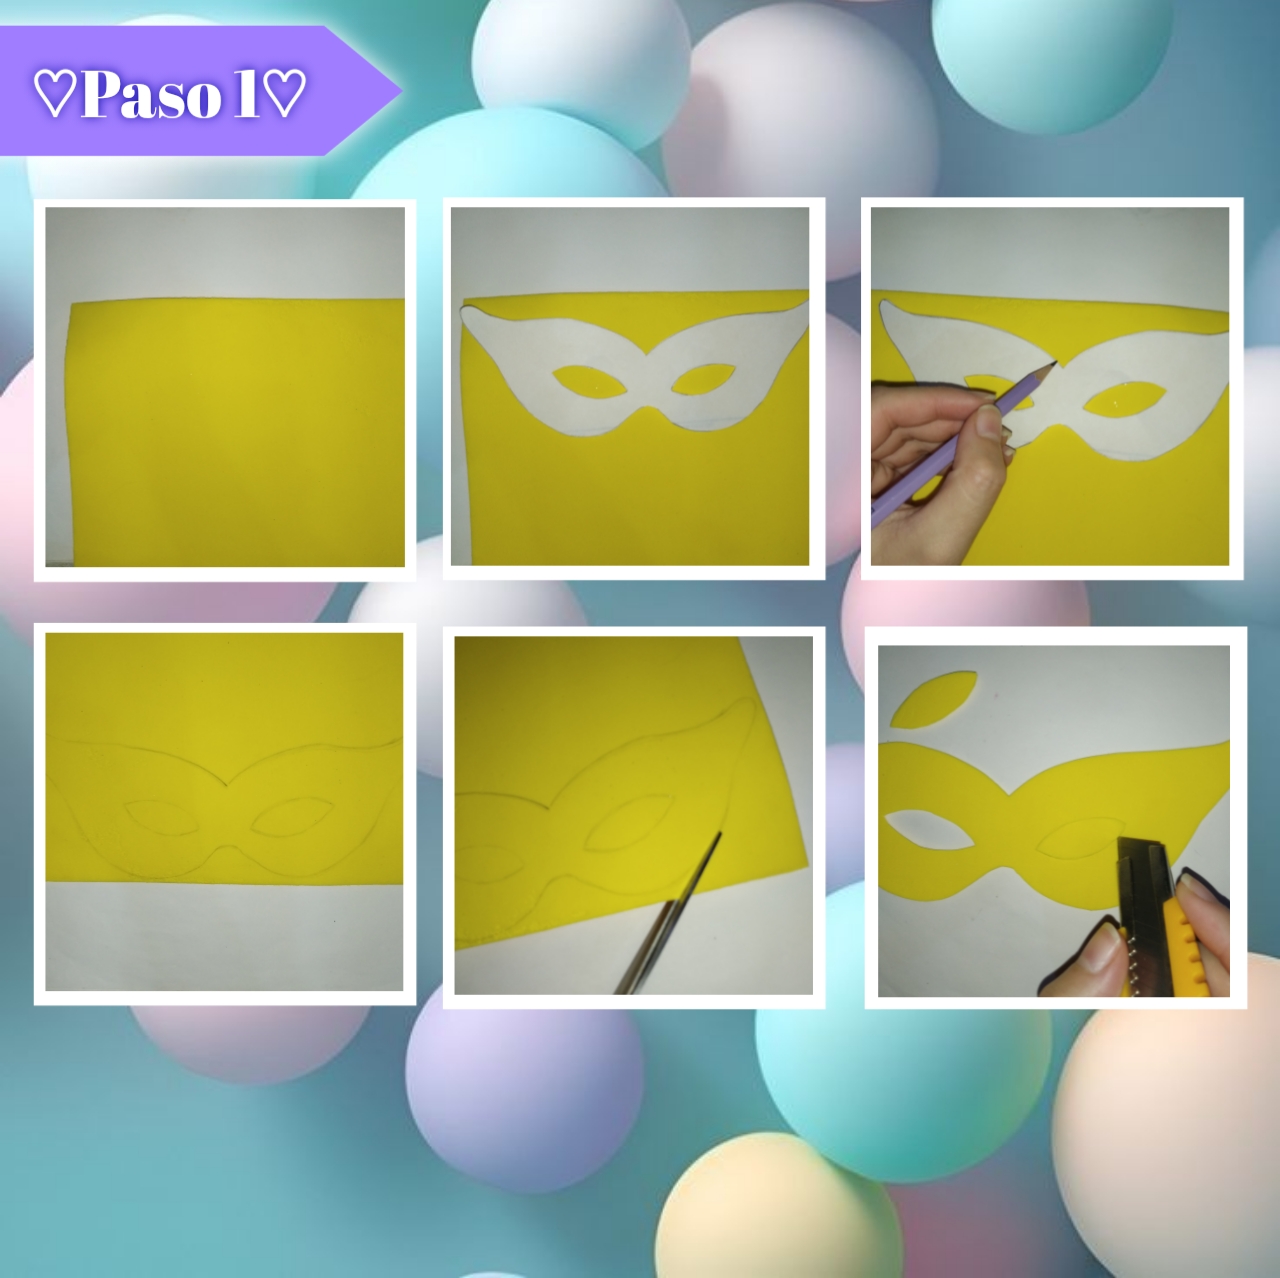
Paso 1:
Step 1:
Primeramente necesitamos una plantilla de una máscara, la que más les guste, yo utilice un modelo básico y sencillo. Así tomamos nuestra cartulina principal, la colocamos al revés, igualmente la máscara encima y marcamos nuestra silueta de la máscara muy bien con ayuda de un lápiz, continuamos tomando nuestra tijera y recortando cuidadosamente todo el contorno, para la parte de los ojos, necesitaremos un exacto (cutter) que utilizaremos con cuidado para recortar está parte.
First we need a template of a mask, the one you like the most, I used a basic and simple model. So we take our main cardboard, we place it upside down, also the mask on top and we mark our mask silhouette very well with the help of a pencil, we continue taking our scissors and carefully cutting all the contour, for the part of the eyes, we will need an exacto (cutter) that we will use carefully to cut this part.
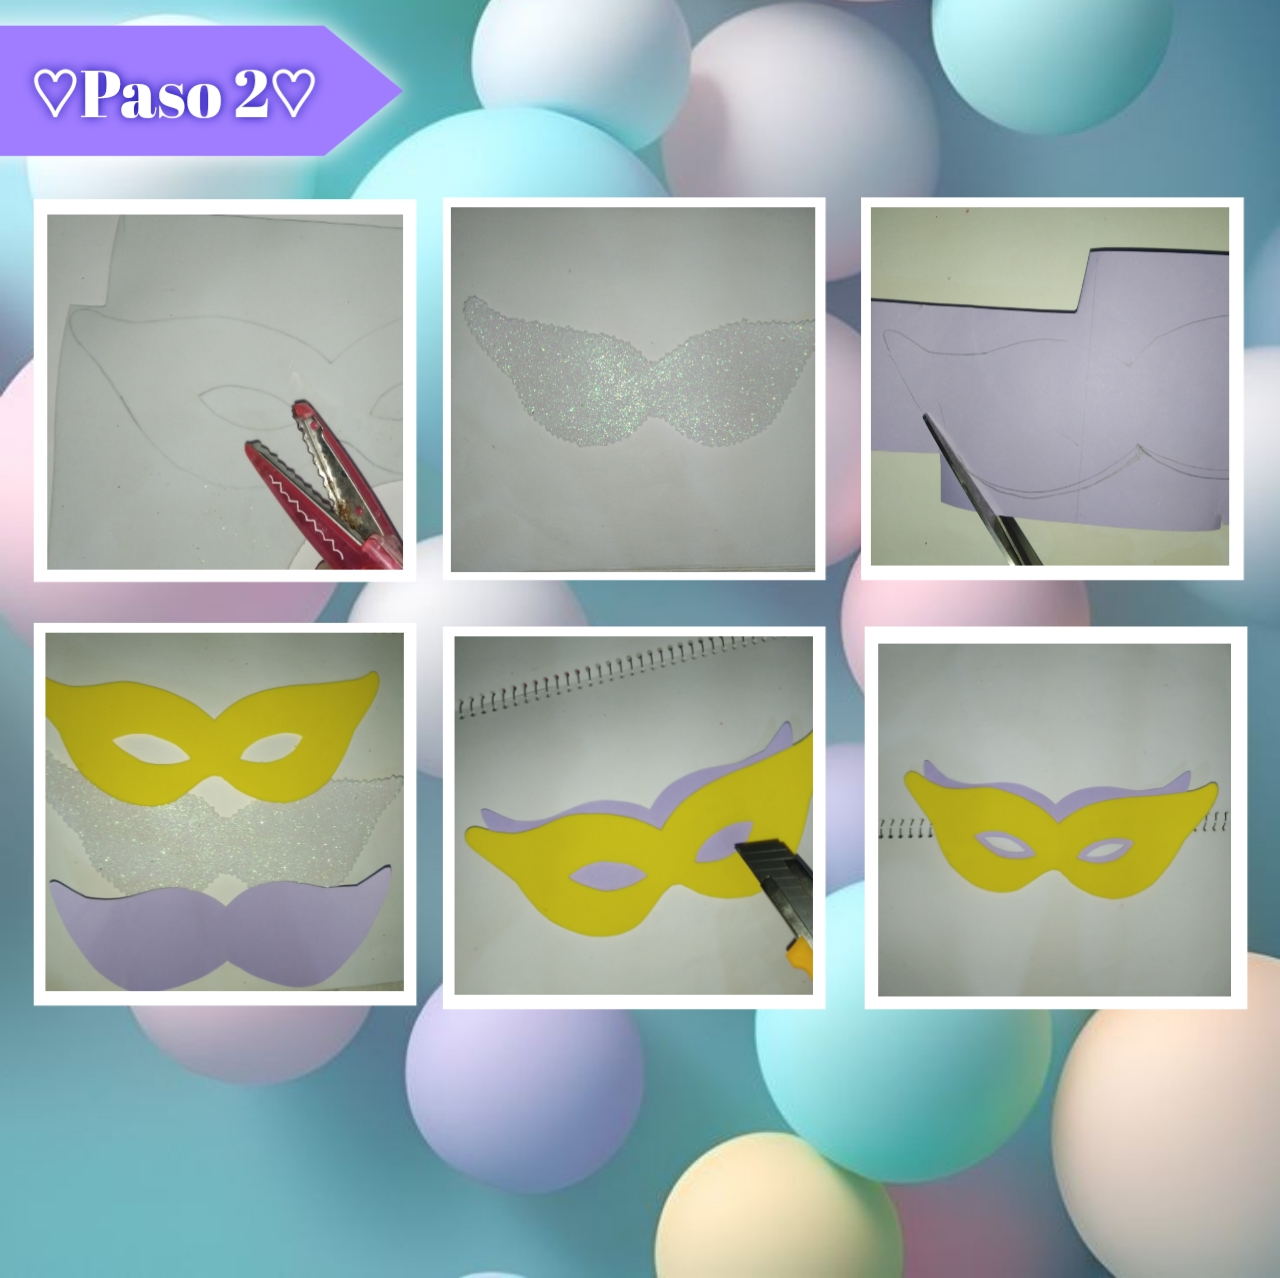
Paso 2:
Step 2:
Ahora vamos con otro color de foami, yo tomé uno color blanco escarchado, marqué la máscara y tome una tijera de formas, así comencé a recortar con está siguiendo el mismo borde de la máscara, pero dejando como 0.6cm de espacio entre el trazo y la tijera, para que quede un poco más grande. Por otro lado tome cartulina de color lila y modifique un poco la forma de la máscara haciéndola un poco más pequeña, así la marqué e igualmente recorté muy bien, hasta obtener las tres piezas y así con silicón caliente uni la pieza morada detrás de la amarilla, luego recorte los ojos dejando un borde sobresaliente.
Now let's go with another color of foami, I took a frosted white color, I marked the mask and took a shape scissors, so I started to cut with it following the same edge of the mask, but leaving about 0.6cm of space between the line and the scissors, to make it a little bigger. On the other hand I took some purple cardboard and modified the shape of the mask making it a little smaller, so I marked it and also cut it very well, until I got the three pieces and so with hot silicone I joined the purple piece behind the yellow one, then I cut out the eyes leaving a protruding edge.
Paso 3:
Step 3:
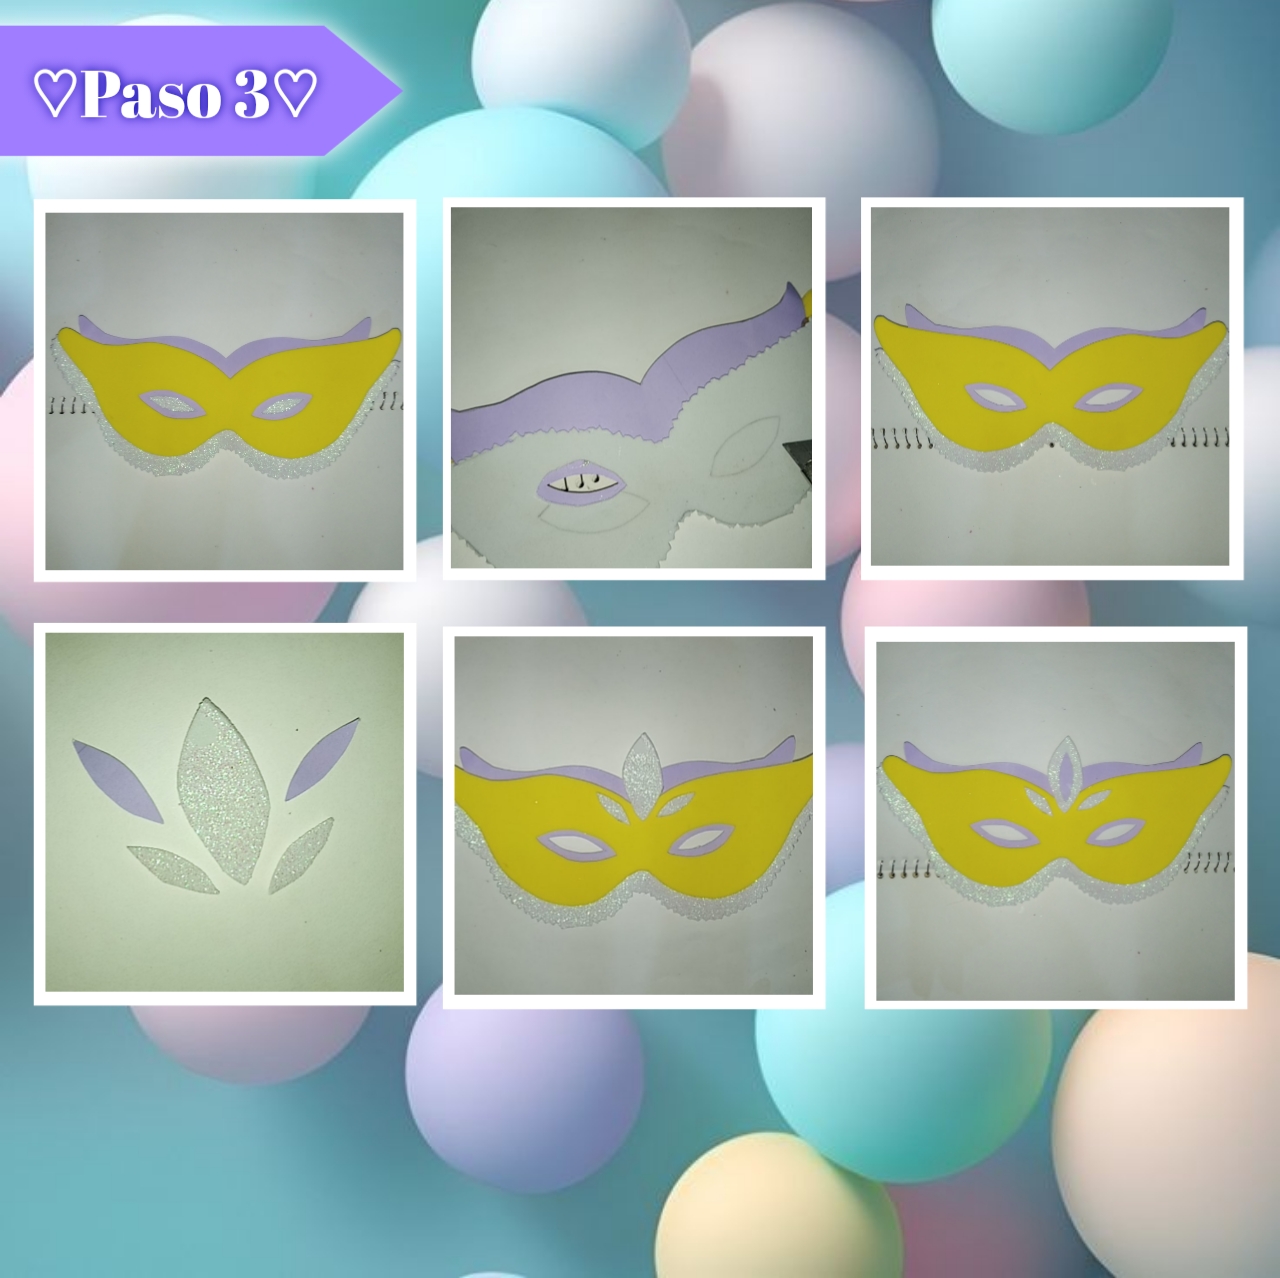
Continuamos pegando la última capa de la máscara que nos queda en color blanco escarchado en la parte de atrás, haciendo que está sobresalga un poco por debajo, con un borde más o menos de 1cm de ancho aproximadamente. También tomaremos un exacto y en la parte de atrás recortaremos un borde más grande del que nos marca el ojo, con mucho cuidado sin pasar al otro foami.
We continue gluing the last layer of the mask that we have left in frosted white on the back, making it protrude a little underneath, with a border of about 1 cm wide. We will also take an exact one and on the back we will cut a bigger border than the one that marks the eye, very carefully without moving to the other foami.
Además para agregar unos detalles con los sobrantes que recortamos de los ojos haremos una pequeña decoración, solo les daremos una pequeña forma de gota más fina, así las pegue en la parte de arriba de la máscara colocando una más grande en el centro y dentro de esa una gota más pequeña en morado.
Also to add some details with the leftovers that we cut out of the eyes we will make a small decoration, we will only give them a small shape of a thinner drop, so I glued them on the top of the mask placing a larger one in the center and inside that a smaller drop in purple.
Paso 4:
Step 4:
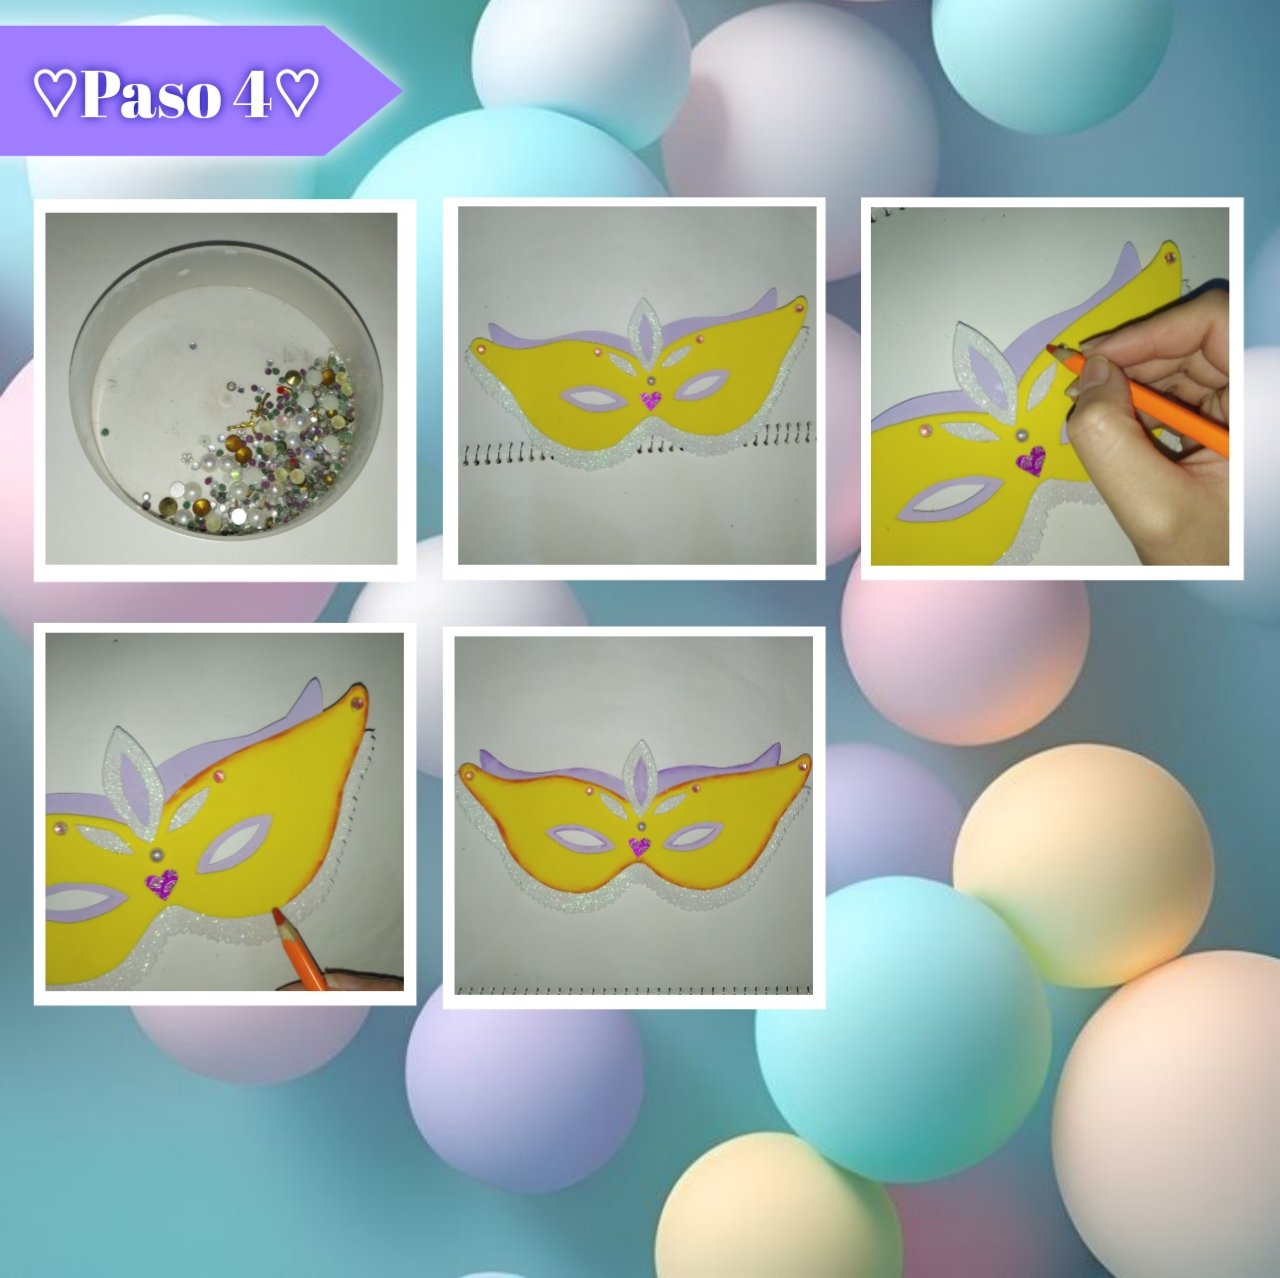
Ya para agregar los detalles finales, tome unas 5 piedritas de esas que se utilizan en las uñas, les agregué, menos de una gota de silicón frío, quite el exceso y fui ubicando una por una, pegue la más grande en el centro de la máscara y el resto por el borde de arriba, dos en cada esquina y otras dos a cada lado. Para terminar completamente le pegue un pequeño corazón en el centro de la máscara más abajo y por otro lado, también tomé un color naranja al cuál le fui mojando un poco la punta y así logré un efecto degradado en todo el borde del foami amarillo, hice lo mismo con el lila, solo aplique color morado, porsupuesto se puede hacer con pintura al frío para un acabado más profesional y limpio, pero no tengo estás pinturas y esto lo remplaza bastante bien.
To add the final details, I took 5 of those little stones that are used in nails, I added less than a drop of cold silicone, removed the excess and placed them one by one, I glued the largest one in the center of the mask and the rest along the top edge, two in each corner and two on each side. To finish completely I glued a small heart in the center of the mask below and on the other side, I also took an orange color to which I was wetting the tip a little and thus achieved a gradient effect around the edge of the yellow foami, I did the same with the lilac, just apply purple, of course you can do it with cold paint for a more professional and clean finish, but I do not have these paints and this replaces it quite well.
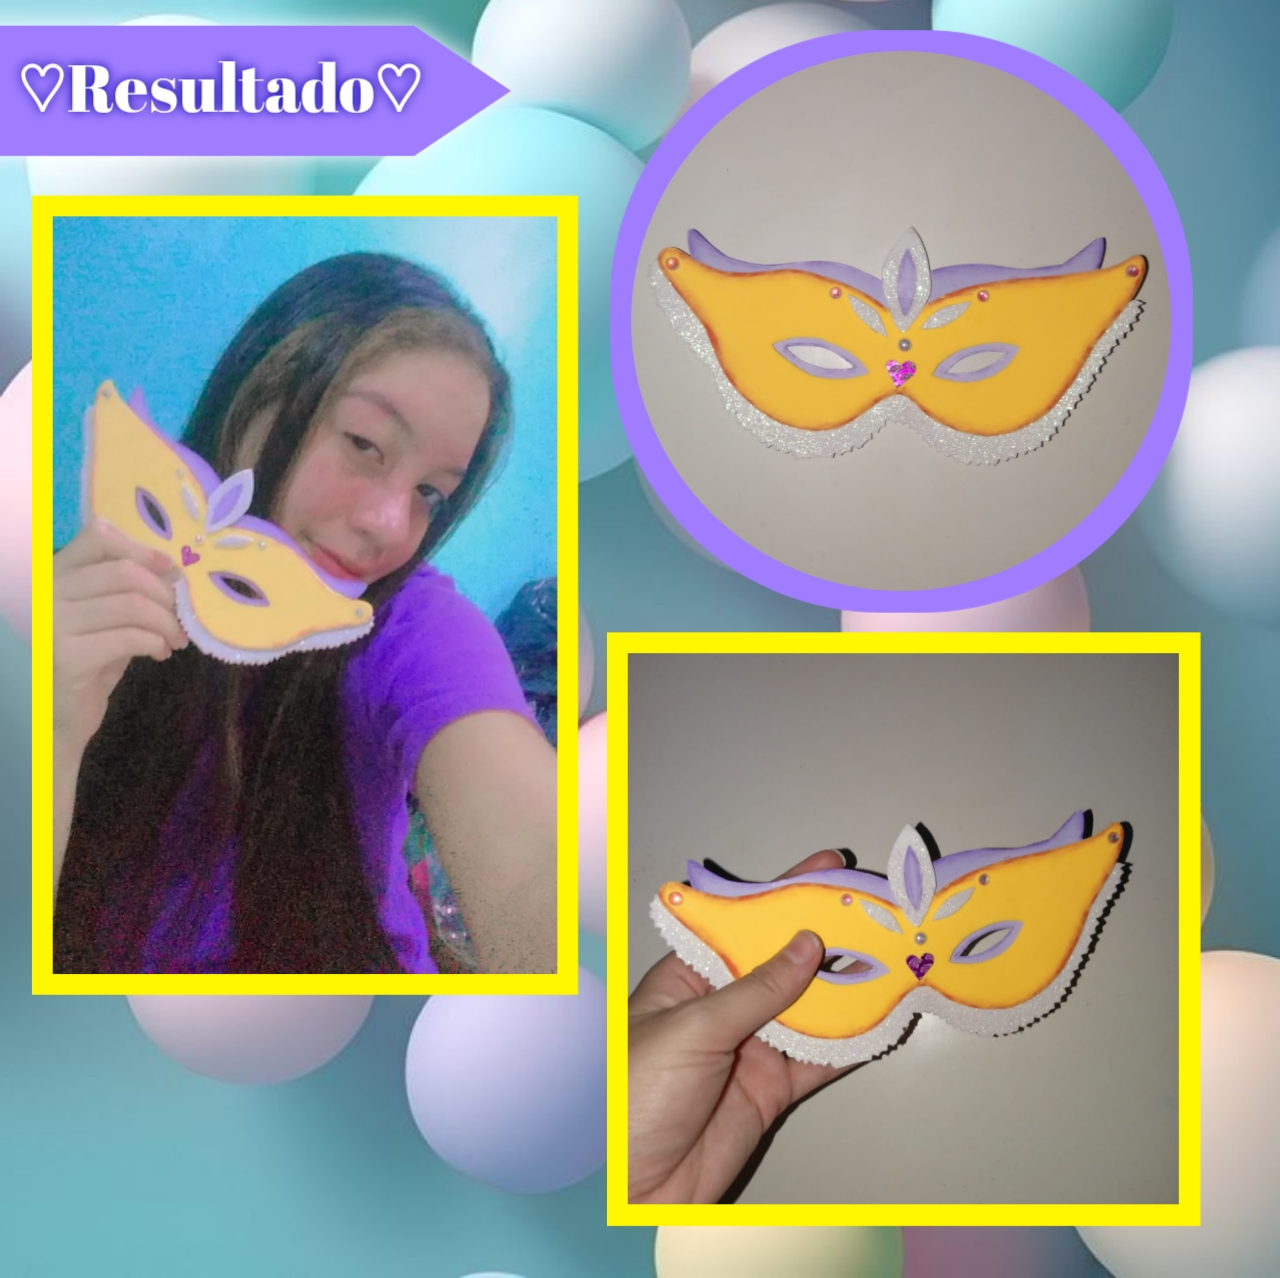
Así en 4 fáciles pasos, podemos obtener una hermosa máscara hecha por nosotros mismos, ya sea para decorar con está temática o incluso le podemos agregar alguna elástica para que pueda colocarse en la cara. Lo mejor es que podemos hacerla con los colores que más nos gusten y hay gran variedad de formas de máscaras, se pueden crear un sin fin de ellas con mucho amor.
So in 4 easy steps, we can get a beautiful mask made by ourselves, either to decorate with this theme or we can even add some elastic so that it can be placed on the face. The best thing is that we can make it with the colors that we like and there is a great variety of shapes of masks, you can create an endless number of them with a lot of love.
Hemos llegado al final de este tutorial, espero que les haya encantado tanto como a mí, es algo sencillo, pero que da un gran toque en cualquier decoración o uso. Ha sido un placer compartir por aquí está tarde con ustedes, les mando un enorme abrazo y bendiciones familia, espero leerlos en los comentarios.✨
We have reached the end of this tutorial, I hope you loved it as much as I did, it's something simple, but gives a great touch in any decoration or use. It has been a pleasure to share this afternoon with you, I send you a huge hug and blessings family, I hope to read you in the comments.
💛💜¡Gracias por leer! Hasta la próxima💜💛
💛💜Thanks for reading! See you next time 💜💛
Photos of my authorship taken from my Xiaomi Redmi 7 phone, edited in the free version of PixeLab
this is so lovely. Looks so cool
Thanks!✨💗
Está bonita, esas mascaras son un clásico. Saludos.
Así es, muchas graciasss, saludos.✨
❤️