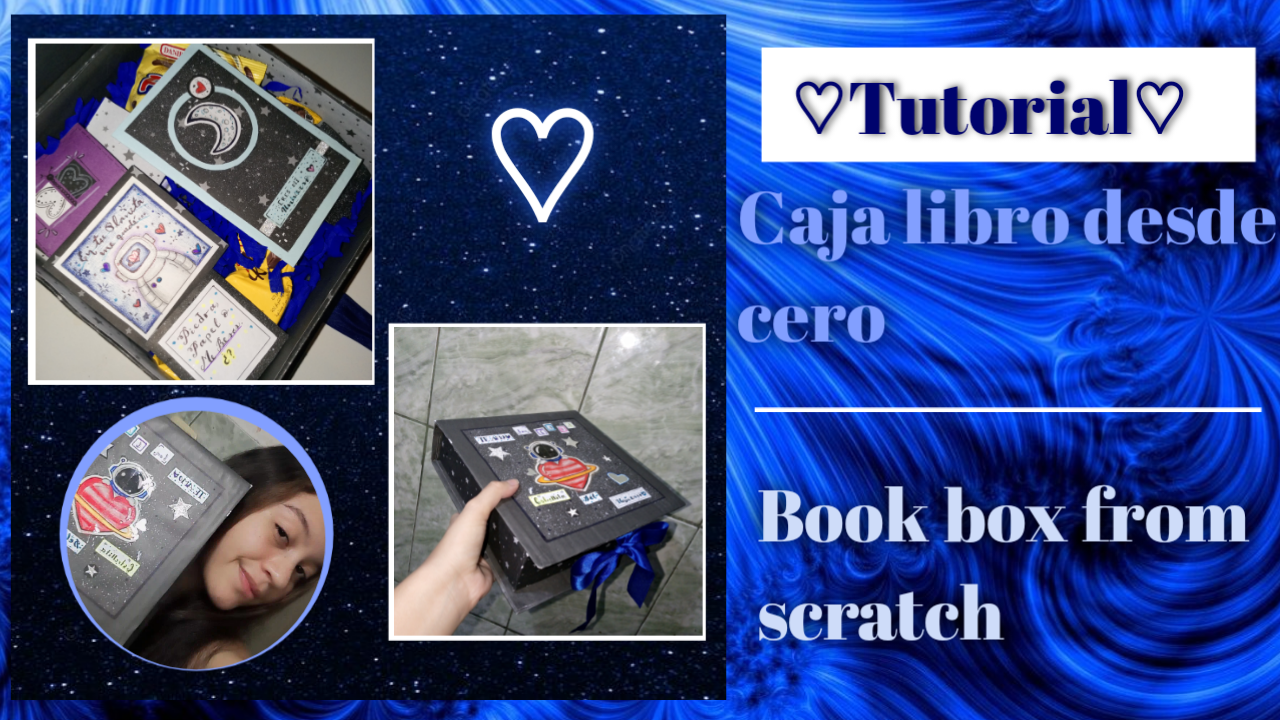
Tutorial Caja Libro 💙 - Haz un regalo especial, para tu persona especial | Paso a Paso 👣✨ [ESP-ENG]
Well, well, well! Happy, blessed and prosperous day, I hope each of you are in the best circumstances, wishing primarily, that you have too much health, be happy, be productive, creative and that every day you improve more and more in different fields, my best wishes, on this day, as well as the month and always, welcome to a new publication.♡
En está apreciada publicación, vengo con una idea demasiado preciosa para obsequiar en distintas ocasiones, es algo que lleva su trabajo, pero el resultado termina siendo magnífico, así que lo vale totalmente, es una caja, para meter más regalos cartas y esas cosas porsupuesto, pero no es cualquier caja, es el tipo de caja llamada "Caja Libro", ya que tiene la forma de un libro se podría decir, la cosa es que es algo diferente que lo hace único y especial, claro que sí, además es hecha con material de reciclaje, así que estarían aprovechando gran parte del material también, más que ideal.
In this appreciated publication, I come with an idea too precious to give away on different occasions, it is something that takes work, but the result ends up being magnificent, so it is totally worth it, it is a box, to put more gifts, letters and those things of course, but it is not just any box, is the type of box called "Book Box", as it has the shape of a book you could say, the thing is that it is something different that makes it unique and special, of course, it is also made with recycled material, so they would be taking advantage of much of the material as well, more than ideal.
Es ese tipo de regalo que le puedes dar perfectamente a alguna persona especial, ya sea alguna amistad, familiar o incluso tu pareja, así que si estabas buscando un regalo súper especial, para una persona especial, estás en el tutorial indicado, te enseñaré cómo hice está linda cajita desde el comienzo, hasta el final, para que puedas recrearla y hacerla a tu manera, porsupuesto es personalizada, por lo que yo elegí el tema de la galaxia y el universo, para dar este regalo a una personita muy especial, sin más que decir, comencemos con el tutorial paso a paso.
It is that kind of gift that you can give perfectly to a special person, either a friend, family or even your partner, so if you were looking for a super special gift for a special person, you are in the right tutorial, I will show you how I made this cute little box from the beginning to the end, so you can recreate it and make it your way, of course it is personalized, so I chose the theme of the galaxy and the universe, to give this gift to a very special person, without more to say, let's start with the step by step tutorial.
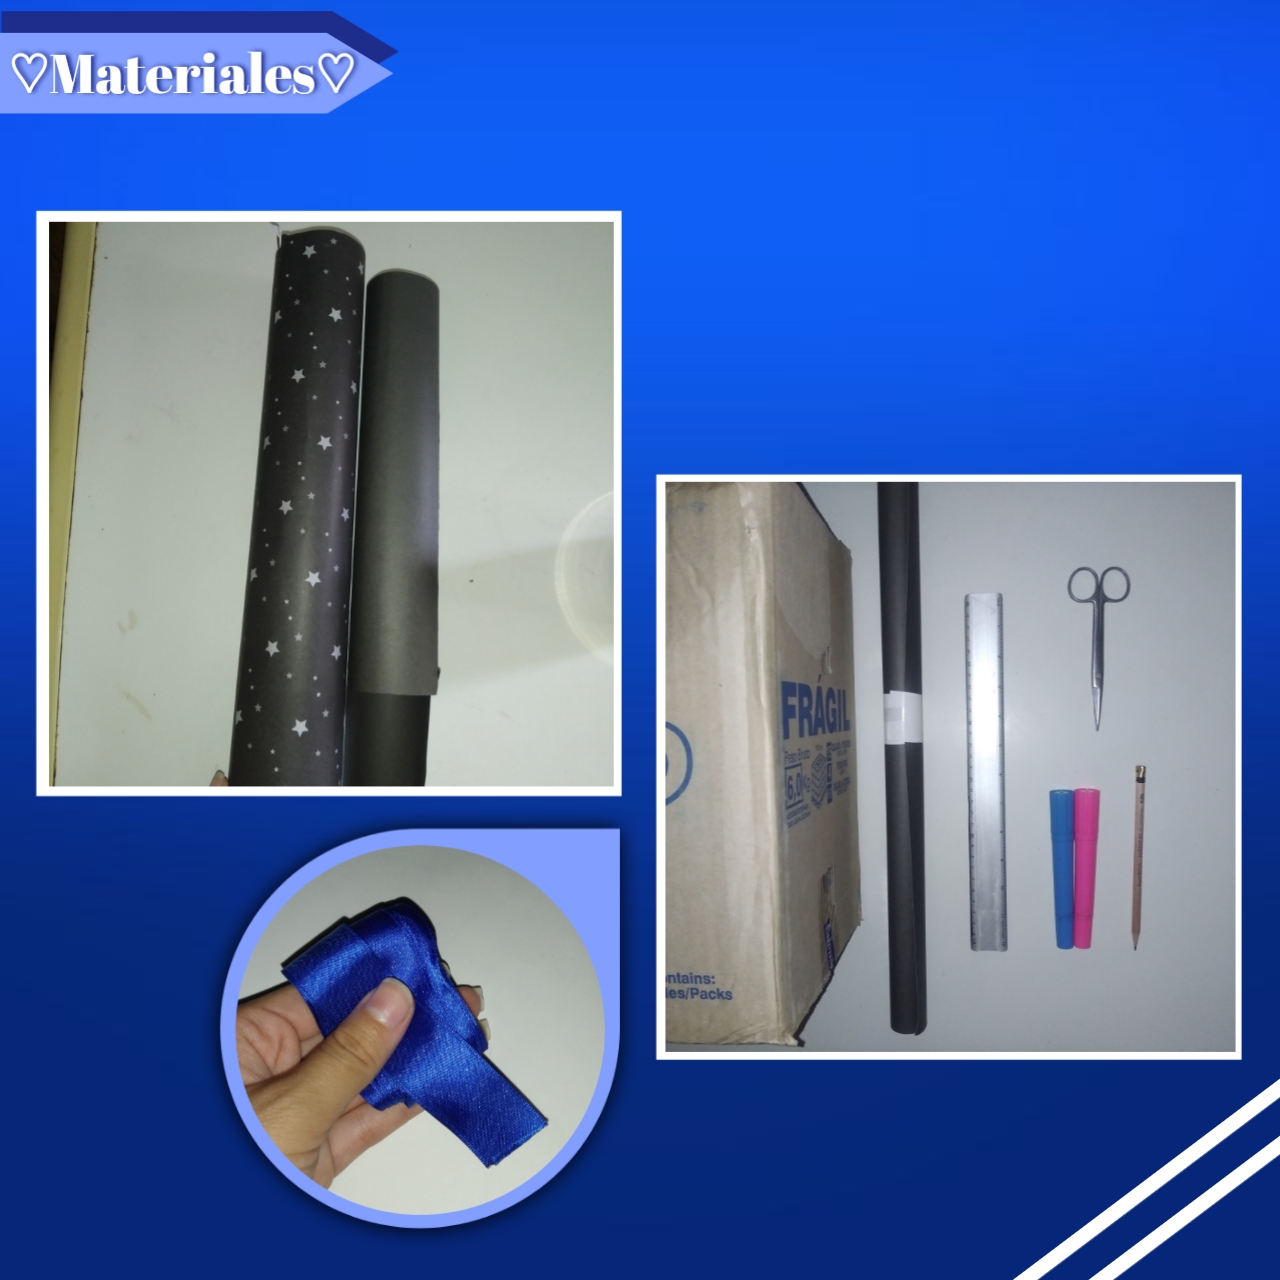
♡Materials♡
- Caja de cartón grande
- Cartulinas
- Silicón
- Pegamento blanco
- Pincel
- Regla
- Lápiz
- Colores
- Marcadores
- Tijera
- Large cardboard box
- Cardboard
- Silicone
- White glue
- Paintbrush
- Ruler
- Pencil
- Coloring pencil
- Marker pen
- Scissors
♡Step by Step Tutorial♡
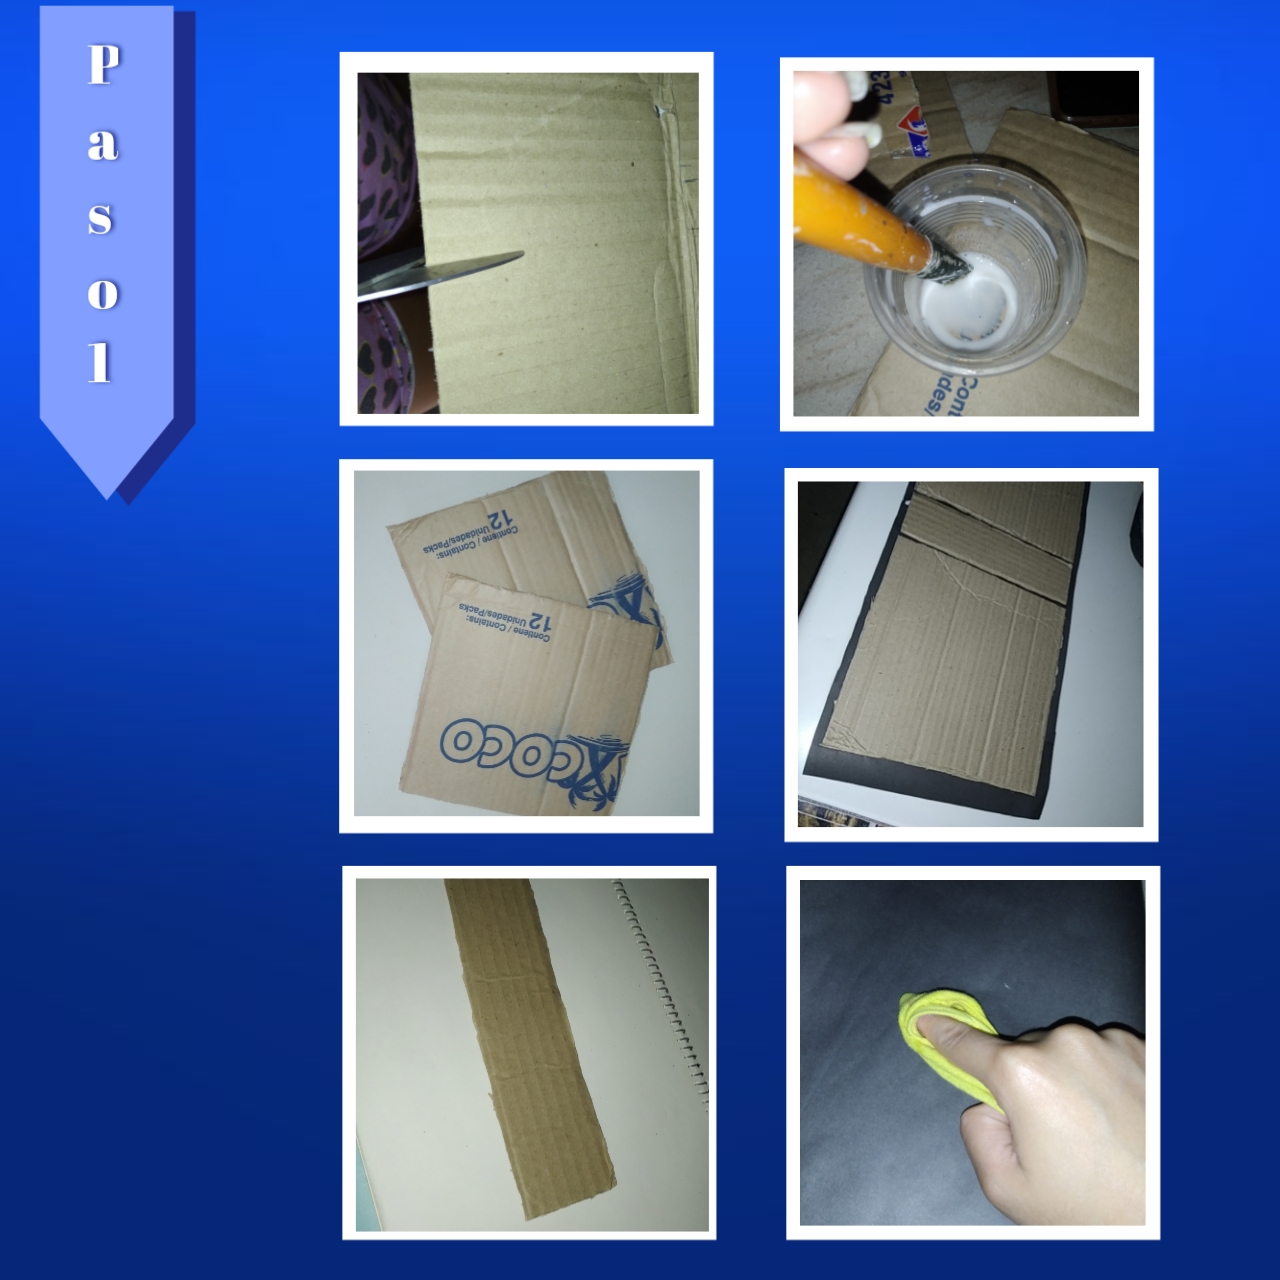
Paso 1:
Step 1:
Comenzaremos tomando el cartón, lápiz, regla y tijeras, así al extender el cartón, marcaremos con nuestra regla y el lápiz primeramente dos cuadrados de 22cm de ancho por 22cm de largo, seguidamente haremos la siguiente pieza, siendo un rectángulo alargado de la misma medida de largo (22cm) por 6cm de ancho, marcamos y recortamos cada pieza. Ahora bien, tomaremos la cartulina del color de nuestra preferencia y la extenderemos, luego haremos una mezcla de agua y pegamento blanco (o pueden utilizar silicón al frío si gustan), para esparcir está con un pincel, en cada pieza y pegaremos está en la cartulina dejando un centímetro de cada lado, pegando primero un cuadrado, luego el rectángulo y después el otro cuadrado, dejando un espacio de 1cm más o menos entre cada pieza y alineando esto porsupuesto, también podemos tomar un trapo y pasarlo en la parte de la cartulina, para esparcir mejor y quitar las burbujas de aire.
We will begin by taking the cardboard, pencil, ruler and scissors, so when we extend the cardboard, we will mark with our ruler and pencil first two squares of 22cm wide by 22cm long, then we will make the next piece, being an elongated rectangle of the same length (22cm) by 6cm wide, we mark and cut each piece. Now, we will take the cardboard of the color of our preference and we will extend it, then we will make a mixture of water and white glue (or you can use cold silicone if you like), to spread it with a brush on each piece and we will glue it on the cardboard leaving a centimeter on each side, gluing first a square, then the rectangle and then the other square, leaving a space of 1cm more or less between each piece and aligning this of course, we can also take a cloth and pass it on the side of the cardboard, to spread better and remove air bubbles.
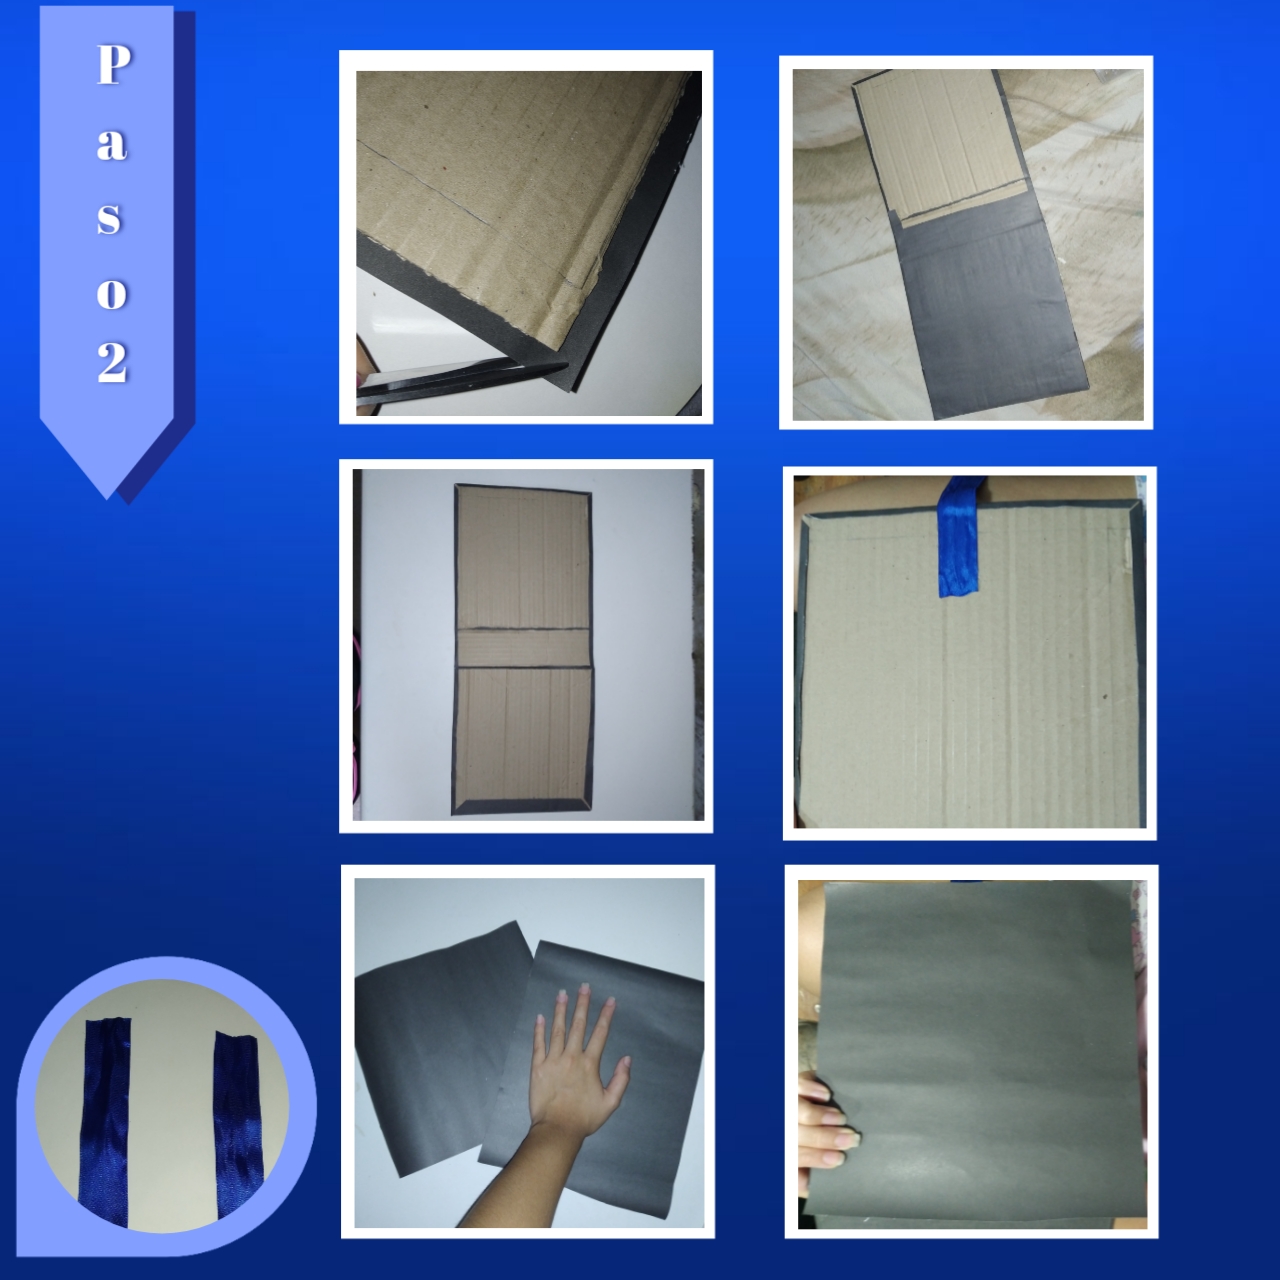
Paso 2:
Step 2:
Ahora, recortaremos cada una de la esquinas en diagonal, dejando aunque sea un milímetro de espacio, continuaremos agregando nuevamente nuestra mezcla de pega o silicón y estás pestañas las pegaremos hacía adentro muy bien, siempre remarcando y haciendo presión durante unos cuantos segundos.
Now, we will cut each of the corners diagonally, leaving at least a millimeter of space, we will continue adding again our glue or silicone mixture and we will glue these tabs inwards very well, always highlighting and pressing for a few seconds.
Seguidamente recortaremos dos rectángulos uno de 21cm x 28cm y el otro de 21cm x 14cm, así tomaremos el más largo y lo pegaremos encima de esta cara del cartón que falta por forrar, después tomaremos una cinta, cuyo tamaño dependerá del largo que ustedes quieran el lazo, está que muestro es de aproximadamente 20 cm de largo, necesitaremos dos, utilizaremos una y apartaremos la otra, está la pegaremos con silicón (para mayor resistencia), en el lado que no tiene cartulina de la caja, de manera centrada, siendo la parte de arriba de la caja (la tapa), después sobre esta pegaremos el rectángulo sobrante de cartulina y así terminamos con cubierta de la caja. Cabe resaltar que a medida que vamos pegando, es importante remarcar los dobleces y esparcir mejor la mezcla con el paño con cuidado.
Next we will cut out two rectangles, one of 21cm x 28cm and the other of 21cm x 14cm, so we will take the longest one and we will glue it on top of this side of the cardboard that needs to be lined, then we will take a ribbon, whose size will depend on the length that you want the bow, this one I show is approximately 20 cm long, We will need two, we will use one and set aside the other, we will stick it with silicone (for greater resistance), on the side that does not have cardboard of the box, in a centered way, being the top of the box (the lid), then on this we will glue the remaining rectangle of cardboard and thus we finish with the box cover. It should be noted that as we are gluing, it is important to mark the folds and spread the mixture carefully with the cloth.
Paso 3:
Step 3:
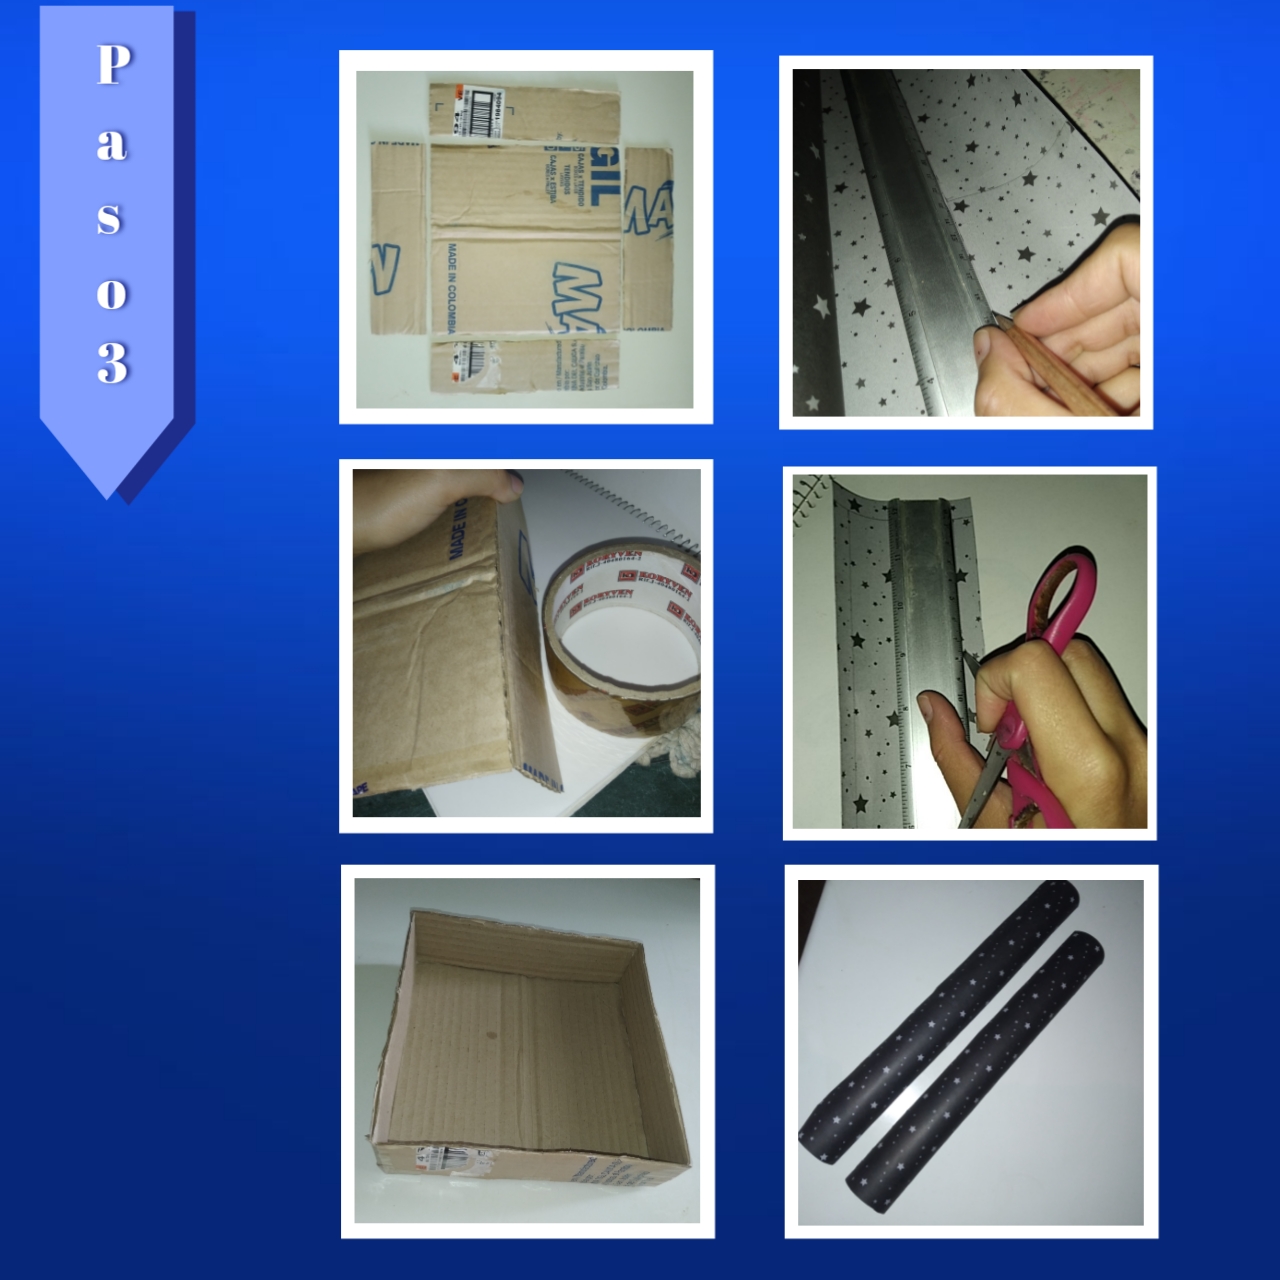
En este momento, haremos la base, para eso tomaremos otra vez cartón, así, marcaremos y recortaremos un cuadrado de 20cm x 20cm, también 4 piezas que irán a los lados, serán dos rectángulos de 20cm x 5.5cm, además de otros dos de 20.2cm x 5.5cm, ya que este cartón tiene más o menos 2 milímetros de grosor, por lo tanto, haciendo así encajarían muy bien al unir las piezas.
At this point, we will make the base, for that we will take cardboard again, so, we will mark and cut out a square of 20cm x 20cm, also 4 pieces that will go on the sides, they will be two rectangles of 20cm x 5.5cm, plus two others of 20.2cm x 5.5cm, since this cardboard is about 2 millimeters thick, therefore, doing so would fit very well when joining the pieces.
Ahora comenzaremos a armar la base, así pegaremos al cuadrado todos los rectángulos, coincidiendo frente con frente las medidas iguales, iremos uniendo esto posicionando bien y pegando con cinta, hasta tener la forma, la cinta ideal, es esa cinta blanca (de enmascarar), pero yo tenía transparente solamente, así que trabaje con lo que pude. Al tener la base, marcaremos y recortaremos dos tiras de cartulina, una de 43cm de largo por 7.5cm de ancho, y la otra de 41cm x 7.5cm, a éstas le haremos dobleces de 1cm a cada lado, así continuamos a forrar la misma.
Now we will begin to assemble the base, so we will glue to the square all the rectangles, matching front to front the equal measures, we will join this positioning well and gluing with tape, until we have the shape, the ideal tape, is that white tape (masking), but I had only transparent, so I worked with what I could. Once we have the base, we will mark and cut out two strips of cardboard, one of 43cm long by 7.5cm wide, and the other of 41cm x 7.5cm, to these we will make folds of 1cm on each side, so we continue to line it.
Paso 4:
Step 4:
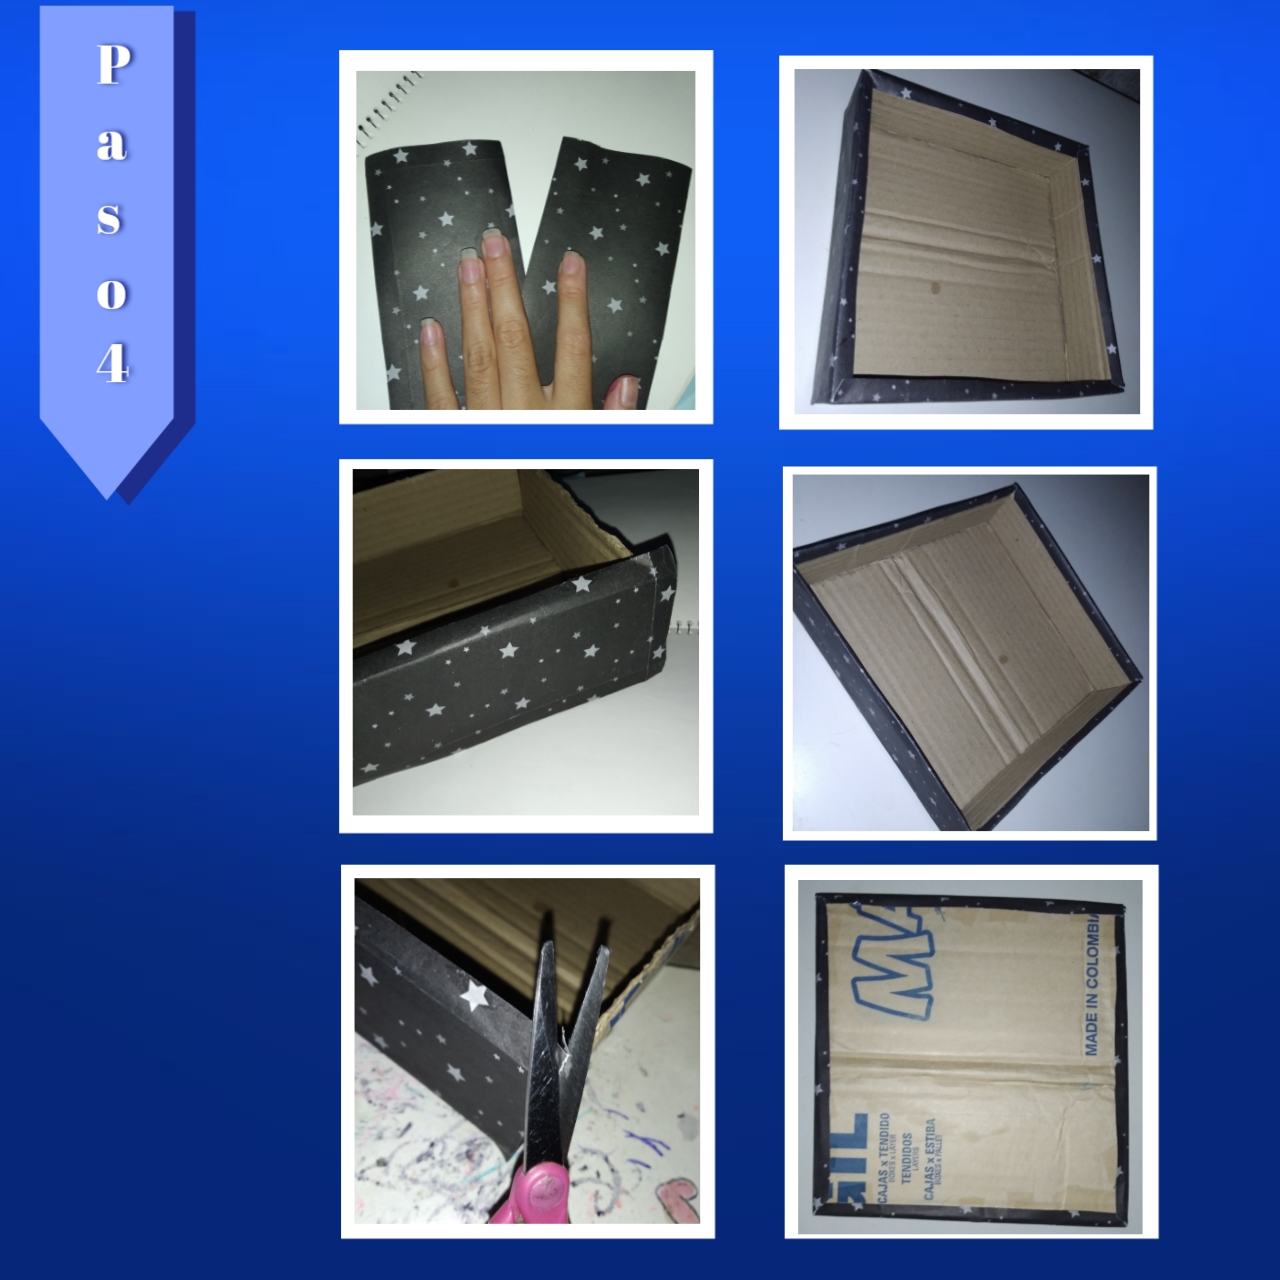
En este paso, tomaremos primero la tira de cartulina más larga, agregaremos nuestro pegamento o silicón a las paredes de la base por fuera, empezando por una esquina y pegaremos la tira acomodando muy bien, para que quede de cada lado 1cm sobresaliente incluyendo la parte de la esquina, para que al momento de doblar se cubran los bordes de la caja, así en las esquinas recortaremos de forma diagonal y hacía arriba en forma de triángulo, dejando de nuevo un milímetro de espacio, para separar los dobleces, así haremos, hasta terminar con la primera tira y seguidamente pegaremos la otra más pequeña, haciendo que coincida, sobre el pedazo sobresaliente de la anterior.
In this step, we will first take the longest strip of cardboard, we will add our glue or silicone to the walls of the base on the outside, starting from one corner and we will glue the strip, arranging it very well, so that each side is 1cm protruding including the corner part, so that when folding it, the edges of the box will be covered, Then in the corners we will cut diagonally and upwards in the shape of a triangle, leaving again a millimeter of space to separate the folds. We will do this until we finish with the first strip and then we will glue the other smaller strip, making it coincide with the protruding piece of the previous one.
Cuando tengamos toda la parte lateral cubierta, después vamos a agregar nuestra mezcla de pegamento y doblamos hacía la parte de adentro de la caja, así sostenemos unos segundos hasta pegar bien, lo mismo haremos con la parte de abajo de la caja.
When we have all the side part covered, then we are going to add our glue mixture and fold it towards the inside of the box, and hold it for a few seconds until it sticks well, the same thing we will do with the bottom part of the box.
Paso 5:
Step 5:
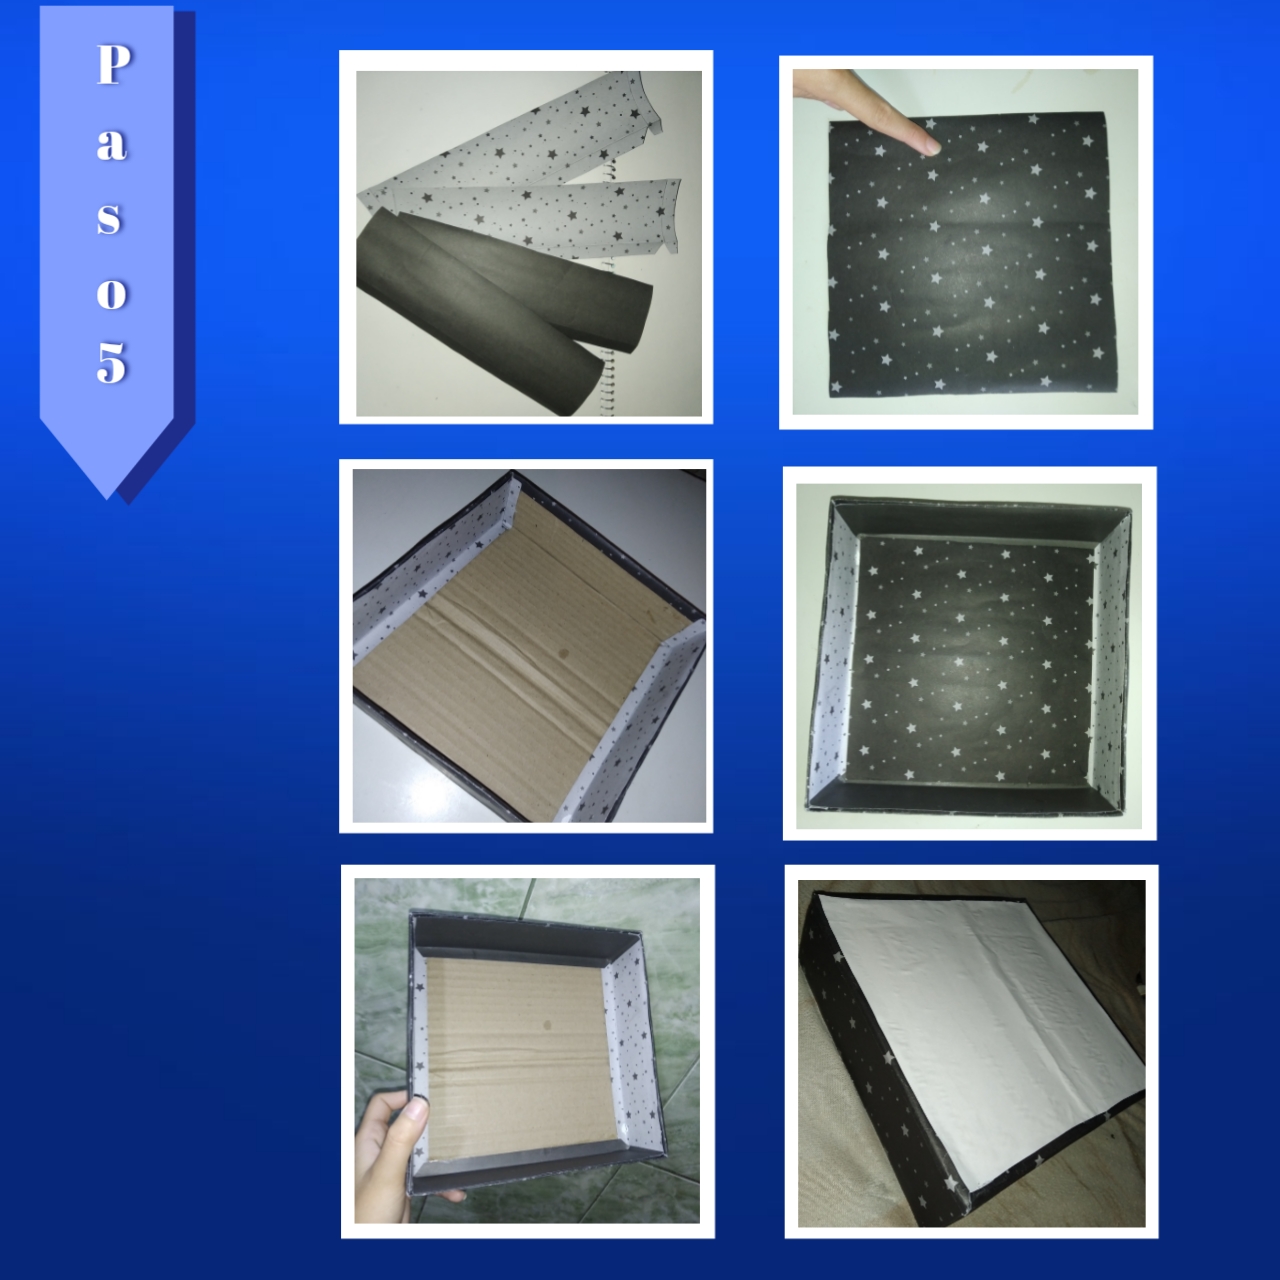
Vamos a terminar de forrar está pieza por dentro, para esto ahora marcaremos y recortaremos en cartulina (del color que queramos) cuatro tiras, dos más largas de 21cm de largo por 6cm de ancho y las otras dos de 20cm de largo por 6cm de ancho, en cada una de estas tiras hay que marcar y hacer el dobles en la parte de abajo, este dobles debe ser de 1cm de ancho, por todo el largo, cabe mencionar que las tiras más largas también deben tener 1cm a cada lado, además recortaremos una pequeña parte en diagonal en cada esquina y en el dobles que separa ambas partes.
Let's finish lining this piece on the inside, for this now we will mark and cut four strips in cardboard (the color we want), two longer strips of 21cm long by 6cm wide and the other two of 20cm long by 6cm wide, in each of these strips we have to mark and make the double at the bottom, this double should be 1cm wide, for the entire length, it is worth mentioning that the longest strips should also have 1cm on each side, also cut a small part diagonally in each corner and in the double that separates the two parts.
Para continuar pegaremos primero las dos tiras largas, una en el lado contrario de la otra, pondremos pegamento otra vez y vamos a pegar ambas tiras negras en los lados restantes, todo esto aplicando presión y pasando nuestro paño por encima para sacar burbujas, como lo hemos estado haciendo. Ahora necesitamos dos cuadrados de 19cm x 19cm, así esparcimos nuestra pega de preferencia por todo un lado de este y pegamos con cuidado en la parte de adentro de la base y en la parte de abajo que queda descubierta en está, así terminamos esa pieza.
To continue we will first glue the two long strips, one on the opposite side of the other, we will put glue again and we will glue both black strips on the remaining sides, all this applying pressure and passing our cloth over it to remove bubbles, as we have been doing. Now we need two 19cm x 19cm squares, so we spread our preferred glue all over one side of it and carefully glue on the inside of the base and on the bottom that is uncovered on it, so we finish that piece.
Paso 6:
Step 6:
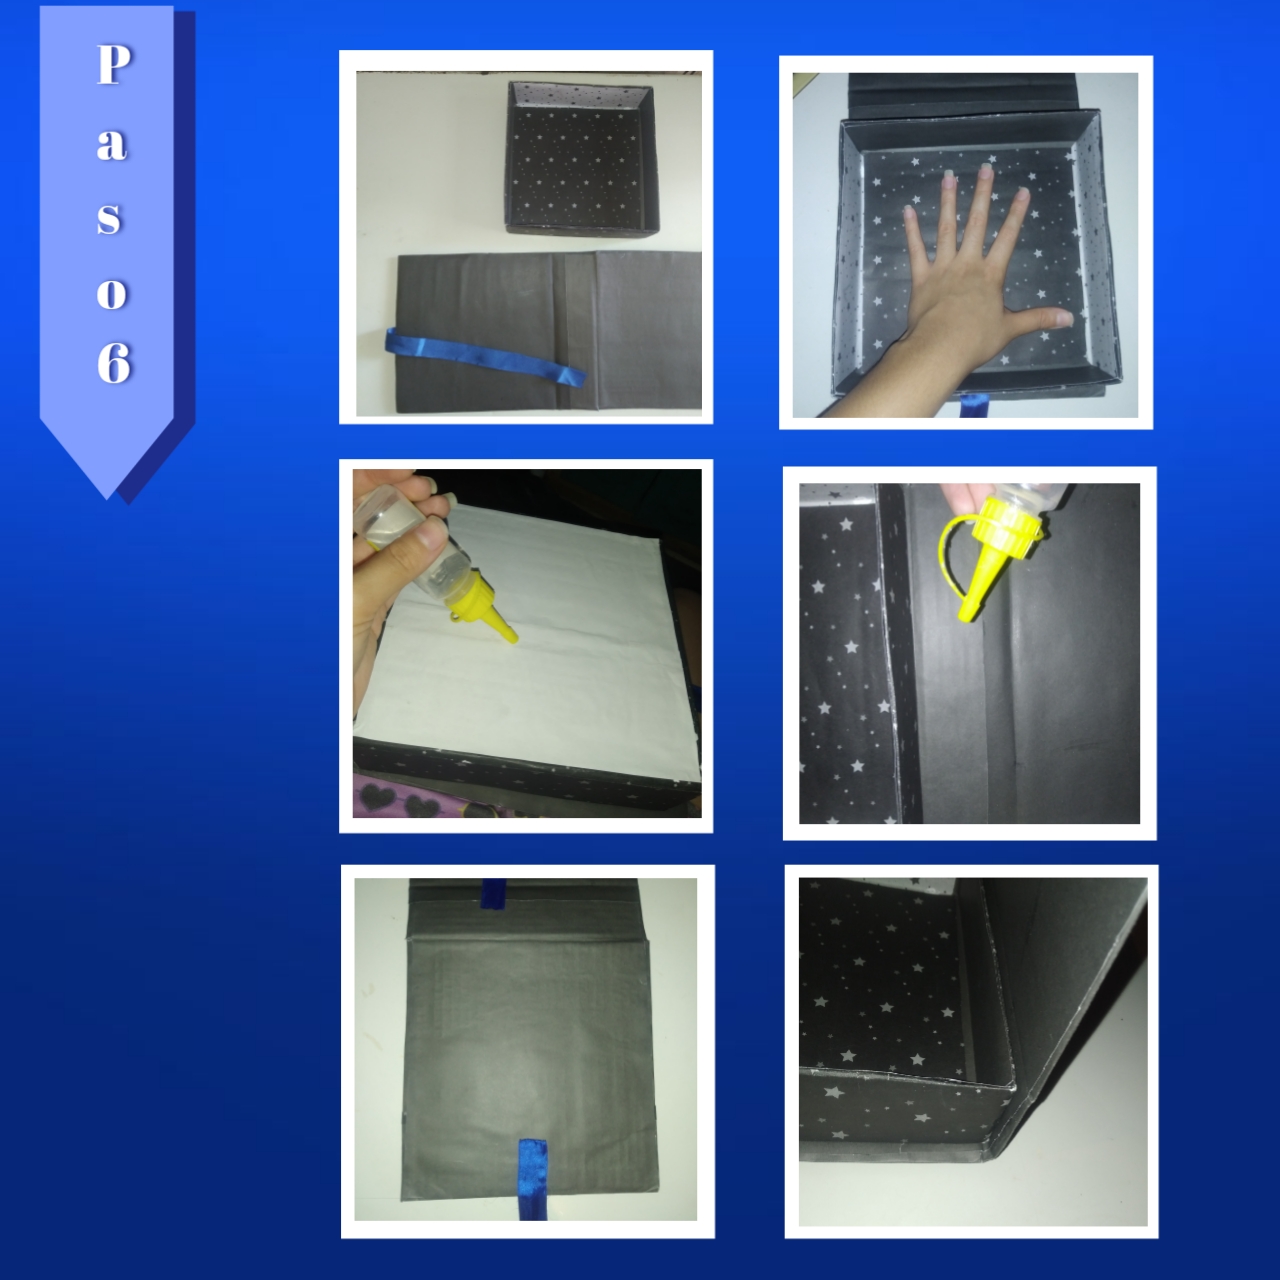
Teniendo ambas piezas totalmente listas, primero tomaremos la cubierta de la caja, es decir, la tapa, así del lado que no tiene la cinta, le pegaremos con silicón la otra que habíamos apartado anteriormente, dejando como 1cm de espacio con el borde, centrando y haciendo que concuerde con las otra de en frente. Ahora tomaremos la pieza de la base, agregaremos silicón en la parte de abajo y unimos a la tapa, justo encima de donde acabamos de pegar la cinta, centrando está, así también aplicaremos silicón en la parte lateral trasera, de forma que se una perfectamente con la parte del dobles de la tapa, en ambas partes aplicamos presión hasta que pegue bien.
Having both pieces completely ready, first we will take the cover of the box, that is, the lid, so on the side that does not have the tape, we will glue with silicone the other that we had previously set aside, leaving about 1cm of space with the edge, centering it and making it match with the other in front. Now we will take the piece of the base, add silicone on the bottom and attach it to the lid, just above where we just glued the tape, centering it, and also apply silicone on the back side, so that it joins perfectly with the double part of the lid, in both parts apply pressure until it sticks well.

Paso 7:
Step 7:
Por último, solo nos queda la decoración por fuera, para mí, es la parte más importante, aún así la pueden dejar como quedó, también es sencilla, pero bonita, pero en fin, recorte una frase que encontré sobre el universo, además recorte estrellitas, corazones e hice un dibujo de un astronauta. Tape todo el borde de la parte de arriba de la caja con cinta, tomé un cepillo de dientes viejo, le sumergí solo la punta en pintura blanca al frío y así esparcimos por todo el espacio, simulando pequeñas estrellas y la galaxia en general, luego quite la cinta, acomode y pegue cada detalle, se termina haciendo el lazo y listo.
Finally, we only have the decoration on the outside, for me, is the most important part, even so you can leave it as it was, it is also simple, but pretty, but anyway, I cut out a phrase I found about the universe, also cut out stars, hearts and made a drawing of an astronaut. Cover all the edge of the top of the box with tape, I took an old toothbrush, I dipped only the tip in cold white paint and so we spread all over the space, simulating small stars and the galaxy in general, then remove the tape, arrange and glue every detail, you end up making the bow and ready.
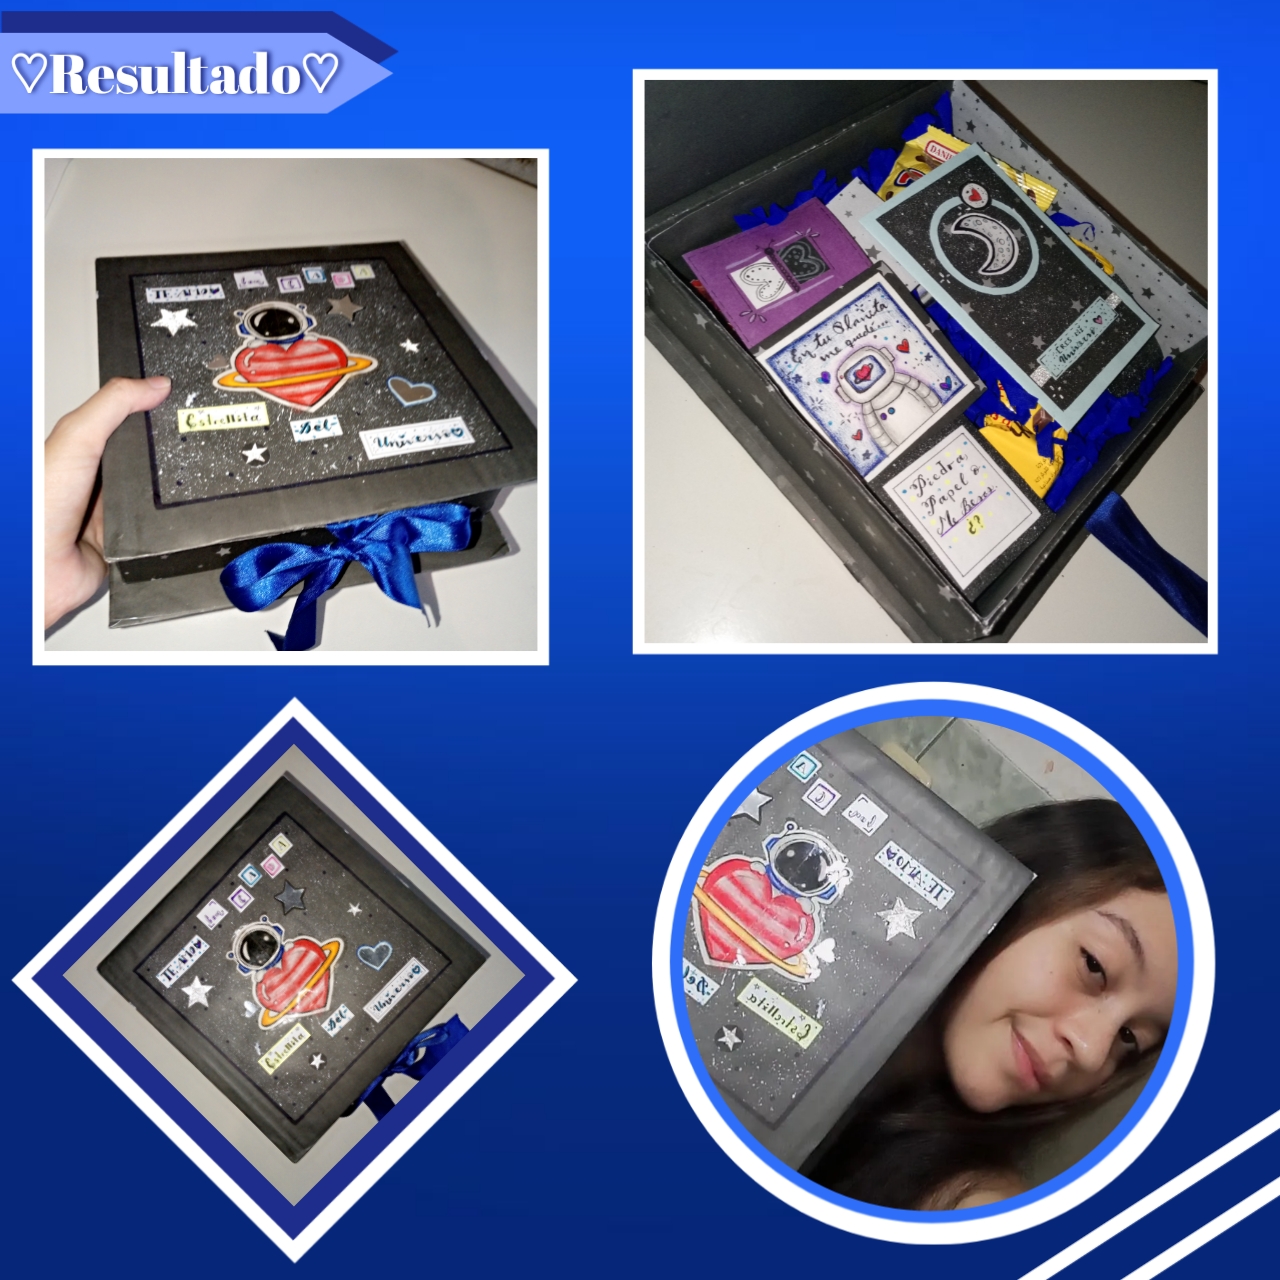
Así de una manera sencilla tienen una caja hermosa, hecha en casa, para rellenar con lo que queramos, como regalitos, cartas o dulces, lista para regalar a esas personas especiales en nuestras vidas, solo es cuestión de tener un poco de paciencia y hacer las cosas con el amor que merece. Está caja es totalmente personalizable, incluso sirve para adaptarla más a la temática, podrían dibujar una portada de un libro y simular así un libro grande, es una idea interesante que les dejo sobre la mesa.
So in a simple way you have a beautiful box, homemade, to fill with whatever you want, as gifts, letters or candy, ready to give to those special people in our lives, it's just a matter of having a little patience and do things with the love it deserves. This box is fully customizable, it even serves to adapt it more to the theme, you could draw a book cover and simulate a big book, it is an interesting idea that I leave on the table.
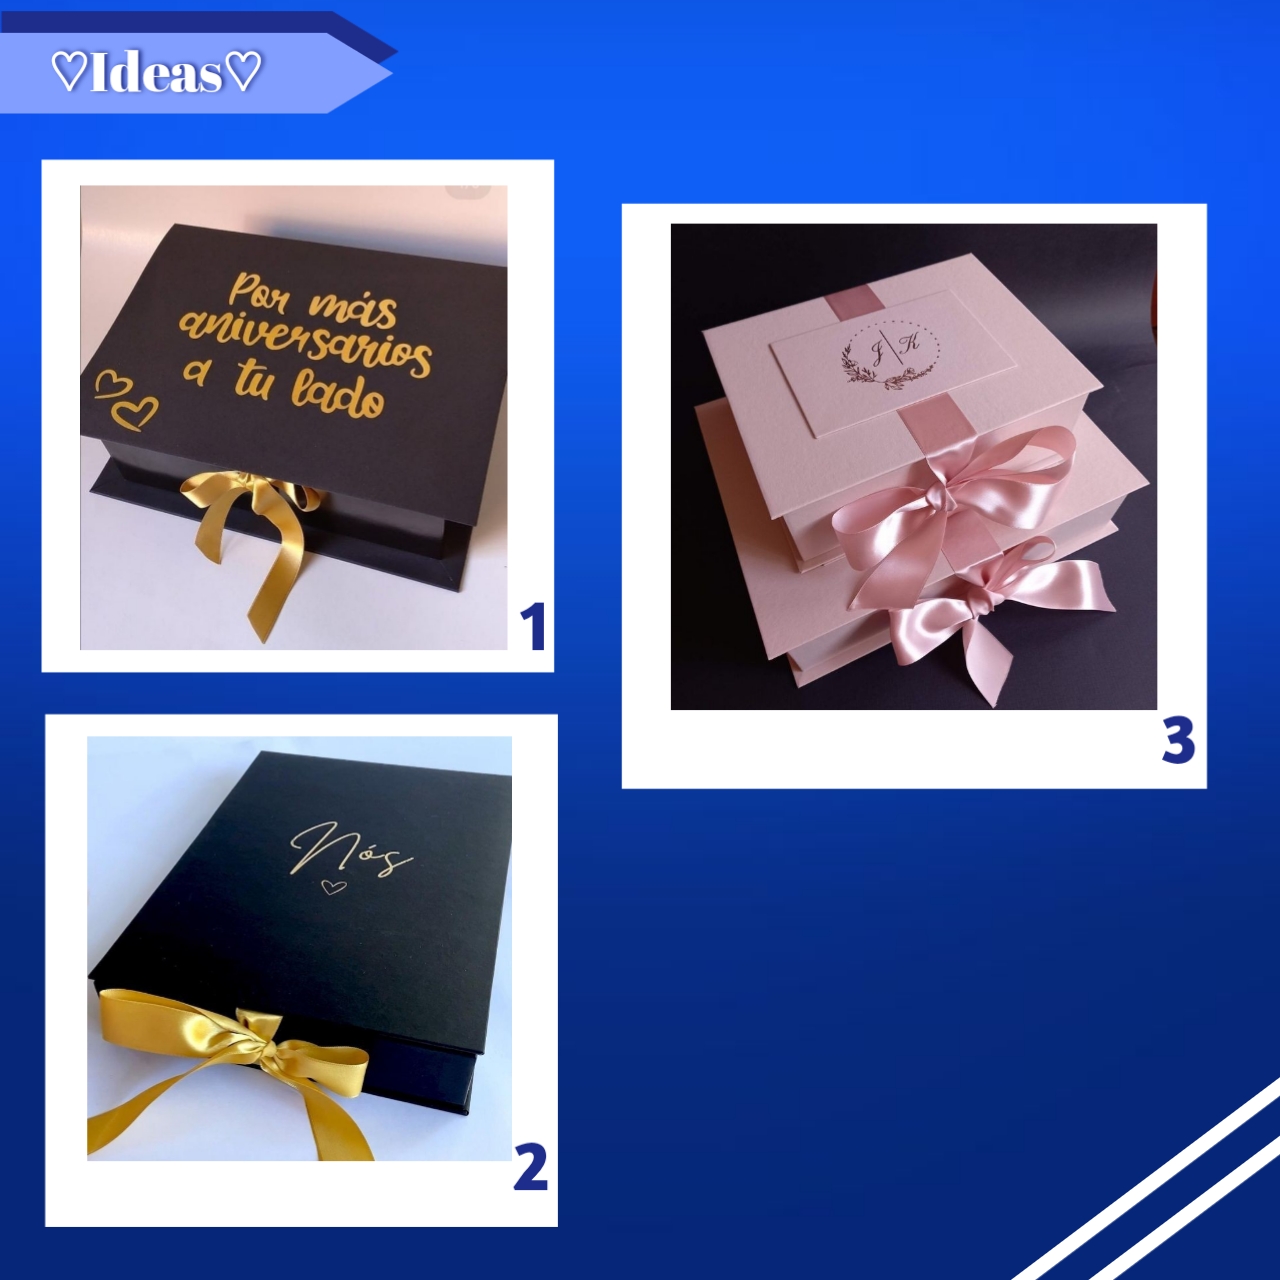
Fuente 1
Fuente 2
Fuente 3
Por aquí antes de despedirme les dejo Inspiración para hacer estás cajas libro, estás con su respectiva fuente para que los lleve al sitio original, saludos.
Here before I say goodbye I leave you Inspiration to make these book boxes, you are with their respective source to take you to the original site, greetings.
Ha sido un placer compartir con ustedes la tarde de hoy, estoy totalmente agradecida y felíz de poder enseñarles este tutorial paso a paso, espero que les haya gustado y puedan recrearla a su manera, un abrazo lleno de cariño, familia Hive Diy.❤️
It has been a pleasure to share with you this afternoon, I am totally grateful and happy to be able to show you this step by step tutorial, I hope you liked it and you can recreate it in your own way, a hug full of love, Hive Diy.❤️ family.
🖤✨¡Muchas gracias por leer!✨🖤
🖤✨Thank you very much for reading!✨🖤
Photos of my authorship taken from my Xiaomi Redmi 7 phone, edited in the free version of PixeLab.
Quedo muy lindo amiga, felicidades
Muchas gracias amiga, saludos.💗
That looks like a durable box. Great tool for storing certain things. Wel done
Yes, after giving it as a gift, the other person can give it an additional use, thank you and best regards.✨
Muy bonita idea de verdad me gusto mucho. Felicidades muy bonito tu trabajo
Encantada, muchas gracias, saludosss.✨💙
Wow, me encantó. Gracias por compartir esta idea creativa. Excelente trabajo sin lugar a dudas.
Me alegra que te haya gustado, un placer amiga, un abrazo.✨💗
oohh genial! pensé que sería más dificil, pero no, es bastante práctica, yo tengo una cajita de metal donde ya no le cabe nada.. creo que llevaré a cabo esta idea.
Tiene cierto trabajo, pero no es la gran cosa, se puede realizar fácil. Está ideal para ti entonces jsjjajs, espero que te guste el resultado.✨
Congratulations @stefania16! You have completed the following achievement on the Hive blockchain And have been rewarded with New badge(s)
Your next target is to reach 600 replies.
You can view your badges on your board and compare yourself to others in the Ranking
If you no longer want to receive notifications, reply to this comment with the word
STOPCheck out our last posts:
Excelente te quedó esta cajita amiga muy buena creatividad te felicito feliz noche.
Muchas gracias, saludos y un enorme abrazo.✨😇
De igual manera feliz noche bendiciones un abrazo.