Dulceros para Halloween creativos y hermosos 🍬🧡 | Paso a Paso bien explicado 🎃🕷️ [ESP-ENG]
Hello my super creative family! Very good afternoon I wish you all with much affection, I hope that today Thursday is greatly blessed for everyone, that you make the most of it early, keep in mind your creativity and be productive, of course I also wish you good health and the best things, not only today but the rest of the days, the month and always family, I hope you are super well and every day goes better.♡
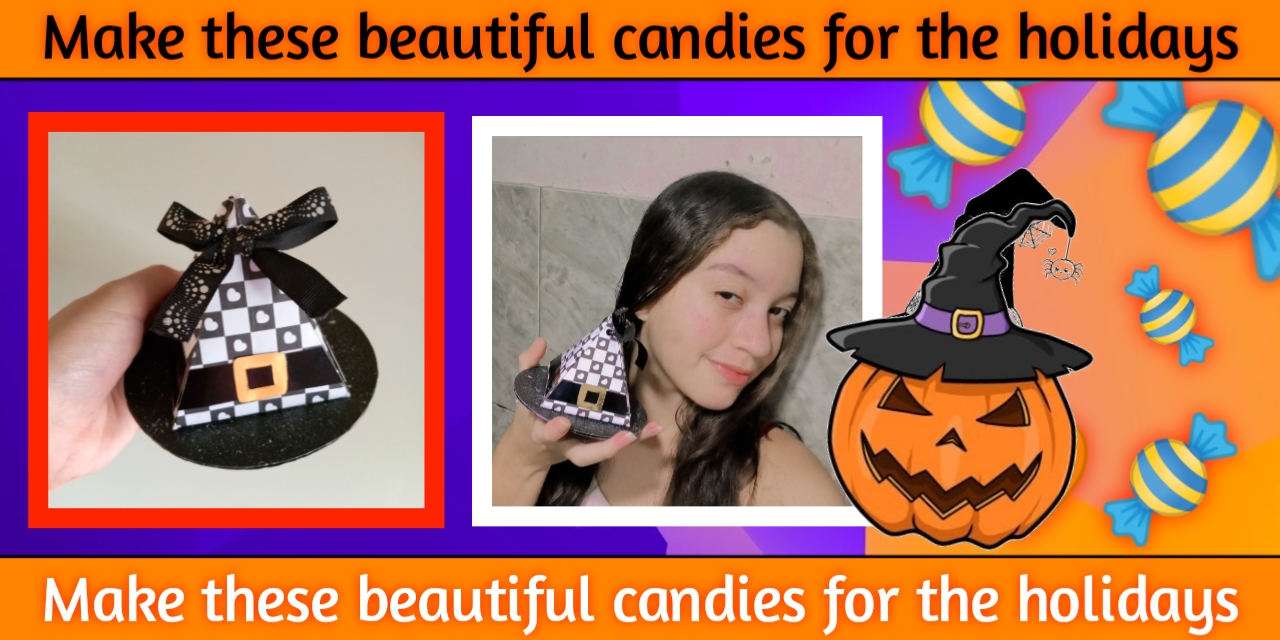
¿Dulce o Truco? 🍬🎃, En está preciada ocasión, vengo con mucho gusto a enseñarles la elaboración de un precioso dulcero/cotillón que realice en casa, ideal para dar como detalle a los invitados de alguna fiesta o incluso para regalar algún regalo pequeño. Además está personalizado con la temática del mes de octubre, Halloween, siendo algo original y creativo para innovar en estás fechas festivas, me uno a está temática con una manualidad, bastante bonita y fácil de hacer, es sencillo, pero práctico, el toque único lo damos nosotros con nuestra creatividad, es personalizado a nuestro gusto 100%, así que vamos con ello.
**In this precious occasion, I come with great pleasure to show you the elaboration of a beautiful candy/cotillion box that I made at home, ideal to give as a detail to the guests of a party or even to give a small gift. It is also personalized with the theme of the month of October, Halloween, being something original and creative to innovate in these festive dates, I join this theme with a craft, quite nice and easy to do, it is simple, but practical, the unique touch is given by us with our creativity, it is personalized to our taste 100%, so let's go with it.
📑✨Materials✨📑
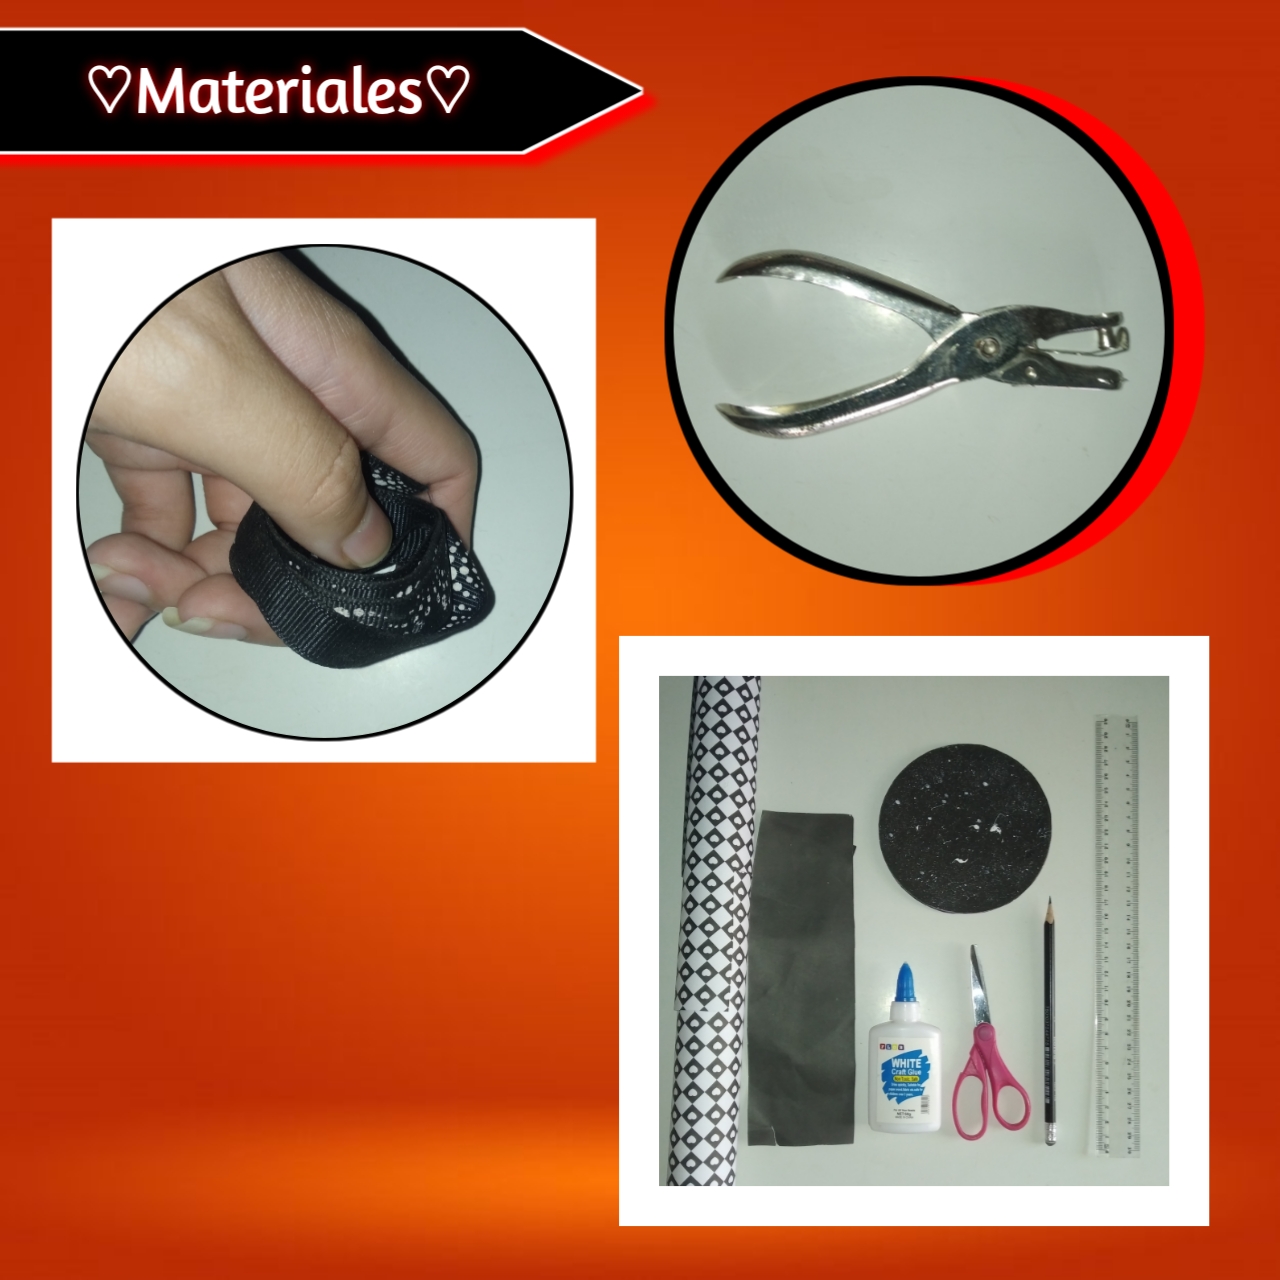
- Cartulinas
- Silicón o pegamento
- Tijeras
- Reglas
- Lápiz
- Base circular
- Cardboard
- Silicone or glue
- Scissors
- Rulers
- Pencil
- Circular base
♡🧡🕷️Step bye Step🕷️🧡♡
Paso 1:
Step 1:
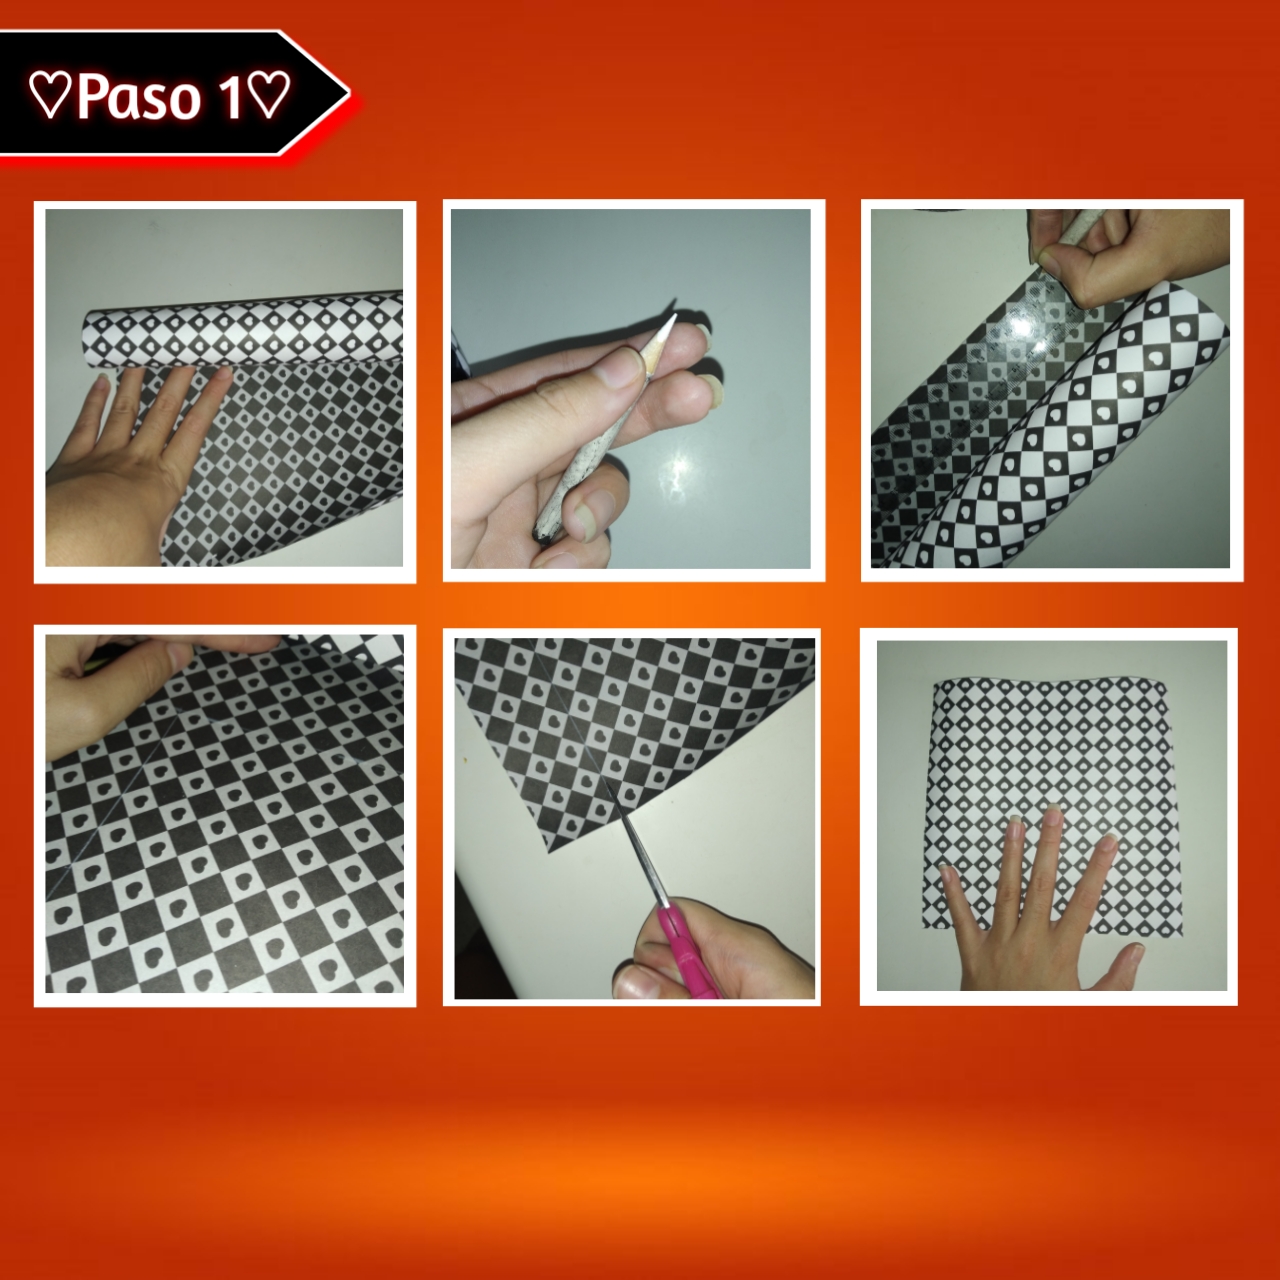
Comenzaremos por extender nuestra cartulina, para esto tomaremos una regla y un lápiz, en esta ocasión yo use un color blanco para que pudieran apreciar mejor en la cámara, así trazaremos un cuadrado a la medida de nuestra gusto yo está vez marque uno de 18cm de largo x 18cm de ancho,luego nos queda recortar muy bien y obtener finalmente nuestro cuadrado.
We will begin by extending our cardboard, for this we will take a ruler and a pencil, this time I used a white color so that they could better appreciate in the camera, so we will draw a square to the extent of our taste, this time I marked one of 18cm long x 18cm wide, then we have to cut very well and finally get our square.
Paso 2:
Step 2:
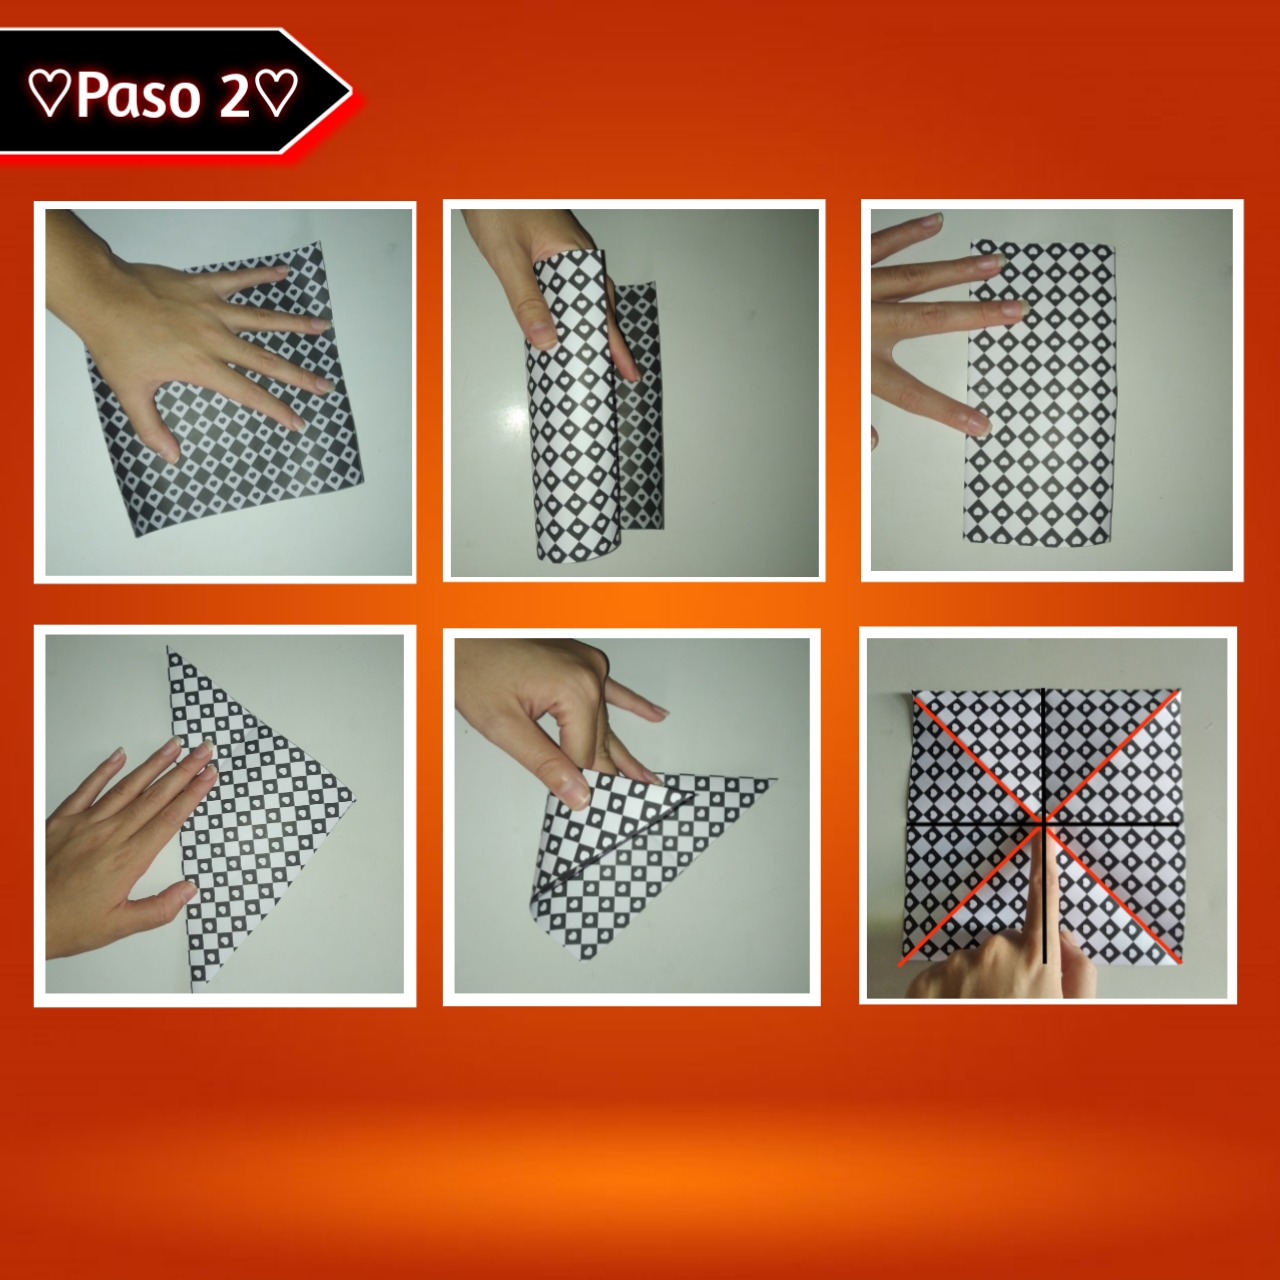
Ahora doblaremos a la mitad de un lado y a la mitad del otro, formando una línea horizontal en el centro e igualmente vertical en el medio (líneas rectas perpendiculares), volvemos a extender, así tomaremos una punta de las esquinas y la llevaremos con cuidado hacia el otro extremo, al estar a la par realizamos el dobles y marcamos muy bien, teniendo esta especie de triángulo, ahora de punta a punta lo volvemos a doblar a la mitad, así abrimos y tenemos otras dos líneas de punta a punta.
Now we fold in half on one side and half on the other, forming a horizontal line in the center and equally vertical in the middle (perpendicular straight lines), we extend again, so we take a tip of the corners and take it carefully to the other end, being at par we make the double and mark very well, having this kind of triangle, now from tip to tip we fold it in half again, so we open and we have two other lines from tip to tip.
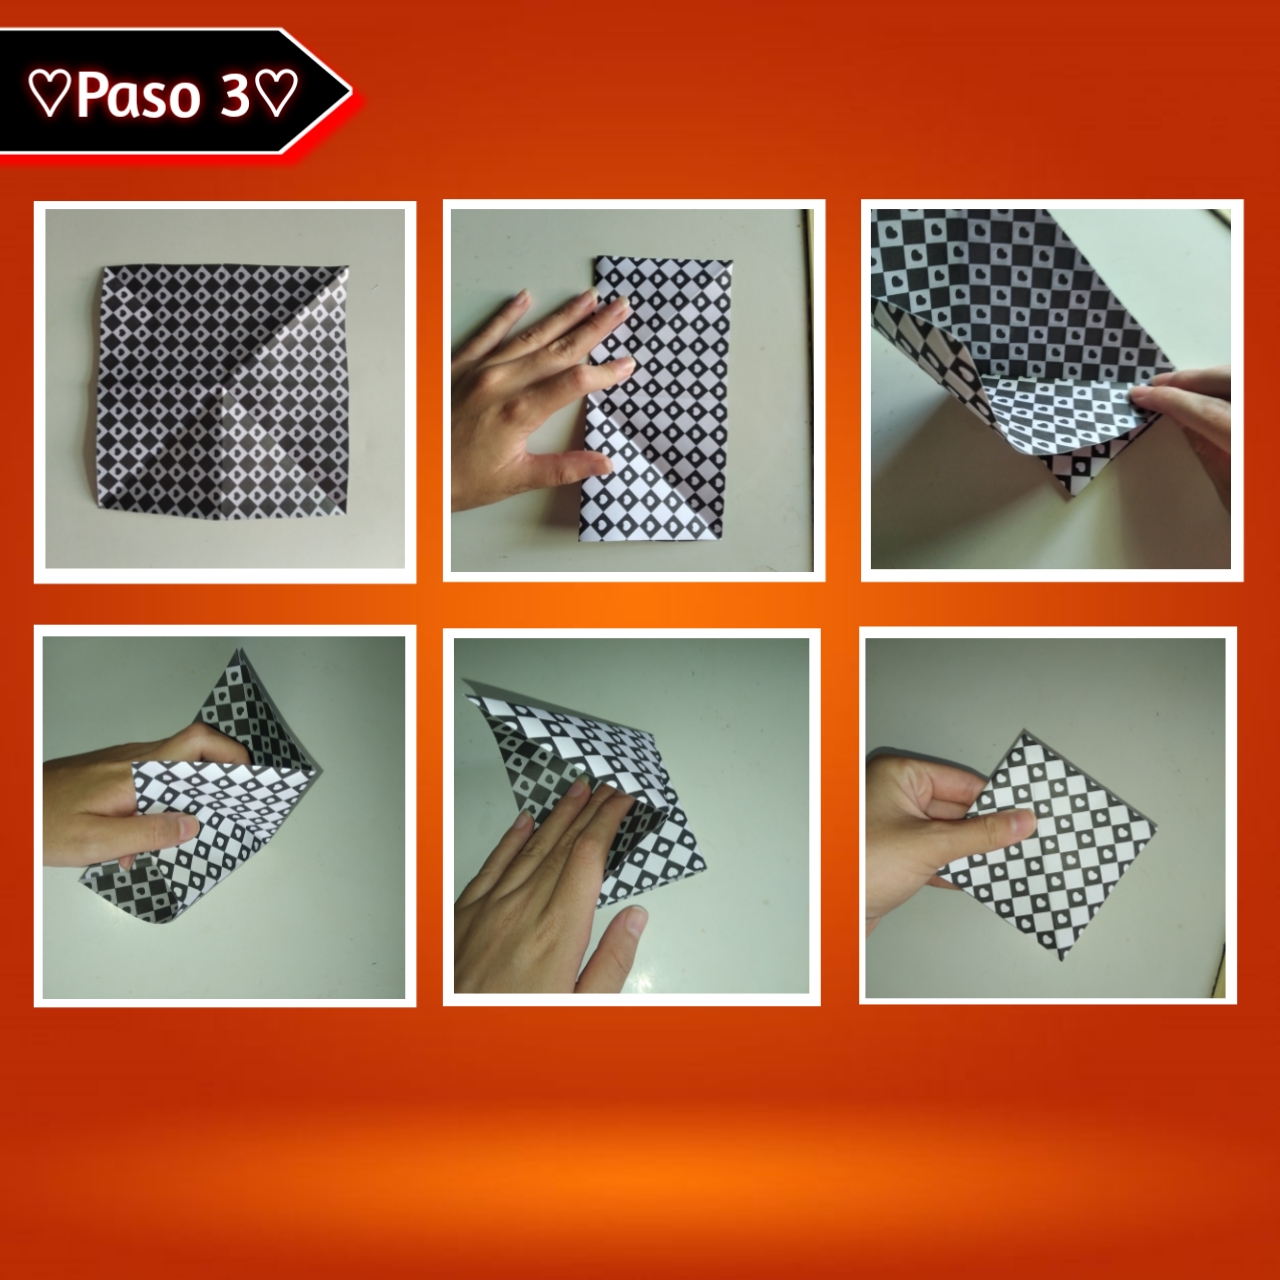
Paso 3:
Step 3:
Ya teniendo nuestra pieza bien marcada, doblaremos a la mitad, al doblar podemos observar una especie de triángulo en el centro ya marcado, de está manera abrimos un poco y lo doblaremos hacía adentro y abajo, remarcamos otro poco y haremos exactamente lo mismo del otro lado, hasta que nos quede está figura que pueden observar en la imágen, que es como un rombo.
Once we have our piece well marked, we will fold in half, when folding we can see a kind of triangle in the center already marked, in this way we open a little and fold it inwards and downwards, we mark another little and do exactly the same on the other side, until we have this figure that you can see in the image, which is like a rhombus.

Paso 4:
Step 4:
Seguimos doblando, tenemos como guía una línea recta que se encuentra en el centro de está figura (rombo), también tenemos varias capas en este, así tomaremos de un lado una esquina (de la primera capa) y la llevaremos exactamente hasta está línea del medio, marcamos el dobles y repetimos lo mismo del otro lado, formando como un triángulo isósceles con la unión de estos, en el medio de la pieza. Continuamos volteando la pieza y haciendo el mismo procedimiento en esta parte de atrás, hasta unificar la pieza de cada lado.
We continue folding, we have as a guide a straight line that is in the center of this figure (rhombus), we also have several layers in this, so we will take from one side a corner (of the first layer) and we will take it exactly to this line in the middle, we mark the double and repeat the same on the other side, forming an isosceles triangle with the union of these, in the middle of the piece. We continue flipping the piece and doing the same procedure on this back side, until we unify the piece on each side.
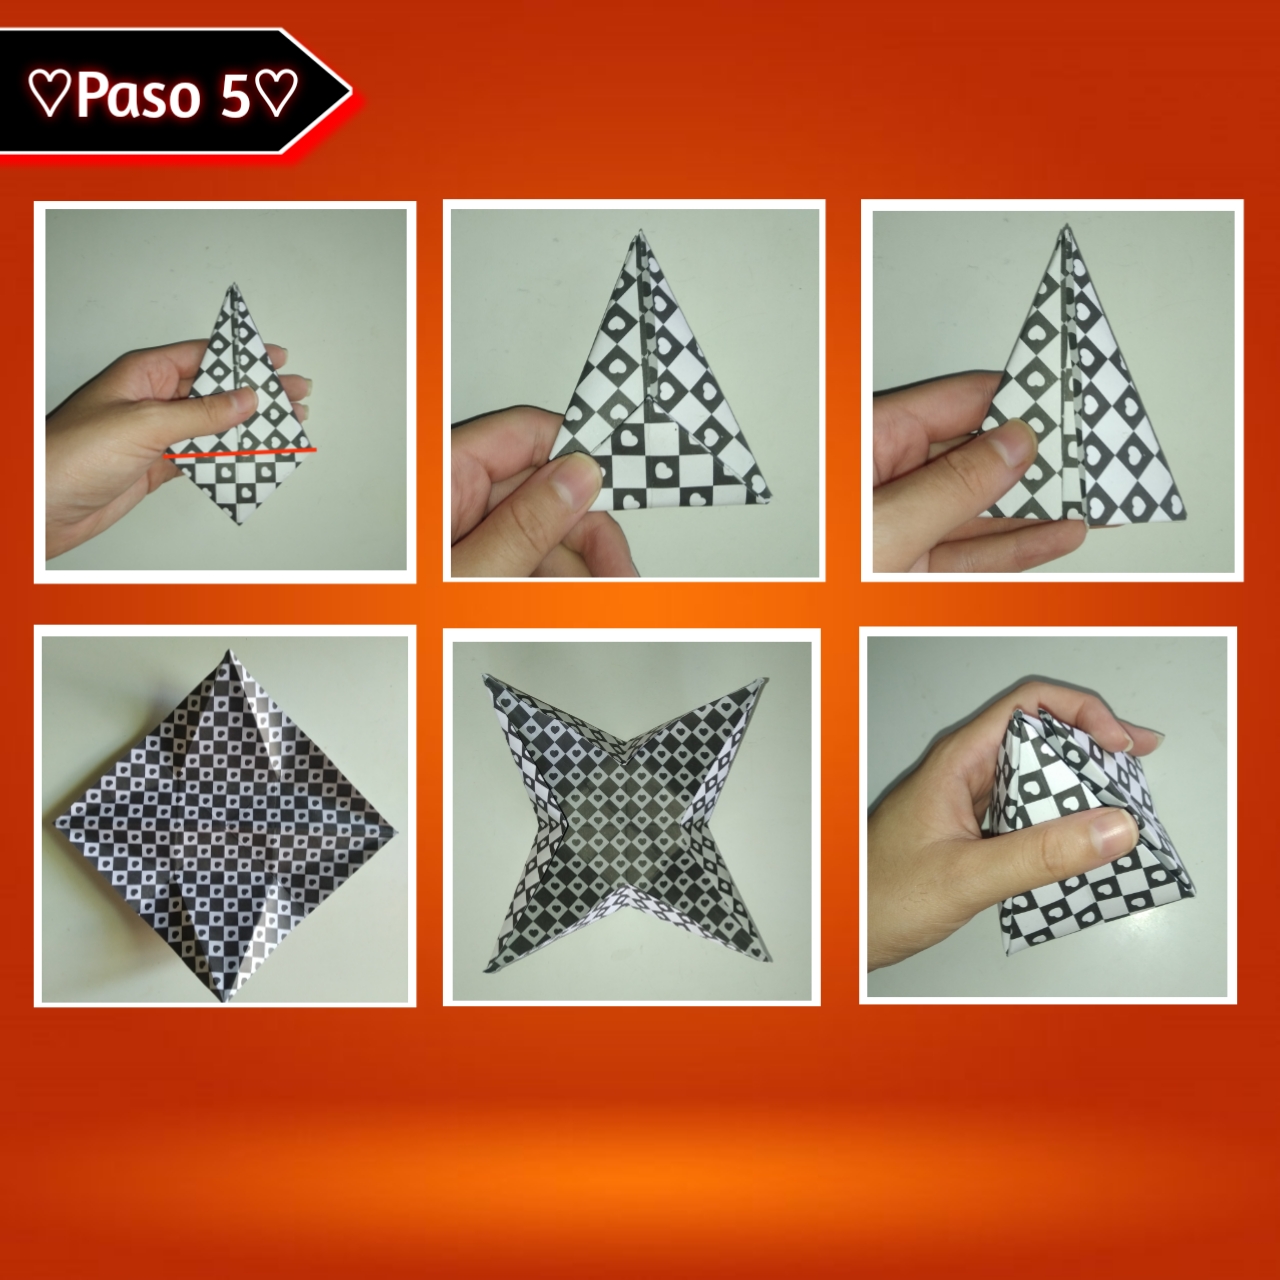
Paso 5:
Step 5:
Continuando, en la pieza queda un triángulo sobresaliente, este lo doblaremos hacía adelante y después hacia atrás, para poder marcar el dobles bastante bien, ahora abriremos completamente la pieza y podemos apreciar varios dobleces, sobre todo la figura del dulcero. Ya con la figura, vamos a doblar las esquinas sobresalientes hacía adentro, formando una clase de borde en cada uno, al cerrar podemos ver la forma del dulcero claramente.
Continuing, in the piece there is a protruding triangle, we will fold it forward and then backward, to be able to mark the folds quite well, now we will open the piece completely and we can see several folds, especially the figure of the candy box. Now with the figure, we are going to fold the protruding corners inwards, forming a kind of border on each one, when we close the piece we can see the shape of the candy box clearly.
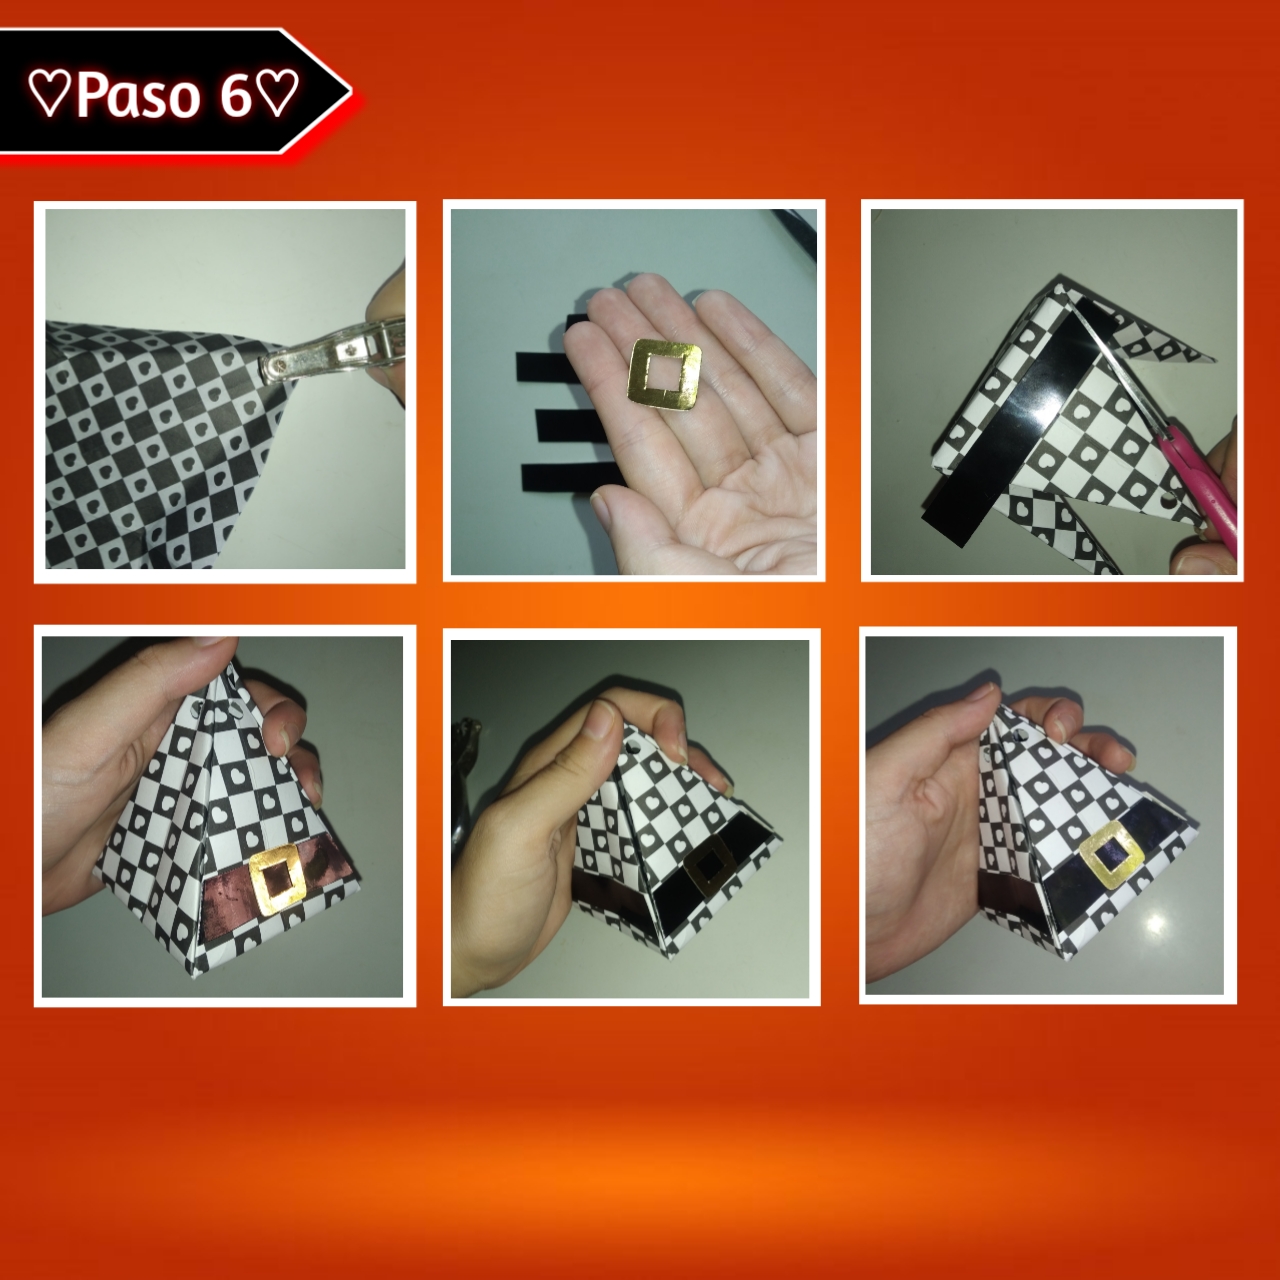
Paso 6:
Step 6:
Nos queda decorar amigos, vamos antes a abrir en cada triángulo un agujero en la parte cercana a la punta, intentando que queden centrados y a la misma altura, pueden abrir lo hoyos con un abridor o incluso con algo puntiagudo. Ahora bien para continuar con la decoración recortaremos cuatro tiras de cartulina en color negro (o depende el que quieran), además también un pequeño borde cuadrado de color dorado, así con silicón o pegamento, pegaremos una tira con un dedo aproximadamente de separación de la parte de abajo, encima añadimos la pieza dorada en el medio, recortamos el excedente y pegamos las demás tiras al mismo nivel.
We have to decorate friends, first we will open in each triangle a hole in the part near the tip, trying to keep them centered and at the same height, you can open the holes with an opener or even with something sharp. Now to continue with the decoration we will cut out four strips of cardboard in black color (or depending on the color you want), also a small square border in gold color, so with silicone or glue, we will glue a strip with a finger approximately of separation from the bottom, on top we add the golden piece in the middle, cut the excess and glue the other strips at the same level.
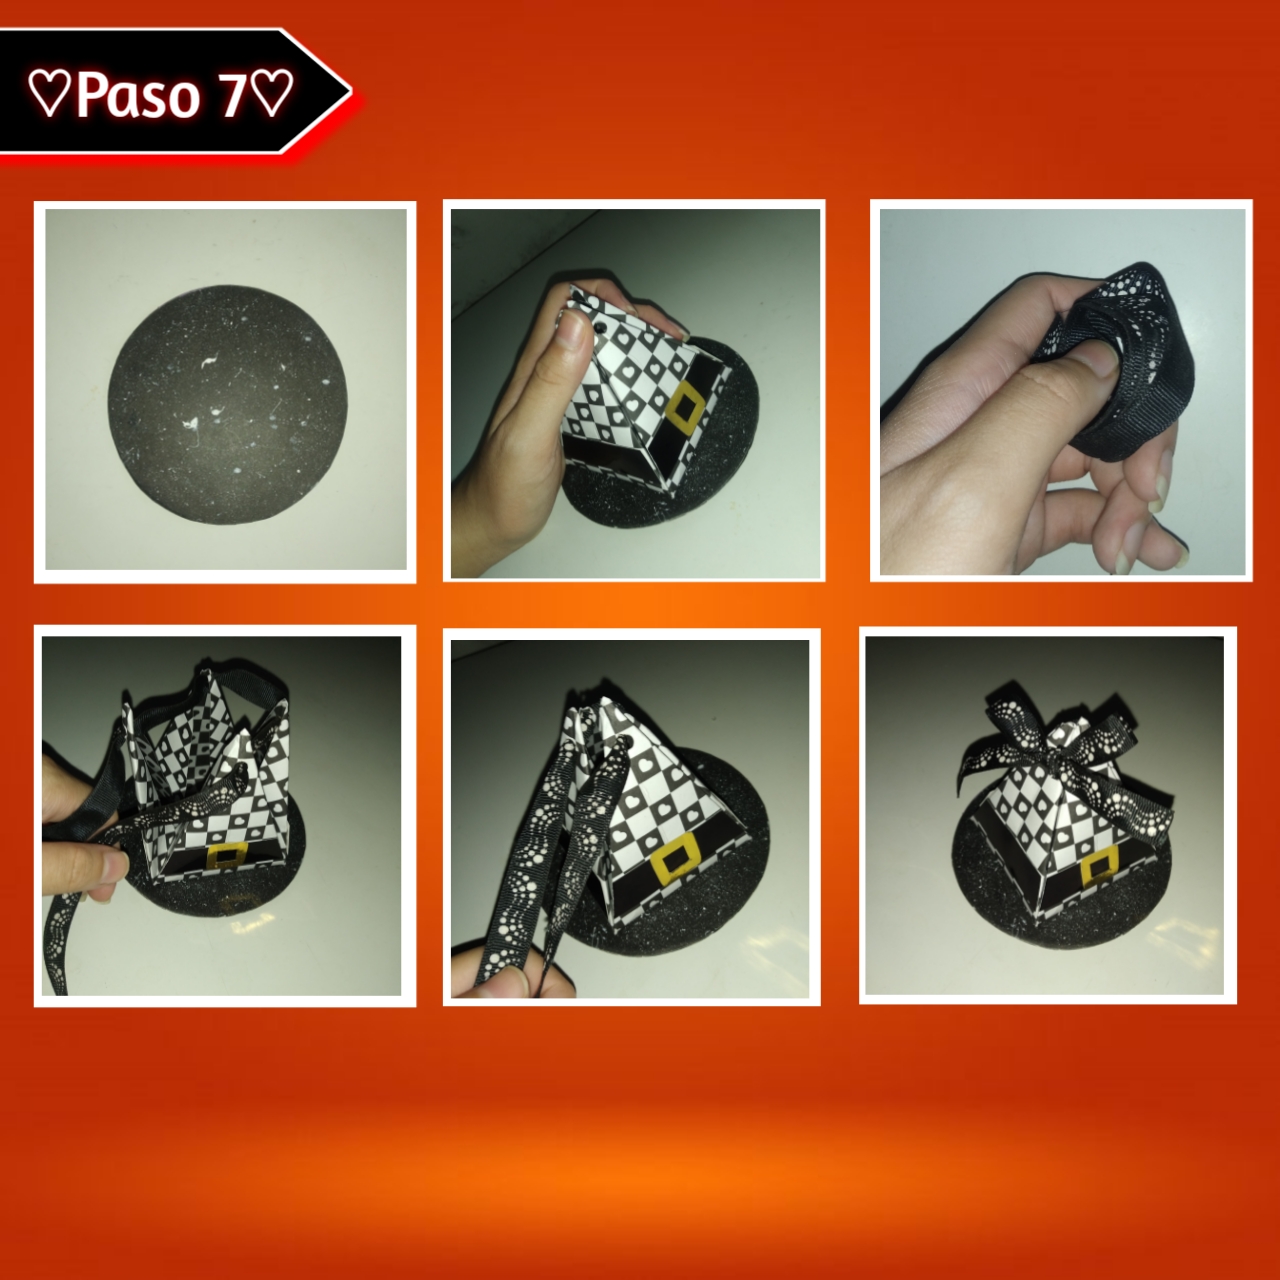
Paso 7:
Step 7:
Vamos a agregar los últimos detalles, tomaremos la pieza anterior, le agregaremos silicón y la pegaremos de forma centrada en una base redonda, previamente forrada, continuamos tomando la cinta y seguidamente vamos insertando está por los agujeros, podemos sacarla por delante en el centro o de un lado, metemos los dulces, además de caramelos y por fin apretamos cerrando y hacemos un lindo lazo o moño.
Let's add the last details, we will take the previous piece, add silicone and glue it centered on a round base, previously lined, we continue taking the ribbon and then we insert it through the holes, we can remove it from the front in the center or on one side, we put the candy, plus candies and finally we tighten closing and make a nice bow or ribbon.

Así de una manera, fácil y rápida podemos realizar desde casa nuestros propios cotillones y/o dulceros para distintas ocasiones, como para este Halloween. Debemos tener en cuenta que los posibles diseños son infinitos, ya que todo es cuestión de poner nuestra creatividad en marcha, existen muchas temáticas, muchos colores, tamaños, tipos de decoración y todo esto lo podemos elegir como más nos guste, así que si buscan algo original y hermoso para obsequiar esto es más que ideal.
This way, in a quick and easy way, we can make our own cotillions and/or candy boxes for different occasions, such as for this Halloween. We must take into account that the possible designs are infinite, since it is all a matter of putting our creativity into action, there are many themes, many colors, sizes, types of decoration and all this we can choose as we like, so if you are looking for something original and beautiful to give as a gift this is more than ideal.
Colorín, colorado este cuento se ha acabado, llega a su fin la manualidad del día de hoy, espero que les haya gustado la idea y la recreen si es de su agrado, ha sido un placer compartir con ustedes en una nueva oportunidad, les agradezco su atención y por llegar hasta aquí, los quiero familia un abrazo y hasta pronto.🧡🎃
Colorín, colorado this story is over, today's craft comes to an end, I hope you liked the idea and recreate it if you like it, it has been a pleasure to share with you in a new opportunity, I thank you for your attention and for coming here, I love you family a hug and see you soon.🧡🎃
🧡✨¡Gracias por leer! Felíz día✨🧡
🧡✨Thanks for reading! Happy reading✨🧡
Photos of my authorship taken from my Xiaomi Redmi 7 phone, edited in the free version of PixeLab
!DIY
!discovery 30
🥺✨
❤️
This post was shared and voted inside the discord by the curators team of discovery-it
Join our Community and follow our Curation Trail
Discovery-it is also a Witness, vote for us here
Delegate to us for passive income. Check our 80% fee-back Program
Thanks💗
That is aovely little box. Can be used to collect candies too. Nice.
Así es, es bastante funcional y bonito JSJSJJS, gracias.💜
You can query your personal balance by
!DIYSTATSMe gustaría ver qué tal, gracias 💗
Muy apropiado para la fecha, te quedo muy lindo.
A todo el estilo de halloween, muchas gracias 🧡
Amiga, te felicito por tu creatividad,me encantó este diseño de dulcero. Exitos.
Muchas gracias amiga, apreció tu apoyo, saludos.💜✨
Que bonito y creativo, esta ideal para regalar en estas fechas ya que esta ambientado en Halloween, te felicito por tu talento para crear cositas unicas 👏 no soy muy afan de estas fechas pero me encanta la decoracion (y los ducles) jajaja
Saludos 😊
Así essss, esa es la mejor parte, concuerdo contigo, un abrazo.🧡
@stefania16
https://inleo.io/threads/view/hive-130560/re-leothreads-2c11jeah6
https://twitter.com/hivediy47901/status/1718061898262843488
😍😍🧡