Diy Hermoso centro de mesa para estás navidades❄️✨ | Paso a paso 👣💙 [ESP-ENG]
Hello everyone, my dear creative Hive Diy family! Have a very good afternoon from me, I hope this week as well as the whole month, is full of blessings and beautiful days, each one full of health, wellness, joy, love, passion, creativity, productivity and many, many good ideas and desire to share in our wonderful community, I wish you a happy December, dear friends.🦋🤍
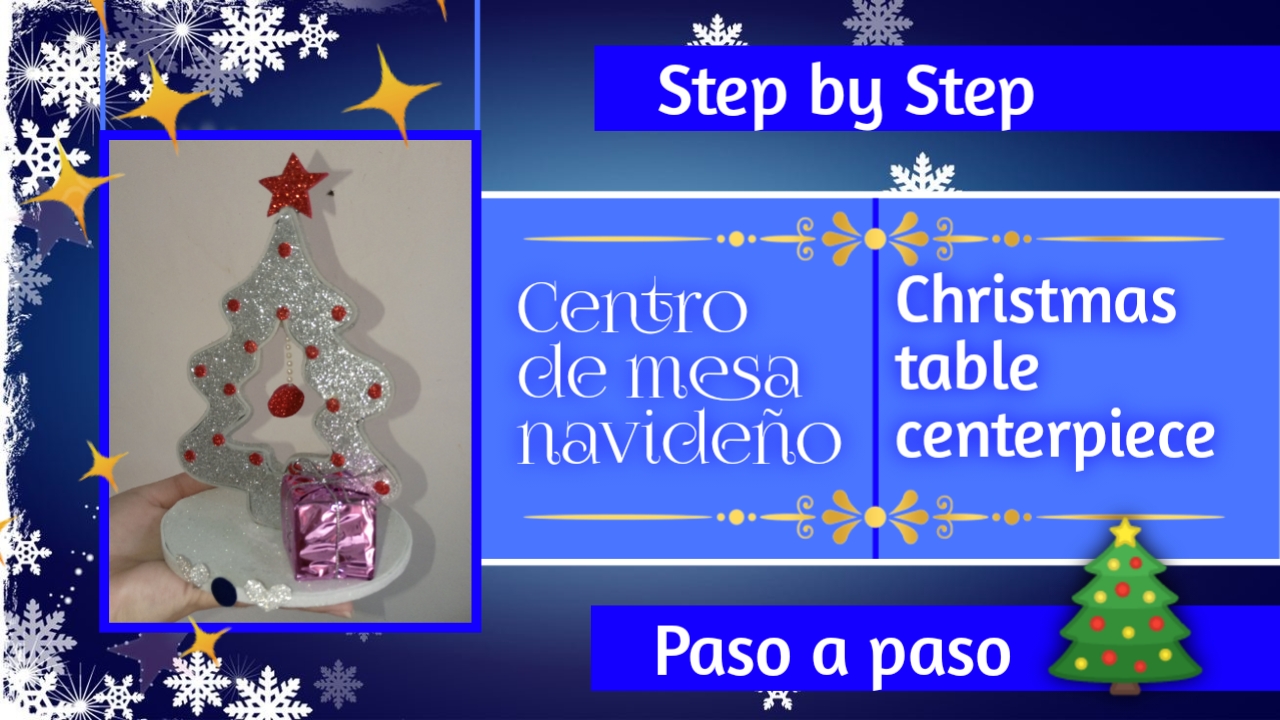
Está vez les traigo la primera manualidad navideña que realizó en este hermoso mes de diciembre y por ende de navidad, este es un mes lleno de magia, al igual que de muchas manualidades creativas y únicas que podemos hacer. Así, vengo a mostrarles con mucho amor y cariño, un hermoso centro de mesa que realice para empezar a dar vida a este mes, un detalle que queda precioso en nuestra mesa, da ese toque navideño, siendo ideal para decorar en la cena familiar, es un precioso arbolito de navidad que podemos hacer fácilmente en casa con materiales sencillos, quédate y te enseñaré el paso a paso completo, a continuación.
This time I bring you the first Christmas craft that I made in this beautiful month of December and therefore Christmas, this is a month full of magic, as well as many creative and unique crafts that we can do. So, I come to show you with love and affection, a beautiful centerpiece that I made to start giving life to this month, a detail that is beautiful on our table, gives that Christmas touch, being ideal for decorating the family dinner, is a beautiful Christmas tree that we can easily make at home with simple materials, stay and I'll show you the complete step by step, below.
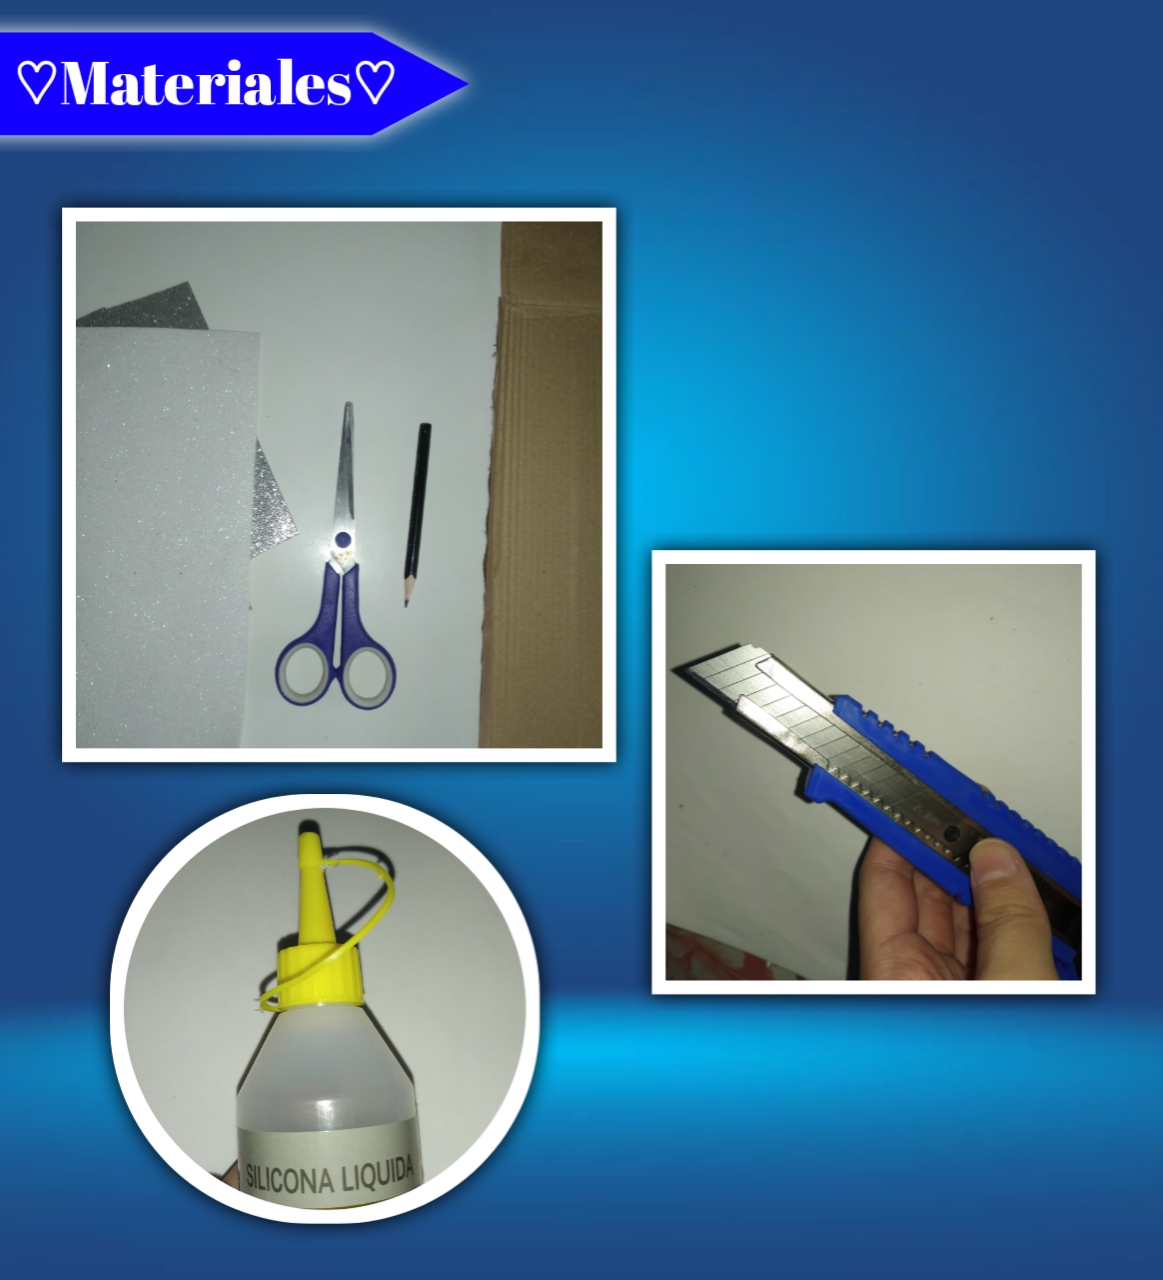
♡📑💙Materials💙📑♡
- Cartón reciclado
- Foami (3) de preferencia escarchado
- Tijeras
- Lápiz
- Cutter
- Silicón frío y caliente
- Recycled cardboard
- Foami (3) preferably frosted
- Scissors
- Pencil
- Cutter
- Hot and cold silicone
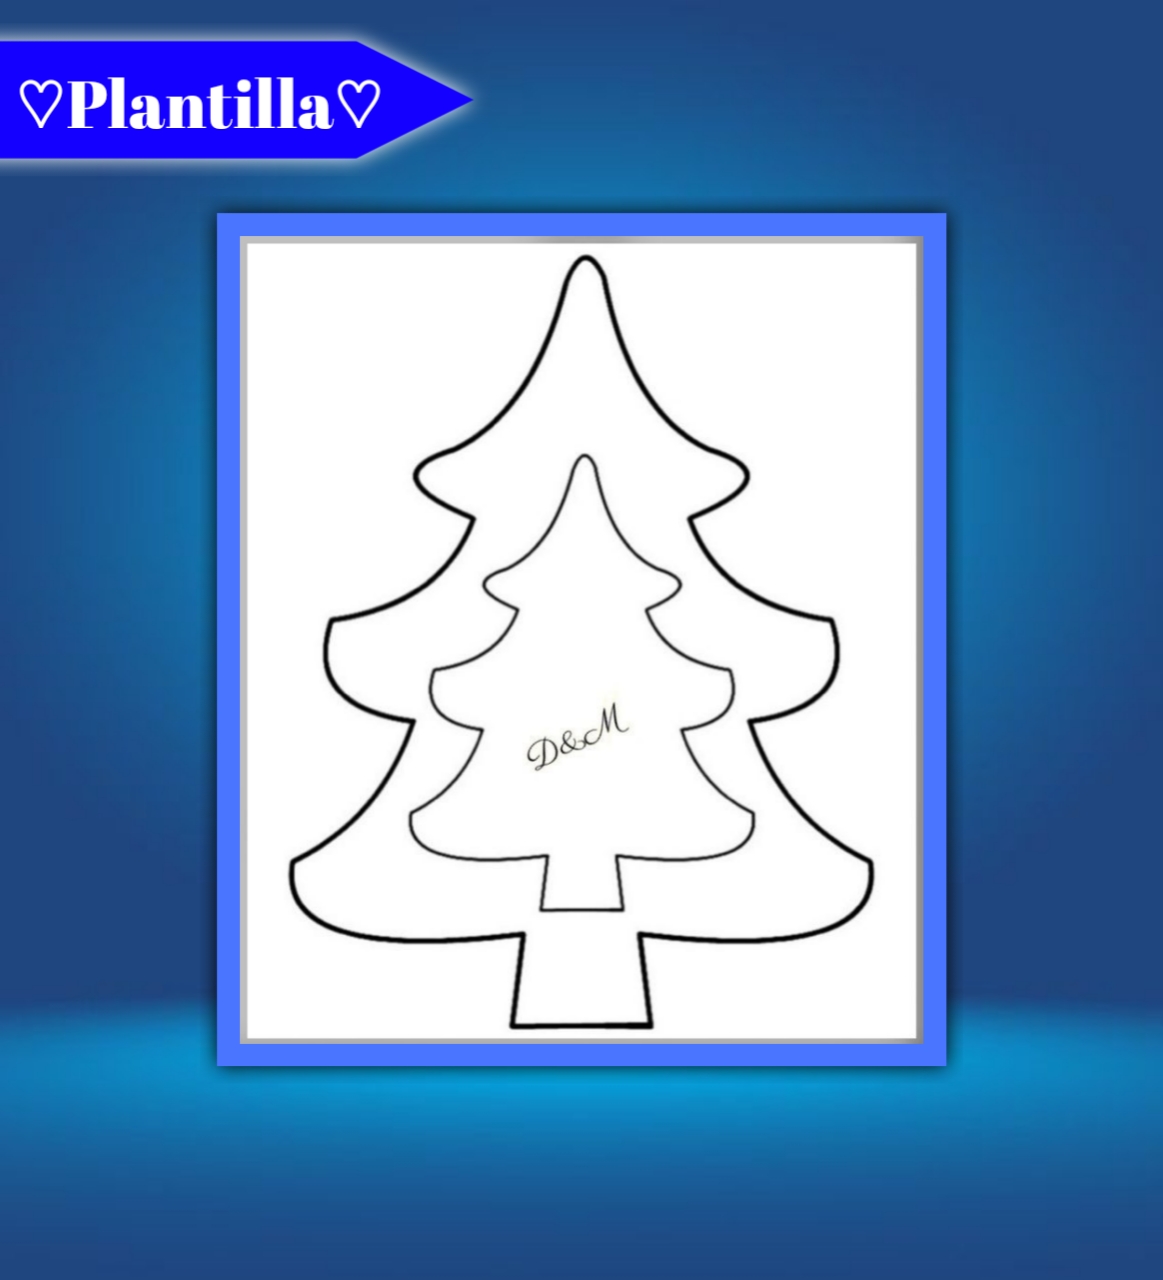
Plantilla aquí
♡🤍✨Step by Step✨🤍♡
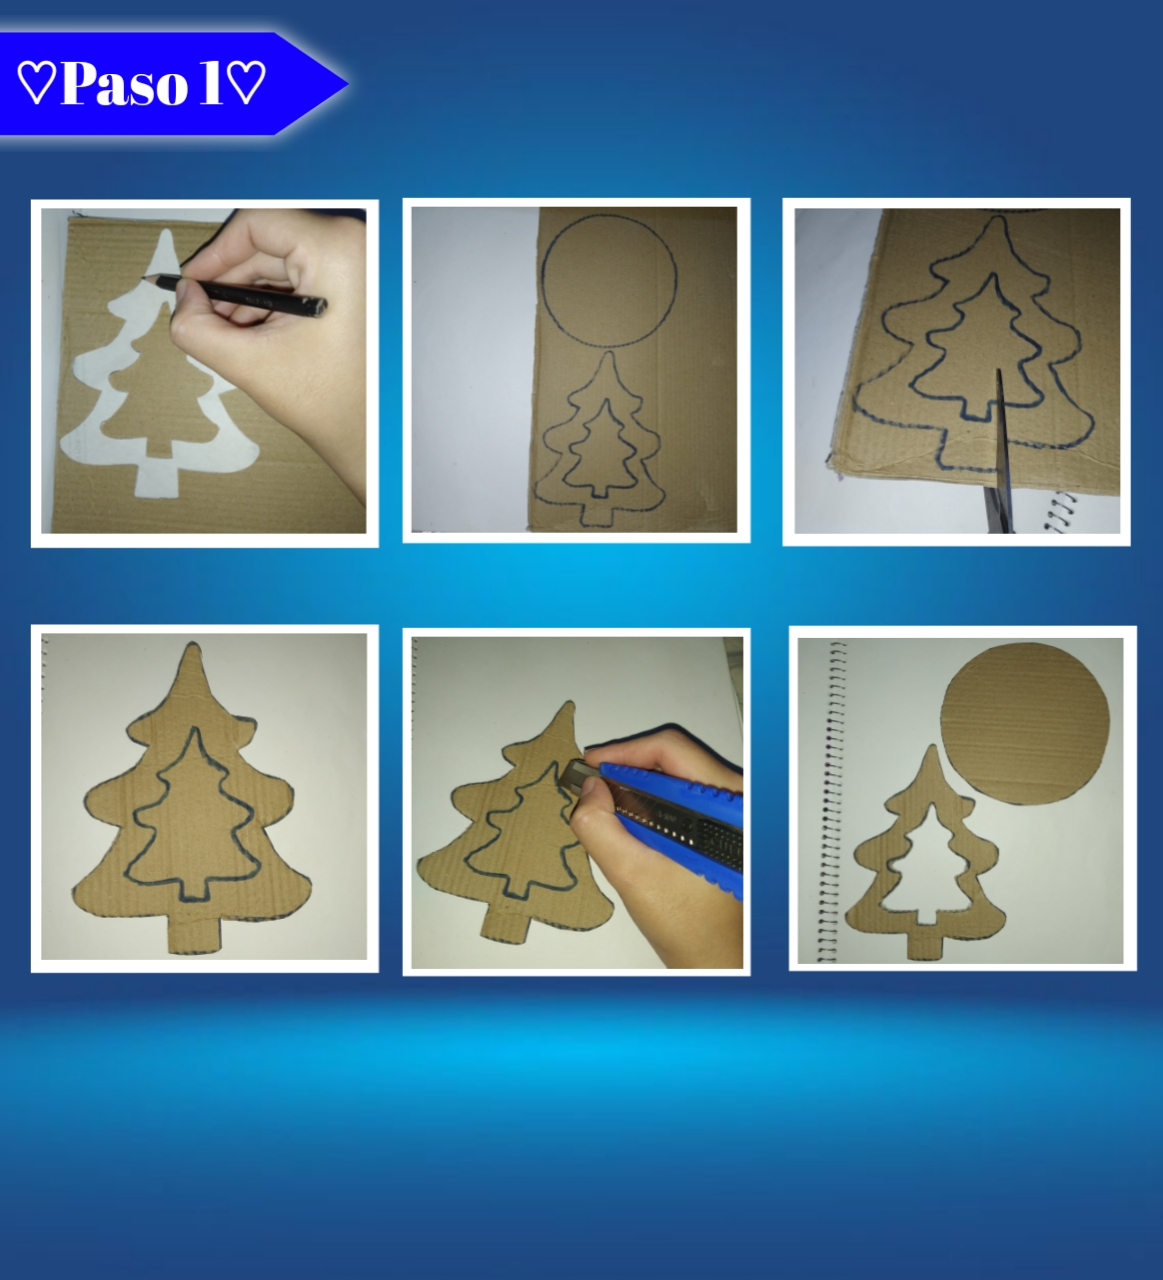
Paso 1:
Step 1:
Para empezar tomaremos nuestro cartón y encima de este pondremos nuestra plantilla (la dejaré arriba), así con la ayuda de un lápiz marcaremos todo el contorno y la figura correctamente, hasta terminar toda, añadiremos un pequeño círculo, yo lo marque con marcador para que aprecien un poco mejor. Luego se procede a tomar las tijeras e ir recortando con cuidado hasta terminar y obtener ambas figuras completas.
To start we will take our cardboard and on top of it we will put our template (I will leave it on top), so with the help of a pencil we will mark all the contour and the figure correctly, until we finish everything, we will add a small circle, I marked it with a marker so you can appreciate it a little better. Then proceed to take the scissors and go carefully trimming to finish and get both figures complete.
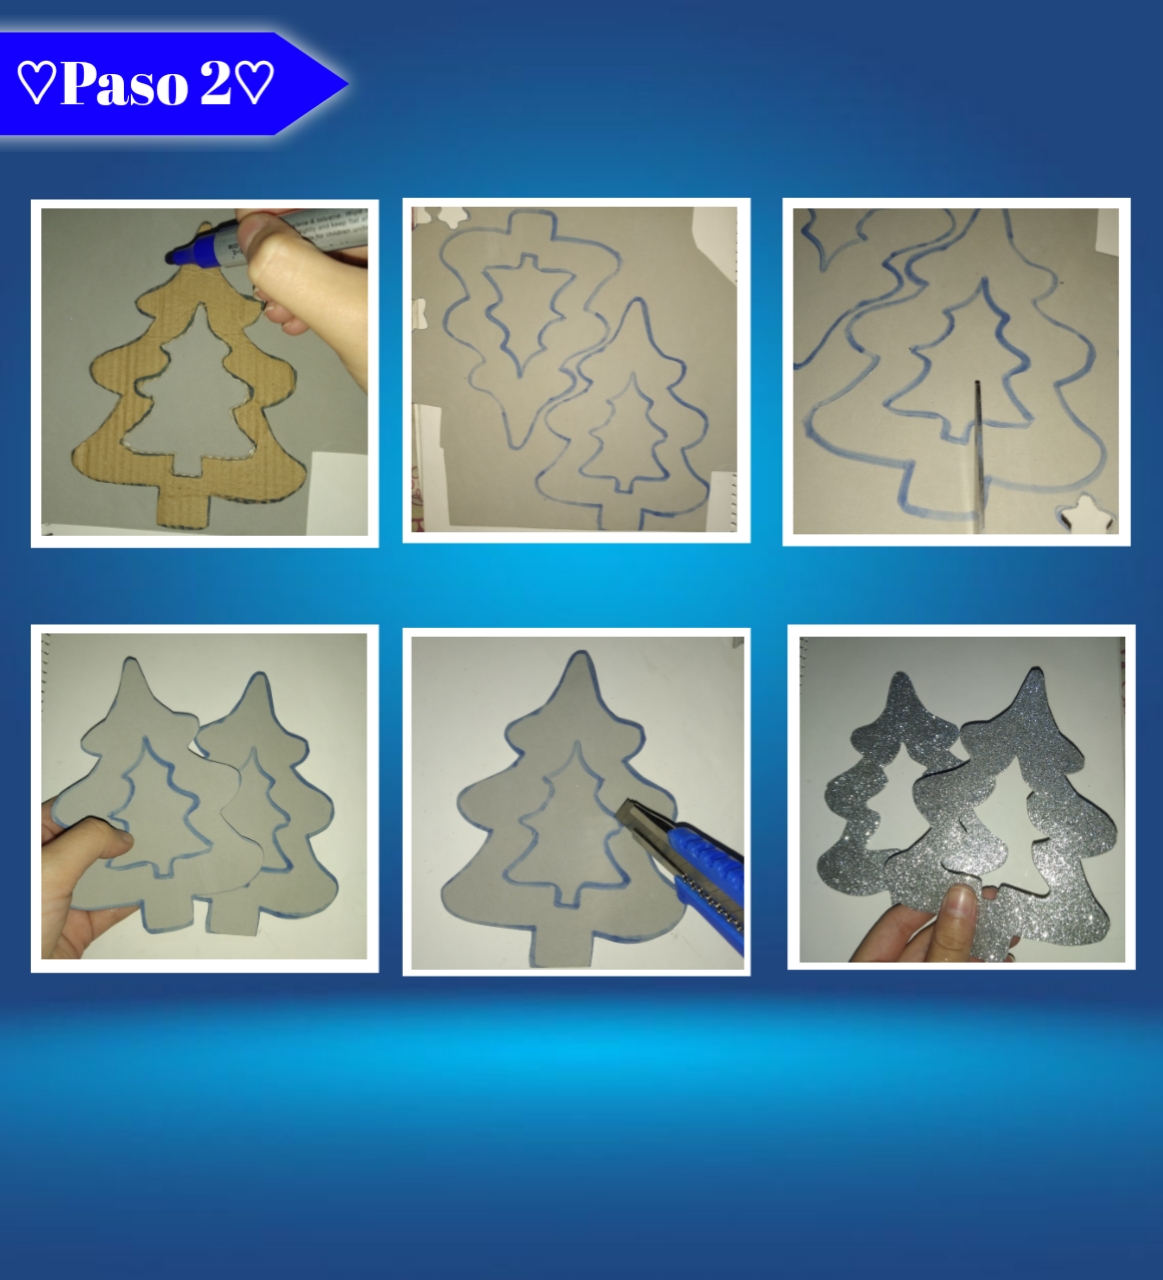
Paso 2:
Step 2:
En este paso, vamos a tomar nuestro foami escarchado del color de nuestra preferencia, en este caso yo elegí gris escarchado, así le daremos la vuelta, encima colocaremos nuestra plantilla del árbol de nuevo o la figura en cartón para mayor facilidad, continuamos remarcando está, pero está vez dos veces. Después recortamos el contorno y seguimos con la ayuda de un cutter a cortar el mini árbol de adentro, hasta tener ambas partes listas.
In this step, we are going to take our frosted foami in the color of our preference, in this case I chose frosted gray, so we will turn it over, on top we will place our tree template again or the cardboard figure to make it easier, we continue to mark it, but this time twice. Then we cut the outline and continue with the help of a cutter to cut the mini tree inside, until we have both parts ready.
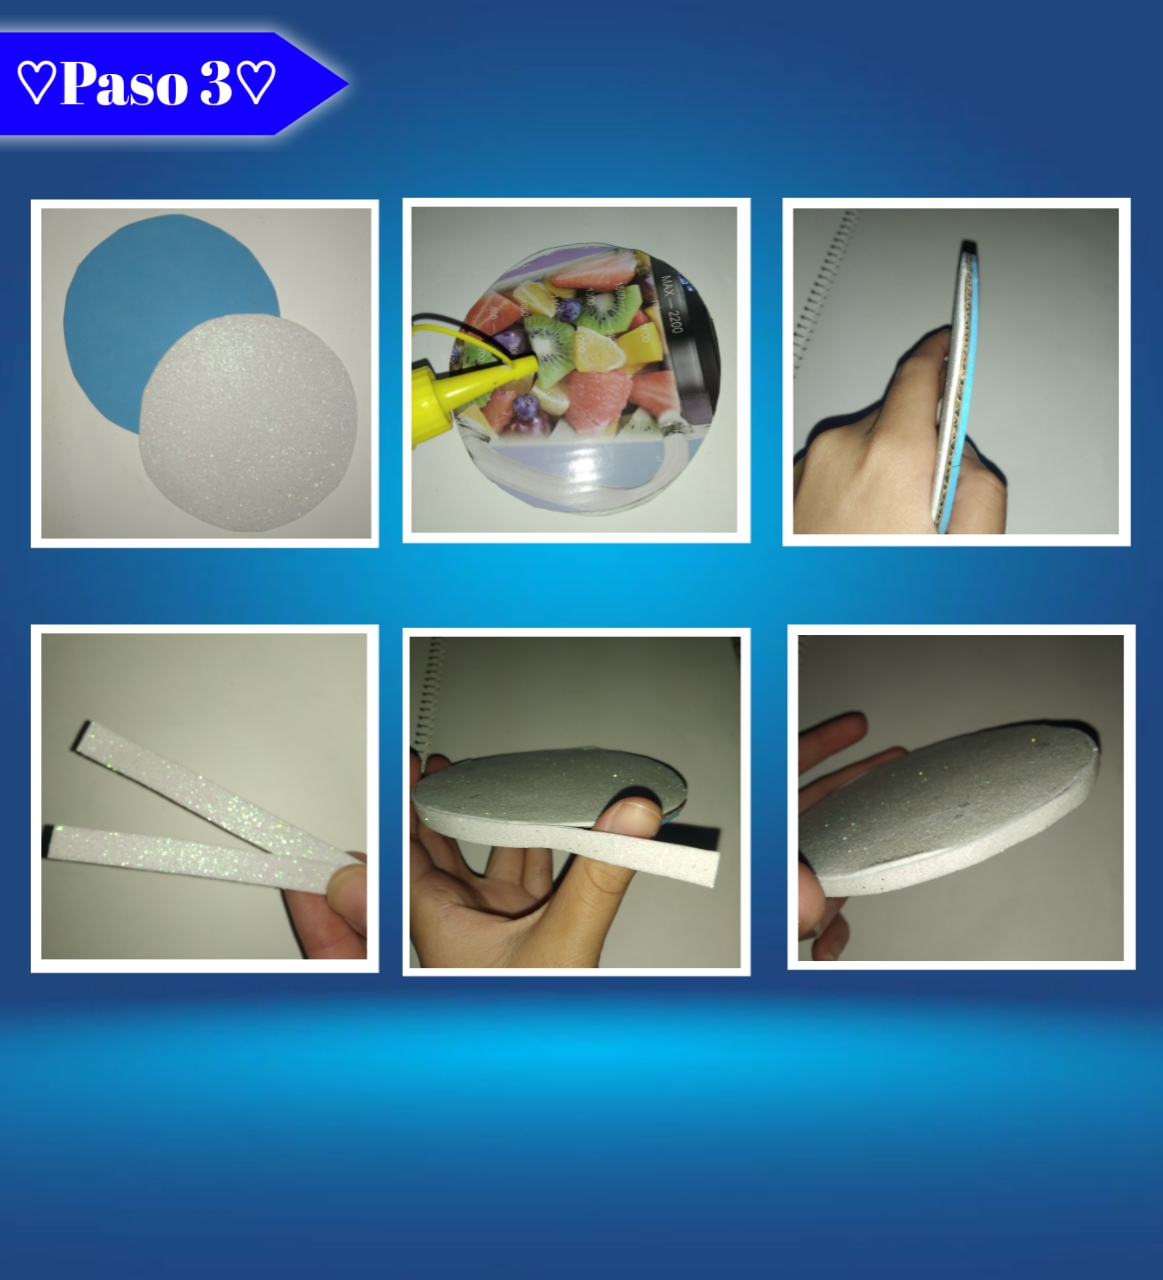
Paso 3:
Step 3:
Seguimos, vamos a tomar nuestro segundo foami, este yo lo elegí blanco escarchado, lo volteamos y ahora colocaremos arriba el círculo e igualmente lo marcaremos muy bien, la misma figura dos veces, yo hice uno de otro color para la parte de abajo. Continuamos recortando ambas piezas y pegamos uno en cada cara del círculo de cartón con ayuda del silicón, también recortaremos una tira de foami y la pegaremos por el borde que queda, hasta cubrir muy bien.
Next, we are going to take our second foami, this one I chose frosted white, we flip it over and now we will place the circle on top and we will also mark it very well, the same figure twice, I made one of another color for the bottom. We continue cutting out both pieces and glue one on each side of the cardboard circle with the help of the silicone, we will also cut a strip of foami and glue it on the edge that remains, until it is well covered.
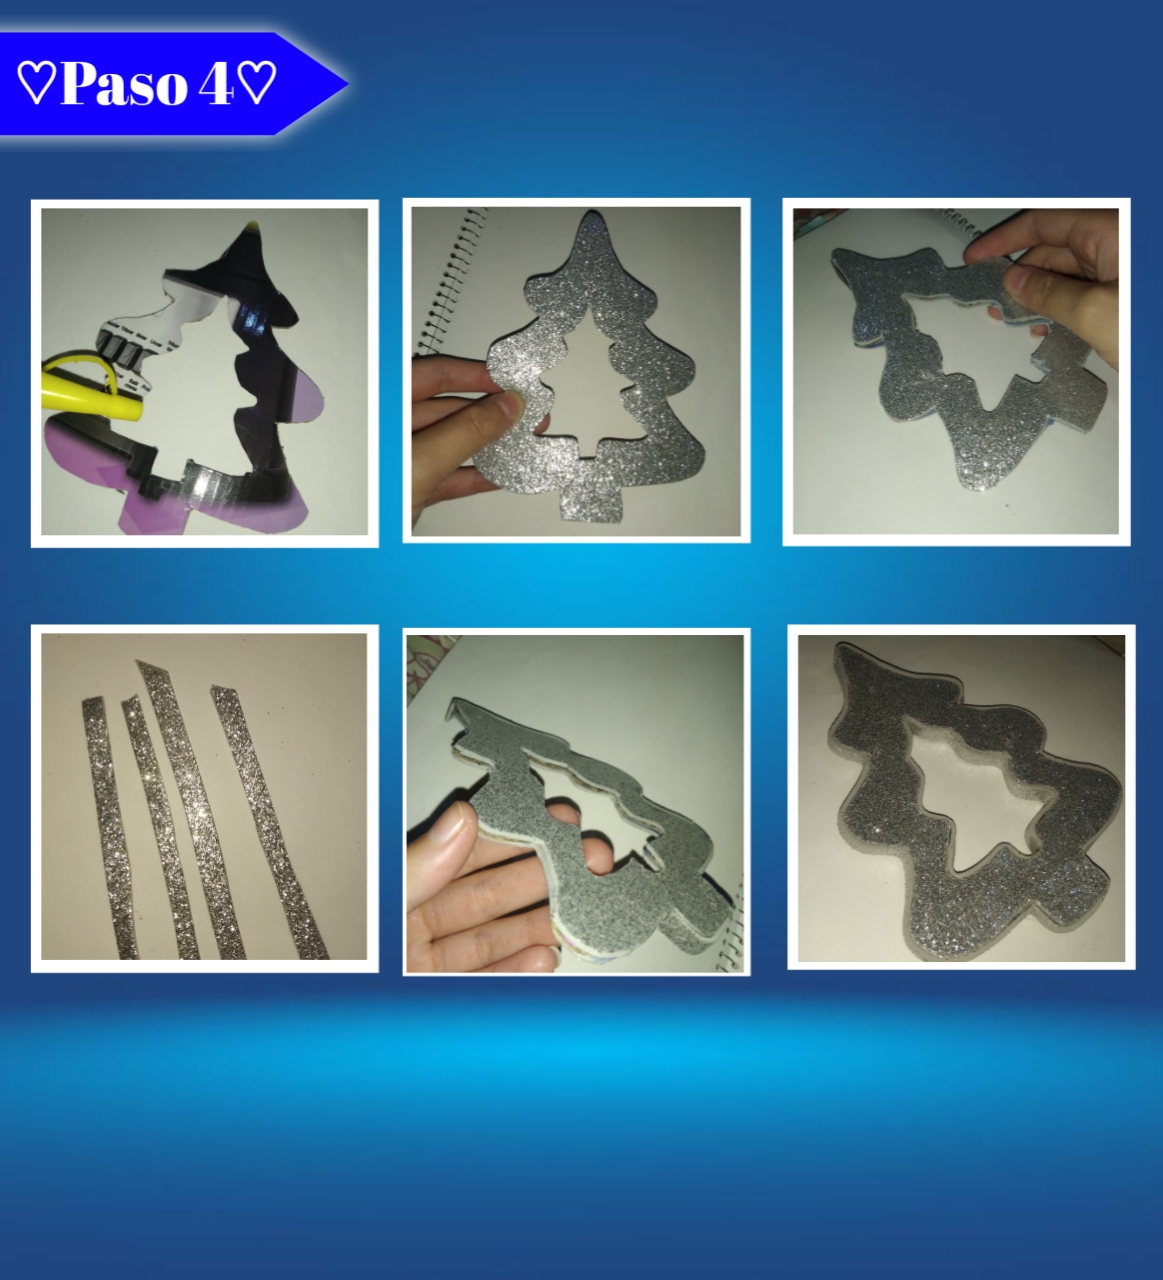
Paso 4:
Step 4:
Luego haremos lo mismo con el árbol, así le agregamos silicón y le pegamos por ambas caras la misma figura de foami que recortamos antes, además recortaremos una tira larga o varias tiras del mismo foami, así le echaremos silicón por el borde que no está cubierto entre cada foami que forra el árbol, seguidamente tomamos la tira y la vamos acomodando y adaptando a la figura muy bien hasta terminar esta parte.
Then we will do the same with the tree, so we add silicone and glue on both sides the same foami figure that we cut before, we will also cut a long strip or several strips of the same foami, so we will put silicone on the edge that is not covered between each foami that covers the tree, then we take the strip and we will accommodate and adapt it to the figure very well to finish this part.
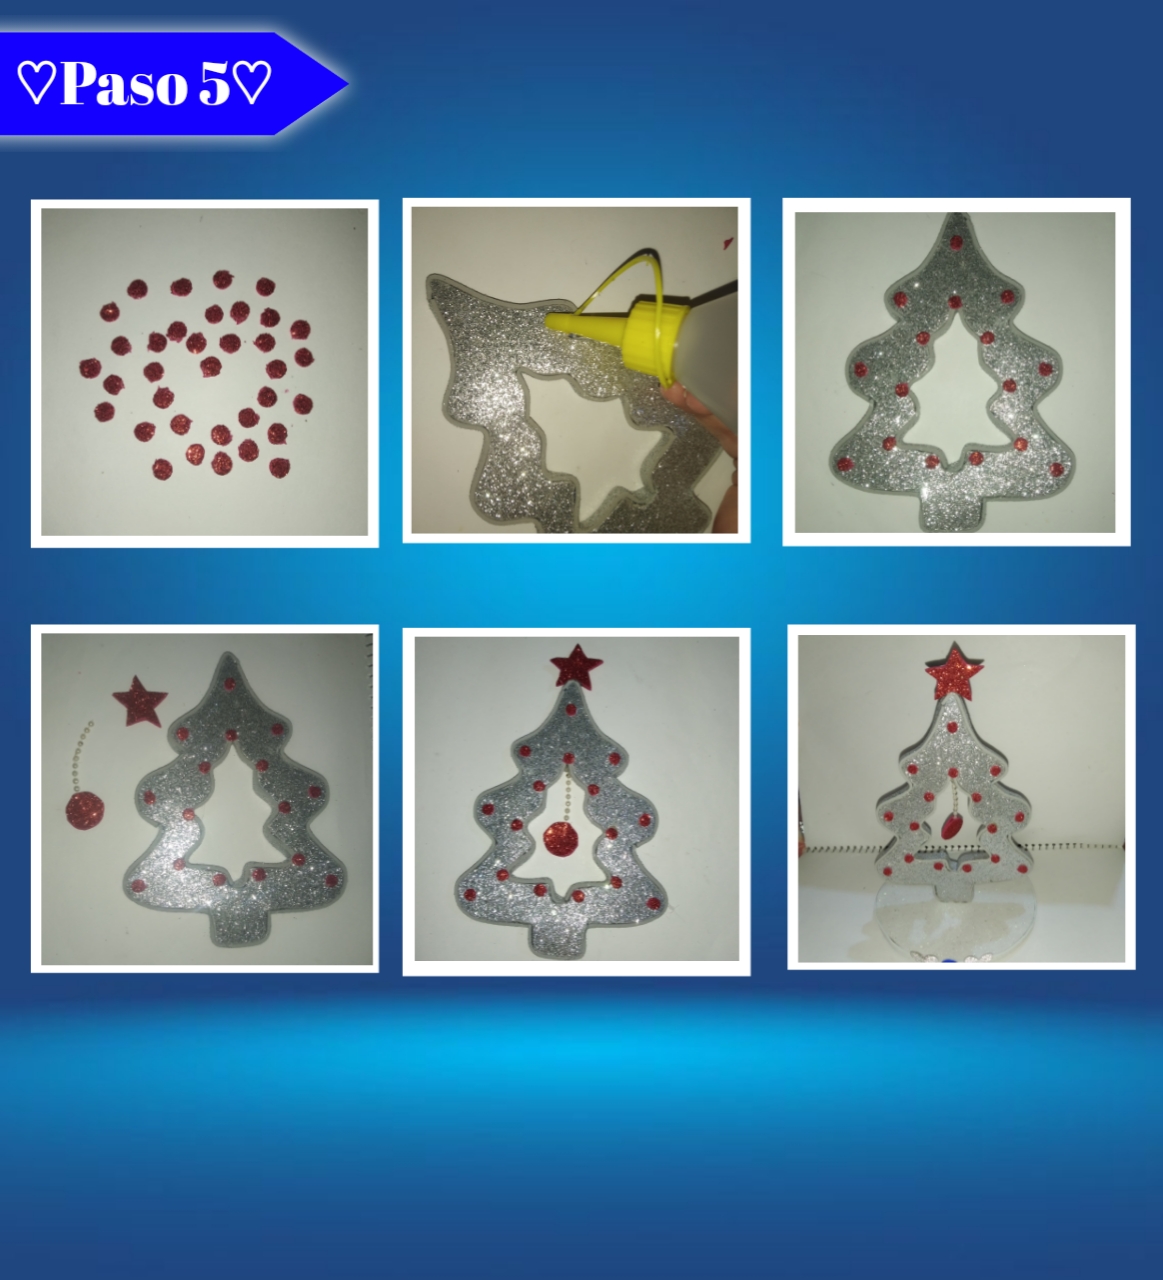
Paso 5:
Step 5:
Ahora bien, seguimos con la pequeña decoración del árbol para terminar, de esta manera recorte detrás de cámaras cierta cantidad de pequeños círculos en foami rojo escarchado con la ayuda de un perforador de círculos:). Seguido fui agregando una pequeña gota de silicón en cada uno de los círculos y pegando estos en cada punta del árbol, hasta llenar de lado y lado, además hice un estrella pequeña en el mismo foami y una bolita unida a una pequeña tira, así con silicón caliente, para mayor resistencia pegue la estrella en la punta del árbol y la bolita colgando en el centro, por último agregué silicón caliente a la pata del árbol y lo uni al círculo, es decir la base, de forma centrada, le pegue un mini regalo y ya está.
Now, we continue with the small decoration of the tree to finish, in this way I cut behind the cameras a certain amount of small circles in frosted red foami with the help of a circle puncher :). Then I added a small drop of silicone on each one of the circles and glued them on each end of the tree, until I filled the sides, I also made a small star in the same foami and a little ball attached to a small strip, so with hot silicone, for greater strength I glued the star at the tip of the tree and the little ball hanging in the center, finally I added hot silicone to the leg of the tree and attached it to the circle, ie the base, centered, I glued a mini gift and that's it.

De está podemos obtener como resultado un hermoso centro de mesa, con la temática navideña, ideal para decorar en la cena navideña o incluso durante todo el mes de diciembre, además es una buena idea para emprender con algo este mes, queda precioso y no lo digo porque lo haya hecho yo, sino que está bien bonito y amé el proceso y mucho más el resultado, estoy segura de que les encantará tanto como a mí, da un toque hermoso y único.💙✨
From this we can get as a result a beautiful centerpiece, with the Christmas theme, ideal for decorating at Christmas dinner or even throughout the month of December, it is also a good idea to undertake with something this month, it looks beautiful and I'm not saying it because I did it, but it is very nice and I loved the process and much more the result, I'm sure you will love it as much as I do, it gives a beautiful and unique touch.💙✨
Así hemos llegado al fin de la publicación de hoy, espero les haya encantado y que no duden en intentarlo si les gusta, amaran el resultado y no se arrepentirán, ha sido un placer compartir con ustedes está tarde, espero el resto del día les vaya de maravilla, un abrazo mis creativos.✨🤍
So we have reached the end of today's publication, I hope you loved it and do not hesitate to try it if you like it, you will love the result and you will not regret it, it has been a pleasure to share with you this afternoon, I hope the rest of the day goes great, a hug my creatives.🤍✨
💙❄️¡Gracias por leer! Hasta luego❄️ 💙
💙❄️Thanks for reading! See you soon❄️💙
Photos of my authorship taken from my Xiaomi Redmi 7 phone, edited in the free version of PixeLab
Muy lindo te quedó ese centro de mesa. Un adorno muy lindo para decorar nuestra mesa especialmente en la cena de navidad ❣️
Así es, muchas gracias amiga, saludos.💗
¡Felicidades! Esta publicación obtuvo upvote y fue compartido por @la-colmena, un proyecto de Curación Manual para la comunidad hispana de Hive que cuenta con el respaldo de @curie.
Si te gusta el trabajo que hacemos, te invitamos a darle tu voto a este comentario y a votar como testigo por La Colmena.
Si quieres saber más sobre nuestro proyecto, te invitamos a acompañarnos en nuestro servidor de Discord.
Gracias, con gusto.✨
Hola, muy lindo detalle de navidad, un centro de mesa que cautivará las miradas de todos. Y es muy fácil de hacer.
Así mismo es, algo único, para unas fechas únicas, gracias por comentar.✨
Muy bonito, me gusto el color plateado que elegiste, saliendo del tradicional arbolito verde, este esta genial y brillante, ideal para la mesa navideña 😍
Muchas gracias, fue una buena elección, aunque al decir verdad andaba indecisa entre ambos, pero siempre es bueno salir de la rutina, saludos y un abrazo.💙✨
https://twitter.com/hivediy47901/status/1733094145248399451
🥺🧡