DIY Hermosa tarjeta con ramo de flores personalizada 💜✨| Tutorial paso a paso para 💐💗 [ESP-ENG]
Good afternoon my creative family of Hive Diy! Happy and blessed Saturday dear ones, I hope you are well and that this month of April you are doing more than excellent in every thing, I wish you in this month a lot of health, wellness, happiness, tranquility, creativity, productivity and much desire to create and innovate.♡
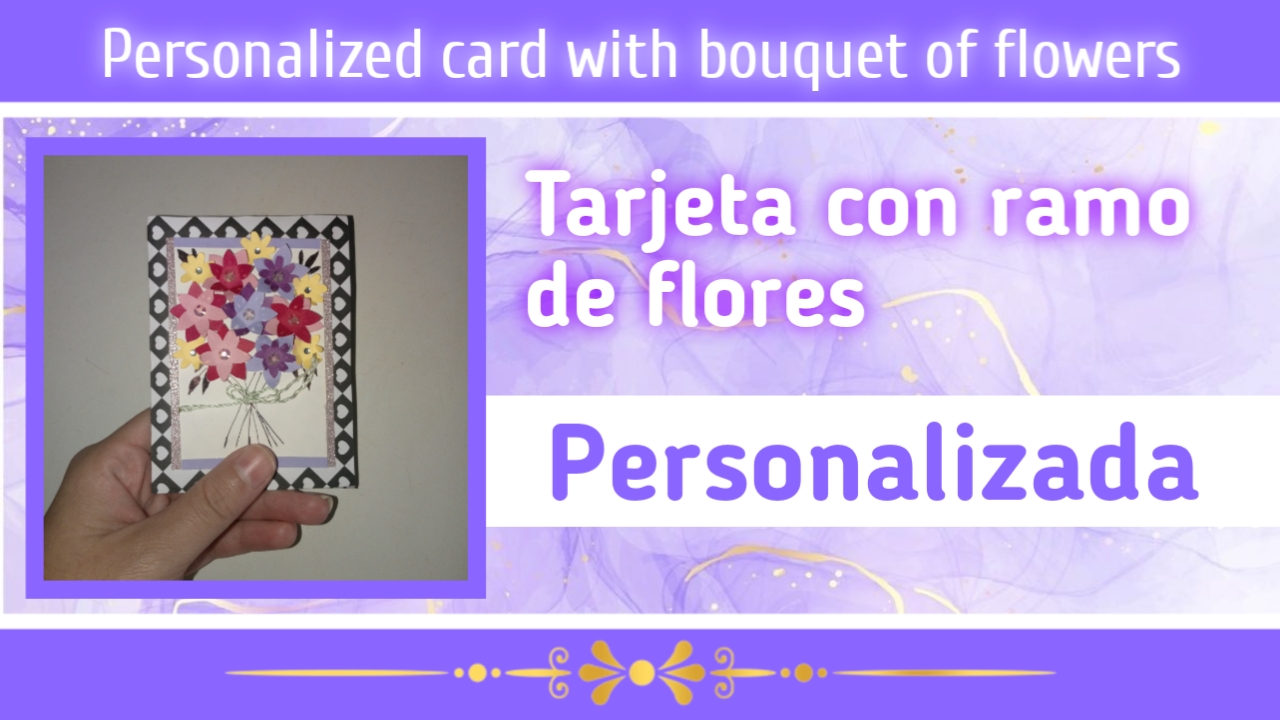
Les traigo un tutorial con mucho cariño sobre como realizar paso a paso, una hermosa tarjeta, ideal para acompañar los regalos especiales y únicos que les damos a las personas que queremos. Es una idea única y diferente, el diseño es muy delicado y la tarjeta está muy bonita, a mí en lo personal me encantó el resultado, porque es relativamente sencilla, pero muy especial, además es creativa y lo mejor es que la podemos hacer personalizada.
I bring you a tutorial with much affection on how to make step by step, a beautiful card, ideal to accompany the special and unique gifts that we give to the people we love. It is a unique and different idea, the design is very delicate and the card is very nice, I personally loved the result, because it is relatively simple, but very special, it is also creative and the best thing is that we can make it personalized.
♡📎📑 Materials📑📎♡
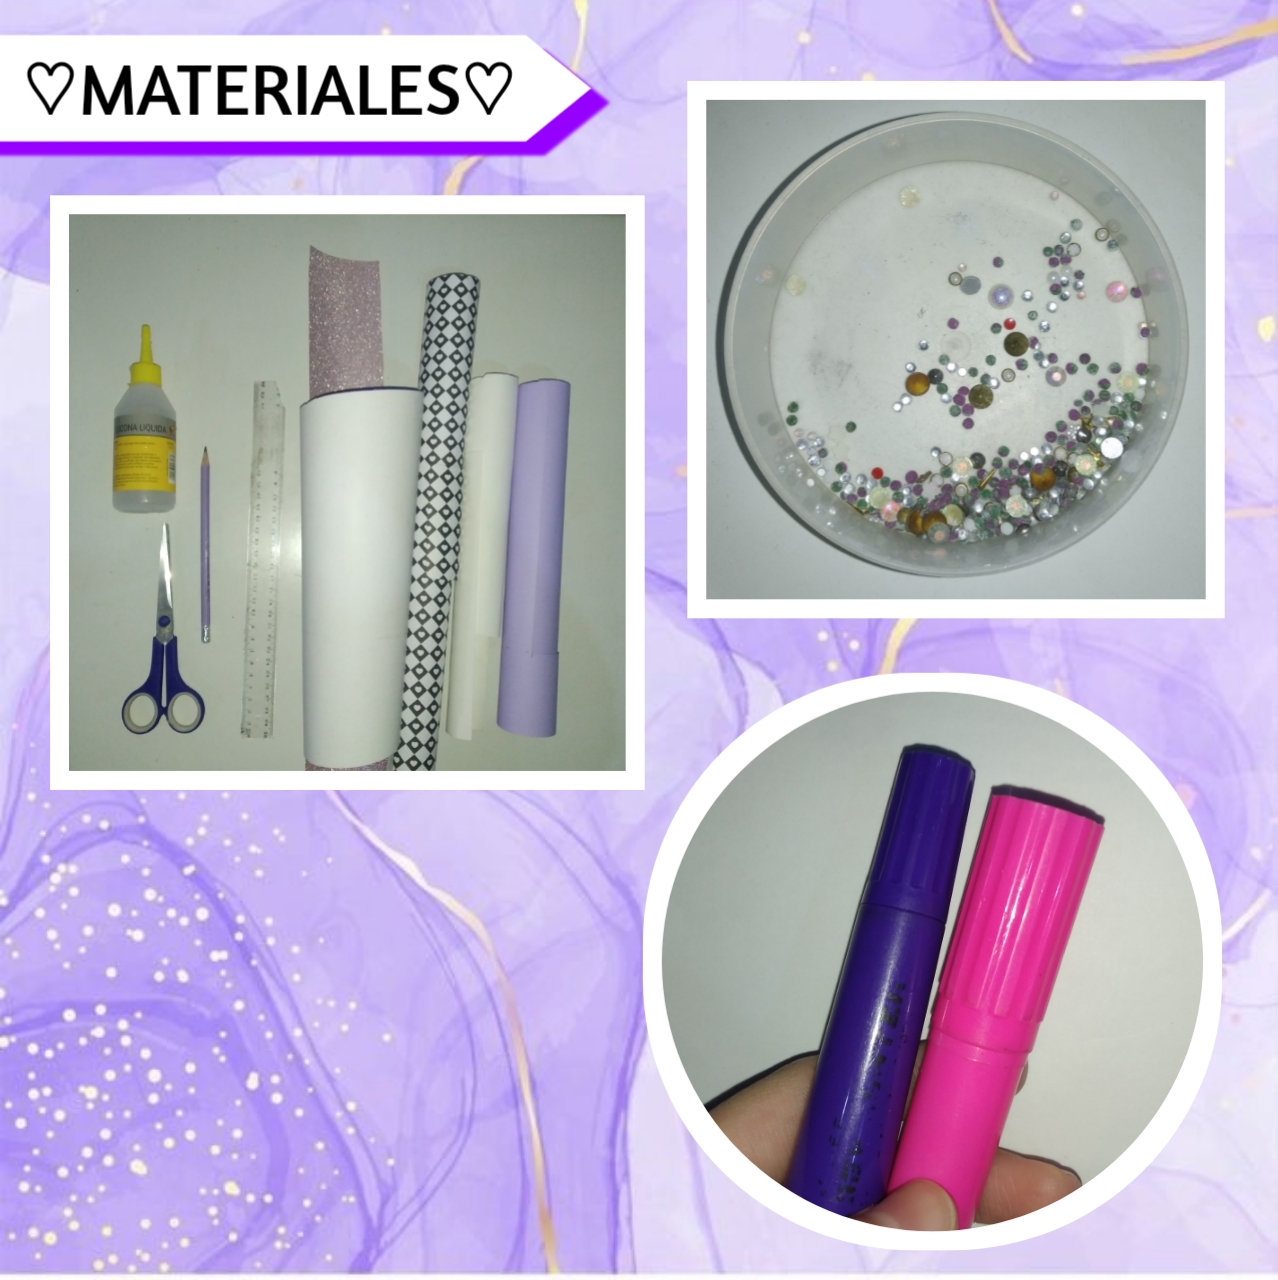
- Cartulinas
- Piedritas de decoración
- Silicón
- Tijeras
- Marcadores
- Regla
- Lápiz
- Cardboard
- Decorative pebbles
- Silicone
- Scissors
- markers
- Ruler
- Pencil
♡💜💗Step by Step💗💜♡
Paso 1:
Step 1:
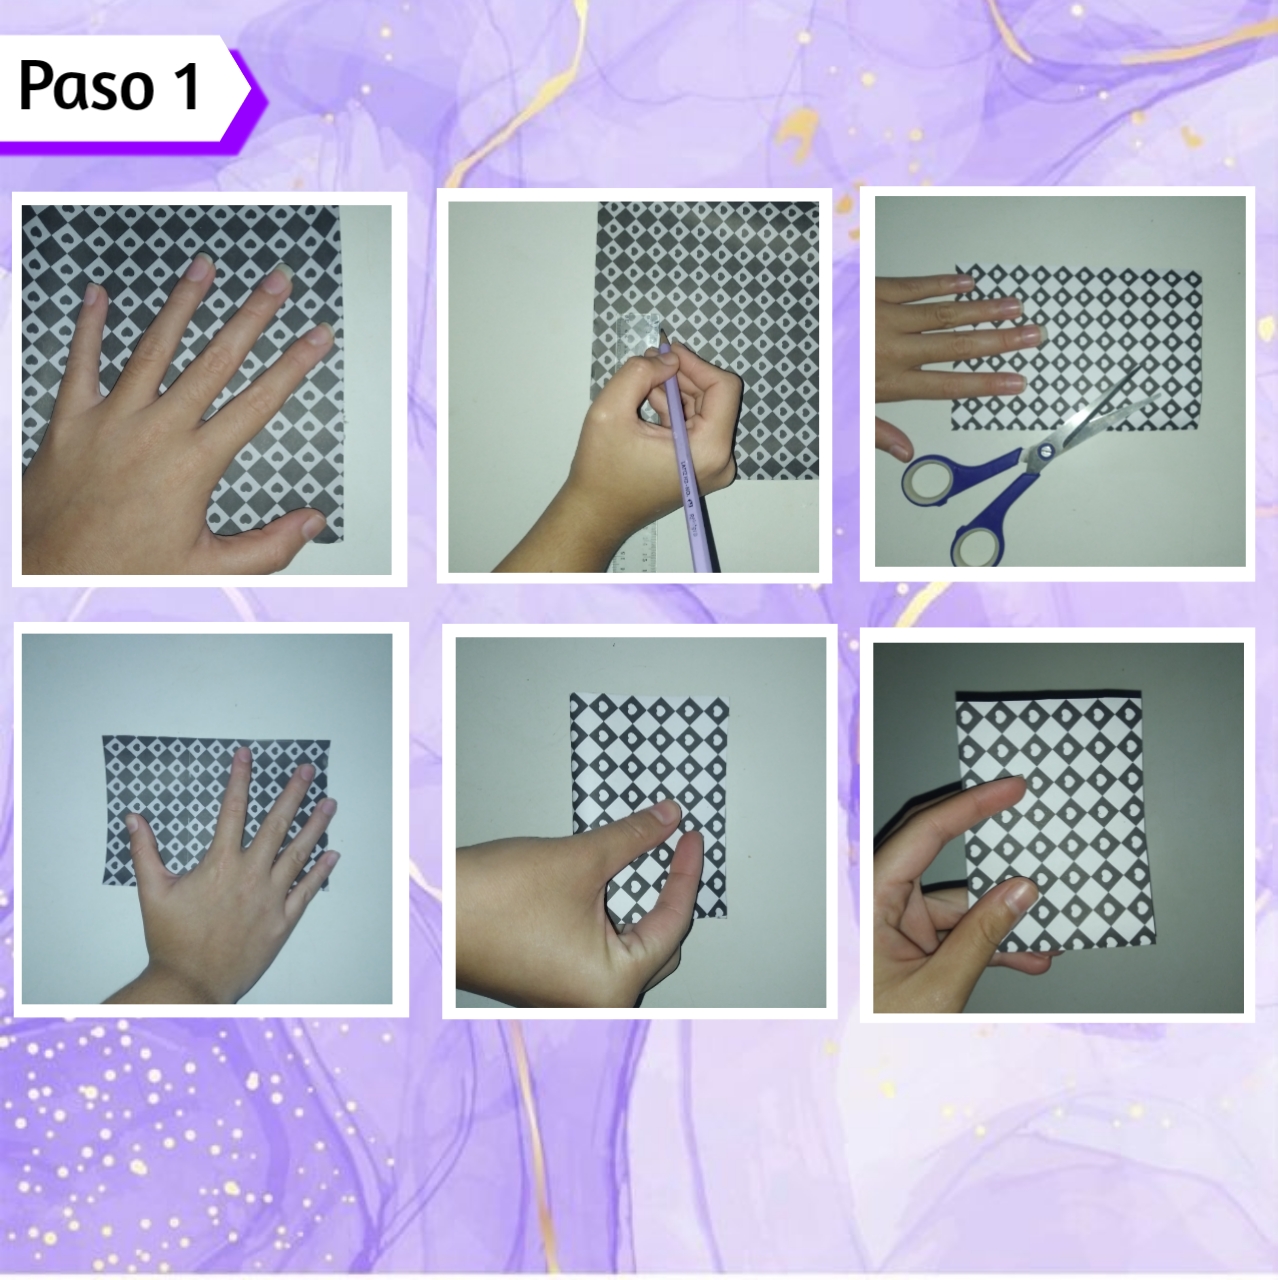
Primeramente comenzaremos extendiendo nuestra cartulina, yo en este caso la extendí del lado contrario ya que tiene dos lados distintos, así marque un rectángulo de 20cm x 8cm, el cuál prosegui a recortar con ayuda de unas tijera. Así continuamos con el mismo lado y tomaremos una esquina llevándola hacía el otro extremo hasta emparejar y aplastaremos con cuidado, permitiendo crear el dobles de exactamente la mitad, formando la base de la tarjeta.
First we will begin by extending our cardboard, in this case I extended it on the opposite side as it has two different sides, so mark a rectangle of 20cm x 8cm, which I proceeded to cut with the help of scissors. So we continue with the same side and we will take a corner taking it to the other end to match and flatten carefully, allowing to create the double of exactly half, forming the base of the card.
Paso 2:
Step 2:
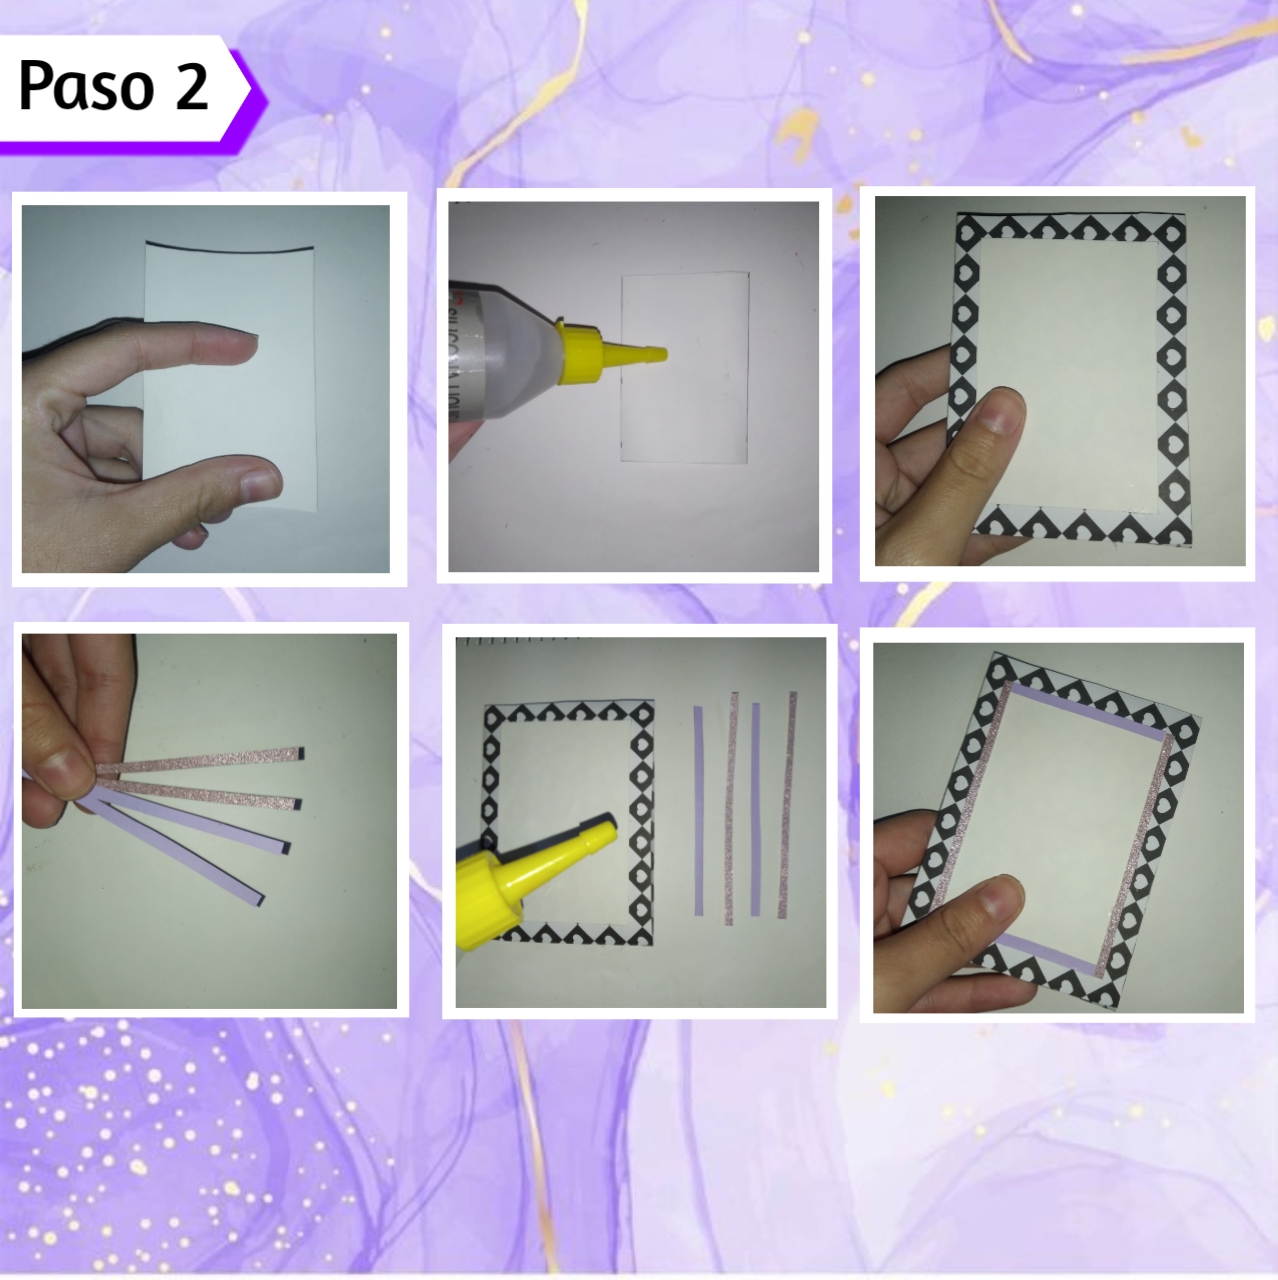
Ahora bien, vamos a marcar con nuestro lápiz y recortar preferiblemente en color de cartulina blanca un rectángulo con las medidas de 9cm x 7cm, es decir, un rectángulo con 1cm menos de cada lado, respecto a cada cara de la base, así le agregaremos silicón y pegaremos en la portada centrando este. Continúe recortando cuatro pequeñas tiras de aproximadamente 0.50c, dos en cartulina escarchada rosa y las otras dos en lila, así pegue estás cubriendo las orillas del rectángulo como pueden ver.
Now, we are going to mark with our pencil and cut out preferably in white cardboard color a rectangle with the measures of 9cm x 7cm, that is, a rectangle with 1cm less on each side, with respect to each side of the base, so we will add silicone and paste on the cover centering this. Continue cutting out four small strips of approximately 0.50c, two in pink frosted cardboard and the other two in lilac, so glue these covering the edges of the rectangle as you can see.
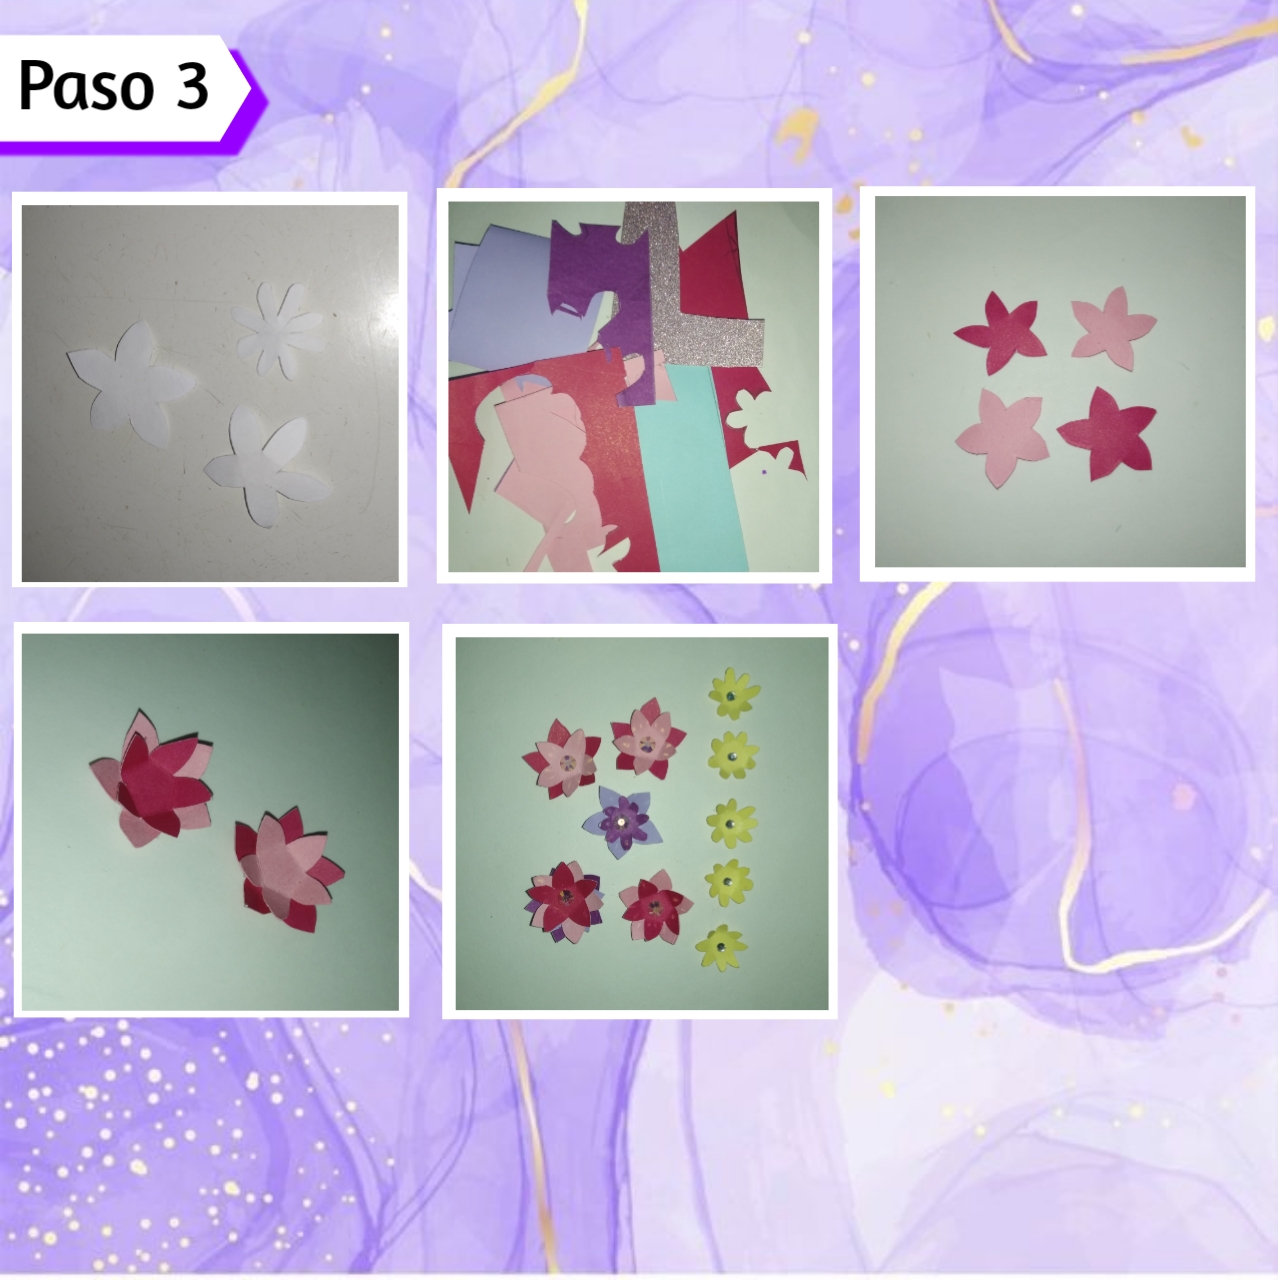
Paso 3:
Step 3:
Luego saque tres pequeñas plantillas de flores de diferentes tamaños, una más grande que las otras dos, continúe tomando unos recortes de cartulina que siempre guardo para reciclar y saque 14 piezas, 7 grandes y 7 pequeñas variando los colores. Así continúe doblando las puntas de los petalos delicadamente y pegando una flor pequeña sobre una grande, hasta formar las 7 en total, además hice unas 5 más diminutas aún en color amarillo, para completar el ramo.
Then I took three small flower templates of different sizes, one larger than the other two, I continued taking some cardboard cutouts that I always keep to recycle and took 14 pieces, 7 large and 7 small, varying the colors. I continued folding the tips of the petals delicately and gluing a small flower on a big one, until I made the 7 in total, I also made 5 more tiny ones in yellow, to complete the bouquet.

Paso 4:
Step 4:
Continuaremos tomando el silicón y también nuestras flores así las acomodaremos para formar el ramo y luego al tener la figura deseada iremos pegando poco a poco cada una, así también tomaremos nuestras mini flores amarillas y las pegaremos muy bien en los espacios vacíos exteriores. Para terminar el ramo, tomaremos un lapicero y haremos unas pequeñas hojas alrededor del ramo, también le haremos el taño, además de hacer un pequeño lazo y pegarlo encima de los tallos.
We will continue taking the silicone and also our flowers so we will arrange them to form the bouquet and then when we have the desired figure we will glue little by little each one, we will also take our yellow mini flowers and we will glue them very well in the empty spaces outside. To finish the bouquet, we will take a pencil and we will make some small leaves around the bouquet, we will also make the ribbon, and we will make a small bow and glue it on top of the stems.
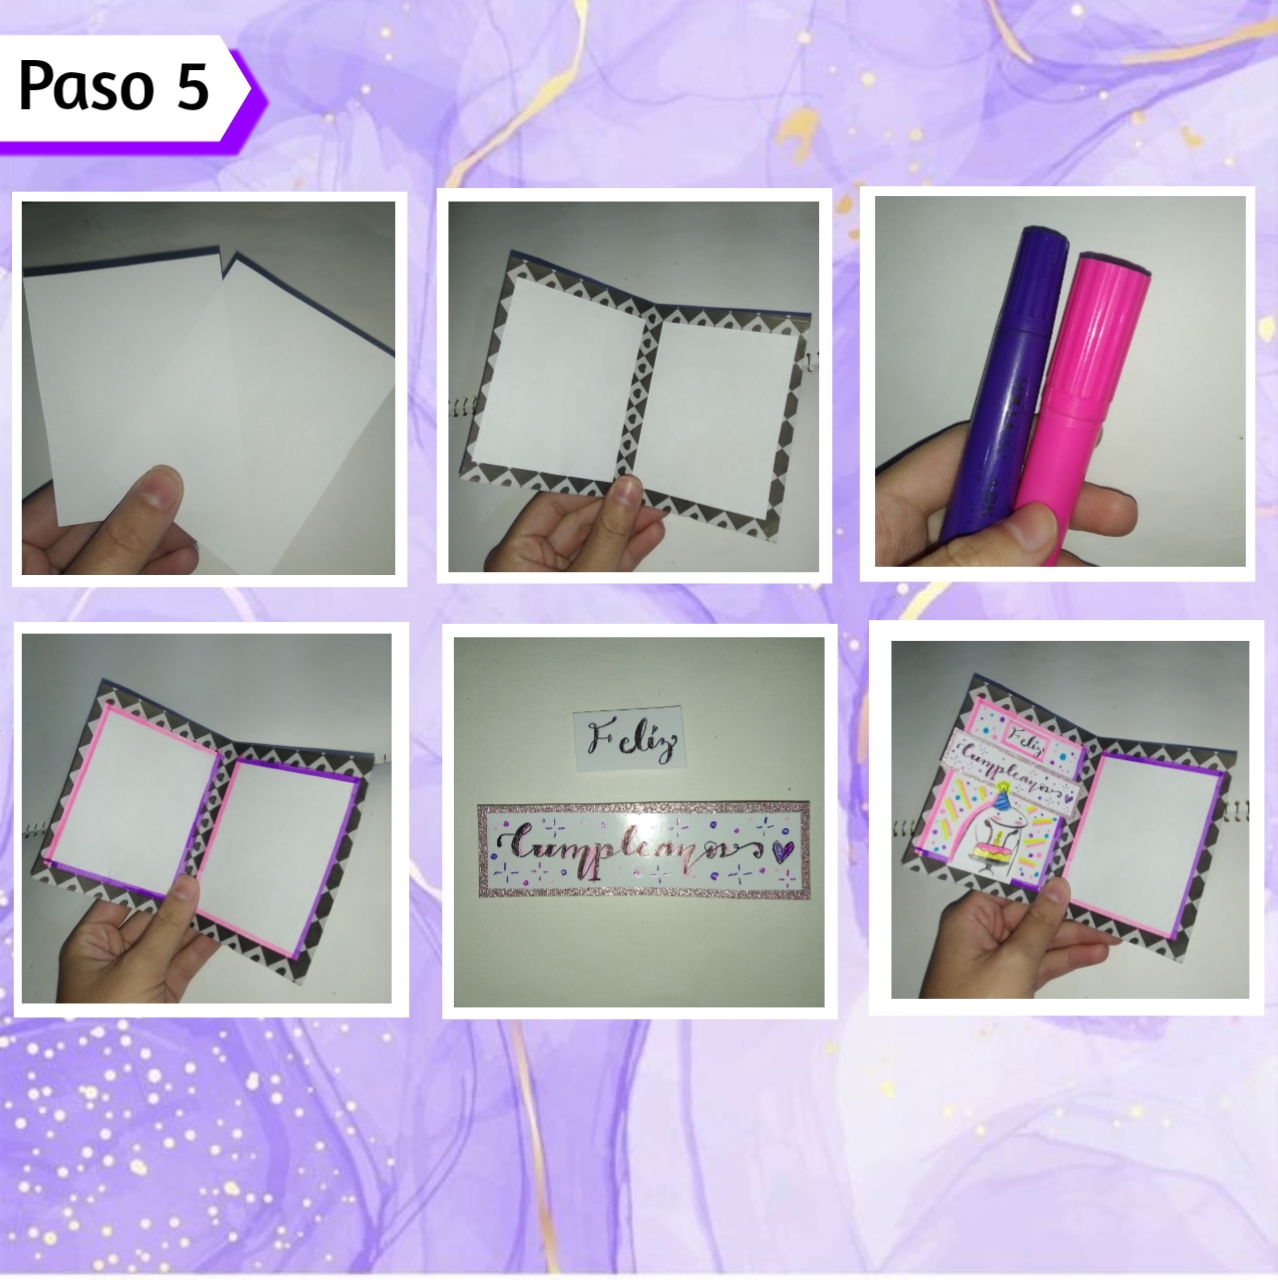
Paso 5:
Step 5:
Por último agregaremos unos detalles internos, de está manera recorté dos rectángulos de 7cm x 9cm, les agregué silicón y los pegue de una forma centrada en cada parte de la tarjeta. Después tomé dos marcadores en este caso en color morado y fucsia e hice un marco por todo el borde, por último recorte la frase "Felíz Cumpleaños" la dividí por cada palabra y las pegue en la parte superior del lado izquierdo, así para finalizar hice un dibujo y ya estaría lista.
Finally we will add some internal details, in this way I cut out two rectangles of 7cm x 9cm, I added silicone and glued them in a centered way in each part of the card. Then I took two markers in this case in purple and fuchsia and made a frame around the edge, finally I cut out the phrase "Happy Birthday" I divided it by each word and glued them at the top of the left side, and finally I made a drawing and it would be ready.
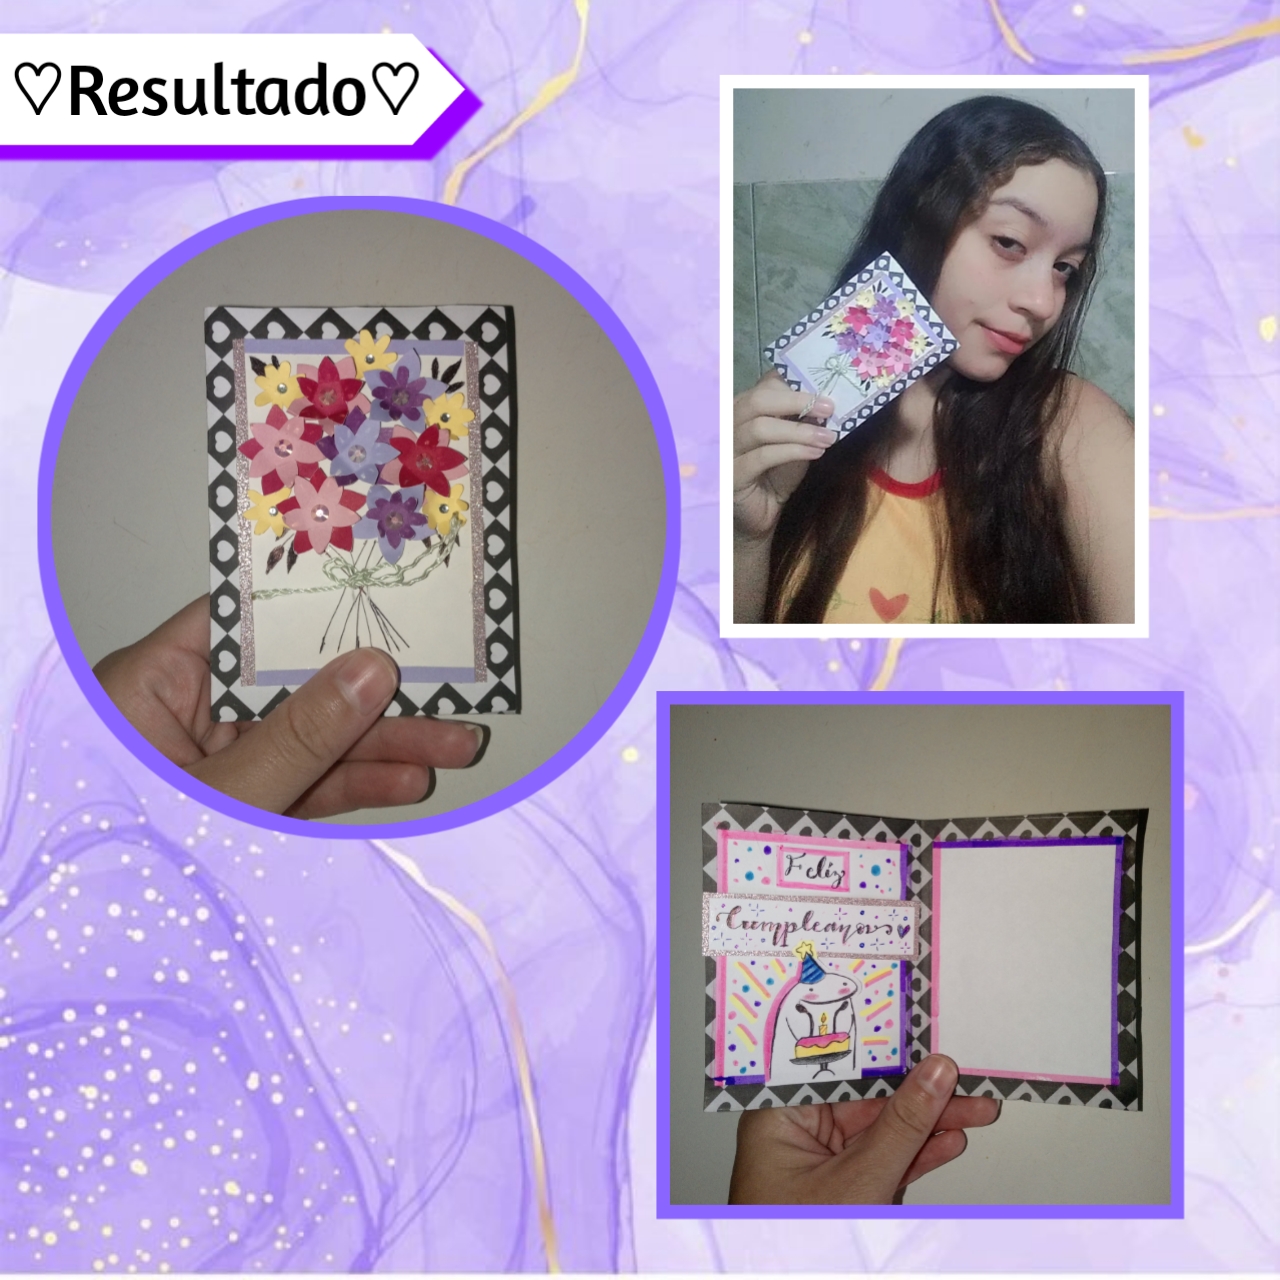
De está manera podemos obtener como resultado una hermosa tarjeta, ideal para complementar nuestros regalos y darles ese toque único y especial que se lo da el toque hecho a mano, con amor y creatividad propia. Es una excelente idea que podemos adaptar a diferentes tamaños y ocasiones, por ejemplo, para el día de las madres estaría increíble hacer varias de este tipo.
This way we can obtain as a result a beautiful card, ideal to complement our gifts and give them that unique and special touch that is given by the handmade touch, with love and creativity. It is an excellent idea that we can adapt to different sizes and occasions, for example, for Mother's Day it would be amazing to make several of this type.
Espero les haya gustado y se animen a recrearlas, les agradezco mucho por llegar hasta aquí y ver este breve tutorial que les hice con mucho amor, espero leer sus comentarios pronto, les mando un gran abrazo ¡Mí Familia Creativa! Los quiero, felíz tarde.
I hope you liked it and are encouraged to recreate them, I thank you very much for coming here and see this short tutorial that I made with love, I hope to read your comments soon, I send you a big hug My Creative Family! I love you, happy afternoon.
💜📎Gracias por leer ¡Hasta la siguiente manualidad!📎💜
💗📎Thanks for reading. See you next craft!📎💗
Photos of my authorship taken from my Xiaomi Redmi 7 phone, edited in the free version of PixeLab
Excelente y delicado trabajo amiga !!👏
¡Hola! Muchas gracias por tu apreciación amiga ✨💜
Te quedo muy linda la tarjeta, que bueno que volvamos a rescatar los detalles de tarjetas, recuerdo hubo un tiempo que ya no se utilizaba este tipo de detalle tan lindo e importante. Gracias por compartir.
Gracias querida 💗, sii, a veces estos detalles se dan por alto, pero nada mejor que recibir una notita de cariño con un regalo lleno de amor, gracias a ti por comentar.
¡Saludos! 💜✨
¡Felicidades! Esta publicación obtuvo upvote y fue compartido por @la-colmena, un proyecto de Curación Manual para la comunidad hispana de Hive que cuenta con el respaldo de @curie.
Si te gusta el trabajo que hacemos, te invitamos a darle tu voto a este comentario y a votar como testigo por La Colmena.
Si quieres saber más sobre nuestro proyecto, te invitamos a acompañarnos en nuestro servidor de Discord.
🥺🧡
Bendiciones , me encantó tu creatividad te quedó muy bonita tu tarjeta
Muchas gracias ☺️💗
Very beautiful!!
Thank you very much, my friend💜✨
https://twitter.com/hivediy47901/status/1779774694868004865
Gracias por compartir y apoyar, saludos 💜