Home Improvement: Fitting a new Skirting Board
Hello DIYers!
It has been a while since I last made a post, but I have still been busy with my trusty tools and doing jobs around the house. This week I come to you with a nice little DIY job to fit some skirting board. We had a big renovation recently and the guys did not finish the skirting board as the plastering needed to dry. Therefore I decided to finish it up myself.
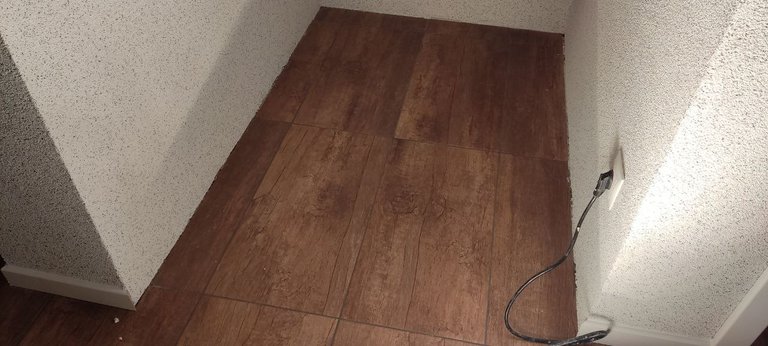
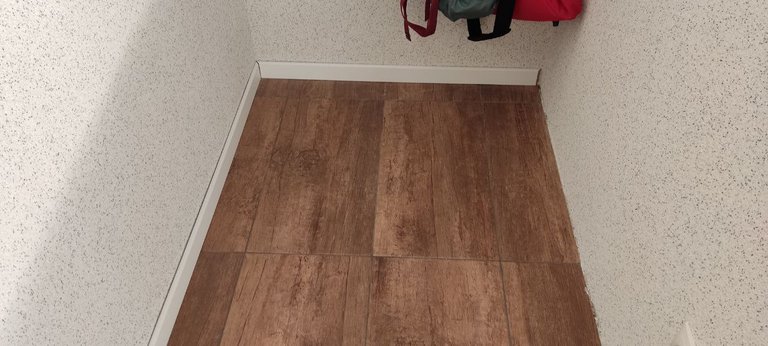
It is just a small corner that needs to be done. 3 pieces in a nice rectangle shape should be easy enough and a good excuse to get out the mitre saw and start cutting some wood.
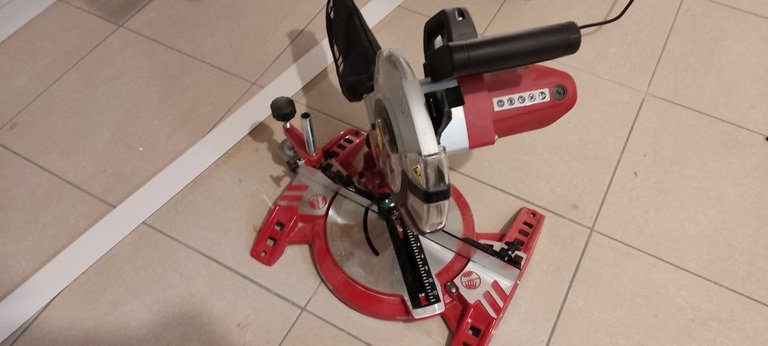
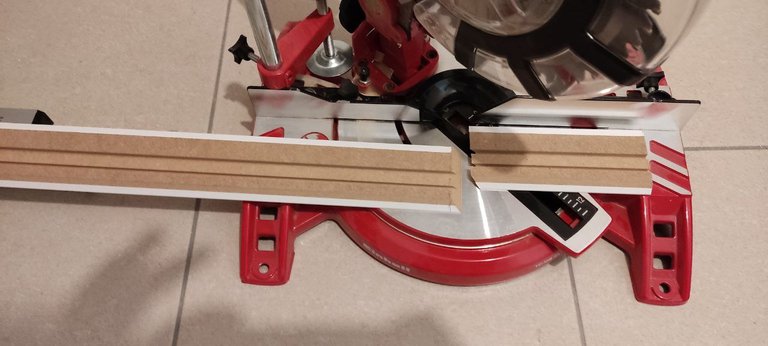
I found a nice place where I could cut the skirting without any problems and that it would be easy to clean up afterward. I have an Einhell mitre saw that I picked up cheap from Amazon. This one does the job for me for the little use that it gets.
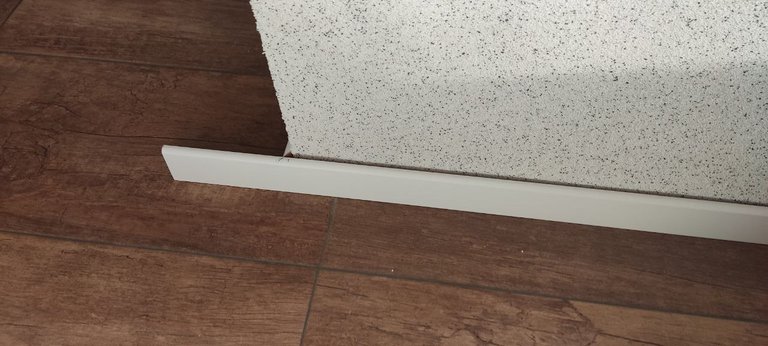
I then took the first piece of skirting and lined it up where I wanted it to be and marked off the edge with my pencil.
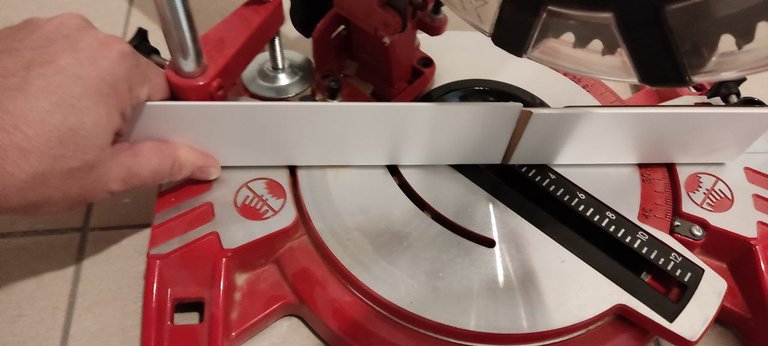
After lining up my mitre saw to 45° (half of the 90° angle), I was ready to cut my first piece of skirting board. It did a nice clean cut and felt good. You can't beat the sound of a mitre saw working.
With the skirting cut, I could then take it and check that it fits in ok.
The first cut was too long, so I needed to trim it down a tiny bit.
Once done, it fit in quite well and I was almost ready to start my 2nd piece already.
First I needed to cut the other side also by 45° for it to fit against the other one. It is important to make sure you cut it in the right direction by 45° so they fit together 😀.
Next I lined up for the middle piece. As it was too long, you could measure the length and cut or I just took the measurements from the outside bit like here.
With that cut on both ends, I checked and it fit in nicely. I was ready for the final piece.
I had one big piece for the last one and so cut it in approximate half and then lined it up to take the measurements where to cut.

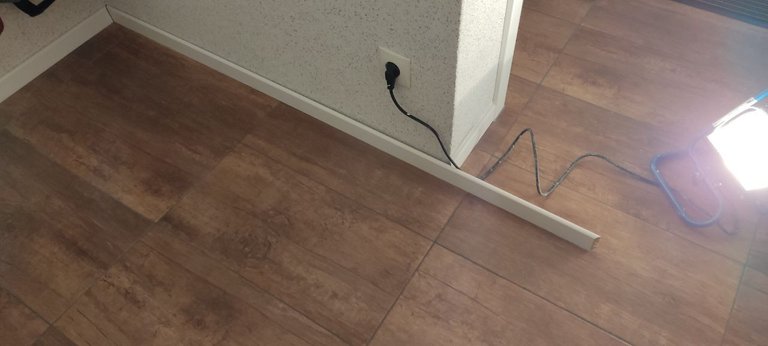
With all the pieces cut and fitting together nicely, I was ready to glue them to the wall. This requires some fast sticking glue and super strong! I have used silicon before which seemed to work fine, but this time I went for some proper glue and gave it a try.
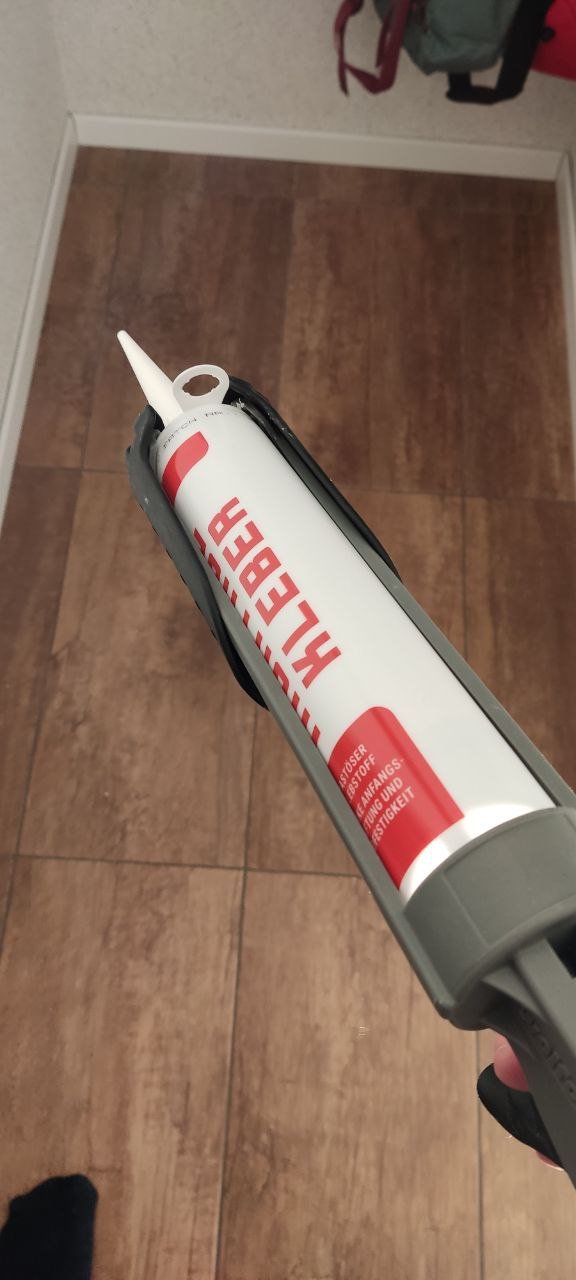
I grabbed my carton of glue and started to glue the first skirting board piece.
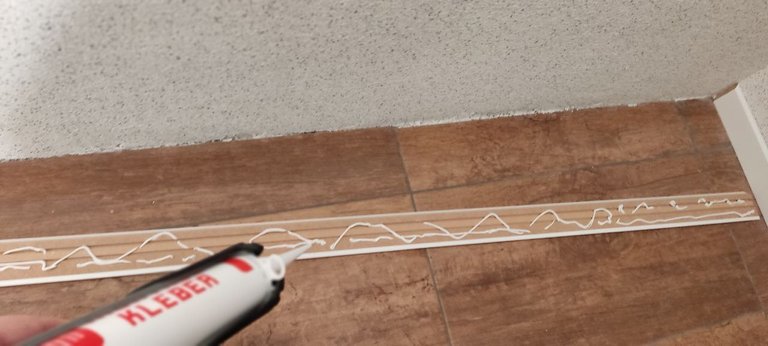
I probably used more than you need to here, but I wanted to be sure it glued tight!
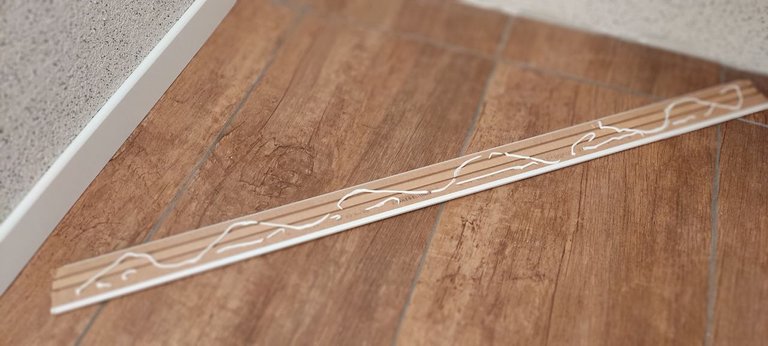
I glued the middle piece and stuck it on.
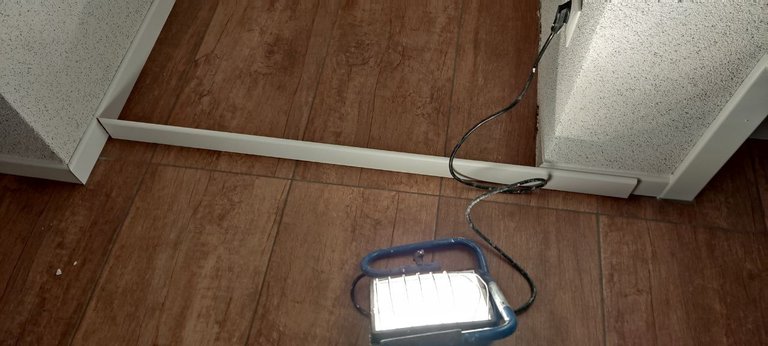
I then glued and stuck on the final piece and it was then ready for the final stage, filling in the gaps.

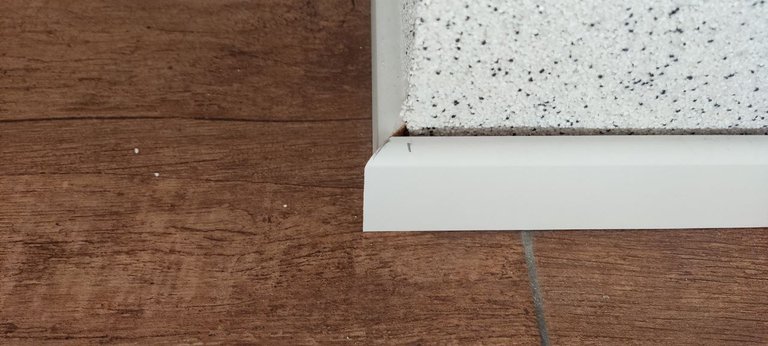
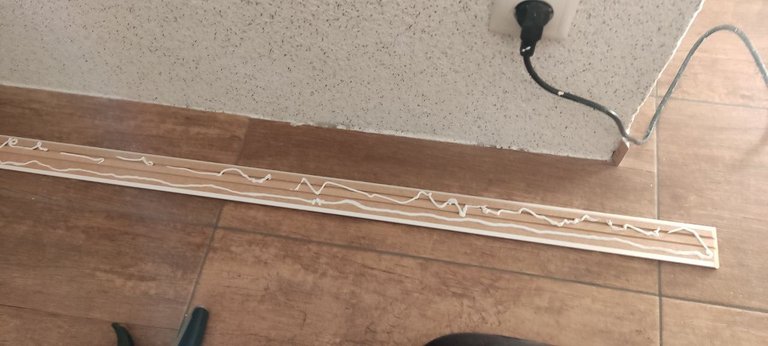
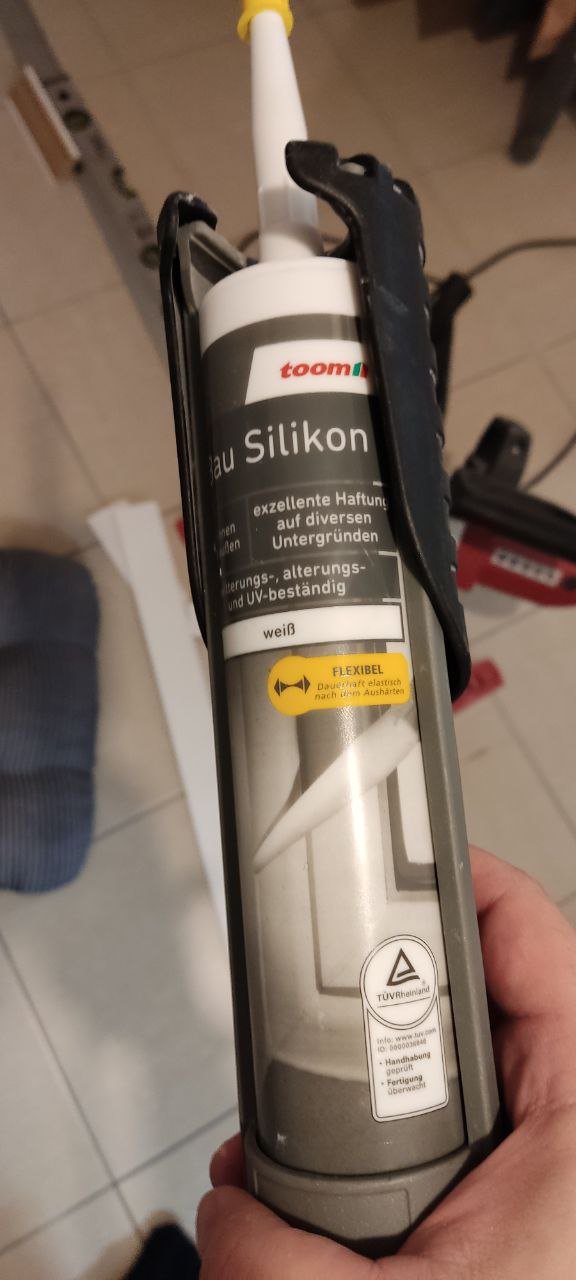
I kept them held in place until I was sure they were nicely stuck to the wall. I then decided to grab some white silicon to fill in the edges. I have before used acryl, but it is getting dirty and not properly protecting and looking as nice, so decided to use silicon this time.

Before adding silicon, you can see the gaps which is not so nice.
I hate working with silicon as it gets everywhere and can be a nightmare to get off. Maybe acryl is worse, but I seem to get it everywhere when I use it! I guess thats cos Im not a professional yet! 😀
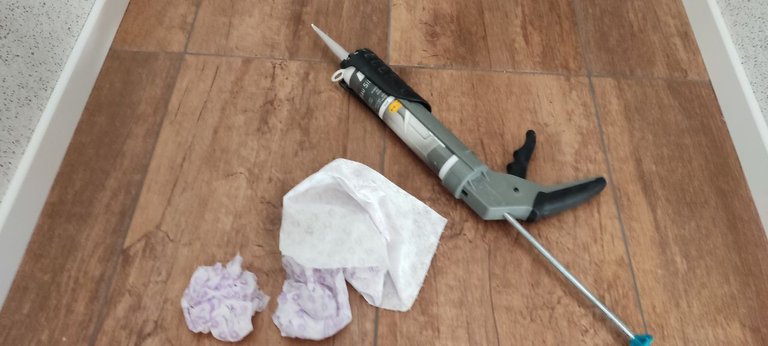
I decided to grab a few cloths extra anyhow to help with the cleanup.
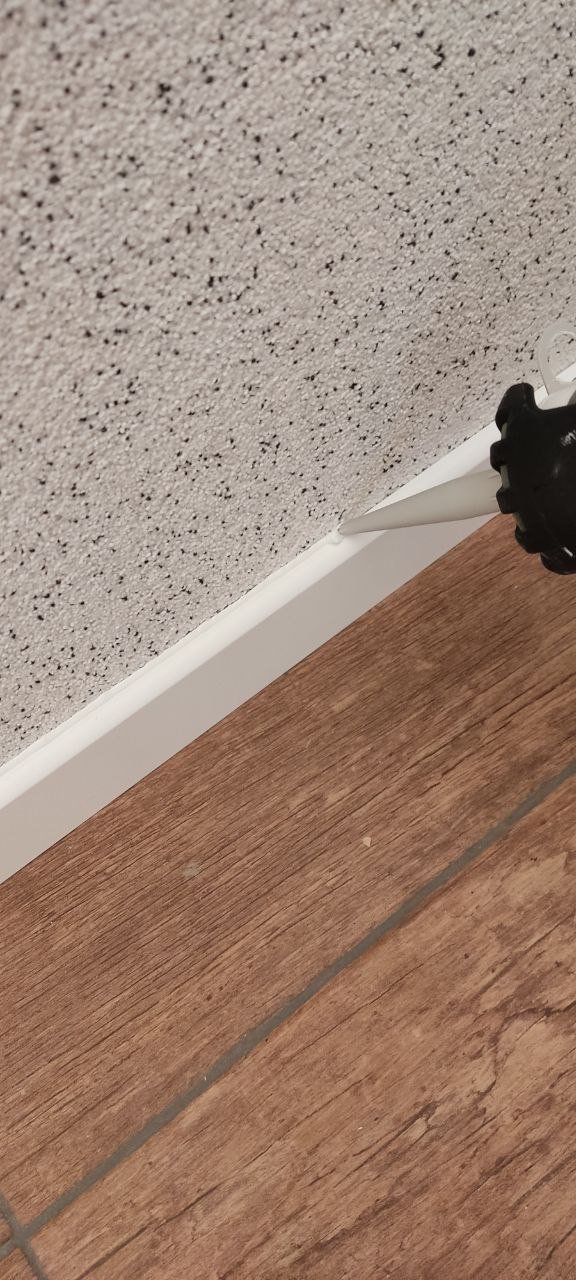
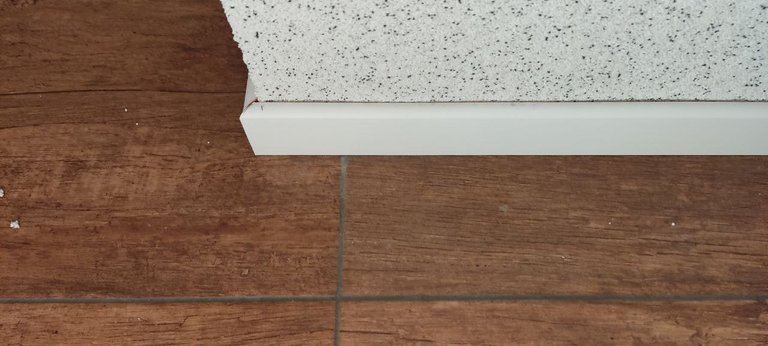
I start applying the silicon and then follow up with a cloth to make it all look nice after.
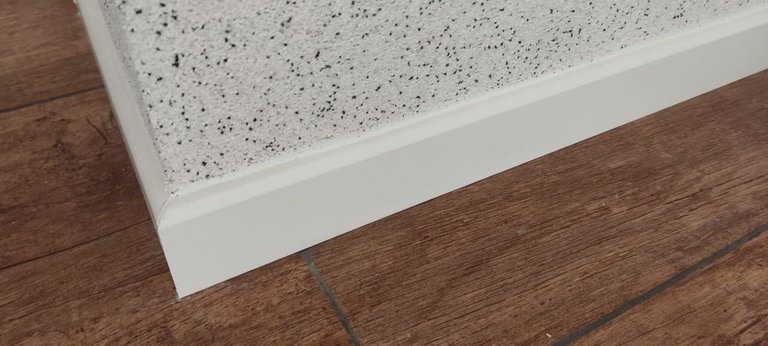
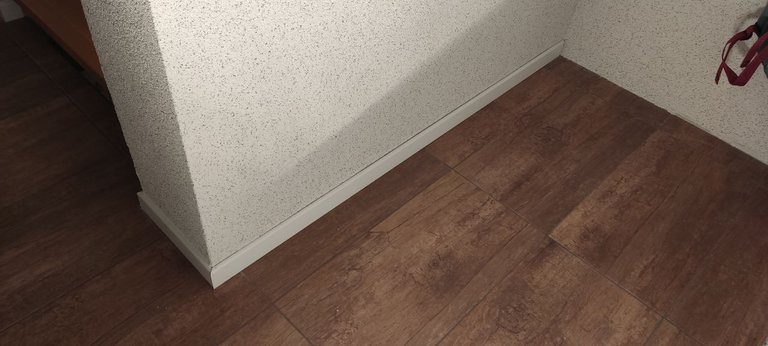
When finished it looks good with no gaps.

The wife was pleased with the results which was good. Happy Wife = Happy Life as they say! With this job done, that was another DIY job crossed off of my ToDo list and it felt good to get the list shorter. Next up I have a few lights to install! A DIYer's life is never done!
Thanks for reading.

Credits:
All Photos are my own.
Ecency Waves banners by @irisworld.
Let's connect : mypathtofire

All looks pretty swish to me, good job!
Thanks, I think it went quite well! Happy Days! 😀
Damn. I didn't know you were this good at making stuff. It looks great and professional. Loving it 😍
Thanks, Im really happy with the results.
Indeed it's a beautiful work
Thanks!
This post has been manually curated by @steemflow from Indiaunited community. Join us on our Discord Server.
Do you know that you can earn a passive income by delegating to @indiaunited. We share more than 100 % of the curation rewards with the delegators in the form of IUC tokens. HP delegators and IUC token holders also get upto 20% additional vote weight.
Here are some handy links for delegations: 100HP, 250HP, 500HP, 1000HP.
100% of the rewards from this comment goes to the curator for their manual curation efforts. Please encourage the curator @steemflow by upvoting this comment and support the community by voting the posts made by @indiaunited.
Thanks for your support team.
DIY Master! 👍
Thanks! Doing my best! haha
Boys and their toys! Looks good though and wife is happy so all good Steve!
Thanks, yeah it is always good to pull out the Mitre saw for some cutting! Thanks Ed!
Well done! Looks very good. Did you not need to prep the wall in any way to make sure the skirts stick? Or is the adhesive a gap filling one?
The wall has been freshly plastered, so there was no real prep work required, just to make sure there were no intrusions so that you can stick the skirting flat against it. But otherwise, yes you should make sure the wall is dust free so the glue and stick better. The glue is this really strong and fast working, it didnt really fill the gaps from what I can see.
Looks good! I've not seen it glued to the wall this way. Instead nails are applied as you can replace things quicker if smth doesn't look appropriate. More importantly though, if your wife is happy, you've done a great job 😊👍
Thanks, yeah there are a few different options to put to the wall. I thought the glue was the easiest way so far. The wife is happy so it is a good job done! lol
Good job! That reminds me, I need to get a mitre saw and do the skirting in our bedroom as the job has been hanging around for a couple of years now!
Thanks, It is a fun job to do, but its just getting started thats the hardest part! 😅
Thats what I have been teiing myself for a long time :OD
That is an amazing job
It’s crazy how the wood cutter looked like a toy in my eye, lol
Thanks, it was a fun job to do. It does look like a toy, but its real! lol
Looking good! I can't tell you the number of times I have cut a 45 degree angle the wrong way thinking I absolutely had it right! I always love an excuse to work with my power tools! I've got some popcorn ceiling you can come remove if you are interested! :)
Thanks. Yeah, I make sure to mark which direction I should cut the 45° or I could get it wrong easily! haha I do like an excuse to get some good tools out. Although Im still cleaning up my workshop after our renovation. I still have a few lamps to install. I would come over and take care of your ceiling , but its too far away! haha
You sure? I really don't feel like messing with it myself. I hate working with drywall!
Hey, you’re talented for this kind of stuff!
I can’t agree more. 😁
Thanks! Im just a beginner really, but its good fun! 😀
Wow mate
This is really something amazing 😍, you have done it in a really great way.
So elegant so beautiful
Thanks, Im glad you liked it.
Well done! You did some great work there. I haven't done that in years now, but I love projects working with wood. Happy wife is what counts!
Yeah, I do like these simple wood projects. I try to keep on the wifes good side, it makes life easier! lol
Do you ever take a rest, or always on fire? :))
Always hustling! But will rest a couple of weeks over Christmas, but there is always something to do! haha
Usually, people end up more tired after the Christmas and New Year holiday period :))
haha yeah it can be that way! I hope I will be ok though!
You did a great job!
Thanks, it was a fun job to tackle!
https://twitter.com/hivediy47901/status/1735712793519611949
Not bad for a guy with three left hands 😜
!PIZZA
Thanks man!
$PIZZA slices delivered:
@thecyberdexter(1/10) tipped @mypathtofire
Hello mypathtofire!
It's nice to let you know that your article won 🥈 place.
Your post is among the best articles voted 7 days ago by the @hive-lu | King Lucoin Curator by fantagira
You and your curator receive 0.3842 Lu (Lucoin) investment token and a 8.07% share of the reward from Daily Report 146. Additionally, you can also receive a unique LUSILVER token for taking 2nd place. All you need to do is reblog this report of the day with your winnings.
Buy Lu on the Hive-Engine exchange | World of Lu created by @szejq
STOPor to resume write a wordSTART