Tuto: cajitas en forma de pastel (ESP-ENG)

¡Hola hivers!💜
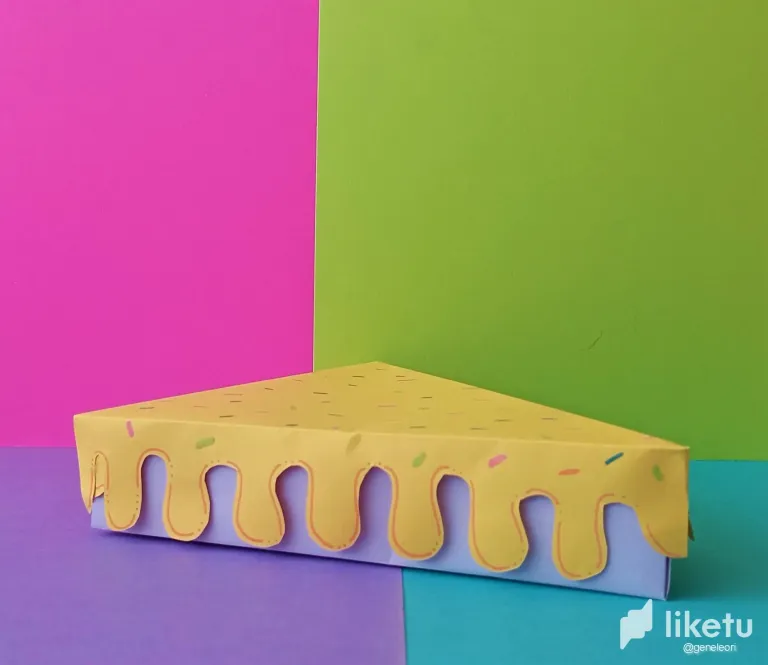
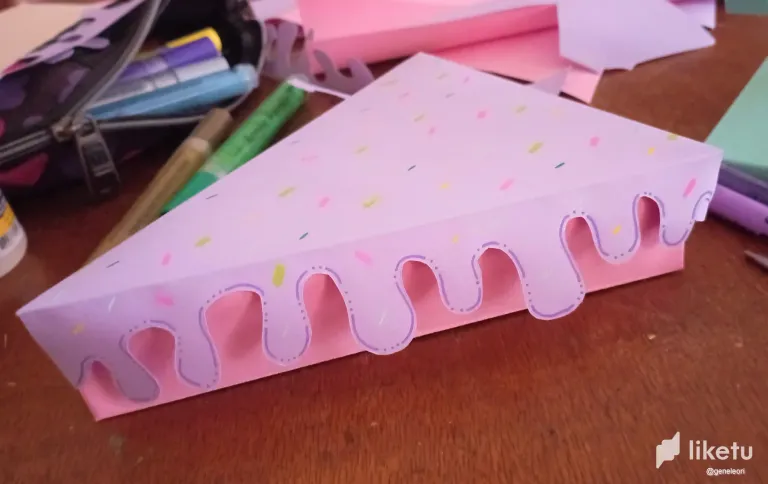
Un placer volver a la comunidad de DIYHub, está vez con un tutorial para hacer cajitas con forma de rebanada de torta o pastel. Estás las hice como cotillón para un taller de lettering. Fueron perfectas para guardar el kit de trabajo de cada participante (lápiz, goma, marcadores, stickers).
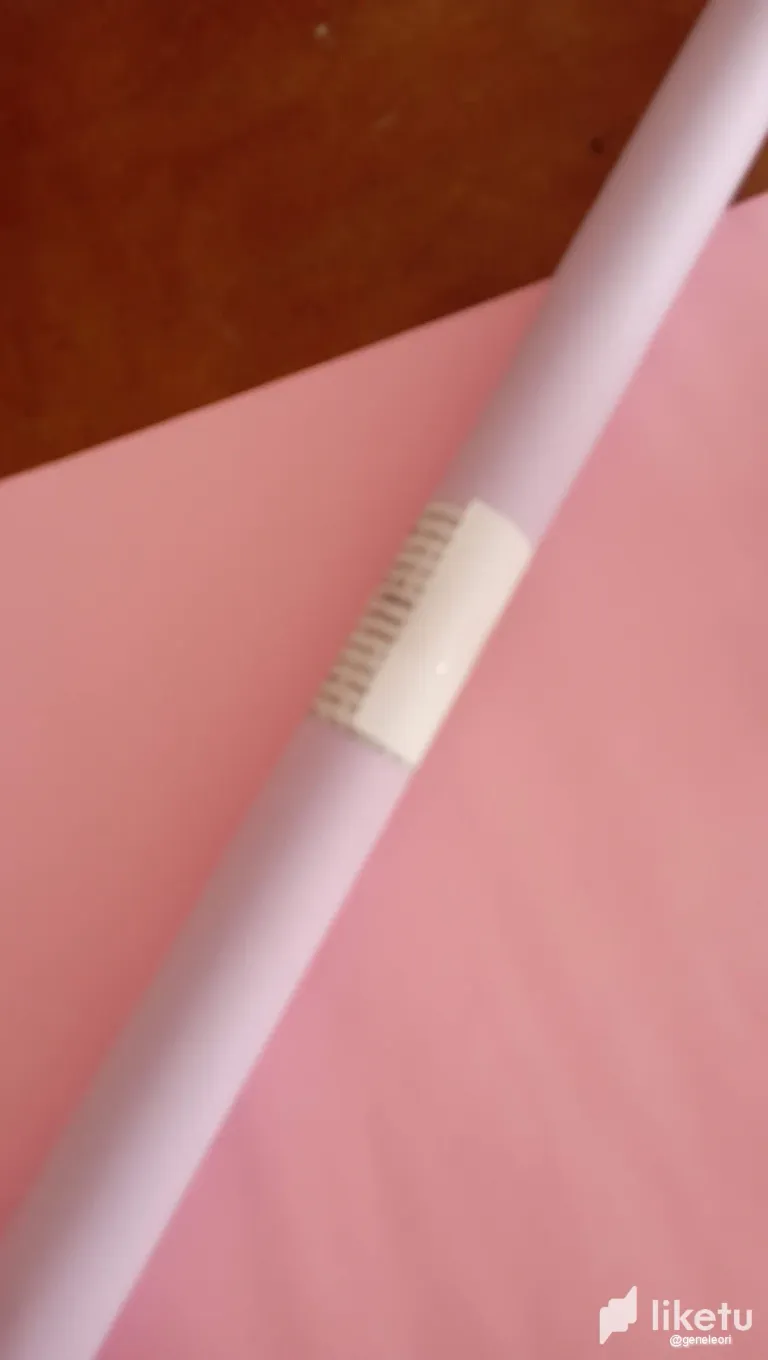
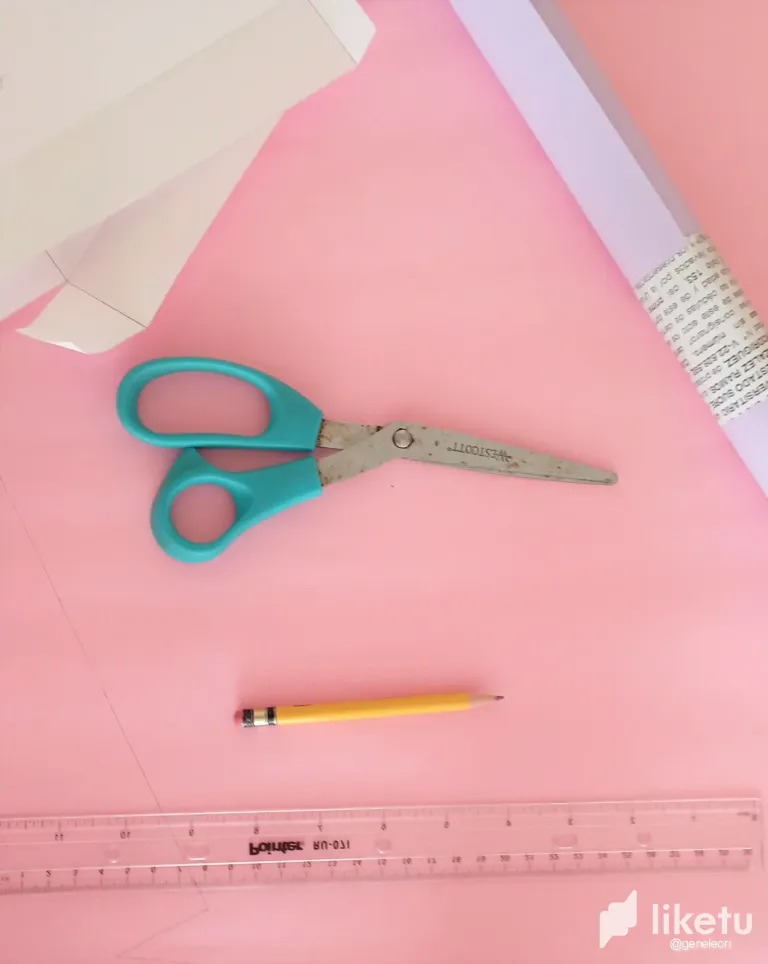
Para realizar estás cajas utilice:
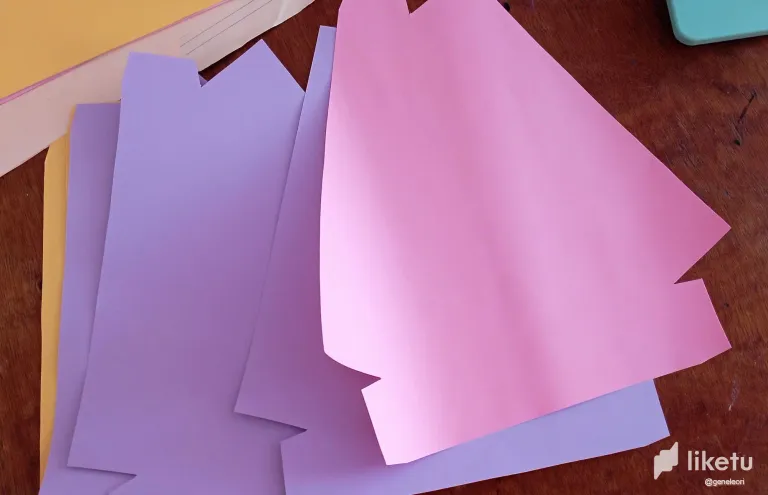
- Cartulina escolar (es más endeble que la cartulina doble faz y más moldeble)
- Lápiz
- Goma
- Regla
- Molde de porción de pastel con medidas exactas (El molde lo saque de aquí)
- Tijera
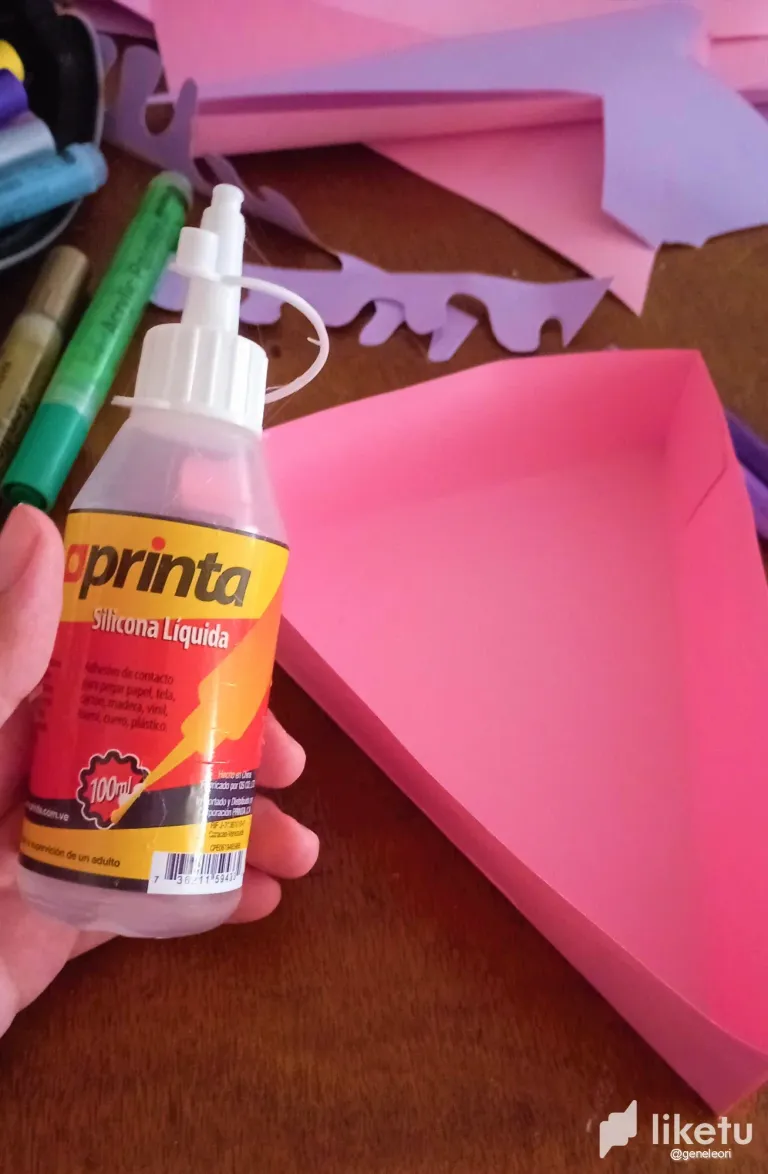
- Pegamento
- Marcadores de pintura para decorar.
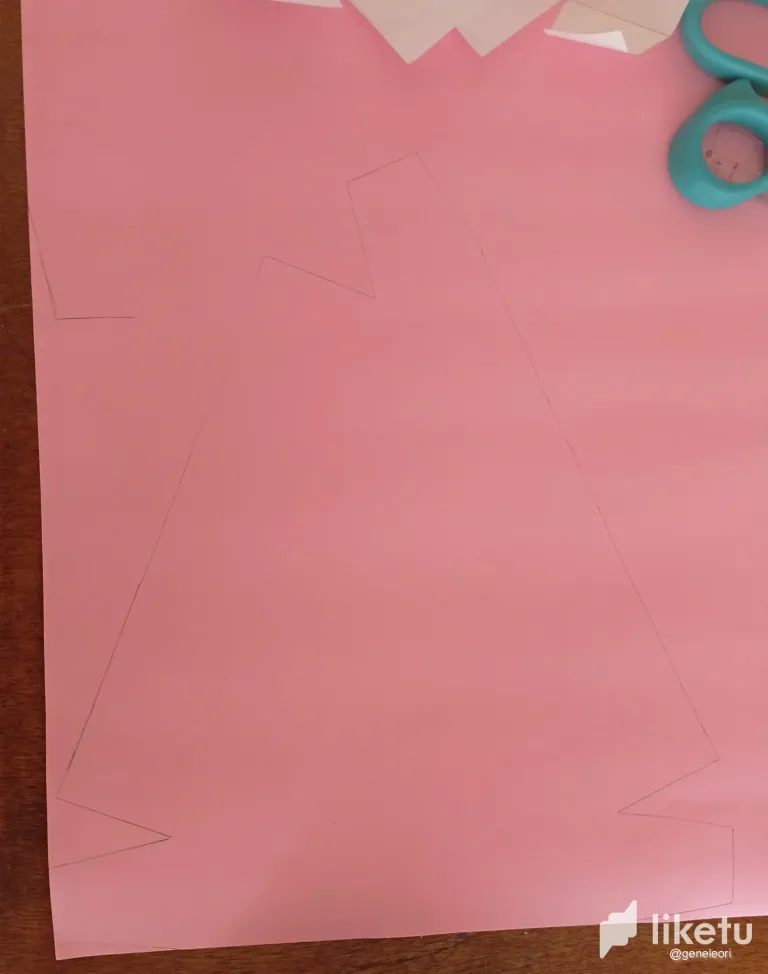
PASO 1
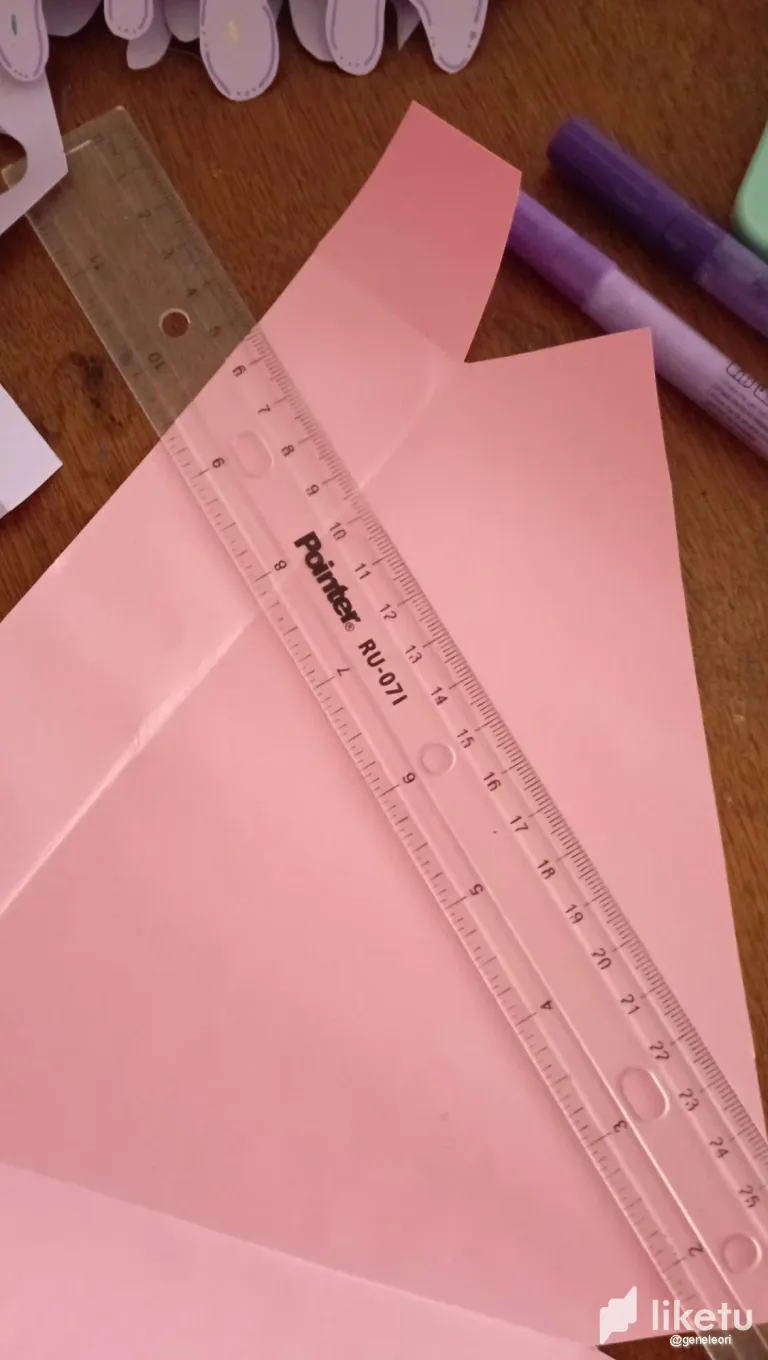
Lo primero fue sacar el molde. Lo saqué de esta página. Es genial, ya que te permite meter las medidas y te da una guía del ángulo que necesitas según las porciones que deseas para que puedas armar la torta con las cajitas si lo deseas. Saque los molde en papel para que fuera más fácil traspasar lo a las cartulinas. Hay uno para la tapa y otro para la base.
PASO 2
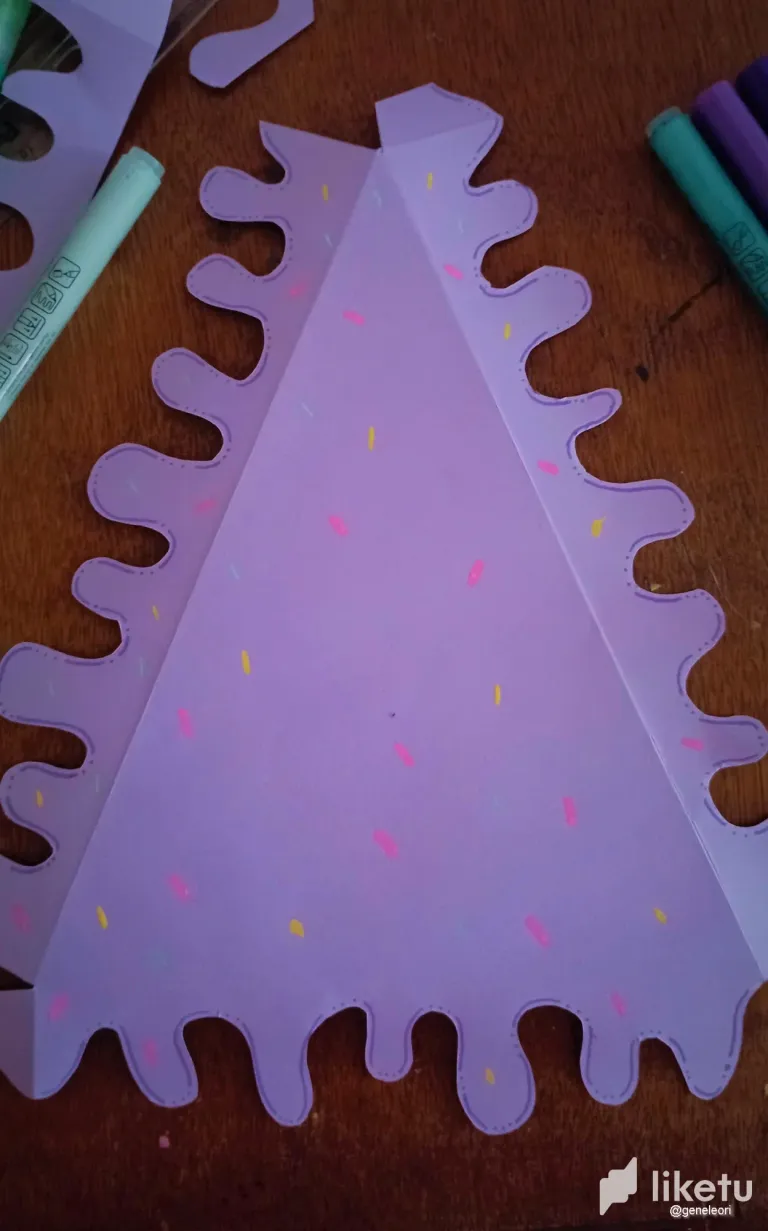
Traspase los moldes a la cartulina con lápiz y regla. Intercale los colores, ya que quería que la base pareciera como la base de la torta de un color y con la tapa de otro color simular un drip (que es como la cremita de decoración)
PASO 3
¡Hora de recortar los moldes!
PASO 4
Una vez los moldes recortados, empecé a ensamblar las bases utilizando el pegamento.
PASO 5
En el caso de las tapas. Primero me encargue de recortar las formas de gotas del drip en los laterales. Luego, dibuje algunos sprinkles con los marcadores de pintura acrílica. Una vez seca la pintura, los ensamble.
PASO 6
Las bases y tapas están listas. Así que pude meter el contenido del cotillón y ¡listas para la fiesta!
Espero te haya gustado este tutorial. Para mí ha sido muy divertido hacerlo y te aseguro que los niños han quedado encantados con el detalle.
Gracias por leerme
Con cariño, G.
Hi hivers! 💜
A pleasure to return to the DIYHub community, this time with a tutorial to make little boxes in the shape of a slice of cake or pie. I made these as cotillion for a lettering workshop. They were perfect to keep the work kit of each participant (pencil, eraser, markers, stickers).
To make these boxes I used:
- School card stock (it is flimsier than double-sided card stock and more moldable).
- Pencil
- Eraser
- Ruler
- Cake slice mold with exact measurements (I got the mold from here)
- Scissors
- Glue
- Paint markers for decorating.
STEP 1
The first thing to do was to get the mold. I got it from this page. It's great, as it allows you to enter the measurements and gives you a guide of the angle you need according to the portions you want so you can assemble the cake with the little boxes if you wish. I took out the paper molds so that it would be easier to transfer them to the cardboard. There is one for the lid and one for the base.
STEP 2
Transfer the molds to the cardboard with a pencil and ruler. Intercalate the colors, since I wanted the base to look like the base of the cake in one color and the lid in another color to simulate a drip (which is like the creamy decoration).
STEP 3
Time to cut out the molds!
STEP 4
Once the molds were cut out, I started to assemble the bases using the glue.
STEP 5
In the case of the lids. First I cut out the drip drip shapes on the sides. Then, draw some sprinkles with the acrylic paint markers. Once the paint was dry, I assembled them.
STEP 6
The bases and lids are ready. So I was able to put in the contents of the cotillion and ready to party!
I hope you liked this tutorial. For me it has been a lot of fun to do and I assure you that the kids have been delighted with the detail.
Thank you for reading me
With love, G..
FUENTE
Fotos: tomadas por mi desde mi redmi 10
Traducción: Deepl
SOURCE
Photos: taken by me from my redmi 10
Translation: Deepl

For the best experience view this post on Liketu
!DIY
!discovery 27
This post was shared and voted inside the discord by the curators team of discovery-it
Join our Community and follow our Curation Trail
Discovery-it is also a Witness, vote for us here
Delegate to us for passive income. Check our 80% fee-back Program
You can query your personal balance by
!DIYSTATSone could mistake that for an actual cake, haha. Nice work.
Congratulations @geneleori! You have completed the following achievement on the Hive blockchain And have been rewarded with New badge(s)
Your next target is to reach 40 posts.
Your next target is to reach 200 upvotes.
Your next target is to reach 3000 upvotes.
You can view your badges on your board and compare yourself to others in the Ranking
If you no longer want to receive notifications, reply to this comment with the word
STOPTo support your work, I also upvoted your post!
Amiga que hermoso!!!! Perfecto para las fiestas de los más chicos. Ya basta de mandar a los pequeños con sus pasteles en la mano enrollados en una servilleta, ahora pueden llevarse eso... me los imagino contentos viendo como les entregan un detalle tan coqueto. Excelente trabajo. Saludos y bendiciones 💗🙏🏻
Gracias💜💜💜💜 sííí, sirven para eso y hasta para ponerles algunos regalos y a los niños les encantan🤭 son de mis favoritas