Topper de cumpleaños hecho con materiales reciclados (ESP-ENG)

¡Hola hivers!💜
Estoy feliz de estar de regreso. Hace poco cumplí años (30 añitos llenos de creatividad e inventos), estuve en búsqueda de quien me hiciera un topper lindo para ponerlo en mi torta de cumpleaños. La idea que le expresé a todos era que dijera: “Make a wish”, es decir, “pide un deseo”. Las referencias que había encontrado no me gustaban para nada, así que ni corta ni perezosa me lancé a diseñar uno con las letras que quería para enviarselo a las personas que le solicite el presupuesto, pero resultó que dijeron que era complicado y bueno, me desanime un poco.
Pero no me rendí. Decidí hacer mi topper yo misma, un día antes de mi cumpleaños y por la premura lo hice con materiales reciclados (que ya tenía en casa). Te cuento el proceso y lo divertido que fue.

MATERIALES
- Foami o goma eva (en mi caso use escarchados color plateado y blanco)
- Cartulina (use un fucsia algo fosforescente)
- Lápiz
- Goma
- Regla
- Tijera
- Marcadores de pintura acrílica
- Cinta doble faz
- Palito de altura
- Pistola de silicone
- Barra de silicone para la pistola
PASO A PASO

PASO 1
La forma que elegí para la base fue una estrella. Usé 3 tamaños distintos: la más grande era de 12 cm, la siguiente de 10 cm y la más pequeña de 8 cm. La más pequeña fue de cartulina fucsia. Primero, las marqué en sus respectivos materiales y procedí a recortarlas. Use pedazos de foami escarchados de dos tonos plateados y blanco y otro trozo de cartulina fucsia que había guardado por si acaso.

PASO 2
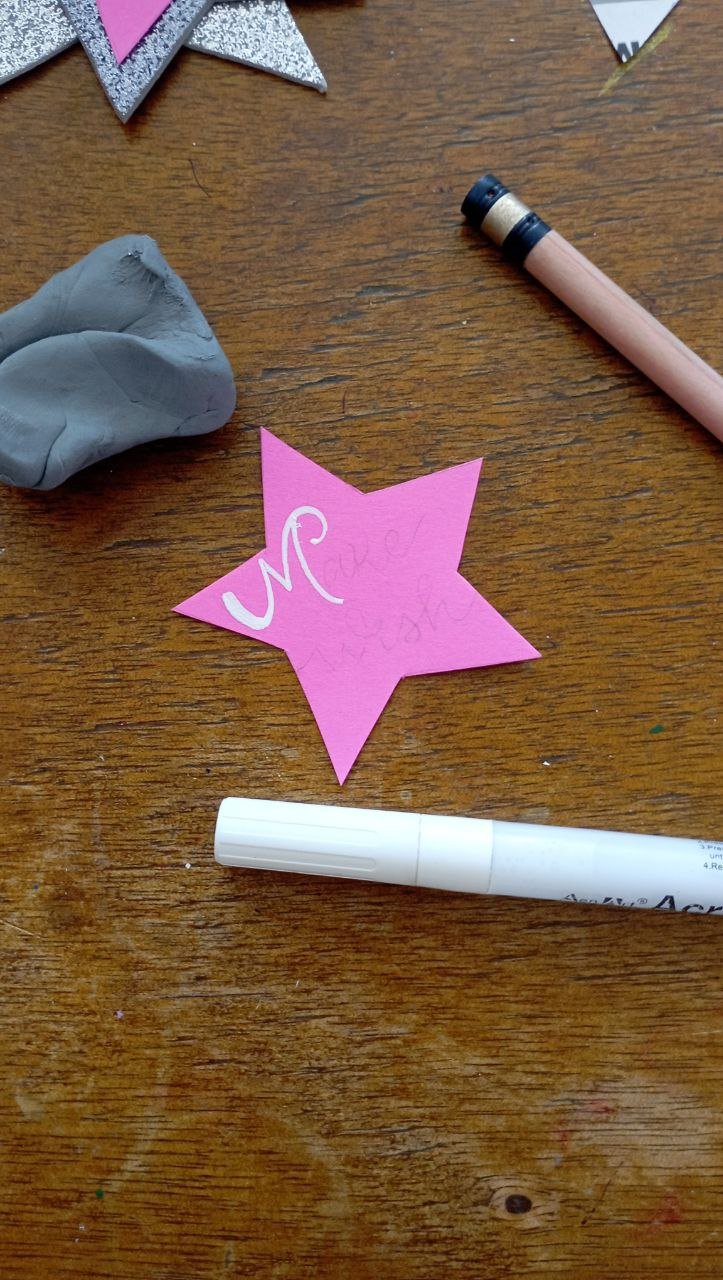
Una vez con las bases recortadas, las probé una encima de otra para confirmar que se veían bien. En la estrella fucsia marque la frase: “make a wish” con lápiz para hacer una guia, la borre un poco y procedí a marcarlo con el marcador de pintura acrílica color blanco.
En realidad, hice 2 estrellas. Me costó decidirme sobre si usar un estilo cursivo o unas letras serif, así que hice ambos. Les agregue un poquito de sombra con un estilo delineado con el marcador de pintura acrilica color negro, buscando realzar las palabras.

PASO 3
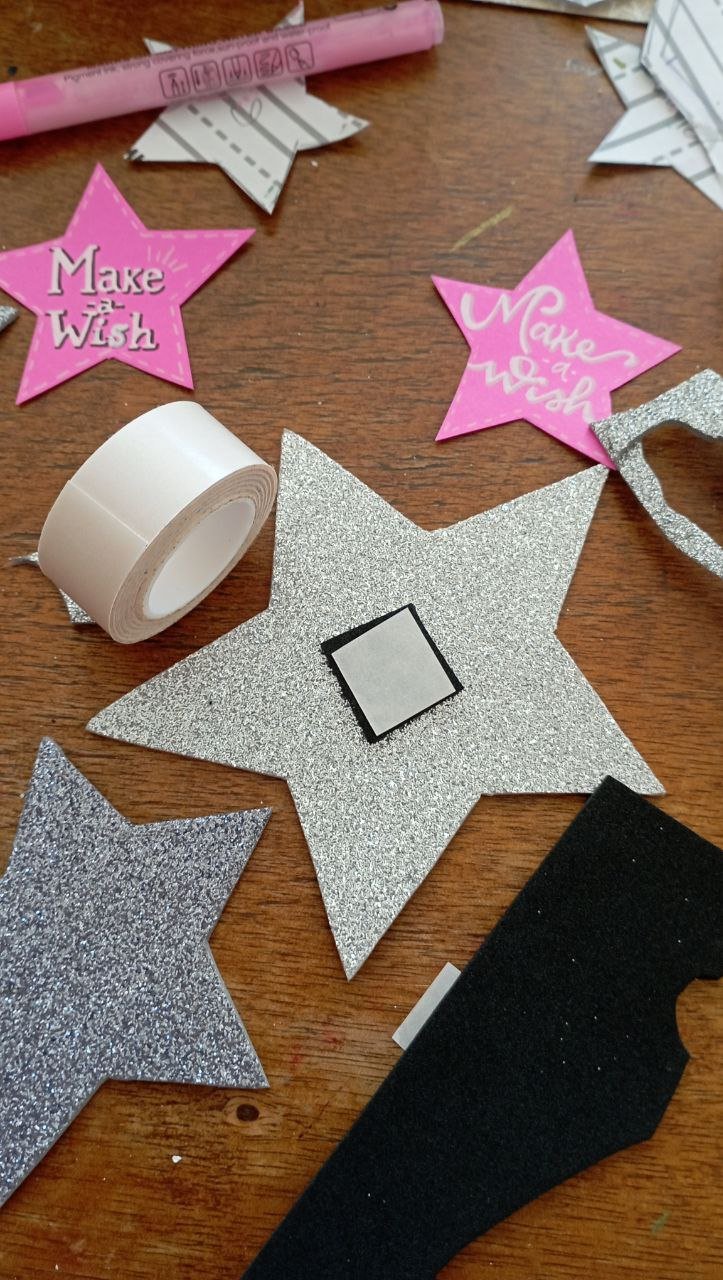
Hora de ensamblar. Para esto use cuadrados de foami y la cinta doble faz. Esta cinta la uso a la hora de hacer planners, ya que me permite pegar muy bien los materiales sin hacer ningún desastre con el pegamento líquido. Así que recorte cuadrados de foami para darle profundidad a las capas del topper, a cada lado del foami le pegue un trozo de la cinta doble faz y así los fui ensamblando hasta completar ambos toppers.
PASO 4
Con ambos toppers listos, me quedaba elegir cual usar para pegarlo al palito de altura. El detalle es que ambos me encantaron, así que mi mama me dio la idea de usar ambos y que el topper se pudiera ver de ambos lados y fue la mejor idea.
Para esto, tomé una de las estrellas y con ayuda de la pistola de silicone pegue el palito de altura (que había pertenecido a un arreglo). Luego le volví a poner más silicone caliente y pegue el otro lado del topper. Para sellarlo mejor (me daba miedo que se desarmara en la torta) también pegue las puntas de las estrellas.

PASO 5
Topper listo, hora de cantar cumpleaños y comer torta.

Fue divertido hacer mi topper y quedé muy contenta con el resultado. El mundo de la papelería creativa siempre me ha gustado y en un futuro me gustaría intentar hacer otro pero con más materiales, capas y más calma.
Gracias por leerme
Con cariño, G.

Hi hivers!💜
I'm happy to be back. I recently had my birthday (30 years full of creativity and inventions), I was looking for someone to make me a cute topper to put on my birthday cake. The idea I expressed to everyone was that it should say: "Make a wish". The references I had found didn't like it at all, so I didn't hesitate to design one with the letters I wanted to send it to the people I asked for the budget, but it turned out that they said it was complicated and well, I got a little discouraged.
But I didn't give up. I decided to make my topper myself, one day before my birthday and because of the rush I made it with recycled materials (that I already had at home). I tell you the process and how much fun it was.
MATERIALS
- Foami or eva gum (in my case I used silver and white frosted)
- Cardboard (I used a fuchsia something phosphorescent)
- Pencil
- Eraser
- Ruler
- Scissors
- Acrylic paint markers
- Double-sided tape
- Height stick
- Silicone gun
- Silicone stick for the gun
STEP-BY-Step
STEP 1
The shape I chose for the base was a star. I used 3 different sizes: the largest was 12 cm, the next was 10 cm and the smallest was 8 cm. The smallest was made of fuchsia cardboard. First, I marked them on their respective materials and proceeded to cut them out. I used pieces of two-tone silver and white frosted foami and another piece of fuchsia cardboard that I had saved just in case.
STEP 2
Once I had the bases cut out, I tried them on top of each other to confirm that they looked good. On the fuchsia star I marked the phrase: "make a wish" with pencil to make a guide, erased it a bit and proceeded to mark it with the white acrylic paint marker.
Actually, I made 2 stars. I had a hard time deciding whether to use a cursive style or serif letters, so I did both. I added a little bit of shadow with an outline style with the black acrylic paint marker, trying to highlight the words.
STEP 3
Time to assemble. For this I used foami squares and double sided tape. I use this tape when making planners, as it allows me to glue the materials very well without making any mess with the liquid glue. So I cut out squares of foami to give depth to the layers of the topper, on each side of the foami I glued a piece of double-sided tape and so I was assembling them until I completed both toppers.
STEP 4
With both toppers ready, I had to choose which one to glue to the tall stick. The detail is that I loved both, so my mom gave me the idea of using both and that the topper could be seen from both sides and it was the best idea.
For this, I took one of the stars and with the help of the silicone gun I glued the height stick (which had belonged to an arrangement). Then I put more hot silicone and glued the other side of the topper. To seal it better (I was afraid it would fall apart on the cake) I also glued the tips of the stars.
STEP 5
Topper ready, time to sing birthday and eat cake.
It was fun to make my topper and I was very happy with the result. The world of creative stationery has always appealed to me and in the future I would like to try to make another one but with more materials, layers and more calm.
Thank you for reading me
With love, G..
FUENTE
Fotos: tomadas por mi desde mi redmi 10
Traducción: Deepl
SOURCE
Photos: taken by me from my redmi 10
Translation: Deepl

Yeehaw, what a journey of creativity and determination captured in this post! Keep on shining bright like those stars on your birthday topper, amigo.
¡Felicidades! Esta publicación obtuvo upvote y fue compartido por @la-colmena, un proyecto de Curación Manual para la comunidad hispana de Hive que cuenta con el respaldo de @curie.
Si te gusta el trabajo que hacemos, te invitamos a darle tu voto a este comentario y a votar como testigo por La Colmena.
Si quieres saber más sobre nuestro proyecto, te invitamos a acompañarnos en nuestro servidor de Discord.
Lindísimo!
Congratulations @geneleori! You have completed the following achievement on the Hive blockchain And have been rewarded with New badge(s)
Your next target is to reach 4750 upvotes.
You can view your badges on your board and compare yourself to others in the Ranking
If you no longer want to receive notifications, reply to this comment with the word
STOPSe ve súper lindo, sobretodo por la combinación de colores que es bastante elegante