Taza personalizada: tutorial (ESP-ENG)

¡Hola hivers!💜
Un placer estar de regreso en esta comunidad tan talentosa y artística. Les cuento que mi cuñada cumplía años y no sabía qué regalarle. Quería que fuera algo que le gustara mucho y se que algo que ama es a su manada perruna. Tiene 5 perritos, entre ellos Bossito que es papá de mi perrita Buda. También el año pasado perdió dos perritos que eran importantes para ella y me pareció que sería bonito homenajearlos. Así que me puse a buscar ideas en pinterest y encontré unas tazas decoradas, muchas eran con vinil, pero como artista que soy quería hacerla yo misma y utilizar pintura para decorarla. Que mejor regalo para mi cuñada que mezclar sus perritos amados y el café.
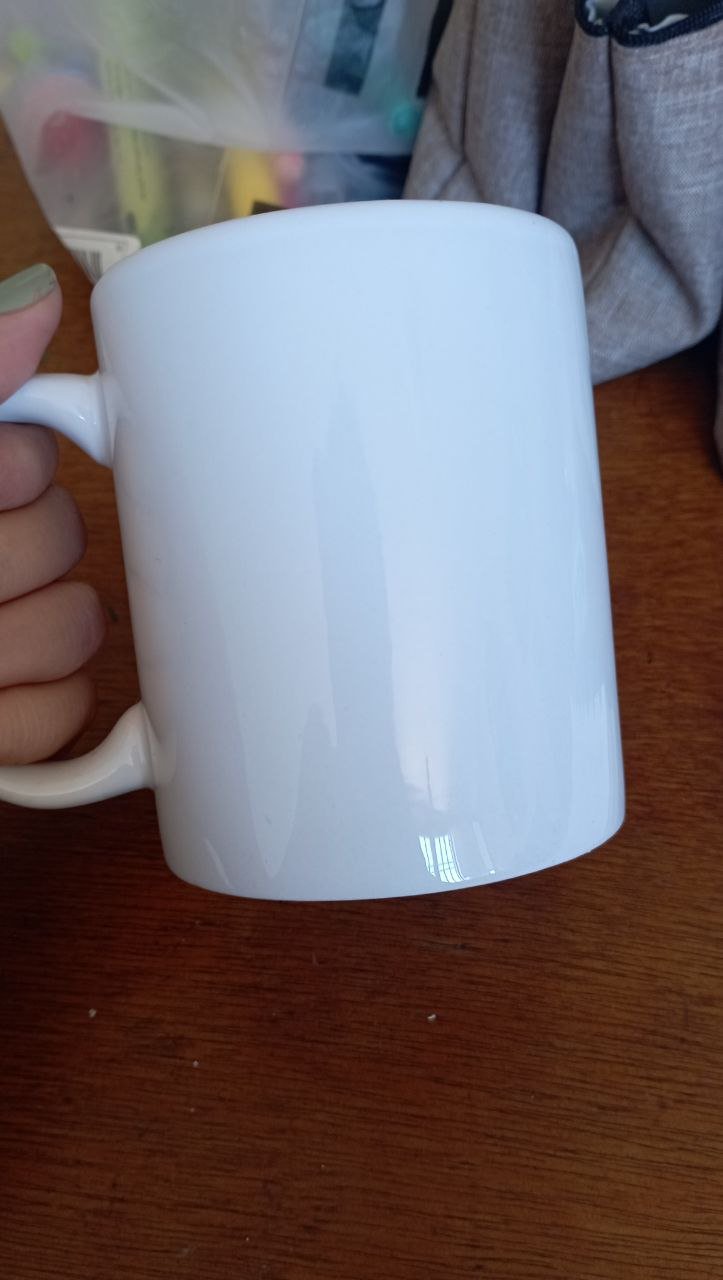
Salí a buscar tazas que sirvieran para ser intervenidas pero no encontré tazas sencillas. Luego recordé que hace algún tiempo compre tazas blancas para sublimacion y buscando encontré que quedaba una y era perfecta para la misión. Así que manos a la pintura:

MATERIALES
- Taza blanca para sublimar (o si encuentras una taza sencilla)
- Lápiz
- Goma
- Marcadores de pintura acrílica
- Barniz fijador de pintura
PASO A PASO
PASO 1
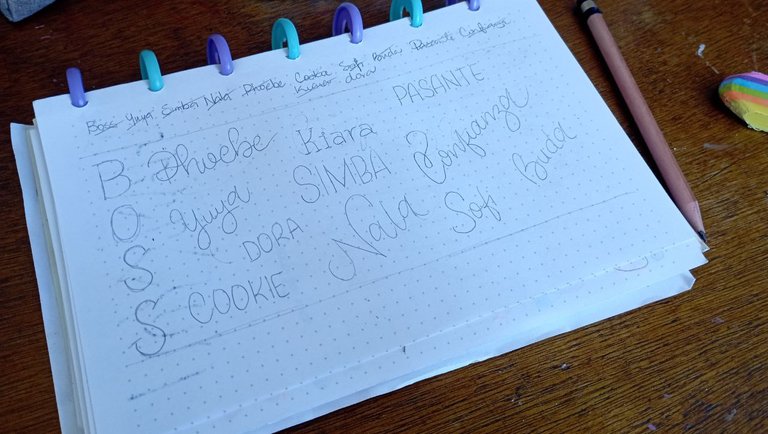
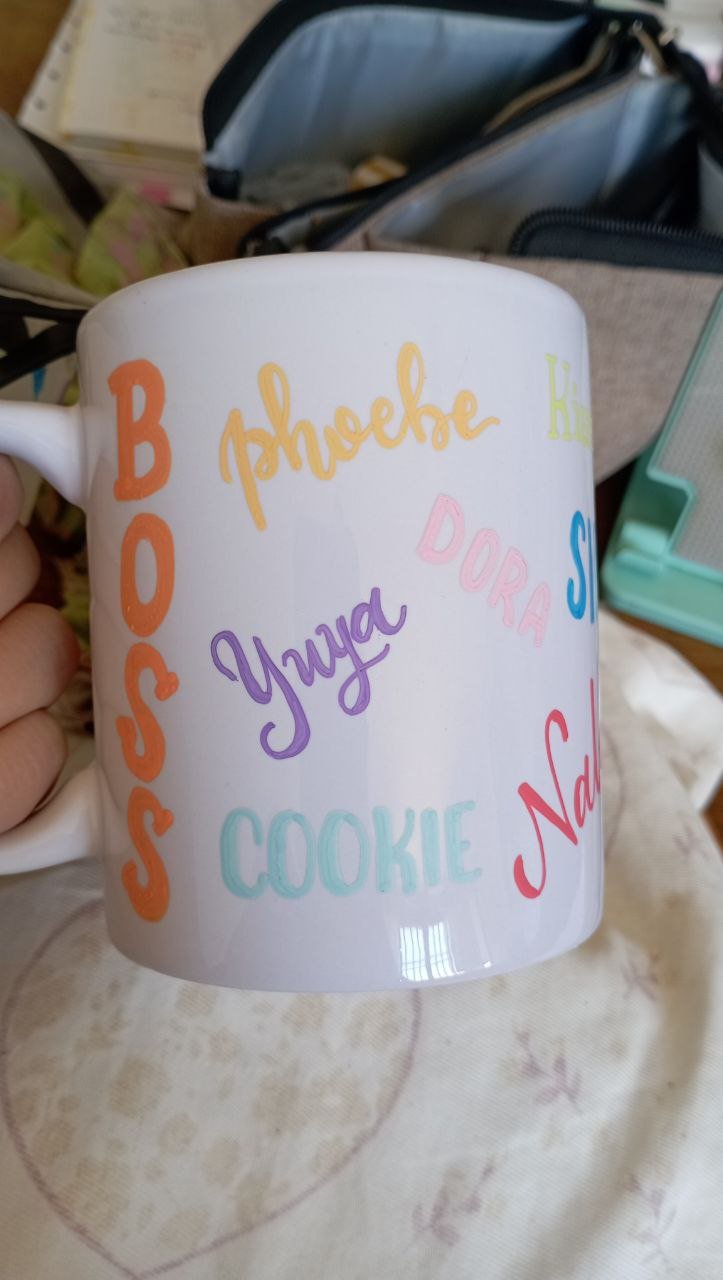
Lo primero fue armar un boceto de lo que dibujaría. Mi idea era poner los nombres de todos los miembros de la mañana y dibujar patitas de perritos y corazones. En el boceto distribuí los nombres de todos usando distintos estilos de letra. Entre esos estilos utilice cursivo, serif y sans serif, variando el contraste entre las letras para diferenciarlos a todos. Como buenos perritos que son, cada uno tiene una personalidad diferente.
PASO 2
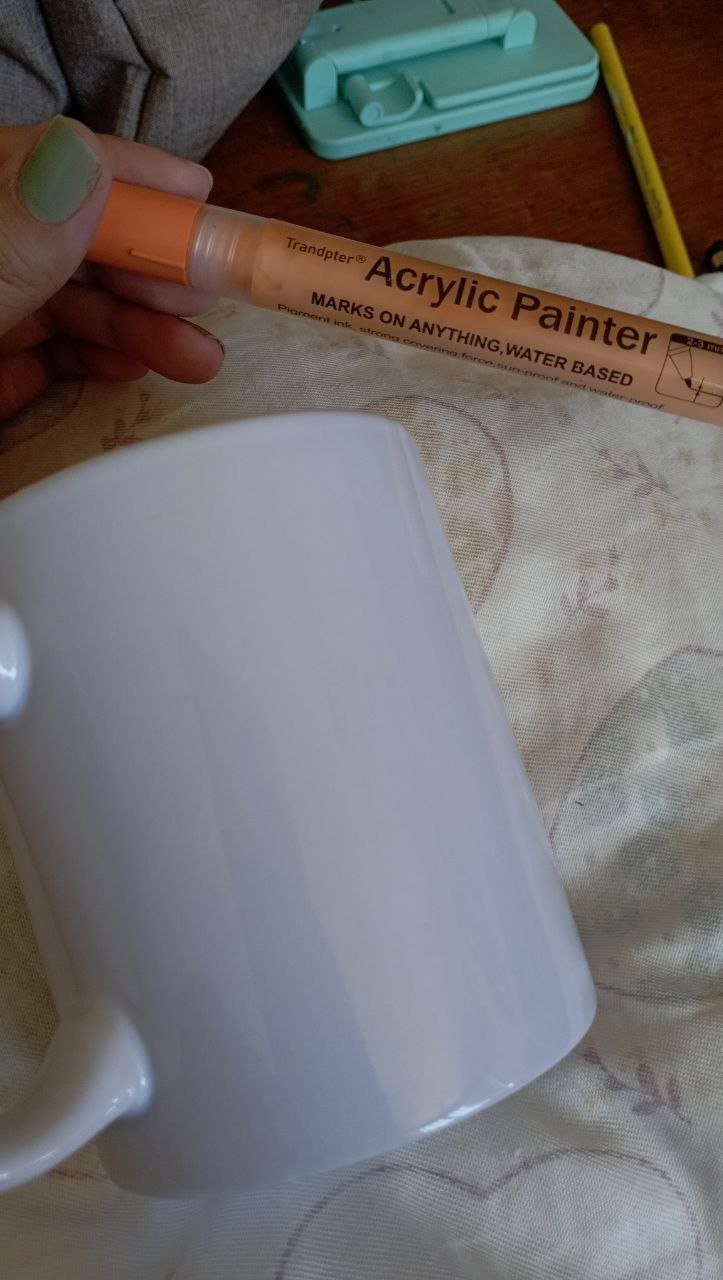
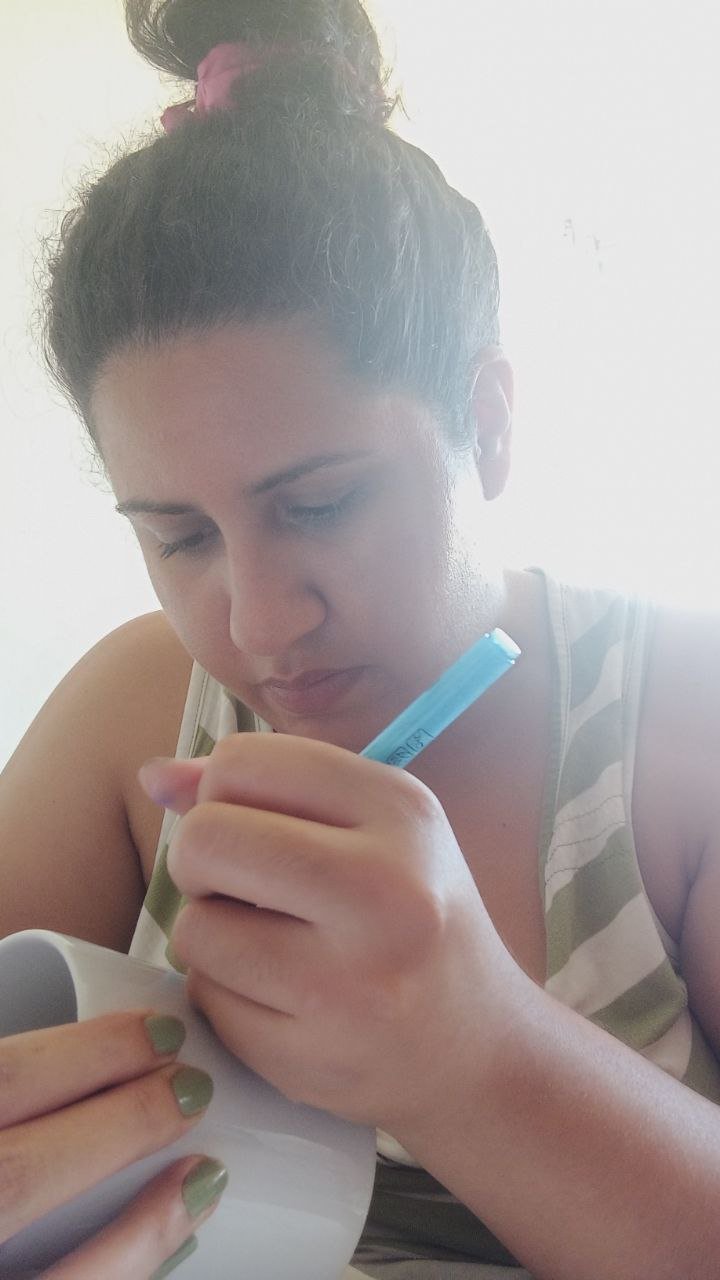
La idea era marcar las letras usando lápices acuarelables peroooo se hizo un desastre. Al ser el fondo claro, debí usar negro pero el color negro se mezclo con la pintura y hubo desastre. Menos mal pude limpiarlo con un pañito húmedo. Intente nuevamente con el amarillo y fue igual. Así que me encomende a Dios y mi boceto, trabajando a mano alzada.
Empecé a dibujar directamente cada nombre con el marcador de pintura respetando la distribución del boceto. Use muchos colores, pero intente que el que más prevaleciera fuera el naranja, ya que es su color favorito. Me daba mucho miedo dañar la taza, pero lo que se salió del diseño lo pude limpiar rápidamente con un pañito húmedo.
 |  |
|---|---|
 |  |
| - | - |
PASO 3
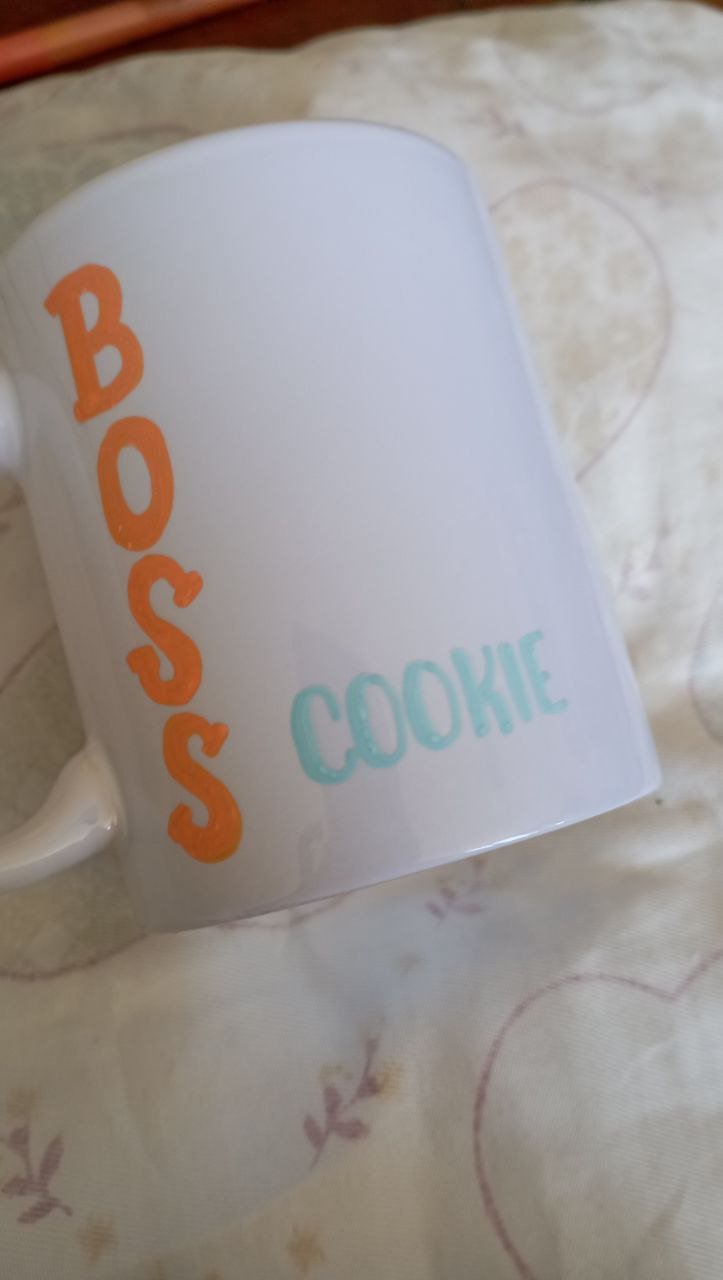
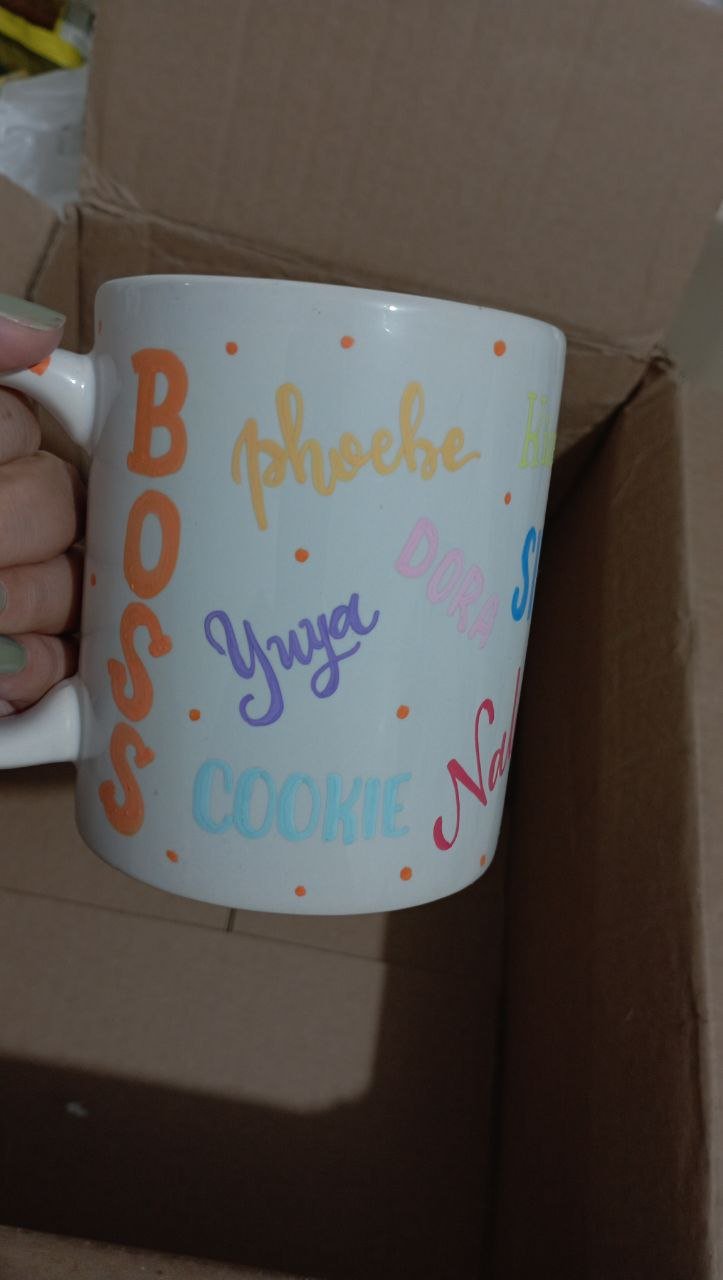
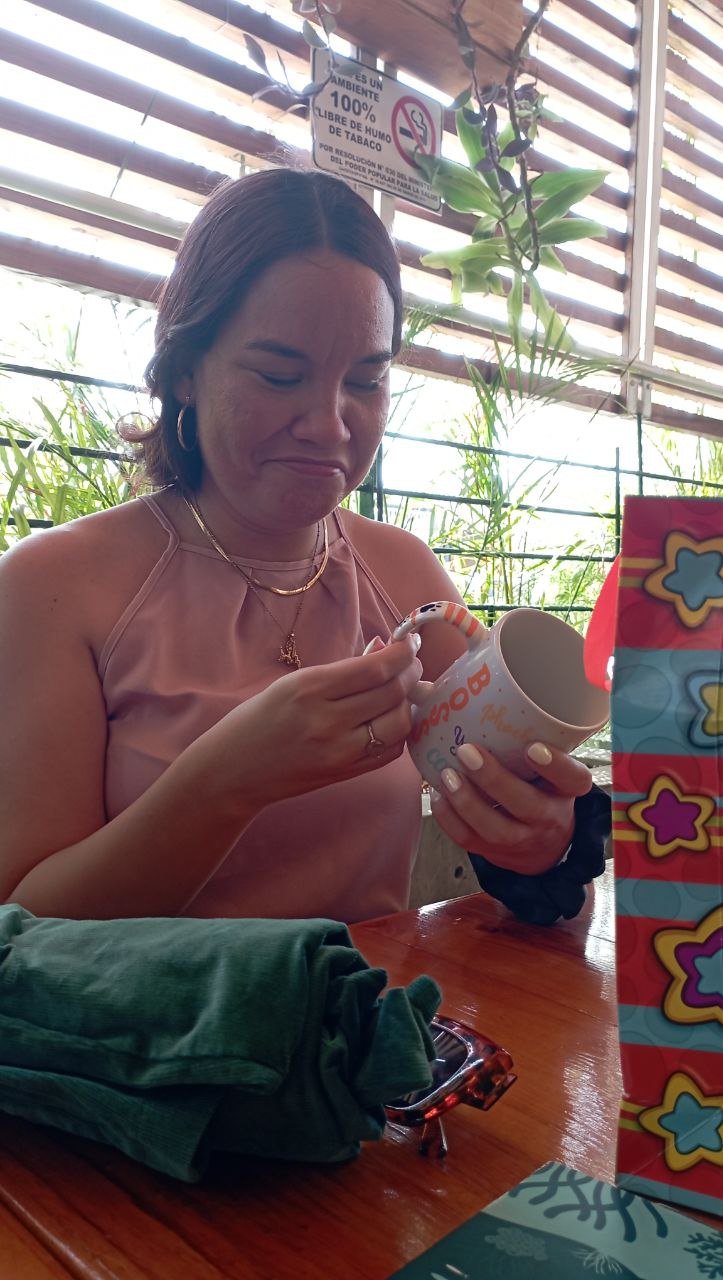
Una vez termine las letras, note que tenía algunos espacios en blanco que rellenar. Para eso hice algunos doodles de patitas, corazones y puntos. Fueron pequeños detalles que agregue y que iban perfecto con la composición.


PASO 4
Deje que secara la pintura por algunas horas antes de aplicar el barniz fijador. Use uno que tengo que es en spray con efecto glossy. Le puse dos capas del spray y lo dejé secando toda la noche.
 |  |
|---|---|
 |  |
| - | - |
PASO 5
Al día siguiente lo lave con agua y jabón para entonces envolverlo y entregarlo a la cumpleañera.
 |  |
|---|
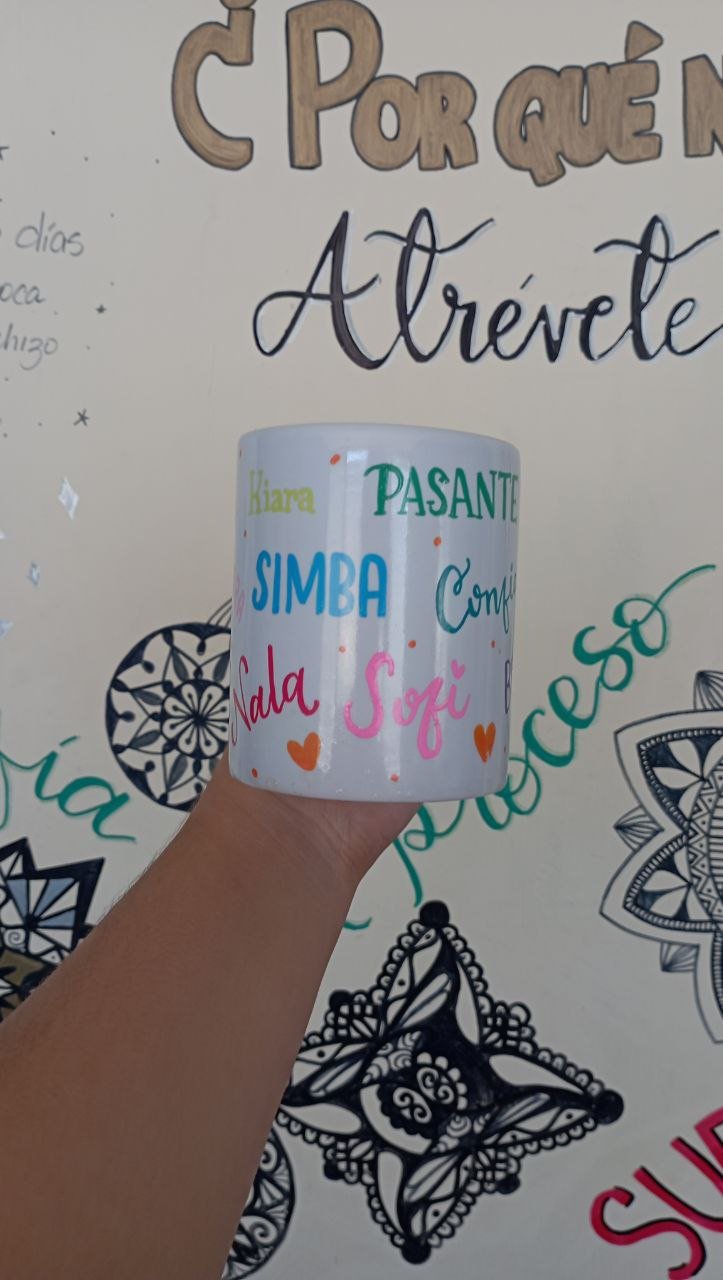
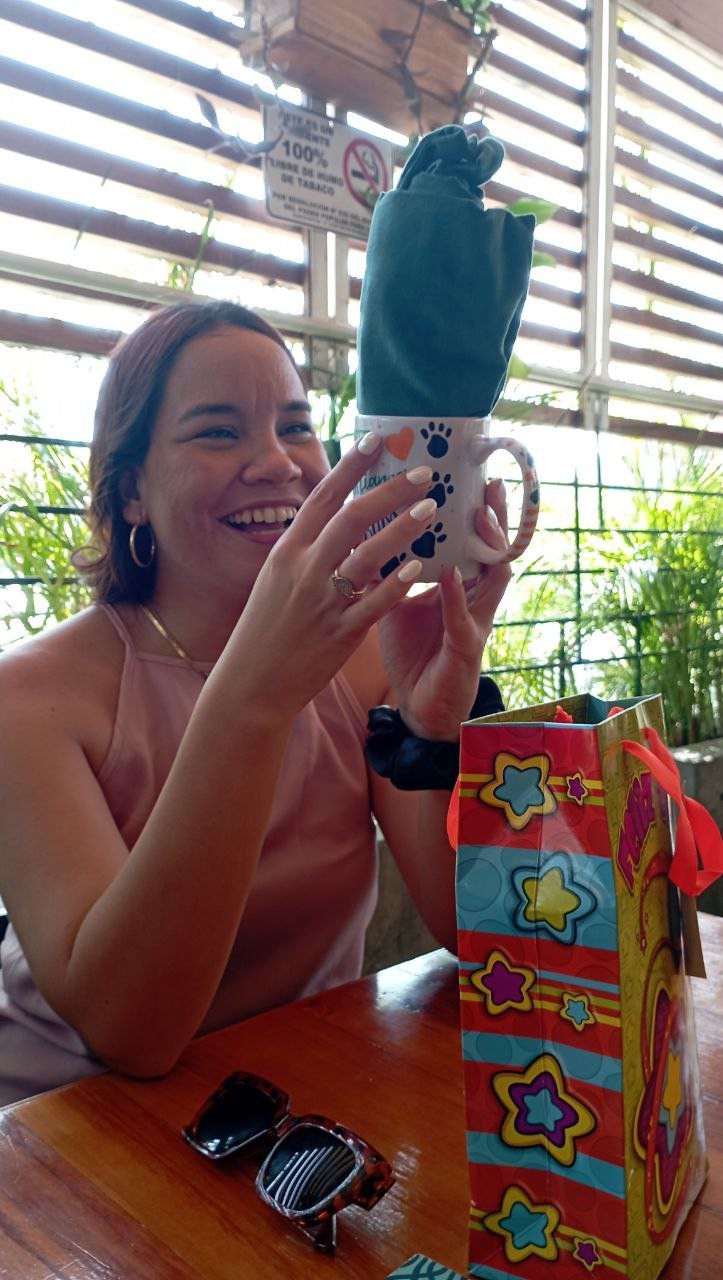
Fuimos a almorzar sushi para celebrar a la cumpleañera, ahí le entregamos su regalo. La taza iba en conjunto con un jumper que le regaló mi mamá. Les dejo una foto de cuando vio su regalo. Se emocionó mucho cuando vio que estaban todos los perritos de su vida, hasta aquellos que habían partido pero ocupan un lugar especial en su corazón.
Gracias por leerme
Con cariño, G.
Hi hivers!💜
It's a pleasure to be back in this talented and artistic community. My sister-in-law had a birthday and I didn't know what to get her. I wanted it to be something she would love and I know that one thing she loves is her pack of dogs. She has 5 puppies, among them Bossito who is daddy to my puppy Buda. She also lost two puppies last year that were important to her and I thought it would be nice to honor them. So I started looking for ideas on pinterest and found some decorated mugs, many were with vinyl, but as an artist I wanted to do it myself and use paint to decorate it. What better gift for my sister in law than to mix her beloved doggies and coffee.
I went out looking for mugs that would work for intervention but I couldn't find any plain mugs. Then I remembered that some time ago I bought white mugs for sublimation and searching I found that there was one left and it was perfect for the mission. So I got to painting:
MATERIALS
White mug for sublimation (or if you find a plain mug)
Pencil
Eraser
Acrylic paint markers
Paint fixative varnish
STEP-BY-Step
STEP 1
The first thing was to draw a sketch of what I would draw. My idea was to put the names of all the members of the morning and draw little dog legs and hearts. In the sketch I distributed everyone's names using different font styles. Among those styles I used cursive, serif and sans serif, varying the contrast between the letters to differentiate them all. As the good little dogs that they are, each one has a different personality.
STEP 2
The idea was to mark the letters using watercolor pencils but it made a mess. Since the background was light, I should have used black but the black color mixed with the paint and there was a mess. Fortunately I was able to clean it up with a damp cloth. I tried again with yellow and it was the same. So I entrusted myself to God and my sketch, working freehand.
I began to draw each name directly with the paint marker respecting the layout of the sketch. I used many colors, but I tried to make orange the most prevalent, since it is her favorite color. I was very afraid of damaging the cup, but what came out of the design I was able to clean it quickly with a damp cloth.
| |
|---|---|
| |
| - | - |
STEP 3
Once I finished the letters, I noticed that I had some blanks to fill in. For that I made some doodles of little paws, hearts and dots. They were small details that I added that went perfectly with the composition.
STEP 4
Let the paint dry for a few hours before applying the fixative varnish. I used one I have that is a glossy spray. I applied two coats of the spray and let it dry overnight.
| |
|---|---|
| |
| - | - |
STEP 5
The next day I washed it with soap and water and then wrapped it and gave it to the birthday girl.
| |
|---|
We went to have sushi for lunch to celebrate the birthday girl, there we gave her her present. The mug went together with a jumper that my mom gave her. Here is a picture of when she saw her present. She was very excited when she saw that all the dogs in her life were there, even those who had passed away but have a special place in her heart.
Thank you for reading me
With love, G..
FUENTE
Fotos: tomadas por mi desde mi redmi 10
Traducción: Deepl
SOURCE
Photos: taken by me from my redmi 10
Translation: Deepl

Hola amiga me encantó esta técnica no la había visto antes pensé que era una taza subliminada
Graciaaaas💜💜 bueno es un taza para sublimación pero sin el sublimado🤭 dije que buscaría otra para hacer más🤭
Qué bonita te quedo la taza, me gusto mucho como la decoraste, tu cuñada se veía tan feliz bueno y quién no lo estaría de ver los nombres de sus mascotas tan especiales en un detalle hecho con tanto cariño.💕
Graciaaaas💜 ay sí, se le aguaron los ojos cuando los vio a todos💜😍
https://twitter.com/hivediy47901/status/1781554043946479919