Etiqueta personalizada para scrunchies: tuto (ESP-ENG)
¡Hola hivers!💜
Estoy feliz de estar de vuelta por aquí, espero que todos estén genial. Hace poco cumplí años y una forma de agradecer a las que asistieron fue regalarles una scrunchie. Hice la compra a un emprendedor local llamada Ay Bendito! que vende bolsos, neceseres, morrales y también accesorios como scrunchies y pinzas para el cabello. Pedí scrunchies de muchos colores pero sentía que necesitaba darle un toque especial y diferenciador a las scrunchies. Busqué inspiración en pinterest y encontré varios estilos de tags o etiquetas que podía ponerle. Así que diseñe mi propia etiqueta con la idea de ponerle un mensaje de agradecimiento y darle mi toque con lettering, que es algo que me apasiona hacer.
Les cuento como lo hice:

MATERIALES
- Lápiz
- Goma
- Tijera
- Papel reciclado
- Cartulina de colores
- Marcadores de pintura acrílica
- Silicone en barra
- Pistola de silicone
- Scrunchie
PASO A PASO
PASO 1
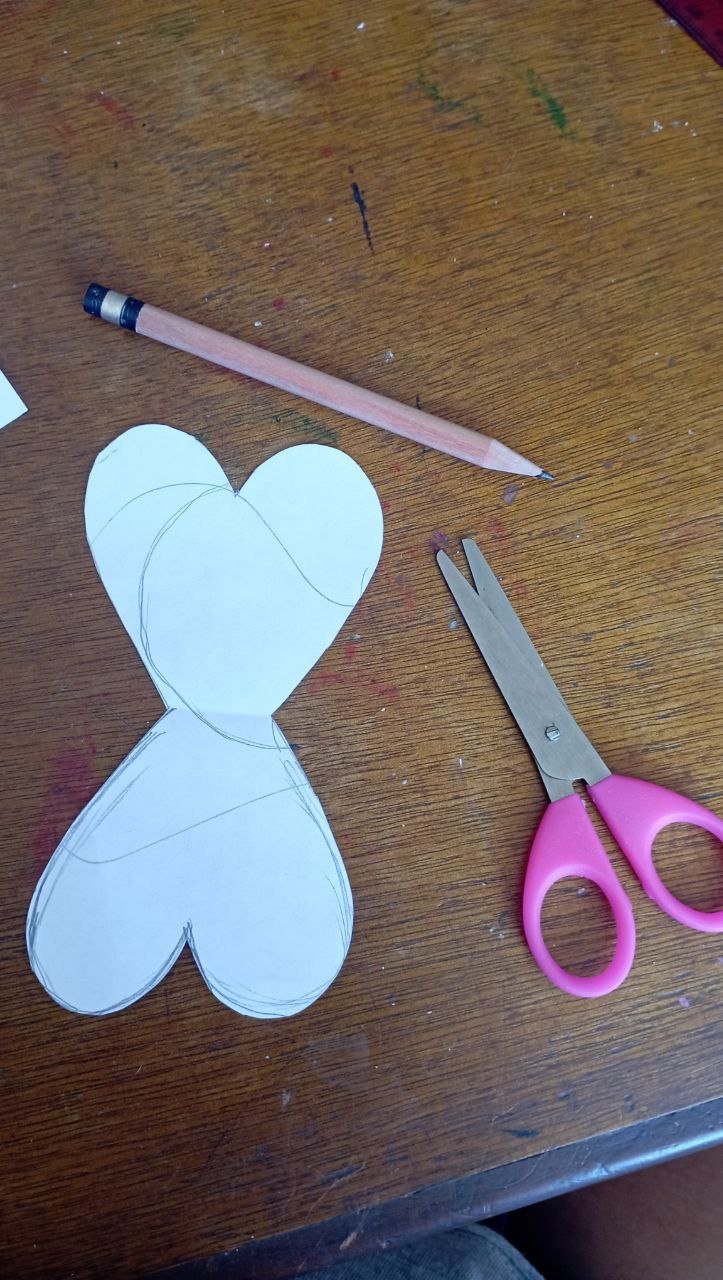
Primero dibujé la forma de la etiqueta en papel reciclado que tenía. Se los muestro en foto porque no estoy muy segura de cómo definir la forma. Pudiera decir que tiene forma de hongo por ambos extremos, cosa de que al envolver la scrunchie con la etiqueta, ambos extremos coincidan. Lo recorte e hice una prueba de tamaño con la scrunchie para asegurarme de que el tamaño funcionaba.


PASO 2
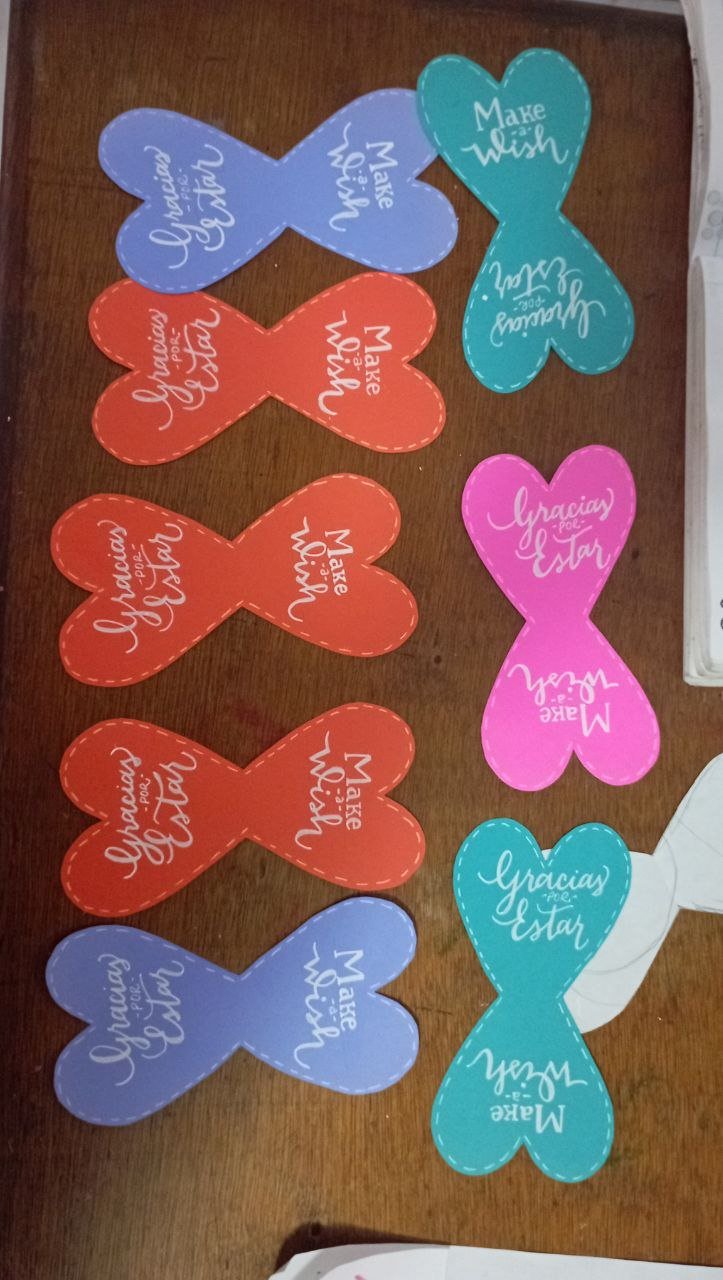
Una vez que comprobé el tamaño, marqué el molde en las distintas cartulinas. Yo uso cartulina opalina de 160 gramos en colores turquesa, fucsia, naranja, violeta. Estas cartulinas eran retazos que había guardado por si acaso y justo hacían contraste con los colores de las scrunchies. Los recorte, fueron 9 en total.


PASO 3
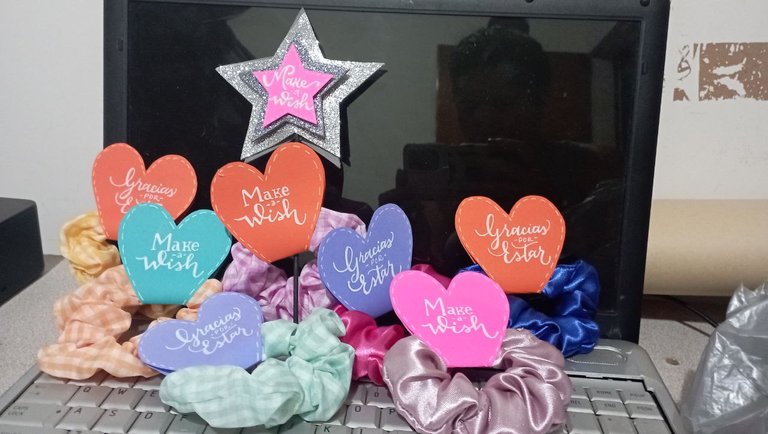
Una vez recortadas, empecé a escribir el molde del mensaje que quería con un lápiz. Hice 2: “gracias por estar” y “make a wish”, uno para cada lado de la etiqueta. Use un estilo cursivo y unas letras serif que me encantan para los mensajes. Combinaban un poco con el topper que había hecho para mi cumpleaños.
Para repasarlo use marcadores de pintura acrílica color blanco. Estuve tentada de ponerle sombra y delineado pero sentí que así se veían delicados. El otro detalle que agregue a las etiquetas fue un borde de línea punteada alrededor de la etiqueta para delinearlo.
PASO 4
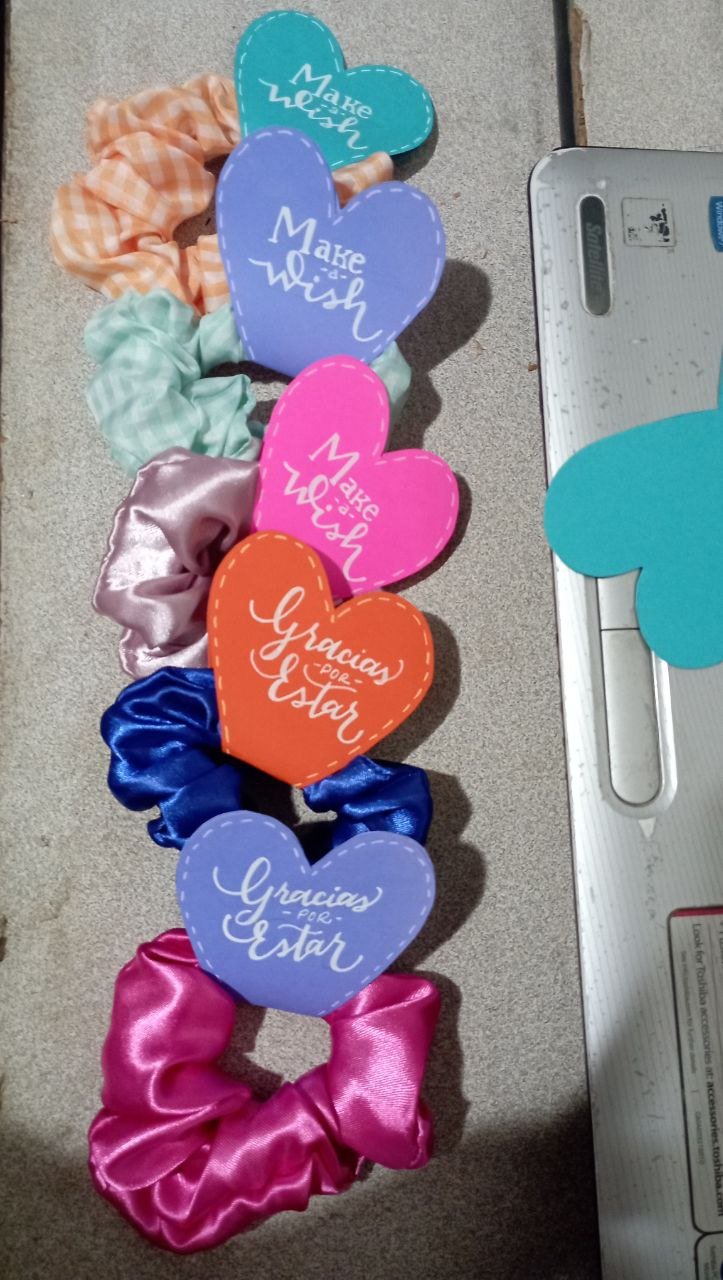
Una vez seco el mensaje y los detalles, use la pistola de silicone para ya colocarle la etiqueta a las scrunchies. Tuve mucho cuidado de; primero no quemarme (algo que pasa seguido) y de procurar que no le cayera silicone caliente a la scrunchie, ya que si pasaba la podía dañar.
PASO 5
¡Y scrunchies decoradas listas!
Quedé encantada con los resultados, me pareció que quedaron super lindas, delicadas y fue una bonita manera de agradecerle a aquellas que están en mi vida y me dan su amor, apoyo y cariño. La noche de mi cumpleaños fuimos a cenar pizza y luego de cantar el cumpleaños las entregué de forma sorpresa. Todas quedaron encantadas con el detalle. Eso me hizo feliz.
Espero este tutorial sea de ayuda, porque aunque es sencillo funciona para darle un toque diferente y personalizado a los detalles.
Gracias por leerme
Con cariño, G.

Hi hivers!💜
I'm happy to be back here, I hope everyone is doing great. I recently had a birthday and one way to thank those who attended was to give them a scrunchie as a gift. I made the purchase from a local entrepreneur called Ay Bendito! who sells bags, toiletry bags, backpacks and also accessories like scrunchies and hair clips. I ordered scrunchies in many colors but felt that I needed to give the scrunchies a special and differentiating touch. I looked for inspiration on pinterest and found several styles of tags or labels that I could put on them. So I designed my own tag with the idea of putting a thank you message on it and giving it my touch with lettering, which is something I love to do.
I'll tell you how I did it:
MATERIALS
- Pencil
- Eraser
- Scissors
- Recycled paper
- Colored cardboard
- Acrylic paint markers
- Silicone stick
- Silicone gun
- Scrunchie
STEP-BY-STEP
STEP 1
First I drew the shape of the label on recycled paper I had. I show it in a picture because I am not sure how to define the shape. I could say that it has a mushroom shape on both ends, so that when I wrap the scrunchie with the label, both ends match. I cut it out and did a size test with the scrunchie to make sure the size worked.
STEP 2
Once I checked the size, I marked the mold on the different cardboards. I use 160 grams opaline cardboard in turquoise, fuchsia, orange, violet. These cardboards were scraps that I had saved just in case and they contrasted with the colors of the scrunchies. I cut them out, there were 9 in total.
STEP 3
Once they were cut out, I began to write the shape of the message I wanted with a pencil. I made 2: "thank you for being" and "make a wish", one for each side of the tag. I used a cursive style and some serif letters that I love for messages. They matched a bit with the topper I had made for my birthday.
To go over it I used white acrylic paint markers. I was tempted to add shadow and eyeliner but I felt it looked too delicate. The other detail I added to the tags was a dotted line border around the tag to outline it.
STEP 4
Once the message and the details were dry, I used the silicone gun to place the label on the scrunchies. I was very careful not to burn myself (something that often happens) and to make sure that no hot silicone fell on the scrunchie, because if it did, it could damage it.
STEP 5
And decorated scrunchies ready!
I was delighted with the results, I thought they were super cute, delicate and it was a nice way to thank those who are in my life and give me their love, support and affection. The night of my birthday we went to have pizza for dinner and after singing the birthday song I gave them as a surprise. They were all delighted with the detail. That made me happy.
I hope this tutorial is helpful, because although it is simple it works to give a different and personalized touch to the details.
Thank you for reading me
With love, G..
FUENTE
Fotos: tomadas por mi desde mi redmi 10
Traducción: Deepl
SOURCE
Photos: taken by me from my redmi 10
Translation: Deepl

Que lindas se ven, realzan la belleza de las Scrunchies. Ahora me has colocado una nueva necesidad, ese marcador blanco de pintura acrílica. Aunque, esas letras son arte, tendría que practicarles mucho antes. Bendiciones, feliz cumpleaños atrasado. Que Dios te colme de paz, amor, salud y éxitos.
Graciaaaas💜 seré honesta, los marcadores de pintura acrílica son mis favoritos😍 los uso para todas las superficies (hasta la pared) y el color se ve genial. Es una forma de usar pintura pero con la comodidad de un marcador🤭
Ahora la necesidad se ha vuelto más que eso. Yo siempre compro cosas de papelería, para tenerles y en el momento indicado usarle. Por eso tengo variedad de cositas. Muchas gracias por compartir tu pensamiento al respecto. Bendiciones
Se que los amarás🤭 el que tengo se asemeja un poco a los marcadores de la marca Posca, que sin geniales pero algo costosos🥲 gracias por comentar💜
Me dio curiosidad, porque no sabía qué querías decir con Scrunchies, pero son colas, jaja, bueno asi le llamamos aquí, coletas o moños,bueno te felicito por el detalle, te quedo muy bien, me gusta ese tipo de letras, no me salen asi jiji, saludos.
jajaja sabes que cuando estaba escribiendo el post tuve la duda, aquí tambien decimos colas, pero cuando consulte la scrunchie es como mas gruesa, hecha con tela. Graciaaas! te aseguro que practicando te pueden salir así de bonitas💜
¡Felicidades! Esta publicación obtuvo upvote y fue compartido por @la-colmena, un proyecto de Curación Manual para la comunidad hispana de Hive que cuenta con el respaldo de @curie.
Si te gusta el trabajo que hacemos, te invitamos a darle tu voto a este comentario y a votar como testigo por La Colmena.
Si quieres saber más sobre nuestro proyecto, te invitamos a acompañarnos en nuestro servidor de Discord.
!discovery 40
This post was shared and voted inside the discord by the curators team of discovery-it
Join our Community and follow our Curation Trail
Discovery-it is also a Witness, vote for us here
Delegate to us for passive income. Check our 80% fee-back Program
Te quedo precioso para las etiquetas con esas letras tan perfectas y llamativos colores.
Graciaaaas💜💜
Congratulations @geneleori! You have completed the following achievement on the Hive blockchain And have been rewarded with New badge(s)
Your next target is to reach 6000 upvotes.
You can view your badges on your board and compare yourself to others in the Ranking
If you no longer want to receive notifications, reply to this comment with the word
STOPCheck out our last posts:
https://twitter.com/hivediy47901/status/1784126783425552552
¡¡¡Buen trabajo!!! Gracias por publicar tu excelente contenido en Hive Diy, los colores que usaste para hacer estas hermosas etiquetas son asombrosas, quiero hacer algunas para usarlas como block de notas en mi ordenador
Tu comunidad artesana ahora es testigo

Gracias💜💜💜 seguro te quedaran bellas🙌🏼