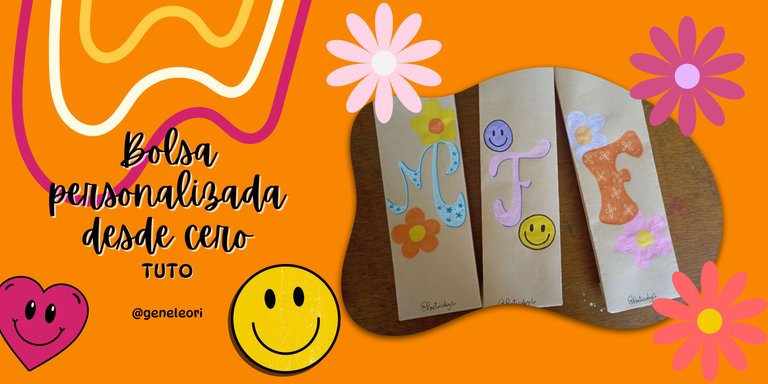
Bolsa personalizada desde cero: tuto (ESP-ENG)
¡Hola hivers!💜
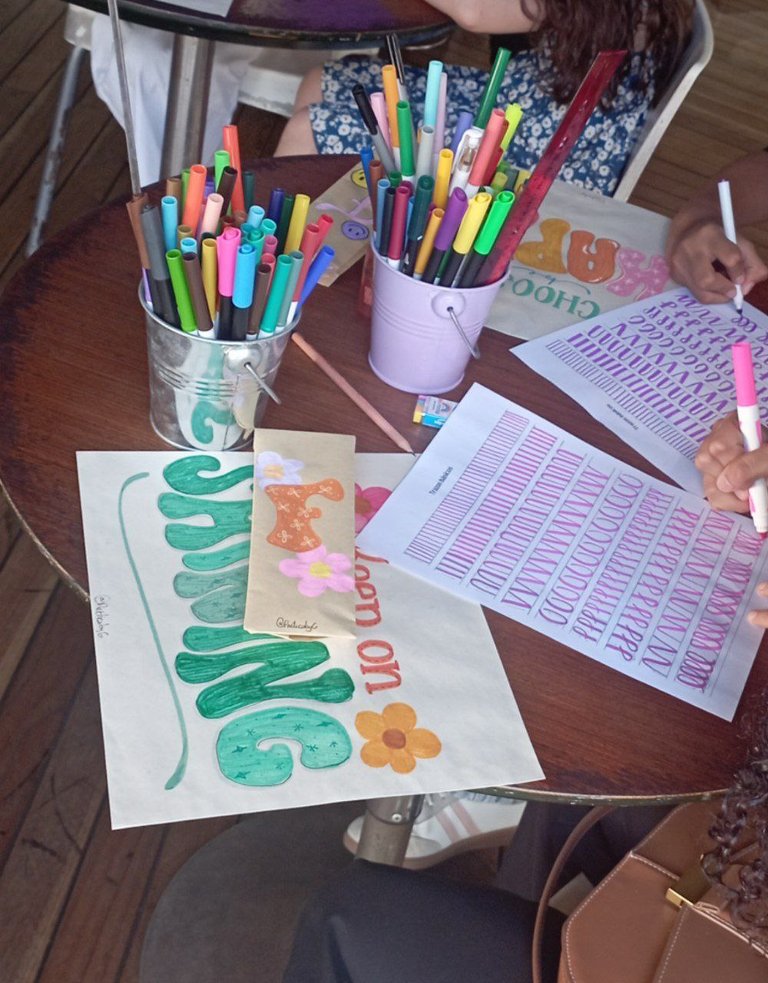
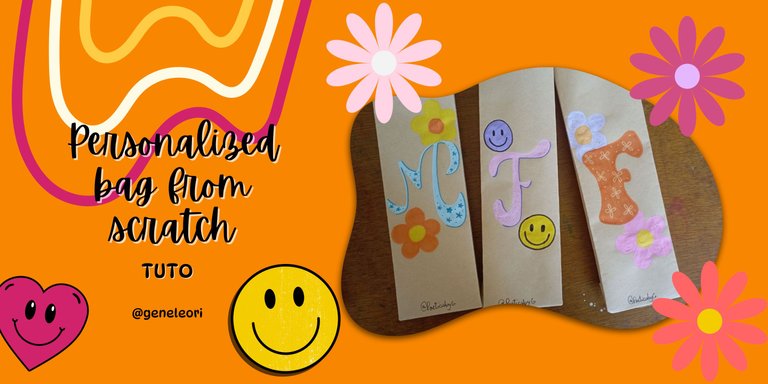
Me alegra volver a esta fantástica comunidad de artesanos. Esta vez tenía que preparar el kit de trabajo para los participantes de mi taller de lettering. En esos kits incluyo lápiz, goma, marcador o lapicero según lo que vayamos a trabajar, en oportunidades anteriores he hecho cajas en forma de porción de pastel, piezas de jenga, entre otros. En este caso íbamos a ver un estilo de lettering usado en los años 70’s, así que era muy hippie y retro, decidí hacer unas bolsas personalizadas con las iniciales de cada participante. Me gusta hacer las bolsas de cero con un papel kraft que es muy grueso y resistente, así que les mostraré todo el proceso:

MATERIALES
- Lápiz
- Goma
- Tijera
- Papel kraft (el que use tiene un gramaje de 200 gramos)
- Pegamento en barra
- Marcadores de pintura acrílica
PASO A PASO
PASO 1
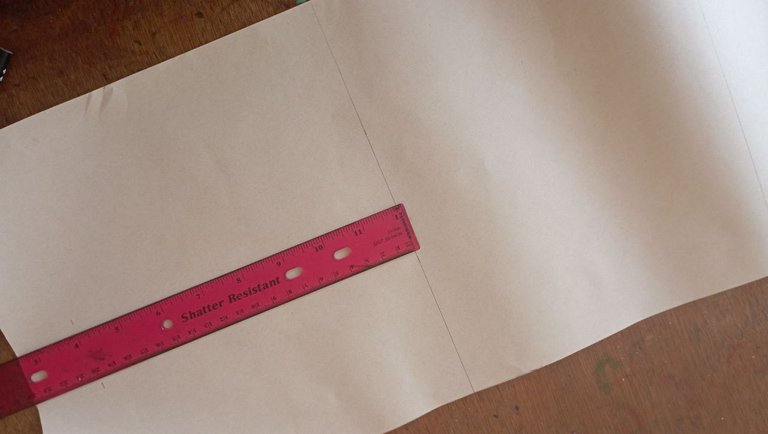
Primero, con ayuda de la regla y el lápiz marque las bolsas en el papel. Tomando en cuenta lo que iba a contener la bolsa, decidí hacerla de 25 cm de alto por 21 cm de ancho (para que quede de aproximadamente 9 cm de ancho al ser doblada). Una vez marcadas las medidas en el papel, procedí a usar la tijera para recortarlas.


PASO 2
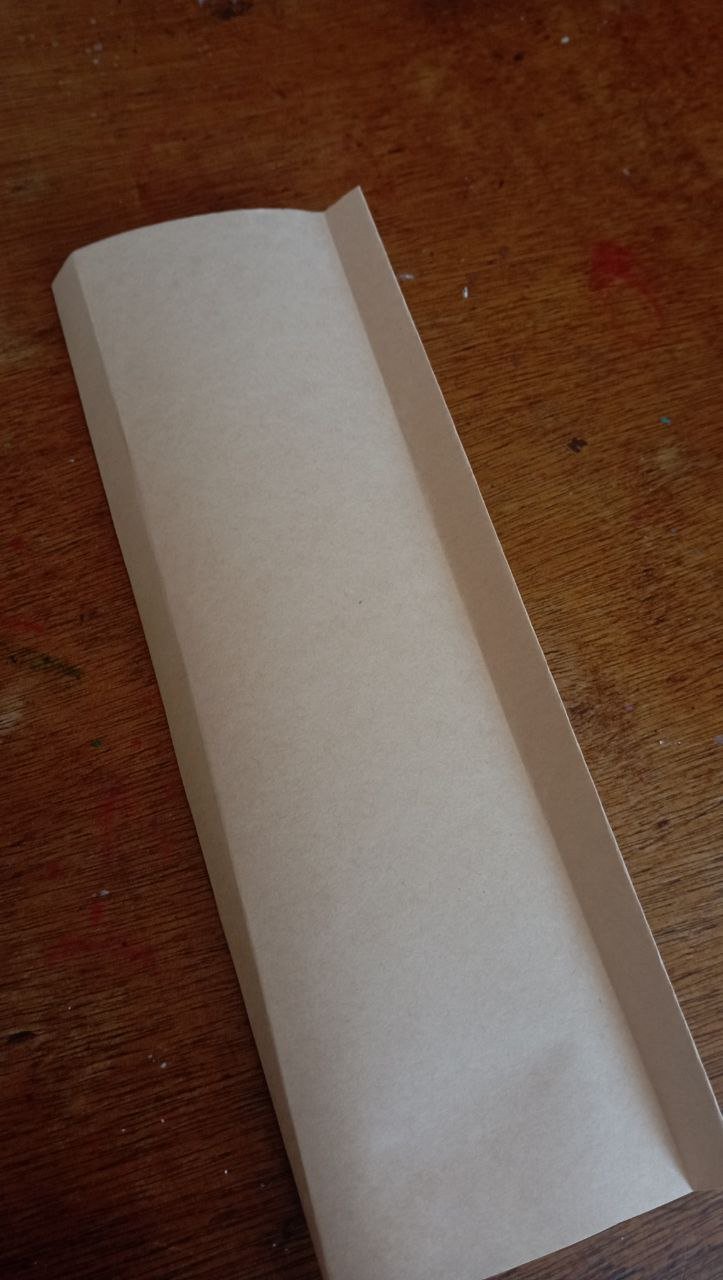
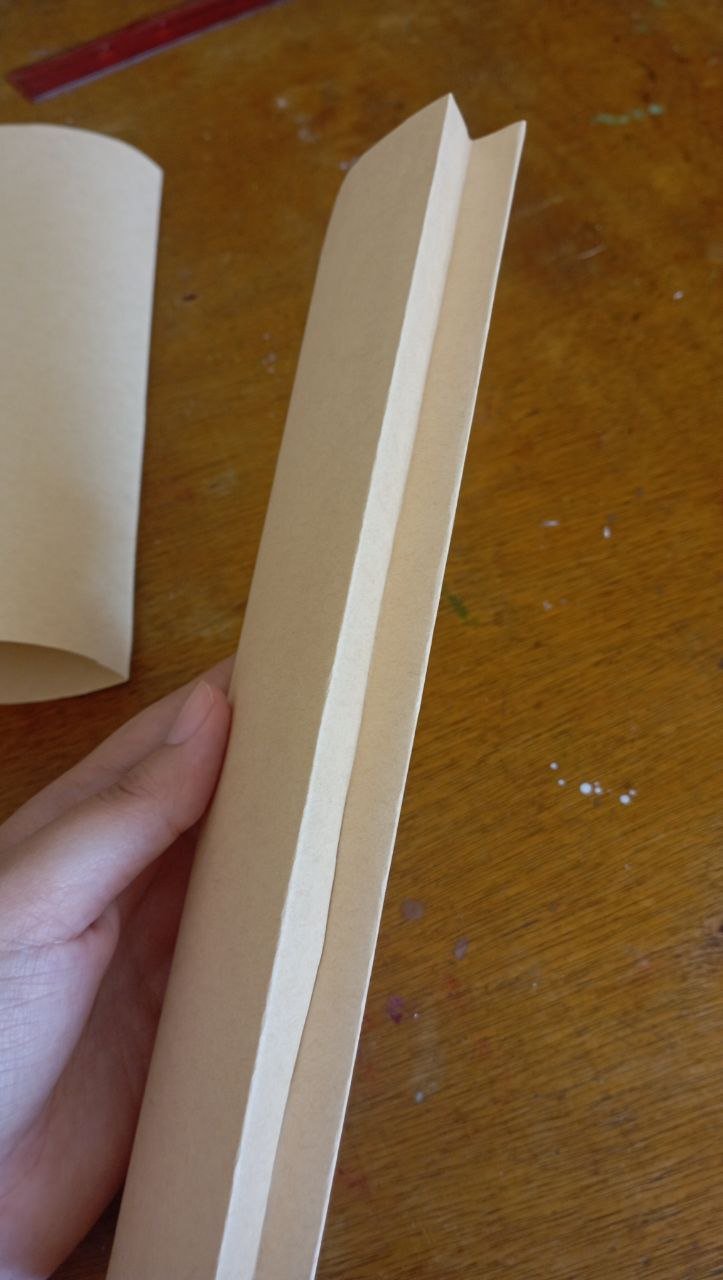
Luego de recortar, viene la parte de armado. Para esto, en uno de los extremos laterales doble 1 cm y le puse pegamento (por eso corte el ancho de 21 cm, para que quedaran 10 cm de anchos y 1 cm para hacer este paso). Curiosamente mi pegamento es morado, y tiene la particularidad de que al ponerlo es morado y con el paso de los minutos se evapora el color quedando solo la pega.

PASO 3
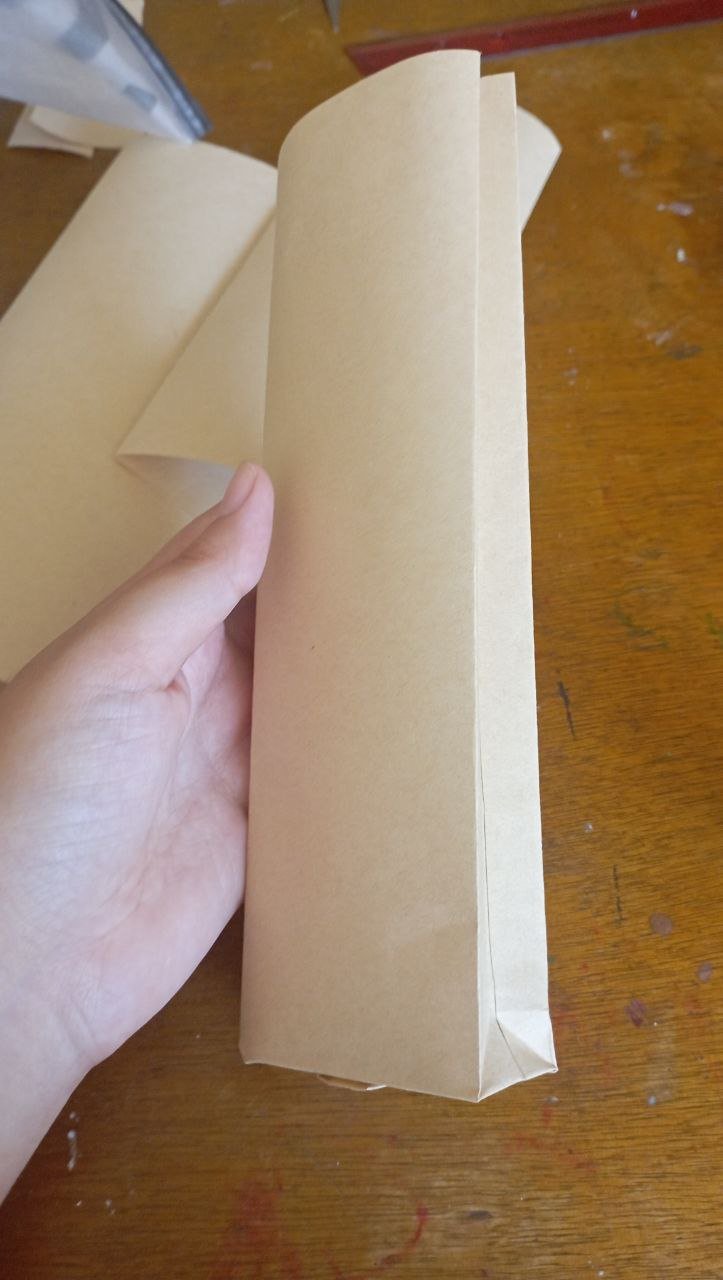
Ya tenemos nuestra bolsa pegada, es más un sobre que una bolsa. Espere un rato a que secara el pegamento. Para convertirlo en bolsa tuve que hacer dos dobleces en cada lado, los hice de aproximadamente 1 cm cada uno (así que la bolsa está quedando de unos 9 cm aproximadamente). En cada lado quedan 3 pliegues, el del medio quedará para dentro y los de los extremos para afuera, así logré que la bolsa tuviera el espesor suficiente para los materiales que contendrá.

PASO 4
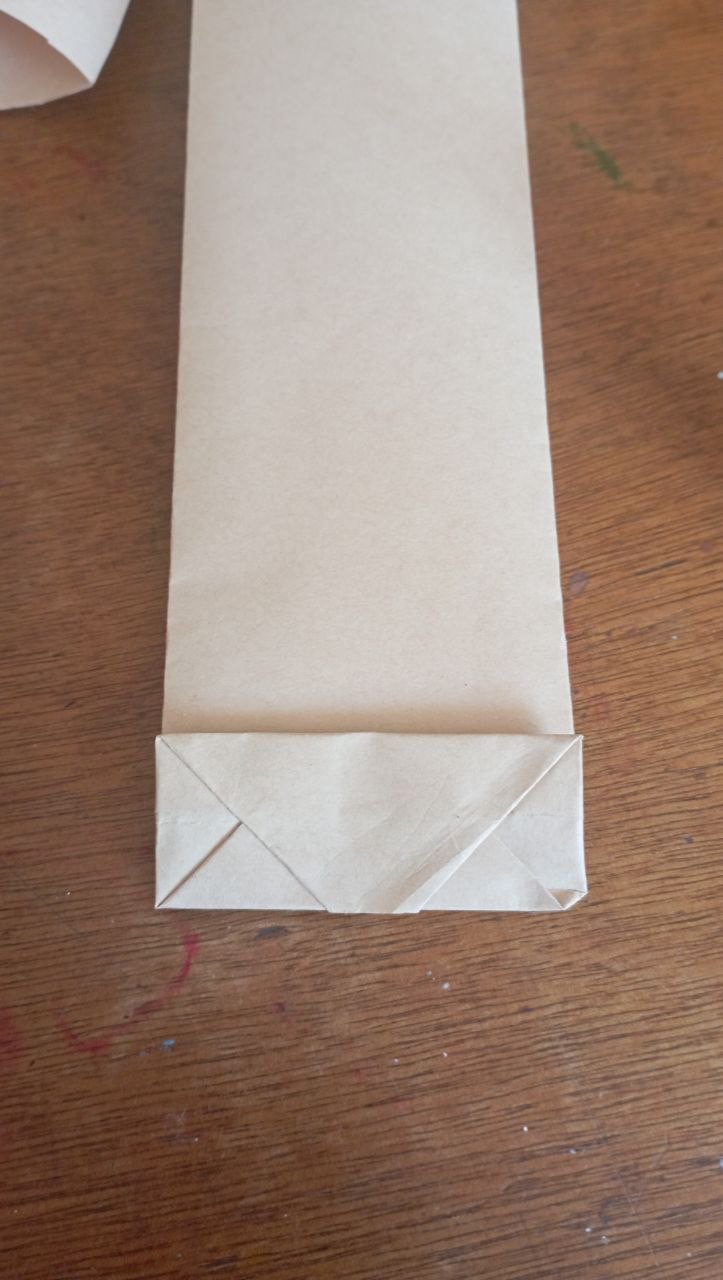
Tenemos listo el espesor, ahora toca la base de la bolsa. Para esto en la parte inferior haremos un doblez de 1,5 cm aproximadamente. Esta parte no me es muy sencilla de explicar, pero espero las imagenes me apoyen para explicarla. Se debe hacer coincidir cada una de las 4 puntas con la línea interna del doblez que le corresponde formando unos triángulos. Al final se formaran dos picos que parecen picos de pato (referencia cuchi para poder explicarme). En el pico inferior colocamos pegamento en las dos esquinas y doblamos para formar la base de la bolsa. En el pico superior colocamos pegamento y pegamos sobre el pico inferior.
 |  |
|---|
 |  |
|---|
 |  |
|---|
PASO 5
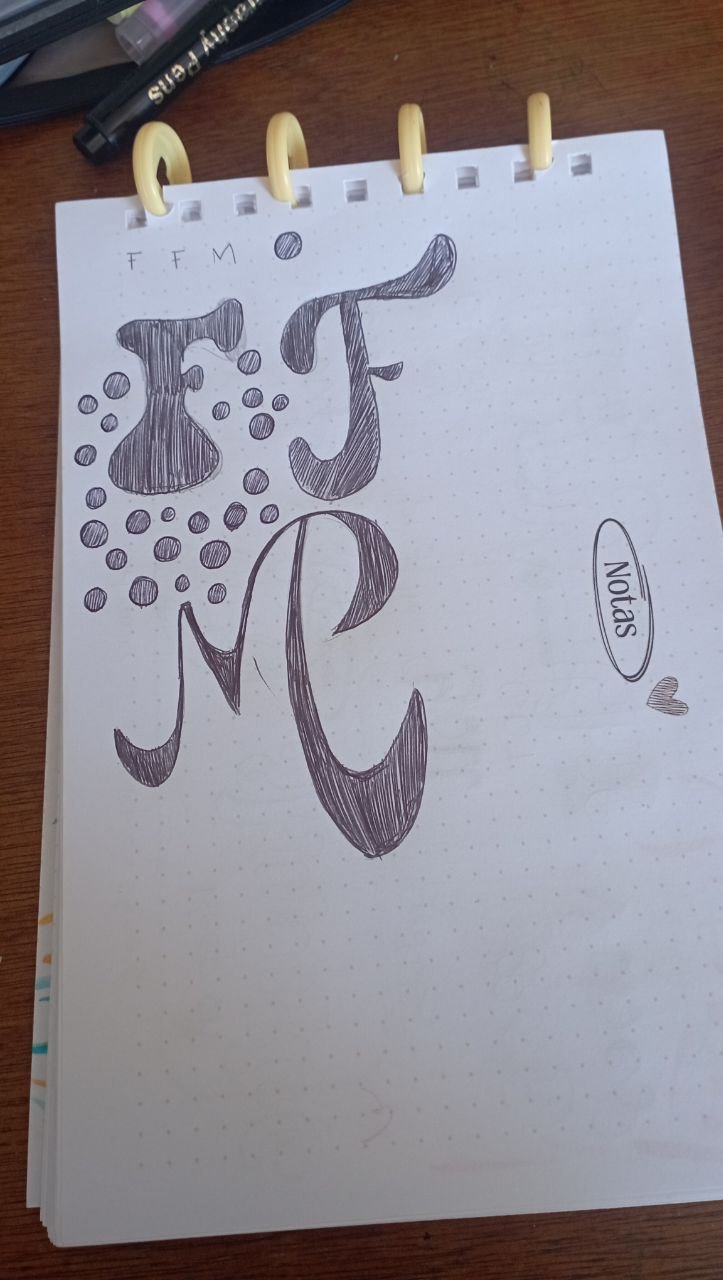
Ya para este momento las bolsas estaban listas, solo quedaba decorarlas. Para esto bocetee varias letras tomando en cuenta estilos retro, uno cursivo con un contraste mayor en su parte inferior que me encanta y otro estilo sans serie con mucho contraste y bastante movimiento. Dos estilos muy divertidos.
 |  |
|---|
 |  |
|---|
PASO 6
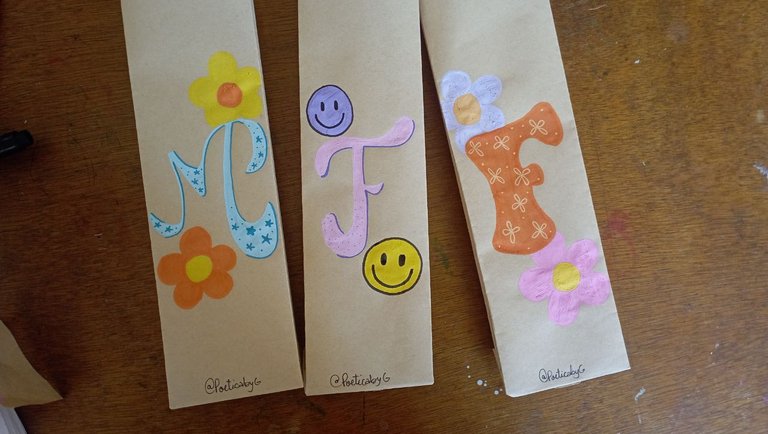
Traspase los bocetos y dibuje con los marcadores de pintura. Para este tipo de papel no podía usar marcadores a base de agua ya que el color no iba a quedar bien, con los de alcohol tenía el detalle de que podía traspasar el papel y ensuciar el otro lado de la bolsa dañandola, así que los de pintura eran perfectos para el trabajo. Hice detalles con los mismos marcadores y dibujé algunos doodles de flores para complementar.
PASO 7
Bolsas personalizadas listas para el taller!
Desde que aprendí a hacer mis bolsas no gasto comprándolas, sino que las armo al tamaño que necesito y las personalizo. Siempre he pensado que un detalle a mano es de lo más bonito que hay, el hecho de que alguien se haya tomado el tiempo para hacerlo es muy valioso. Tal vez te parece que hacer la bolsa sea complicado, siendo honesta al principio me costó, pero una vez que aprendes los pasos es un paseo.
Las participantes quedaron encantadas con el resultado y las guardaron con mucho cariño. Espero le haya gustado y sea útil este tutorial.
Gracias por leerme
Con cariño, G.
Hi hivers!💜
I'm glad to be back to this fantastic community of crafters. This time I had to prepare the work kit for the participants of my lettering workshop. In those kits I include pencil, eraser, marker or pen depending on what we are going to work on, in previous opportunities I have made boxes in the shape of a slice of cake, jenga pieces, among others. In this case we were going to see a style of lettering used in the 70's, so it was very hippie and retro, I decided to make some personalized bags with the initials of each participant. I like to make the bags from scratch with a kraft paper that is very thick and resistant, so I will show you the whole process:
MATERIALS
- Pencil
- Eraser
- Scissors
- Kraft paper (the one I used has a grammage of 200 grams)
- Glue stick
- Acrylic paint markers
STEP-BY-Step
STEP 1
First, using the ruler and pencil, mark the bags on the paper. Taking into account what the bag was going to contain, I decided to make it 25 cm high by 21 cm wide (so that it would be approximately 9 cm wide when folded). Once the measurements were marked on the paper, I proceeded to use the scissors to cut them out.
STEP 2
After cutting out, comes the assembly part. For this, in one of the lateral ends I folded 1 cm and put glue (that's why I cut the width of 21 cm, so that there were 10 cm wide and 1 cm to do this step). Curiously my glue is purple, and it has the particularity that when I put it on it is purple and with the passing of the minutes the color evaporates leaving only the glue.
STEP 3
We already have our bag glued, it is more like an envelope than a bag. I waited a while for the glue to dry. To turn it into a bag I had to make two folds on each side, I made them of about 1 cm each (so the bag is about 9 cm long). On each side there are 3 folds left, the middle one will be inside and the end ones outside, so the bag will be thick enough for the materials it will contain.
STEP 4
We have the thickness ready, now it's time for the base of the bag. For this at the bottom we will make a fold of about 1.5 cm. This part is not very easy to explain, but I hope the images help me to explain it. Each of the 4 points must be made to coincide with the internal line of the fold that corresponds to it, forming triangles. At the end there will be two beaks that look like duck beaks (cuchi reference to explain me). On the lower beak we put glue on the two corners and fold to form the base of the bag. On the upper beak we put glue and glue on the lower beak.
| |
|---|
| |
|---|
| |
|---|
STEP 5
By this time the bags were ready, the only thing left to do was to decorate them. For this I sketched several letters taking into account retro styles, one cursive with a higher contrast at the bottom that I love and another sans serif style with a lot of contrast and a lot of movement. Two very fun styles.
| |
|---|
| |
|---|
STEP 6
I transferred the sketches and drew with the paint markers. For this type of paper I couldn't use water based markers because the color wouldn't look good, with the alcohol ones I had the problem that it could go through the paper and dirty the other side of the bag damaging it, so the paint markers were perfect for the job. I made details with the same markers and drew some flower doodles to complement.
STEP 7
Personalized bags ready for the workshop!
Since I learned to make my bags I don't spend money buying them, I assemble them to the size I need and personalize them. I have always thought that a handmade detail is one of the most beautiful things there is, the fact that someone has taken the time to do it is very valuable. Maybe you think that making the bag is complicated, to be honest at first I found it difficult, but once you learn the steps it's a breeze.
The participants were delighted with the result and kept them very fondly. I hope you liked and found this tutorial useful.
Thank you for reading me
With love, G..
FUENTE
Fotos: tomadas por mi desde mi redmi 10
Traducción: Deepl
SOURCE
Photos: taken by me from my redmi 10
Translation: Deepl

Congratulations @geneleori! You have completed the following achievement on the Hive blockchain And have been rewarded with New badge(s)
Your next target is to reach 80 posts.
You can view your badges on your board and compare yourself to others in the Ranking
If you no longer want to receive notifications, reply to this comment with the word
STOPCheck out our last posts:
Te quedaron preciosa amiga, es un bonito diseño y color.
Graciaaaaas💜💜💜
Quedaron muy lindas las bolsas, con sus detalles diferentes!
Feliz noche 🙏
Muchas gracias💜