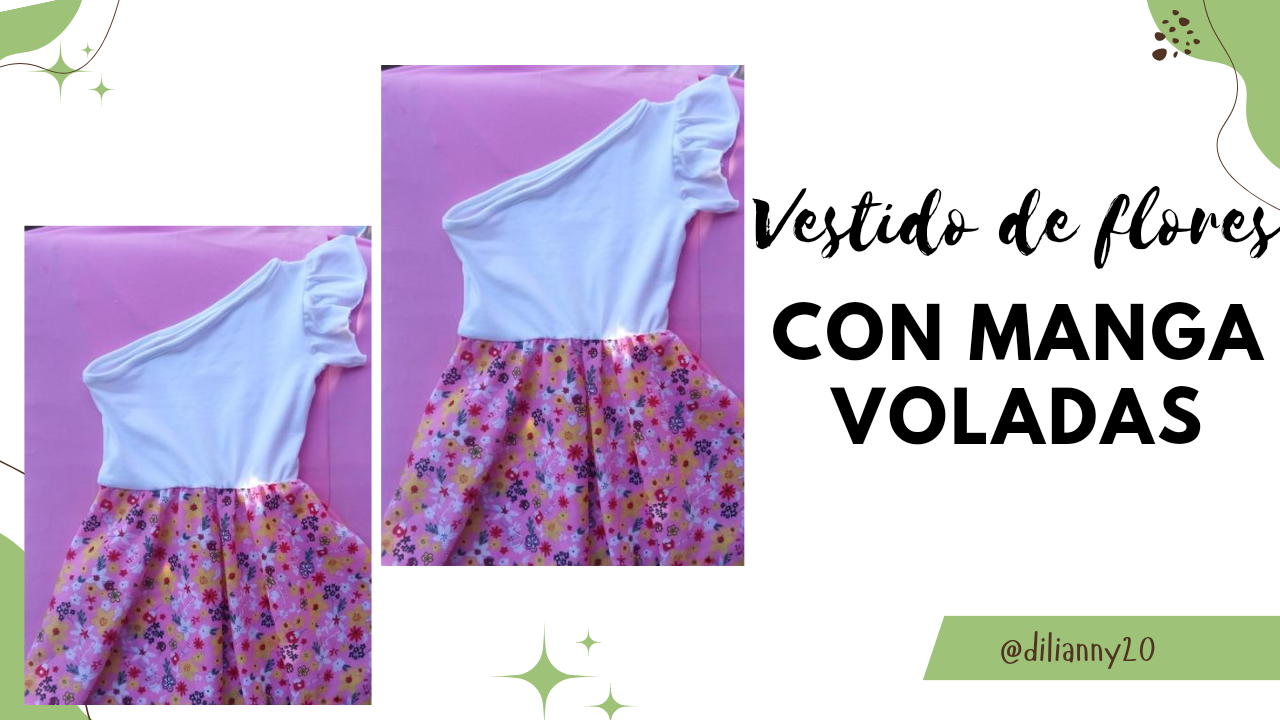
[ESP-ING] Tutorial Vestido de flores con manga voladas para mi niña. // Tutorial Flower dress with ruffled sleeves for my little girl.
ESPAÑOL

Holaa querida comunidad, espero que estén muy bien, sean bienvenidos a mi blog ❤️ Espero que tengan las mejores energías para aprender algo nuevo cada día!!!
Me encanta aprender como realizar diversos modelos de vestidos para así hacerlos a mi hija de 1 año. Utilicé un pedazo de tela reciclada la cual le di un excelente uso.
Siempre me gusta vestir a mi hija con vestidos, son muy hermosos✨
Materials used.
- 🌸Tela microdurazno color blanco
- 🌸Tela dracon de rosas
- 🌸Ganchillos
- 🌸Tijera ✂
- 🌸Máquina de coser
- 🌸Cinta métrica
- 🌸Lápiz
Pasos para realizar el vestido de flores
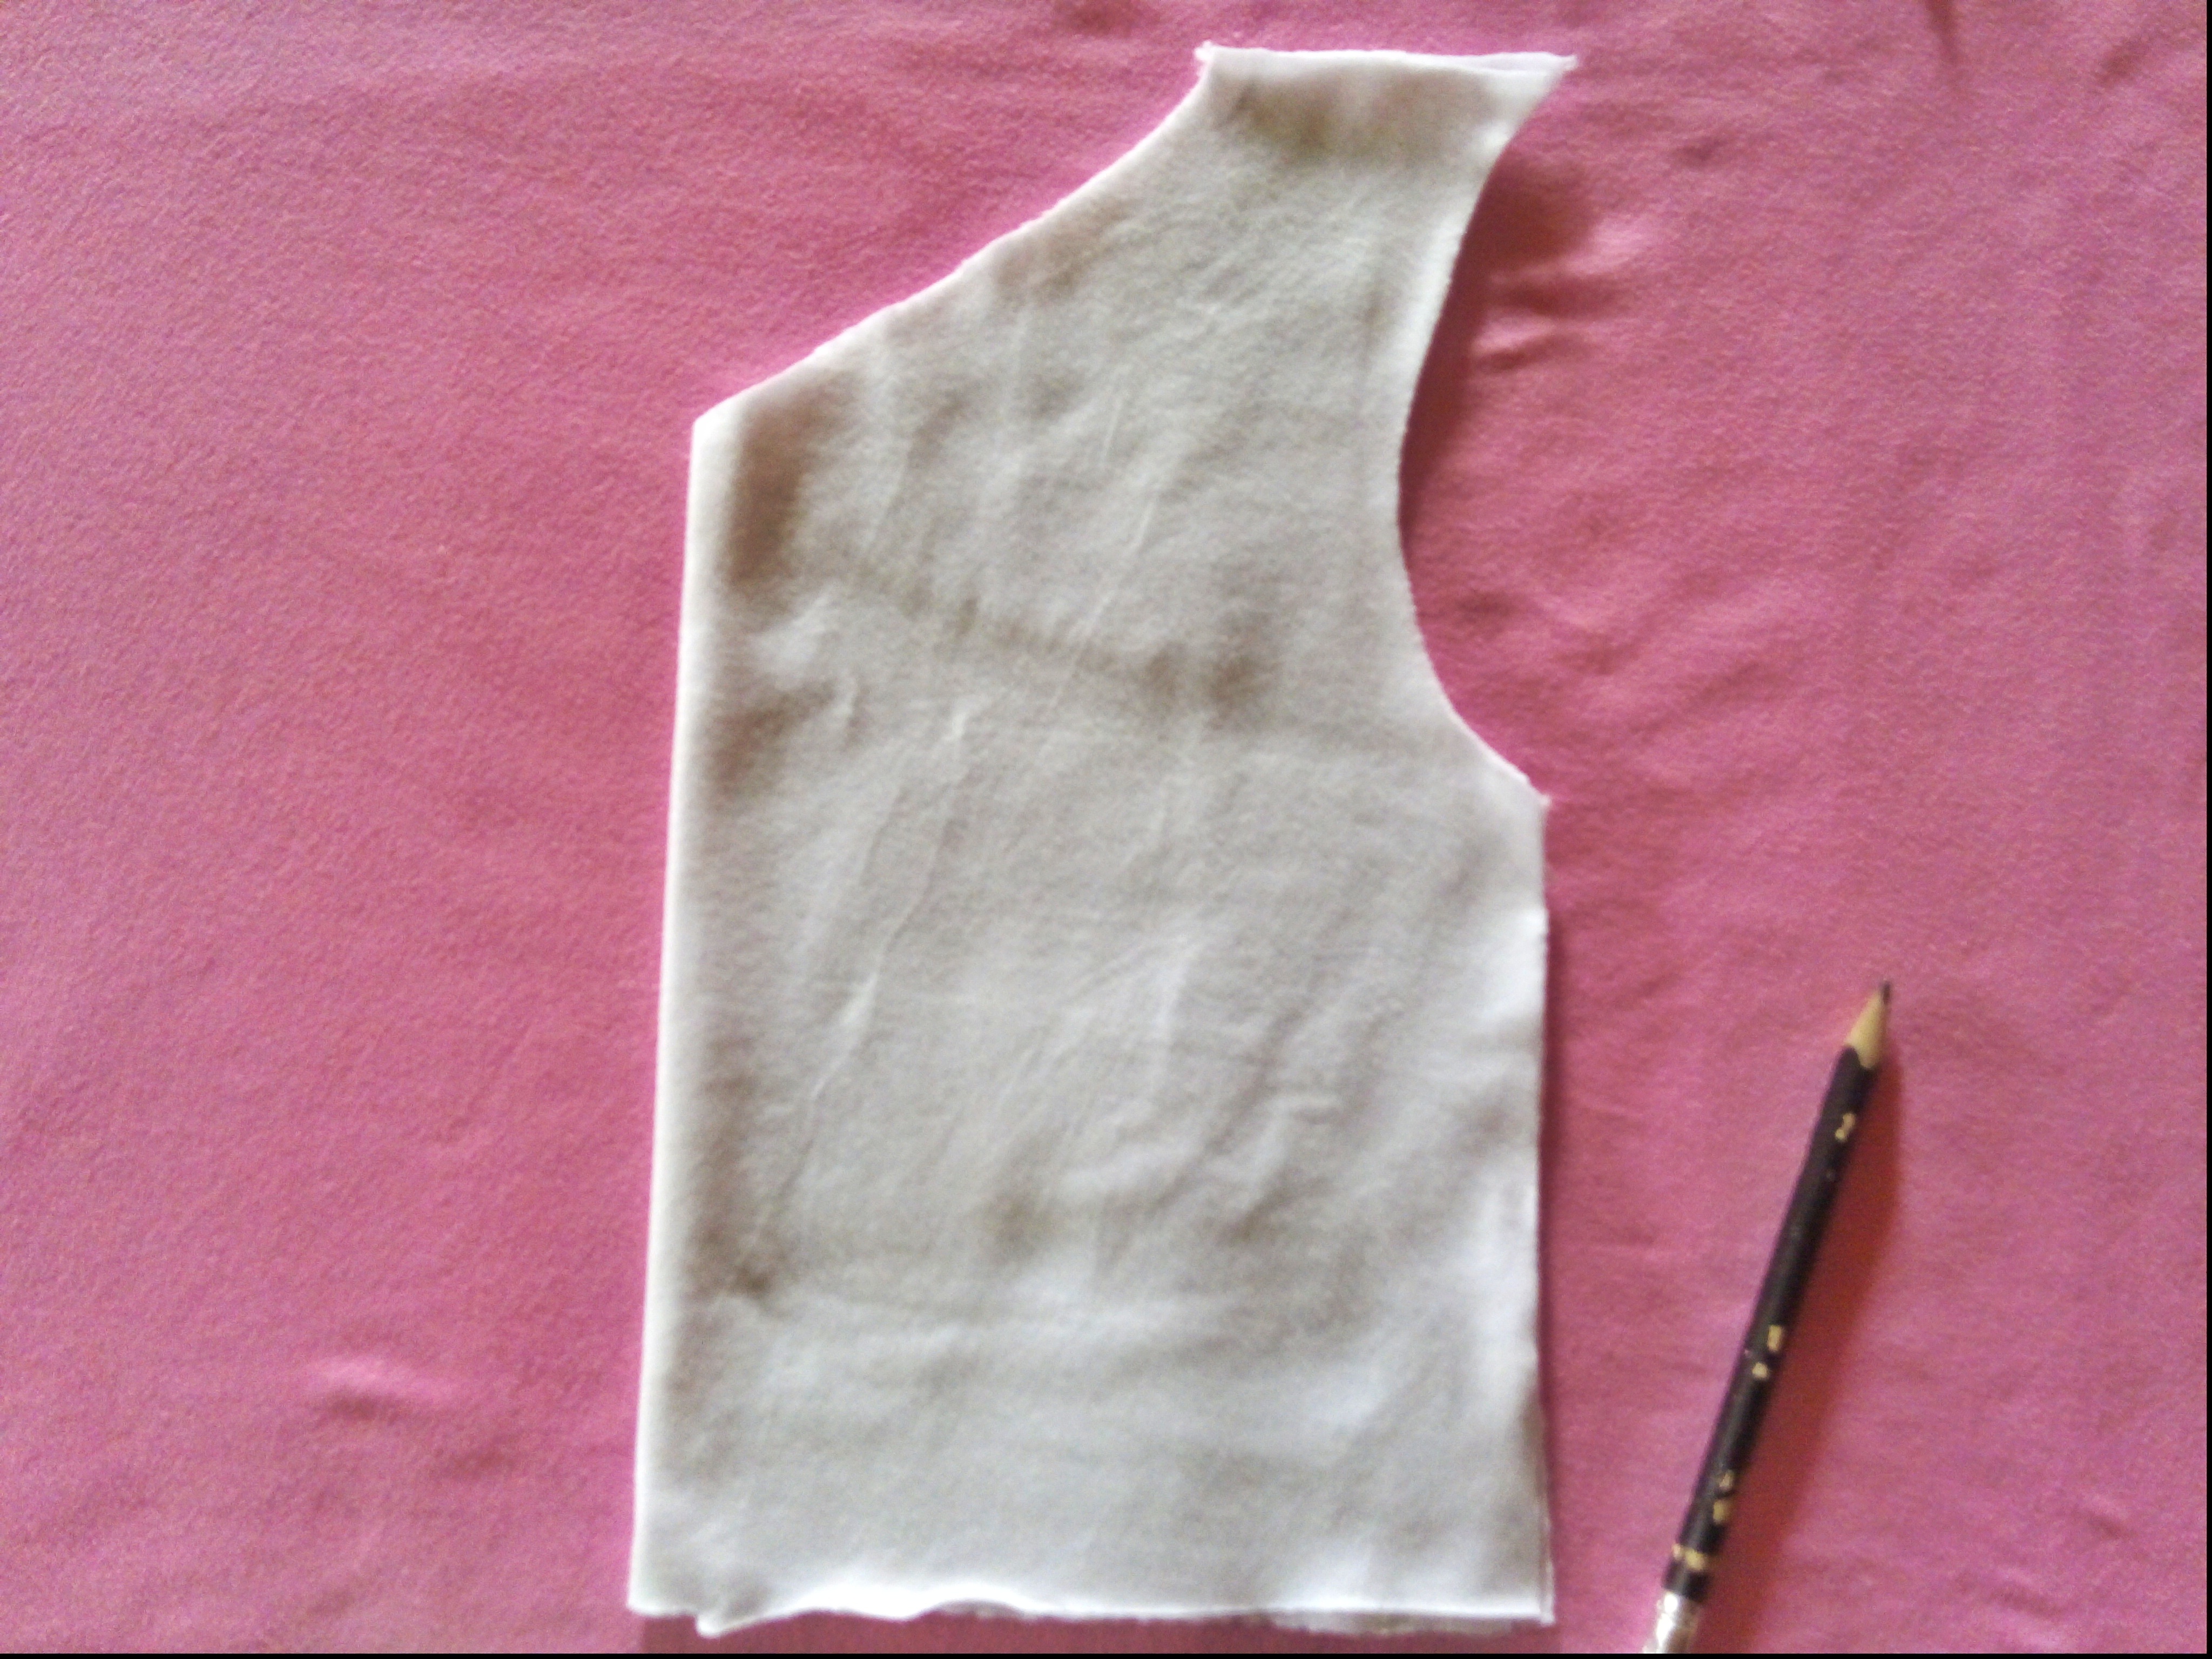
Primer Paso:
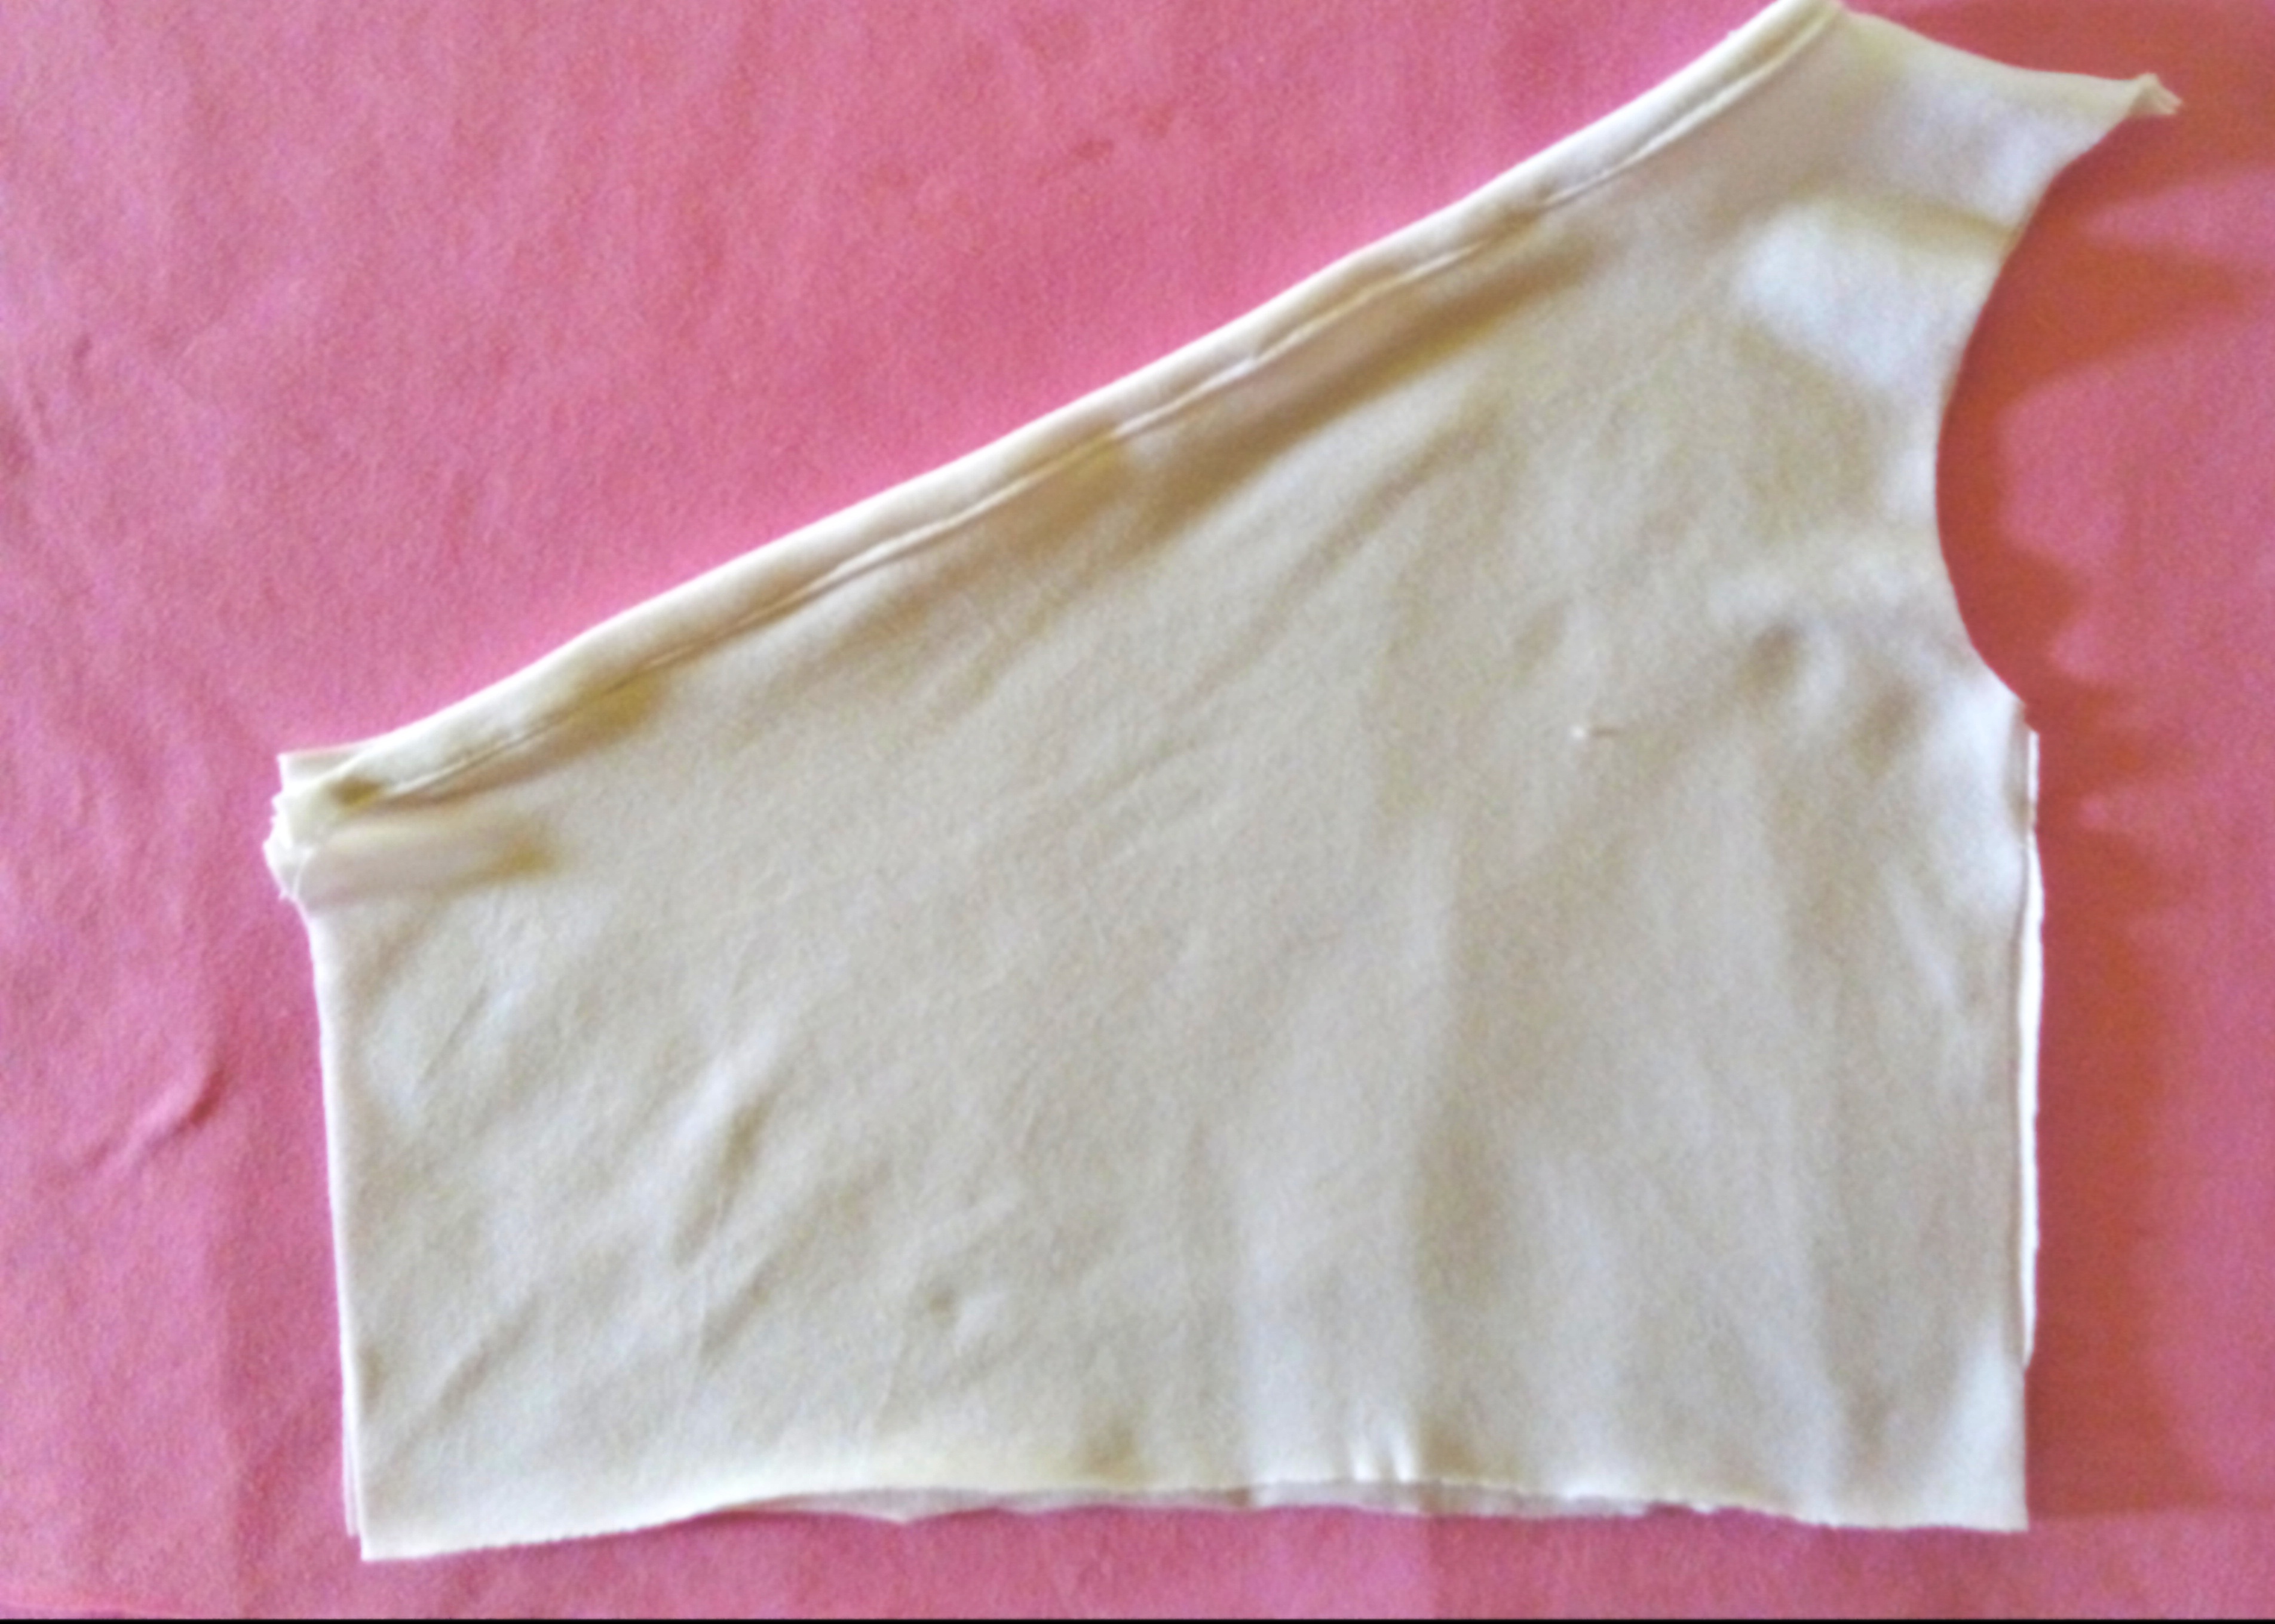
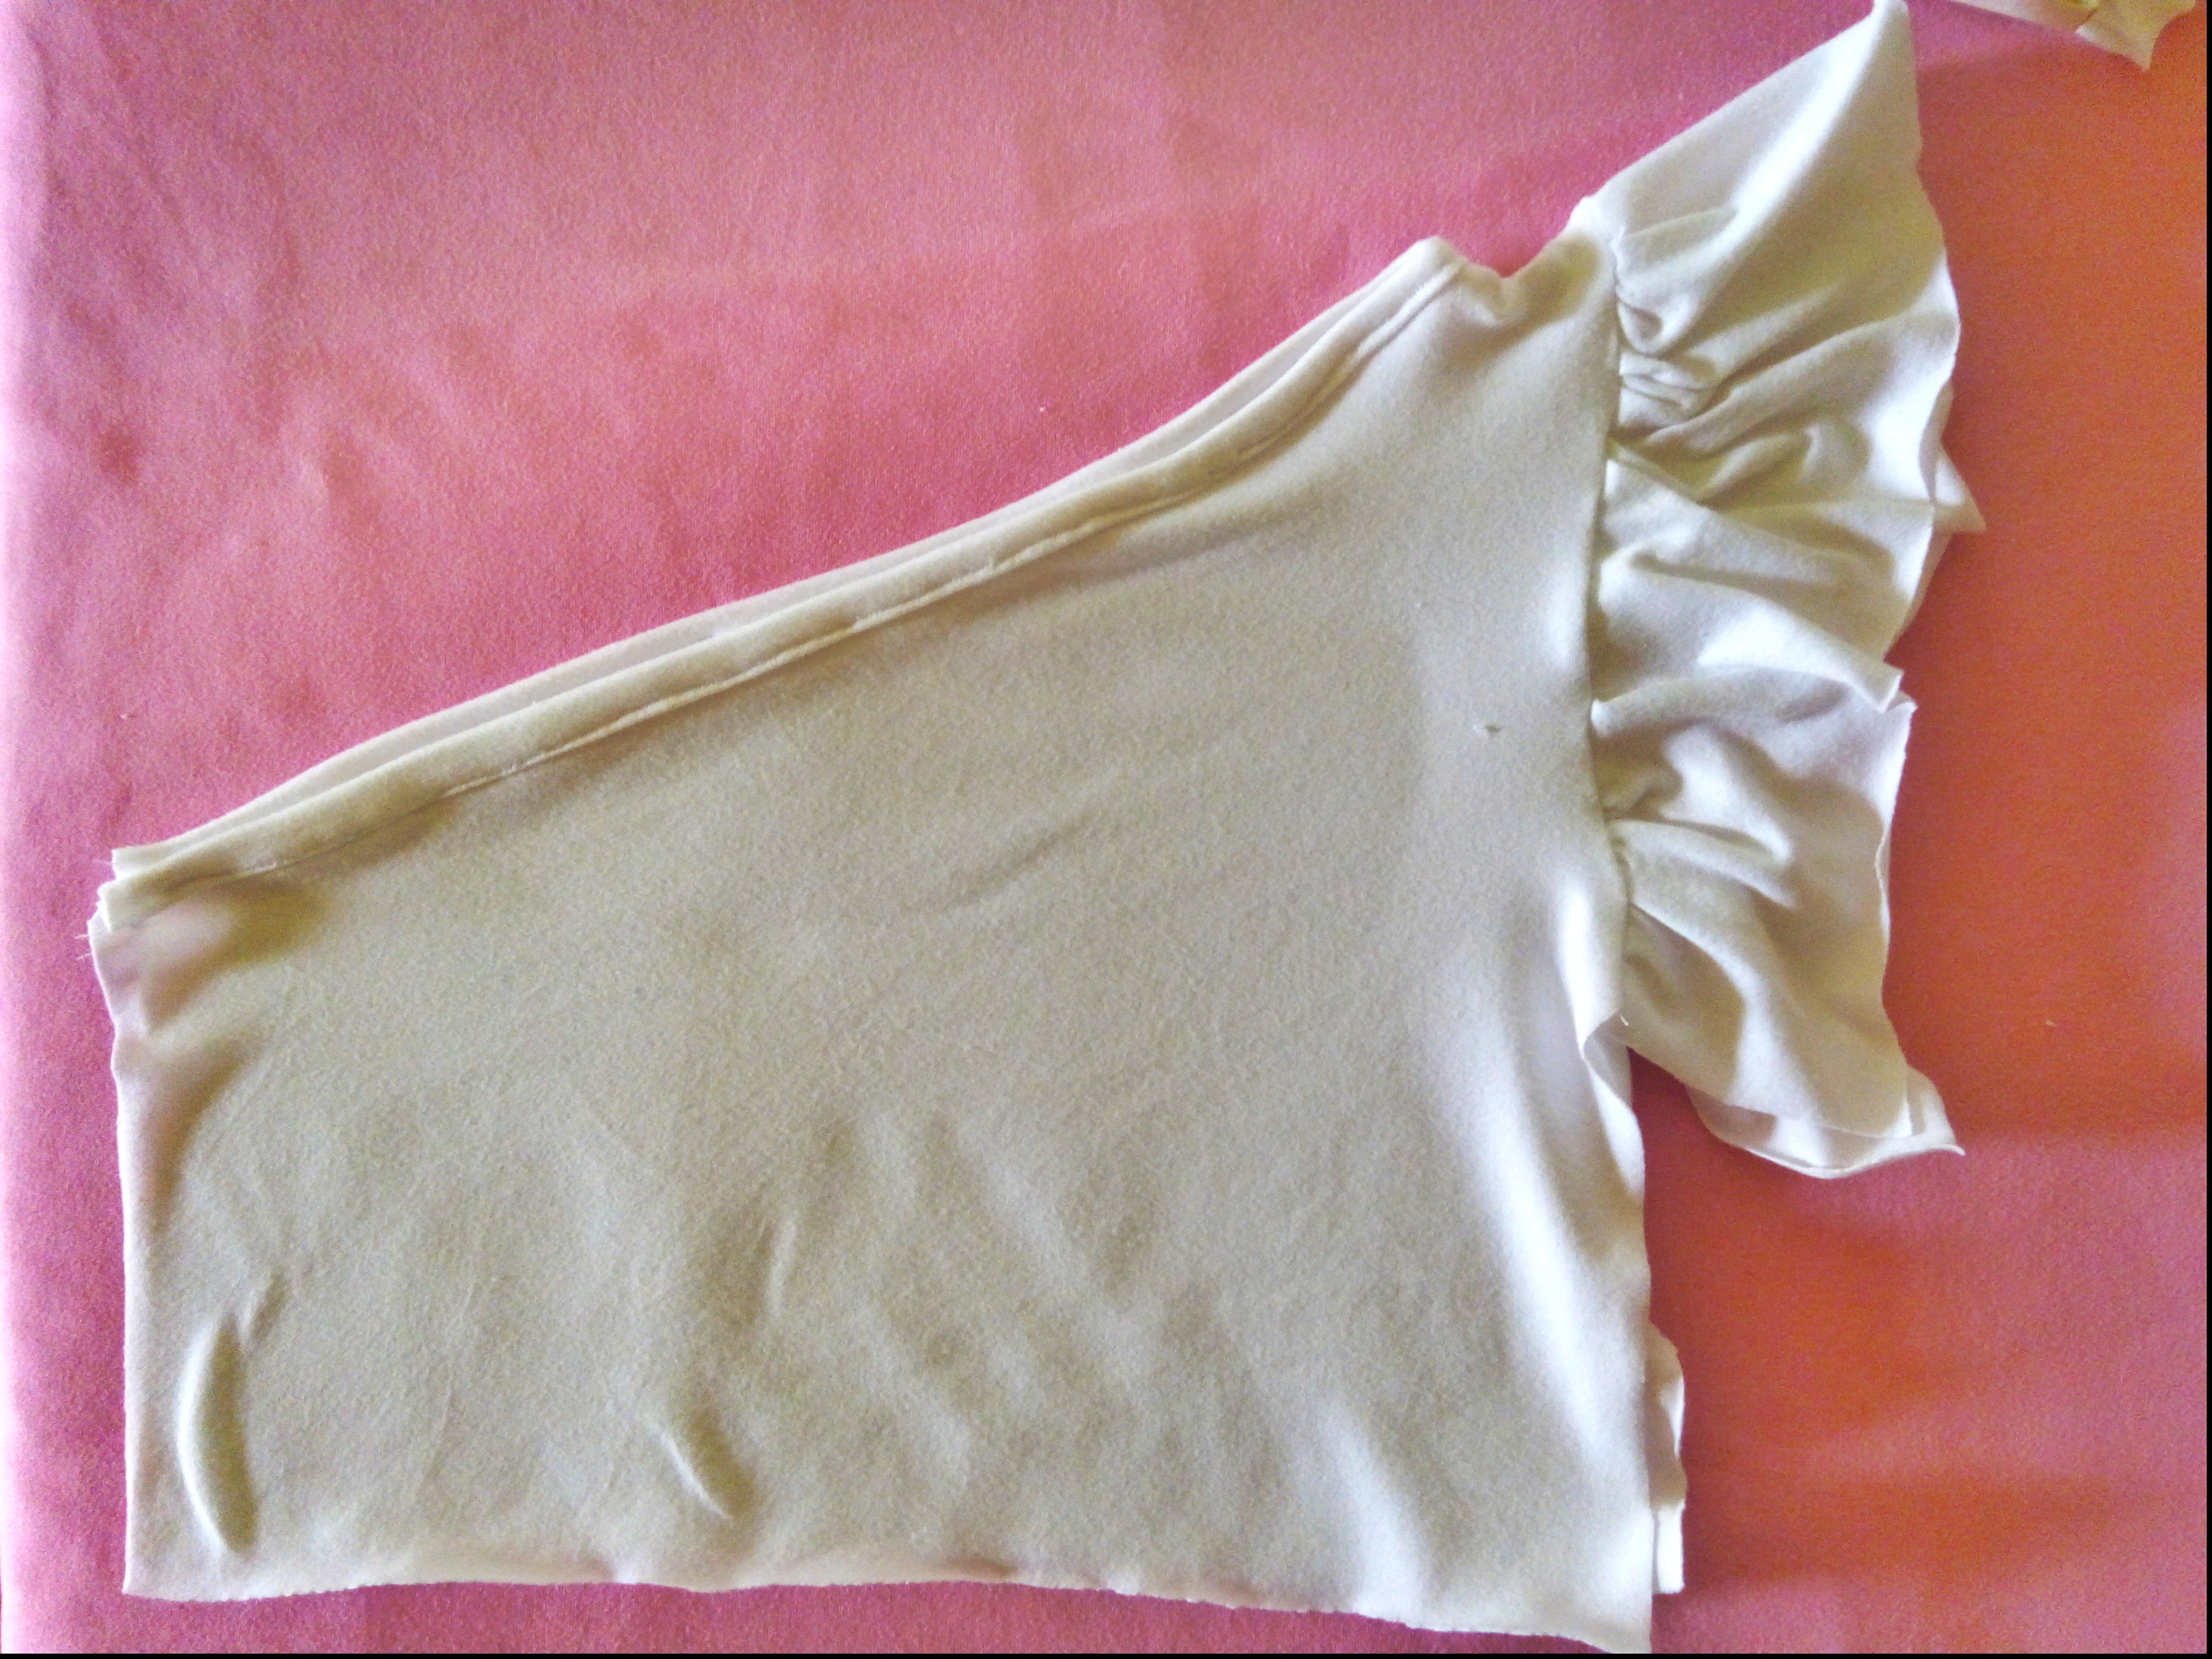
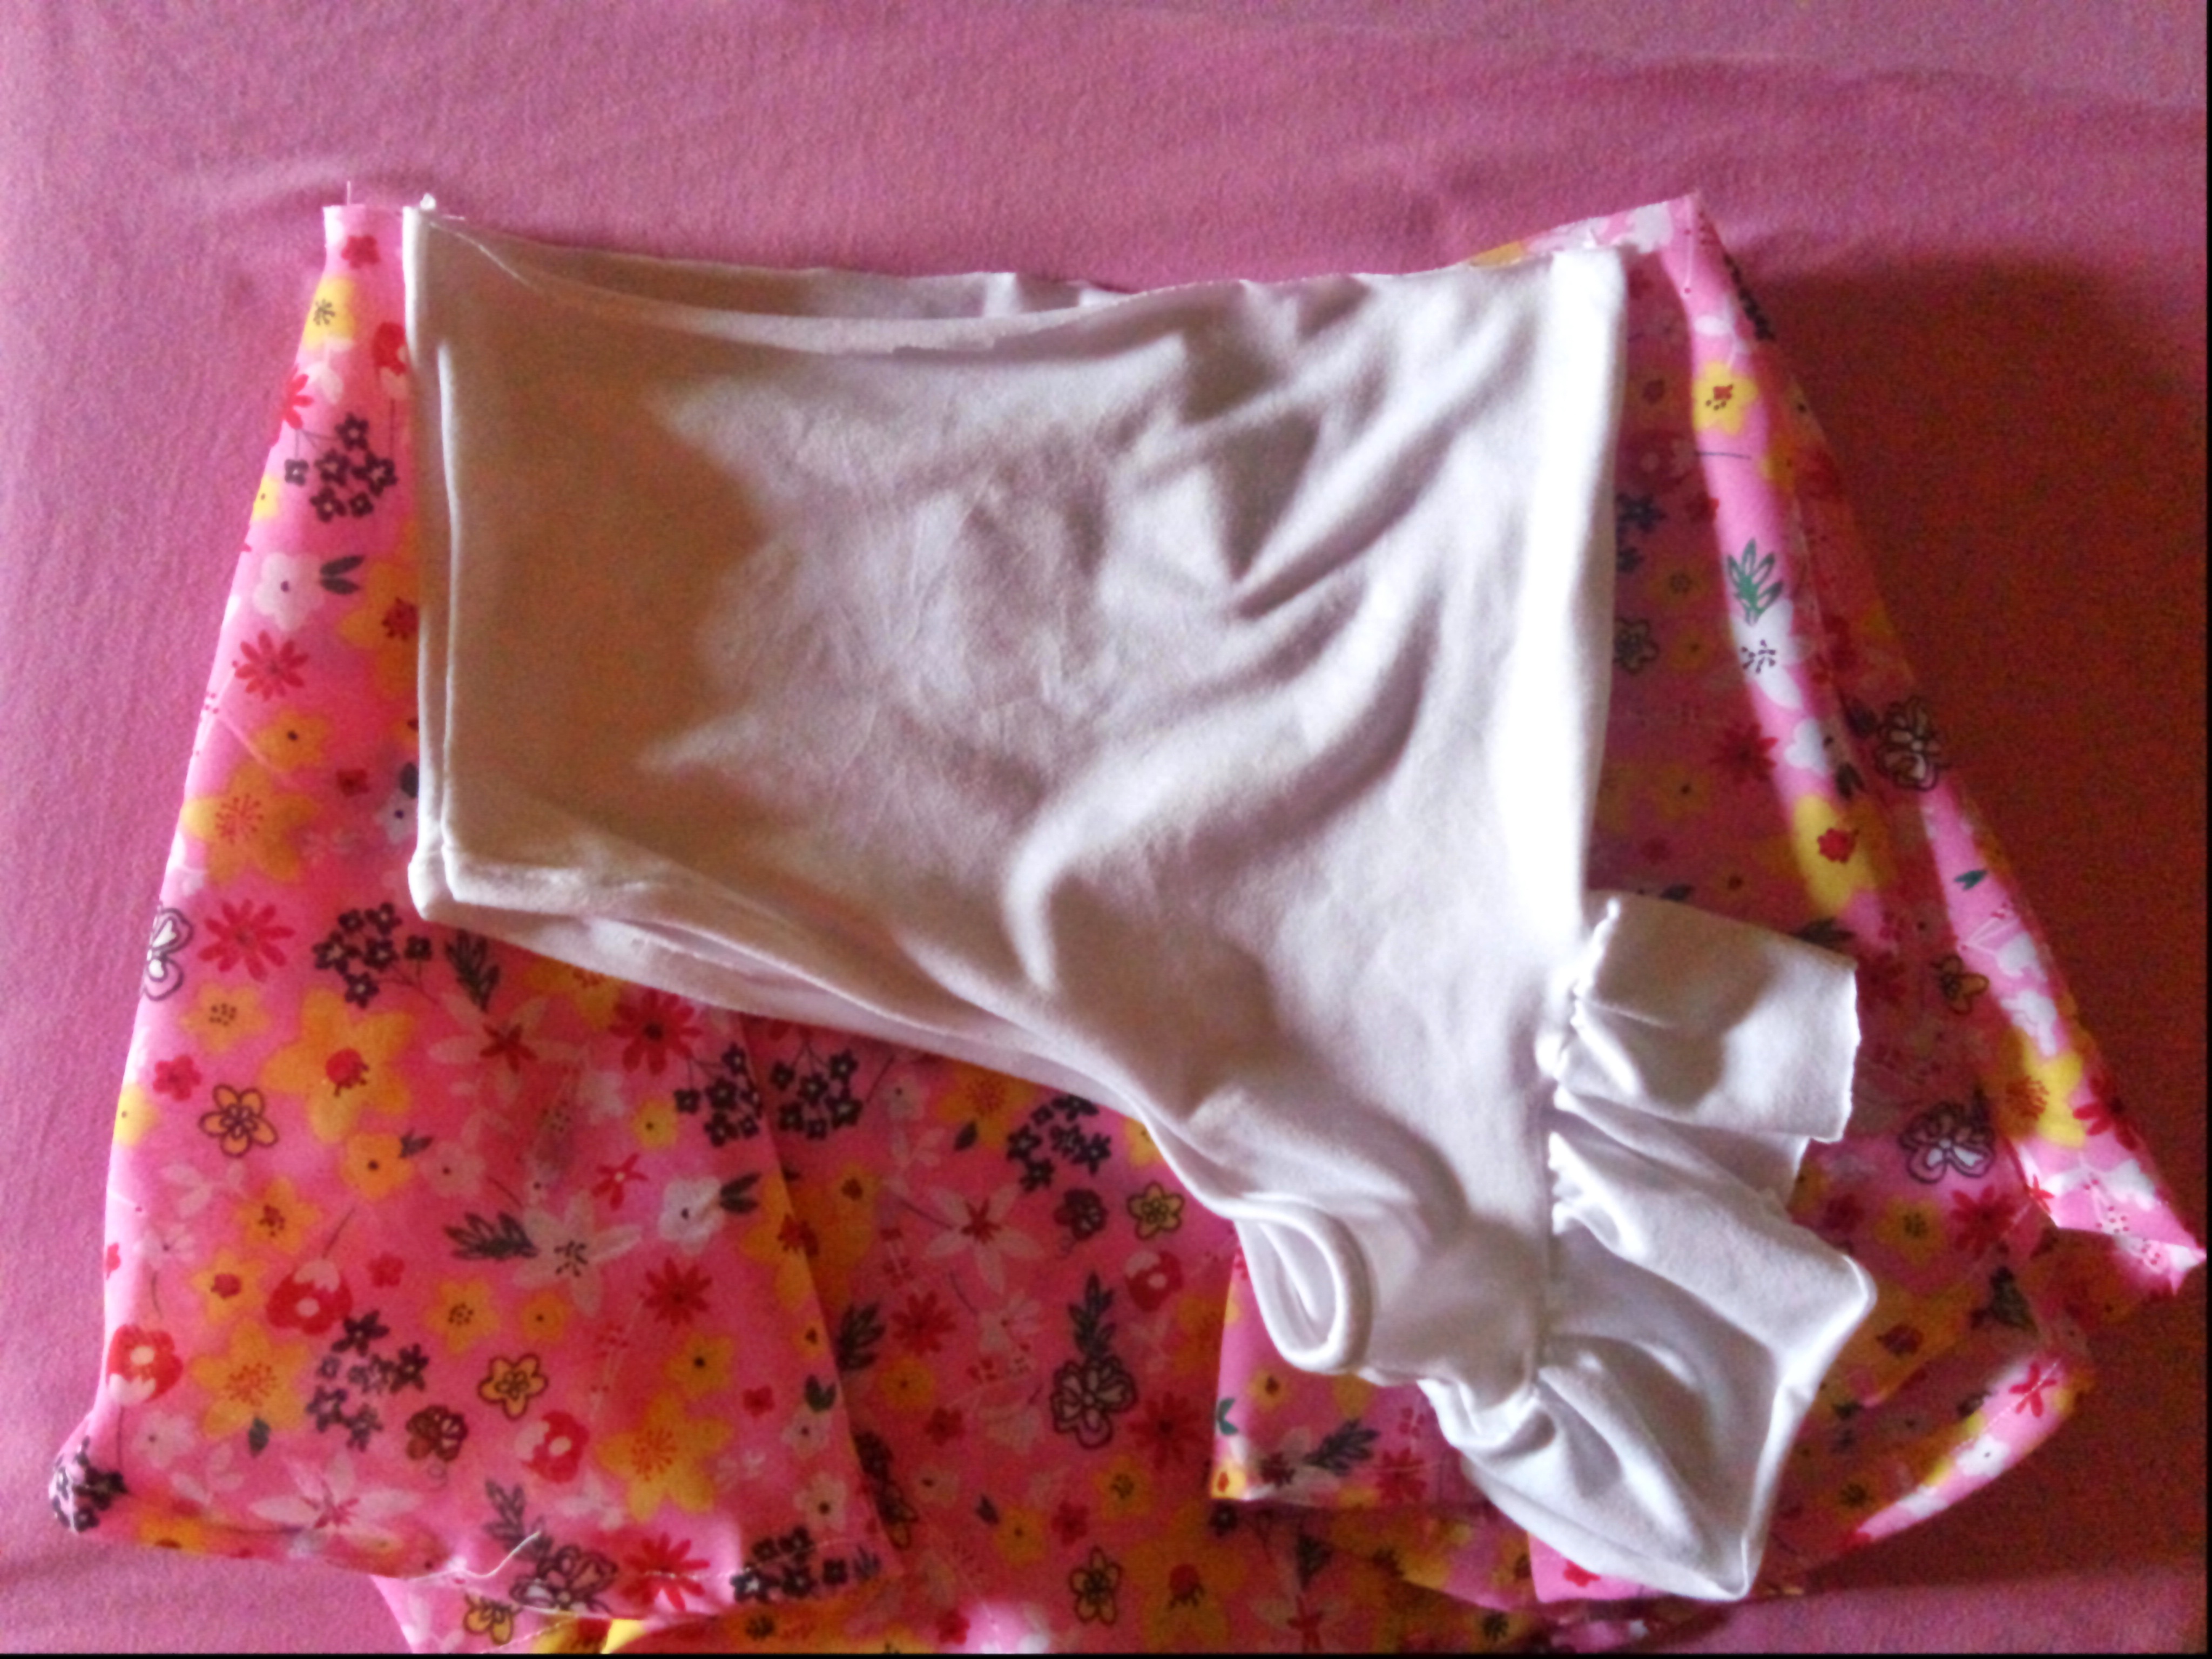
Lo primero que hice fue tomar la tela color blanca para sacar el molde de la camisa del vestido, las medidas son 30 de ancho y 26 de largo, luego con la tijera proseguí a cortar el cuadro. luego con el lápiz marque las medidas para hacer las mangas que mide 12 cm de largo, luego deje 5 cm de ancho para el hombro y proseguí de nuevo a cortar el cuello de forma recta.

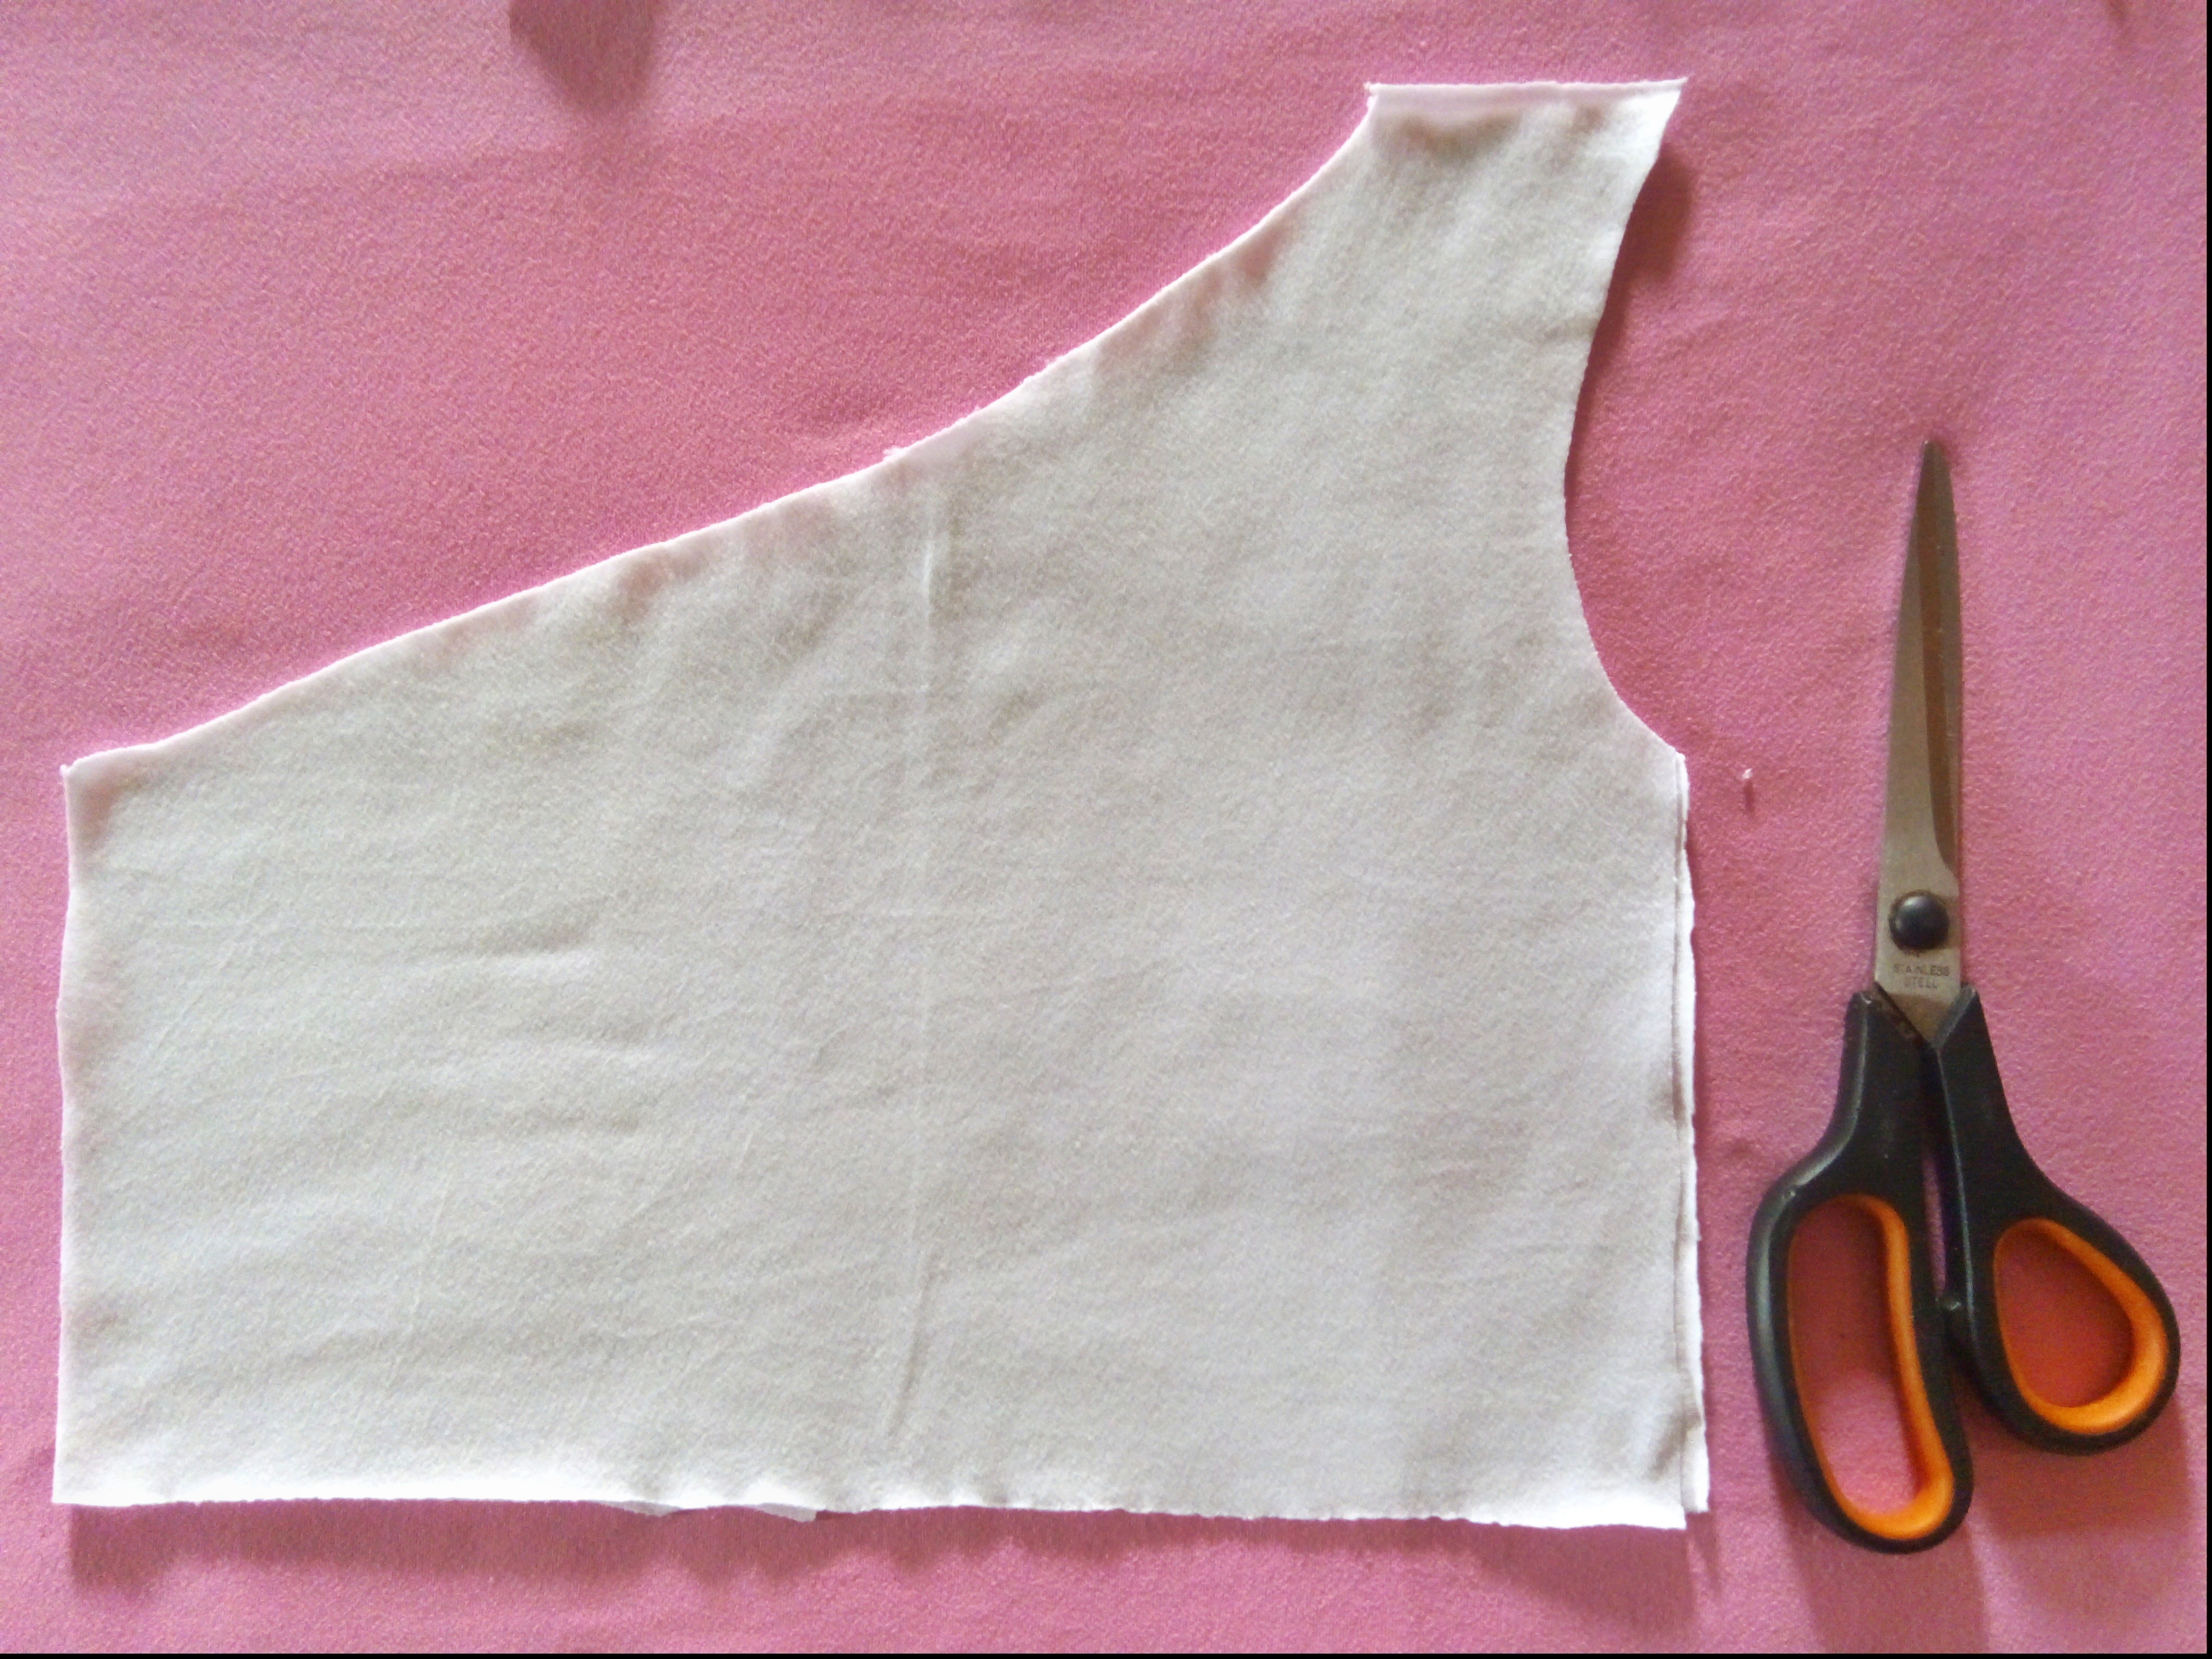
Segundo Paso:
Luego marqué con el lápiz una línea que va del cuello a una de las mangas, después con la tijera prosegui a cortar. Luego pase una costura recta y luego zigzag para unir el hombro.
.
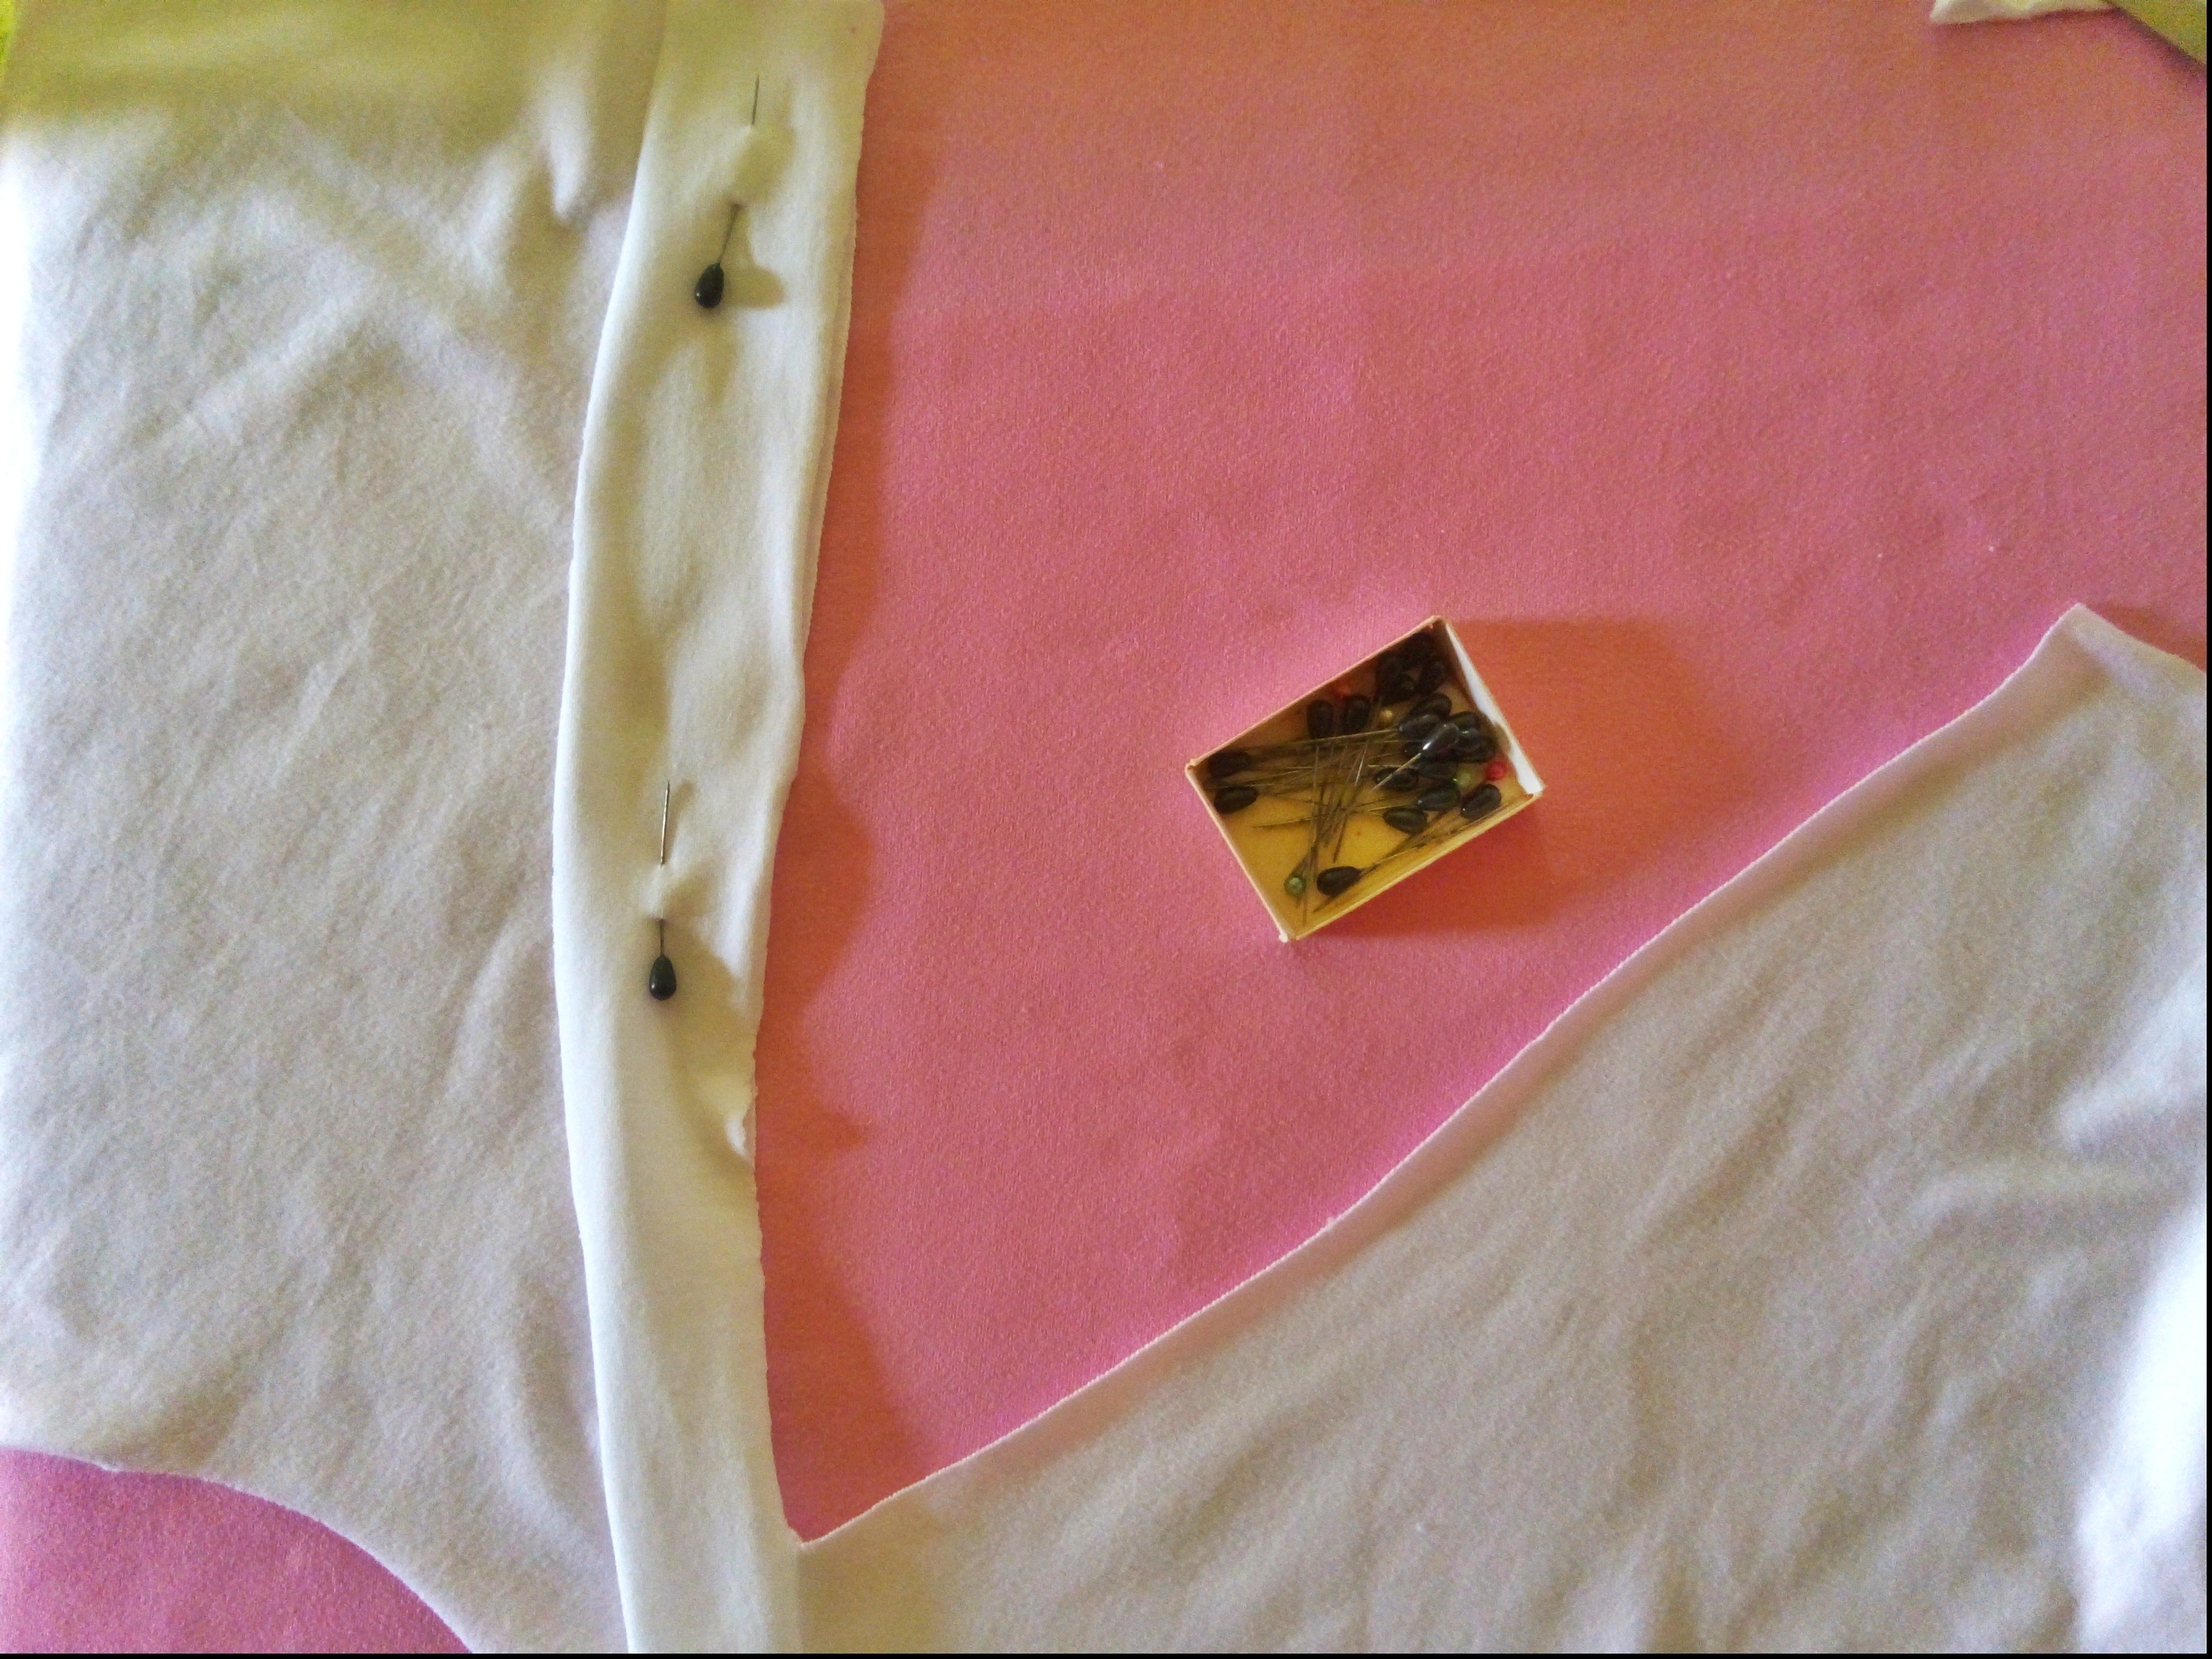
Tercer Paso:
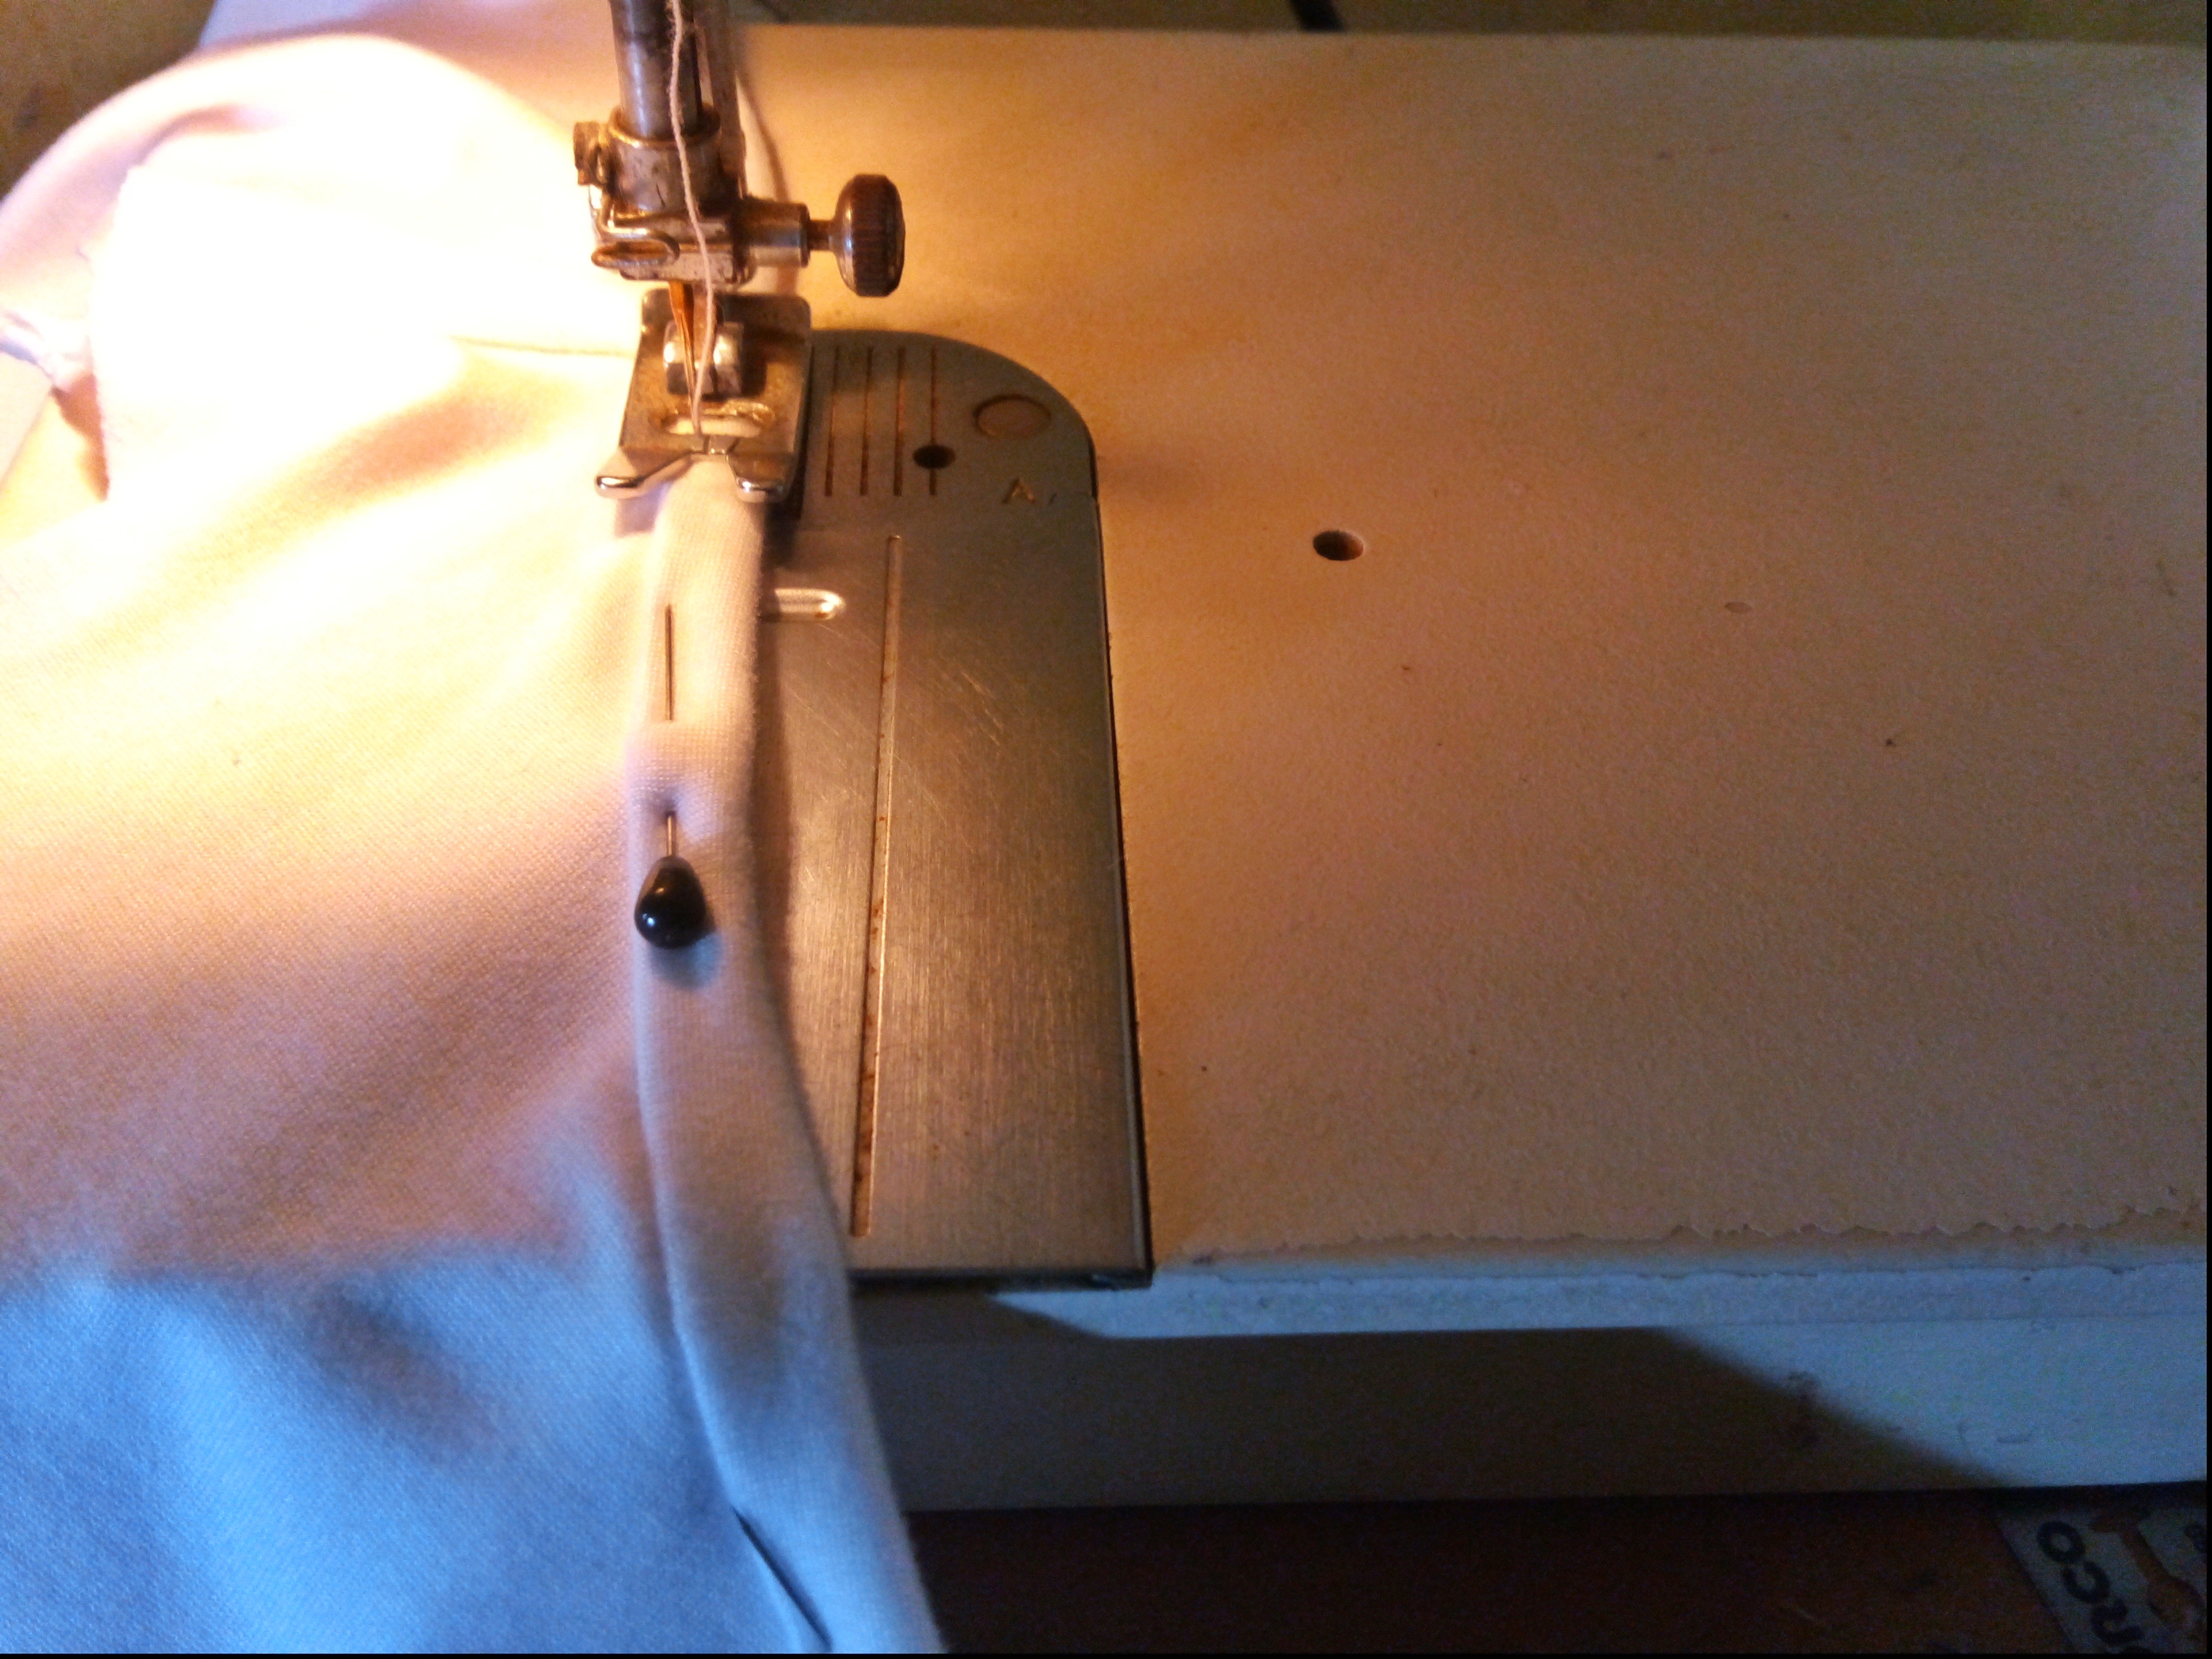
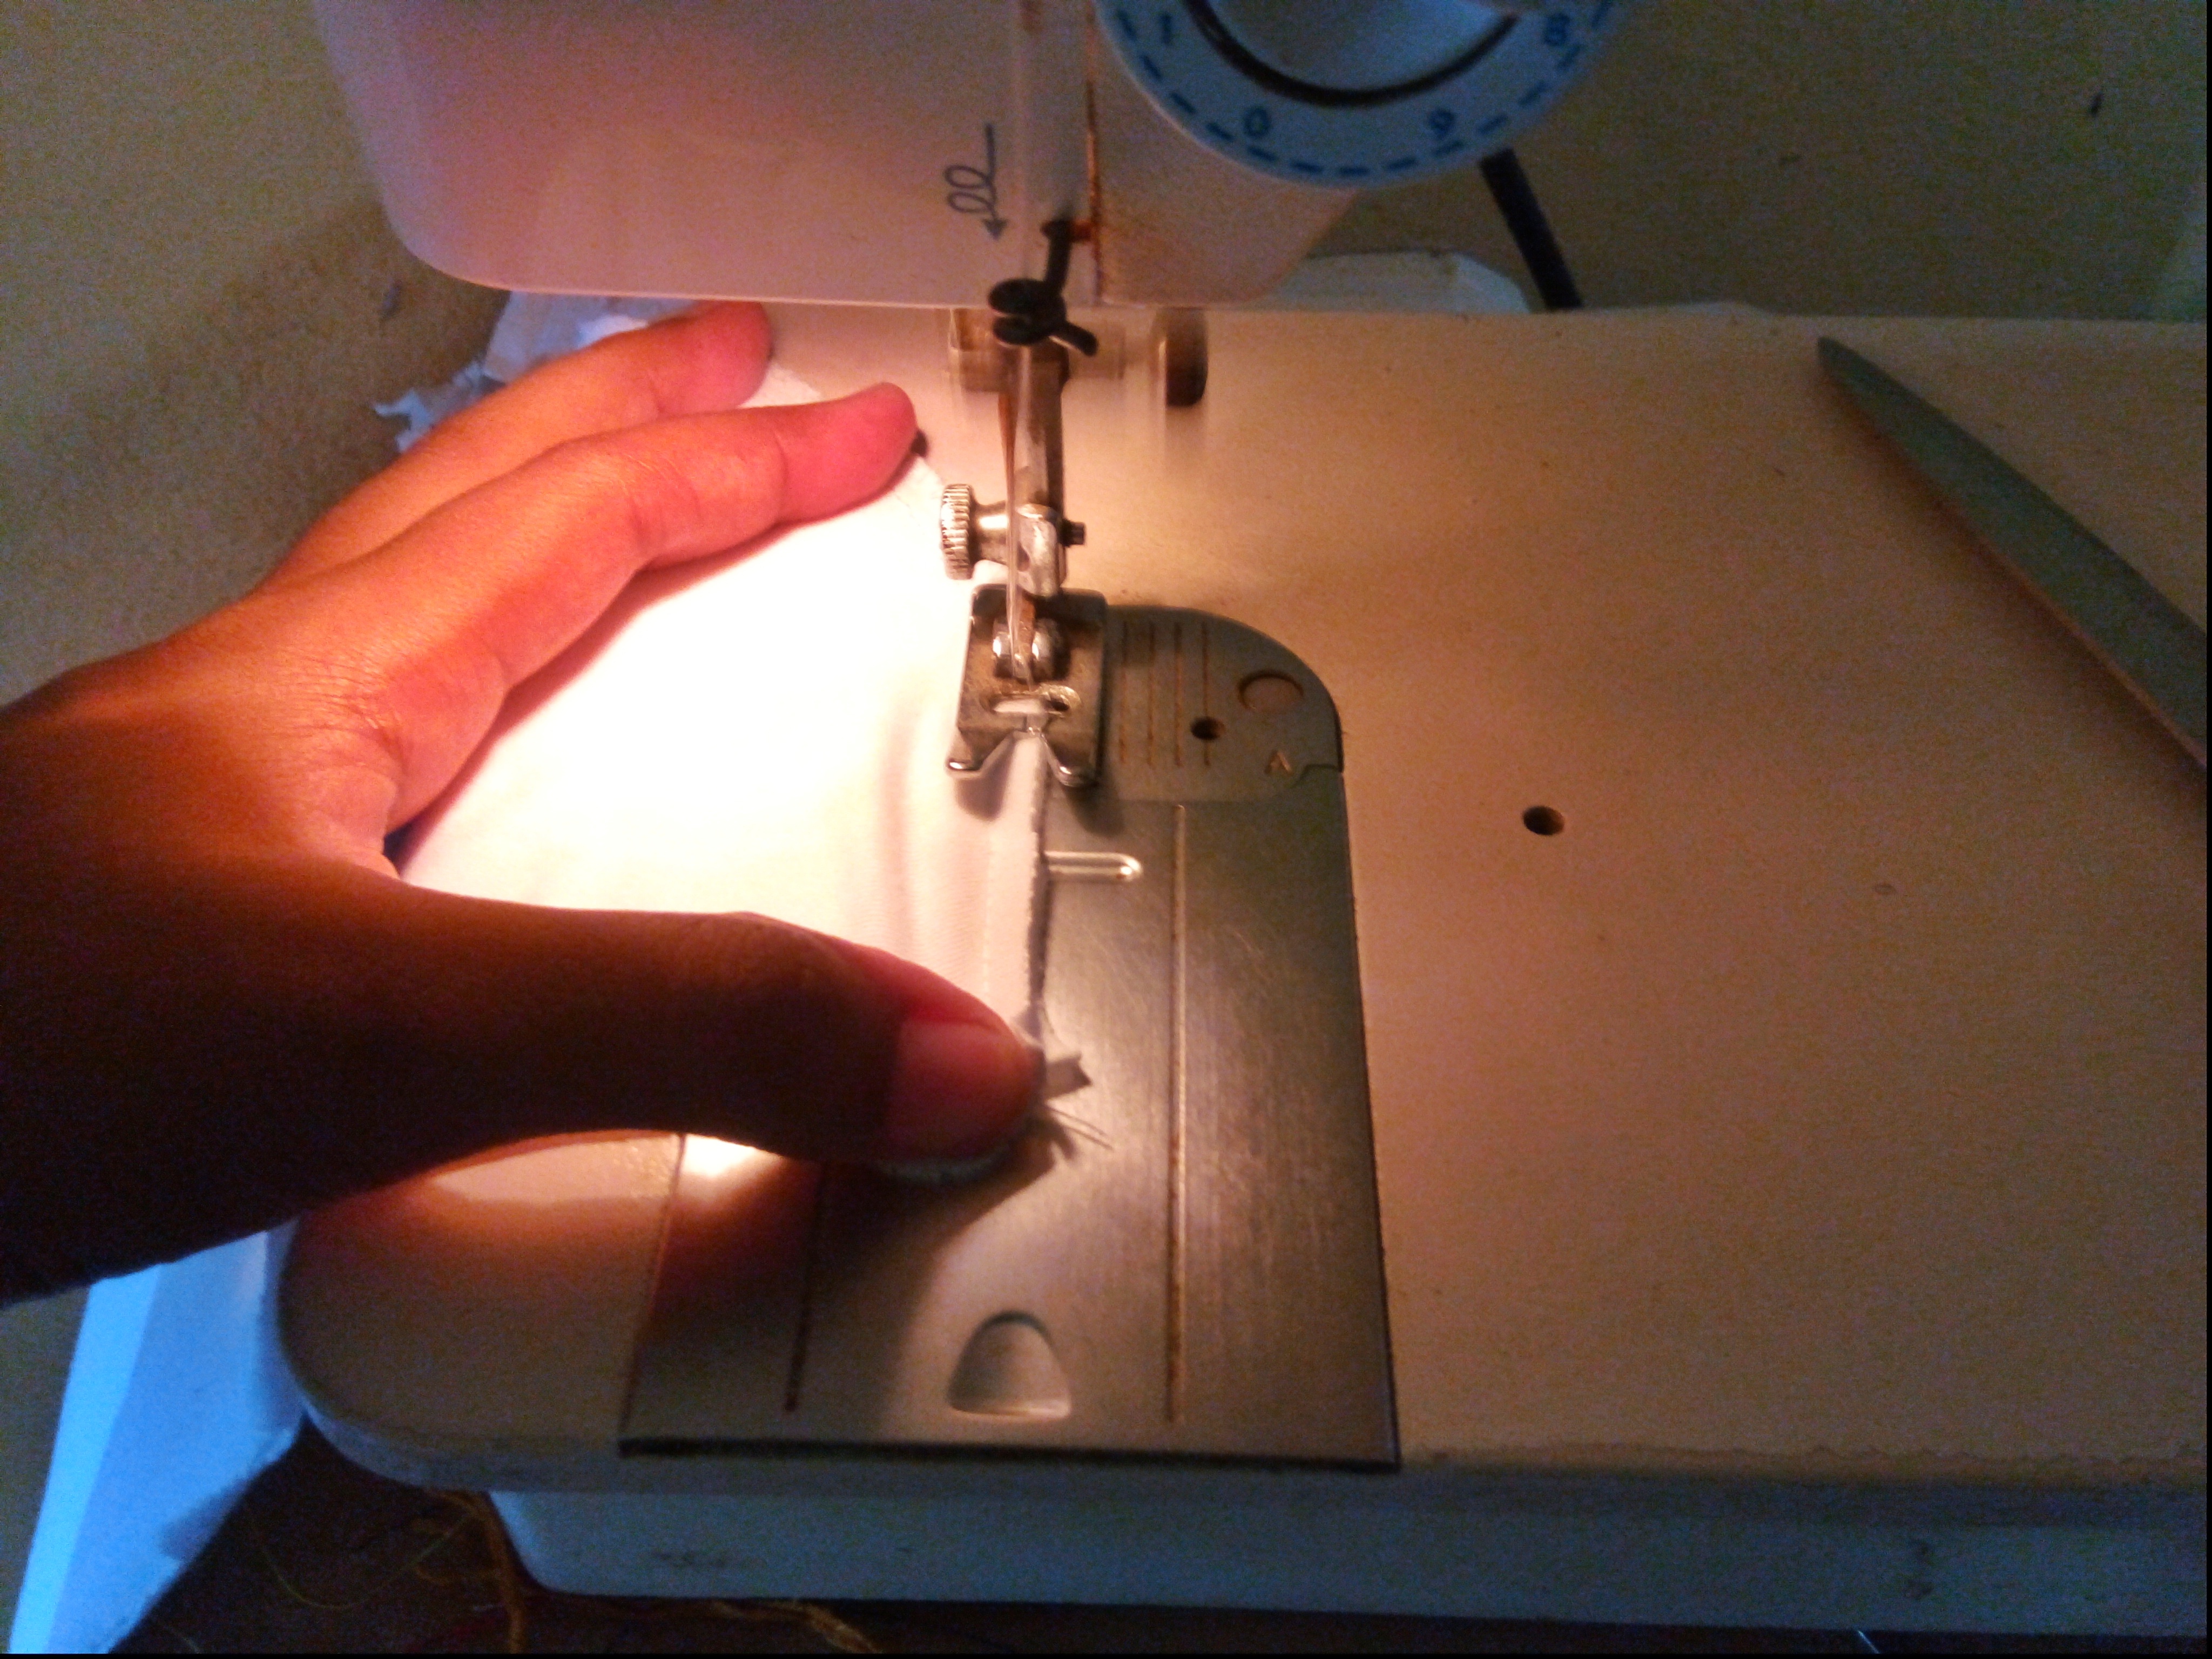
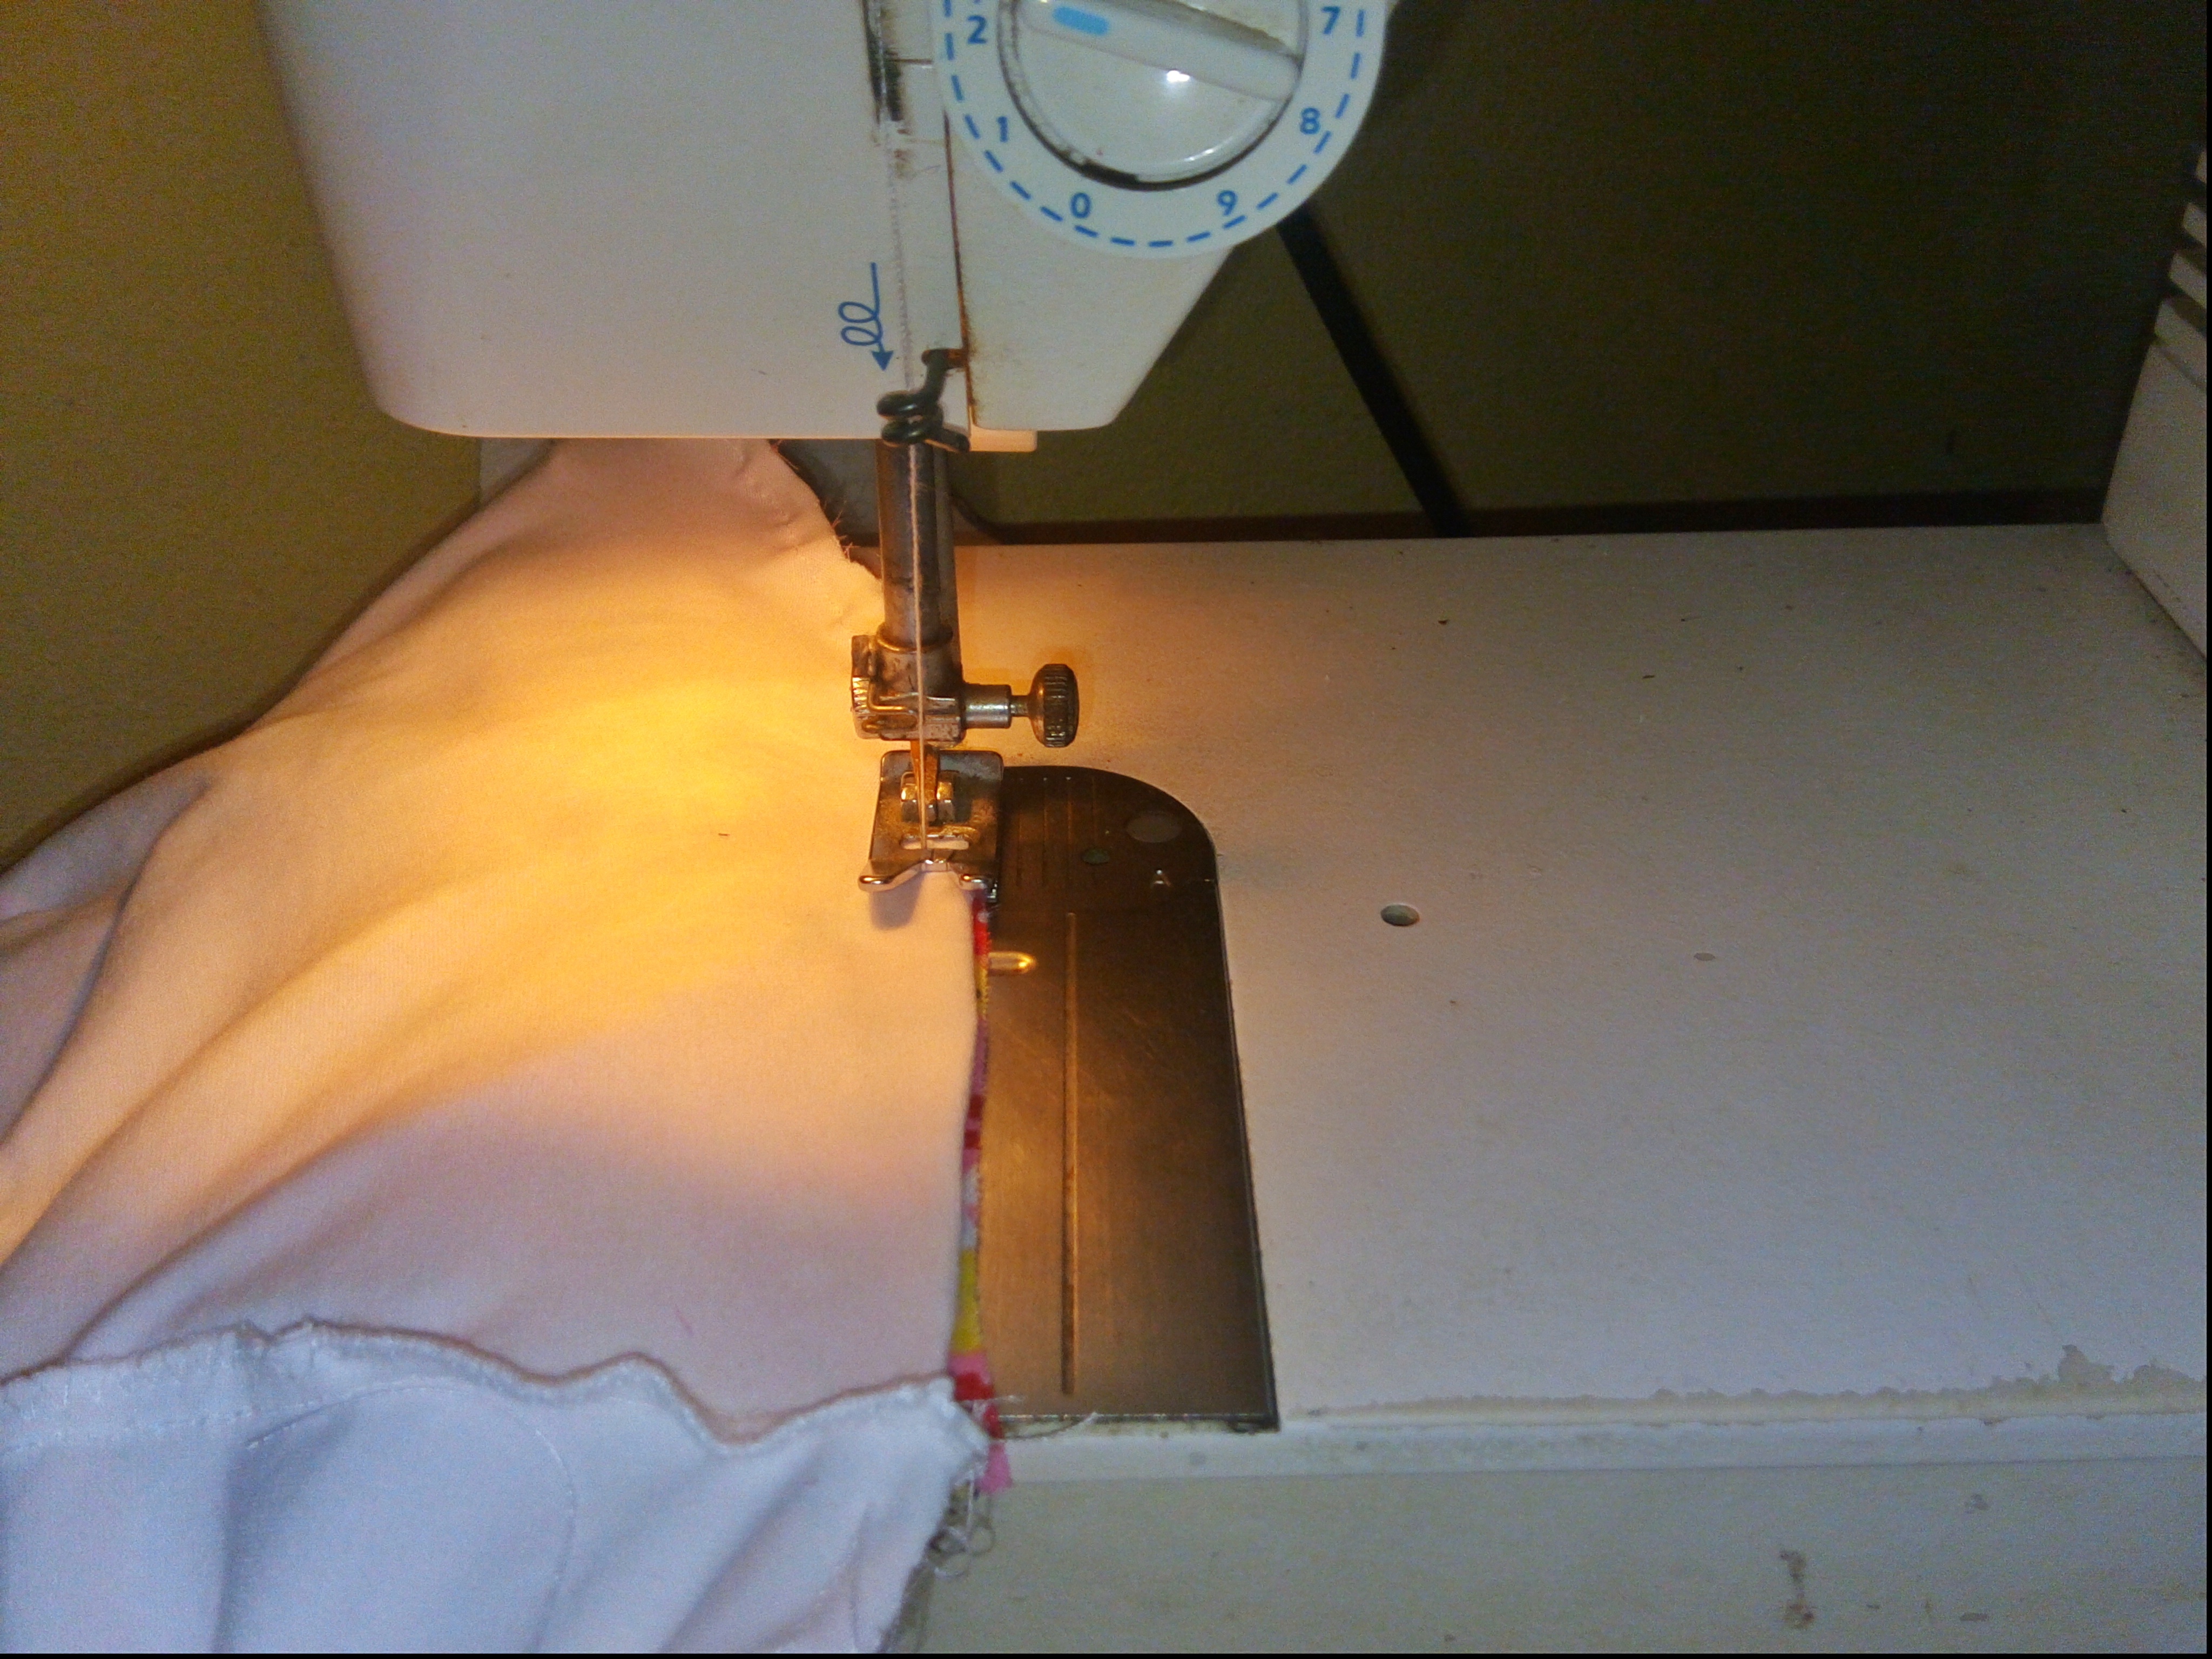
Ahora corte una tira de tela para realizar el bies de la camisa, mide 60 cm de largo y 3 cm de ancho. Luego con los ganchillos fui sujetando por el borde de la manga y cuello , después de esto pase una costura recta con la máquina de coser.

Cuarto Paso:
Luego de haber cosido doble para realizar el bies, pase de nuevo una costura recta .
Quinto Paso:
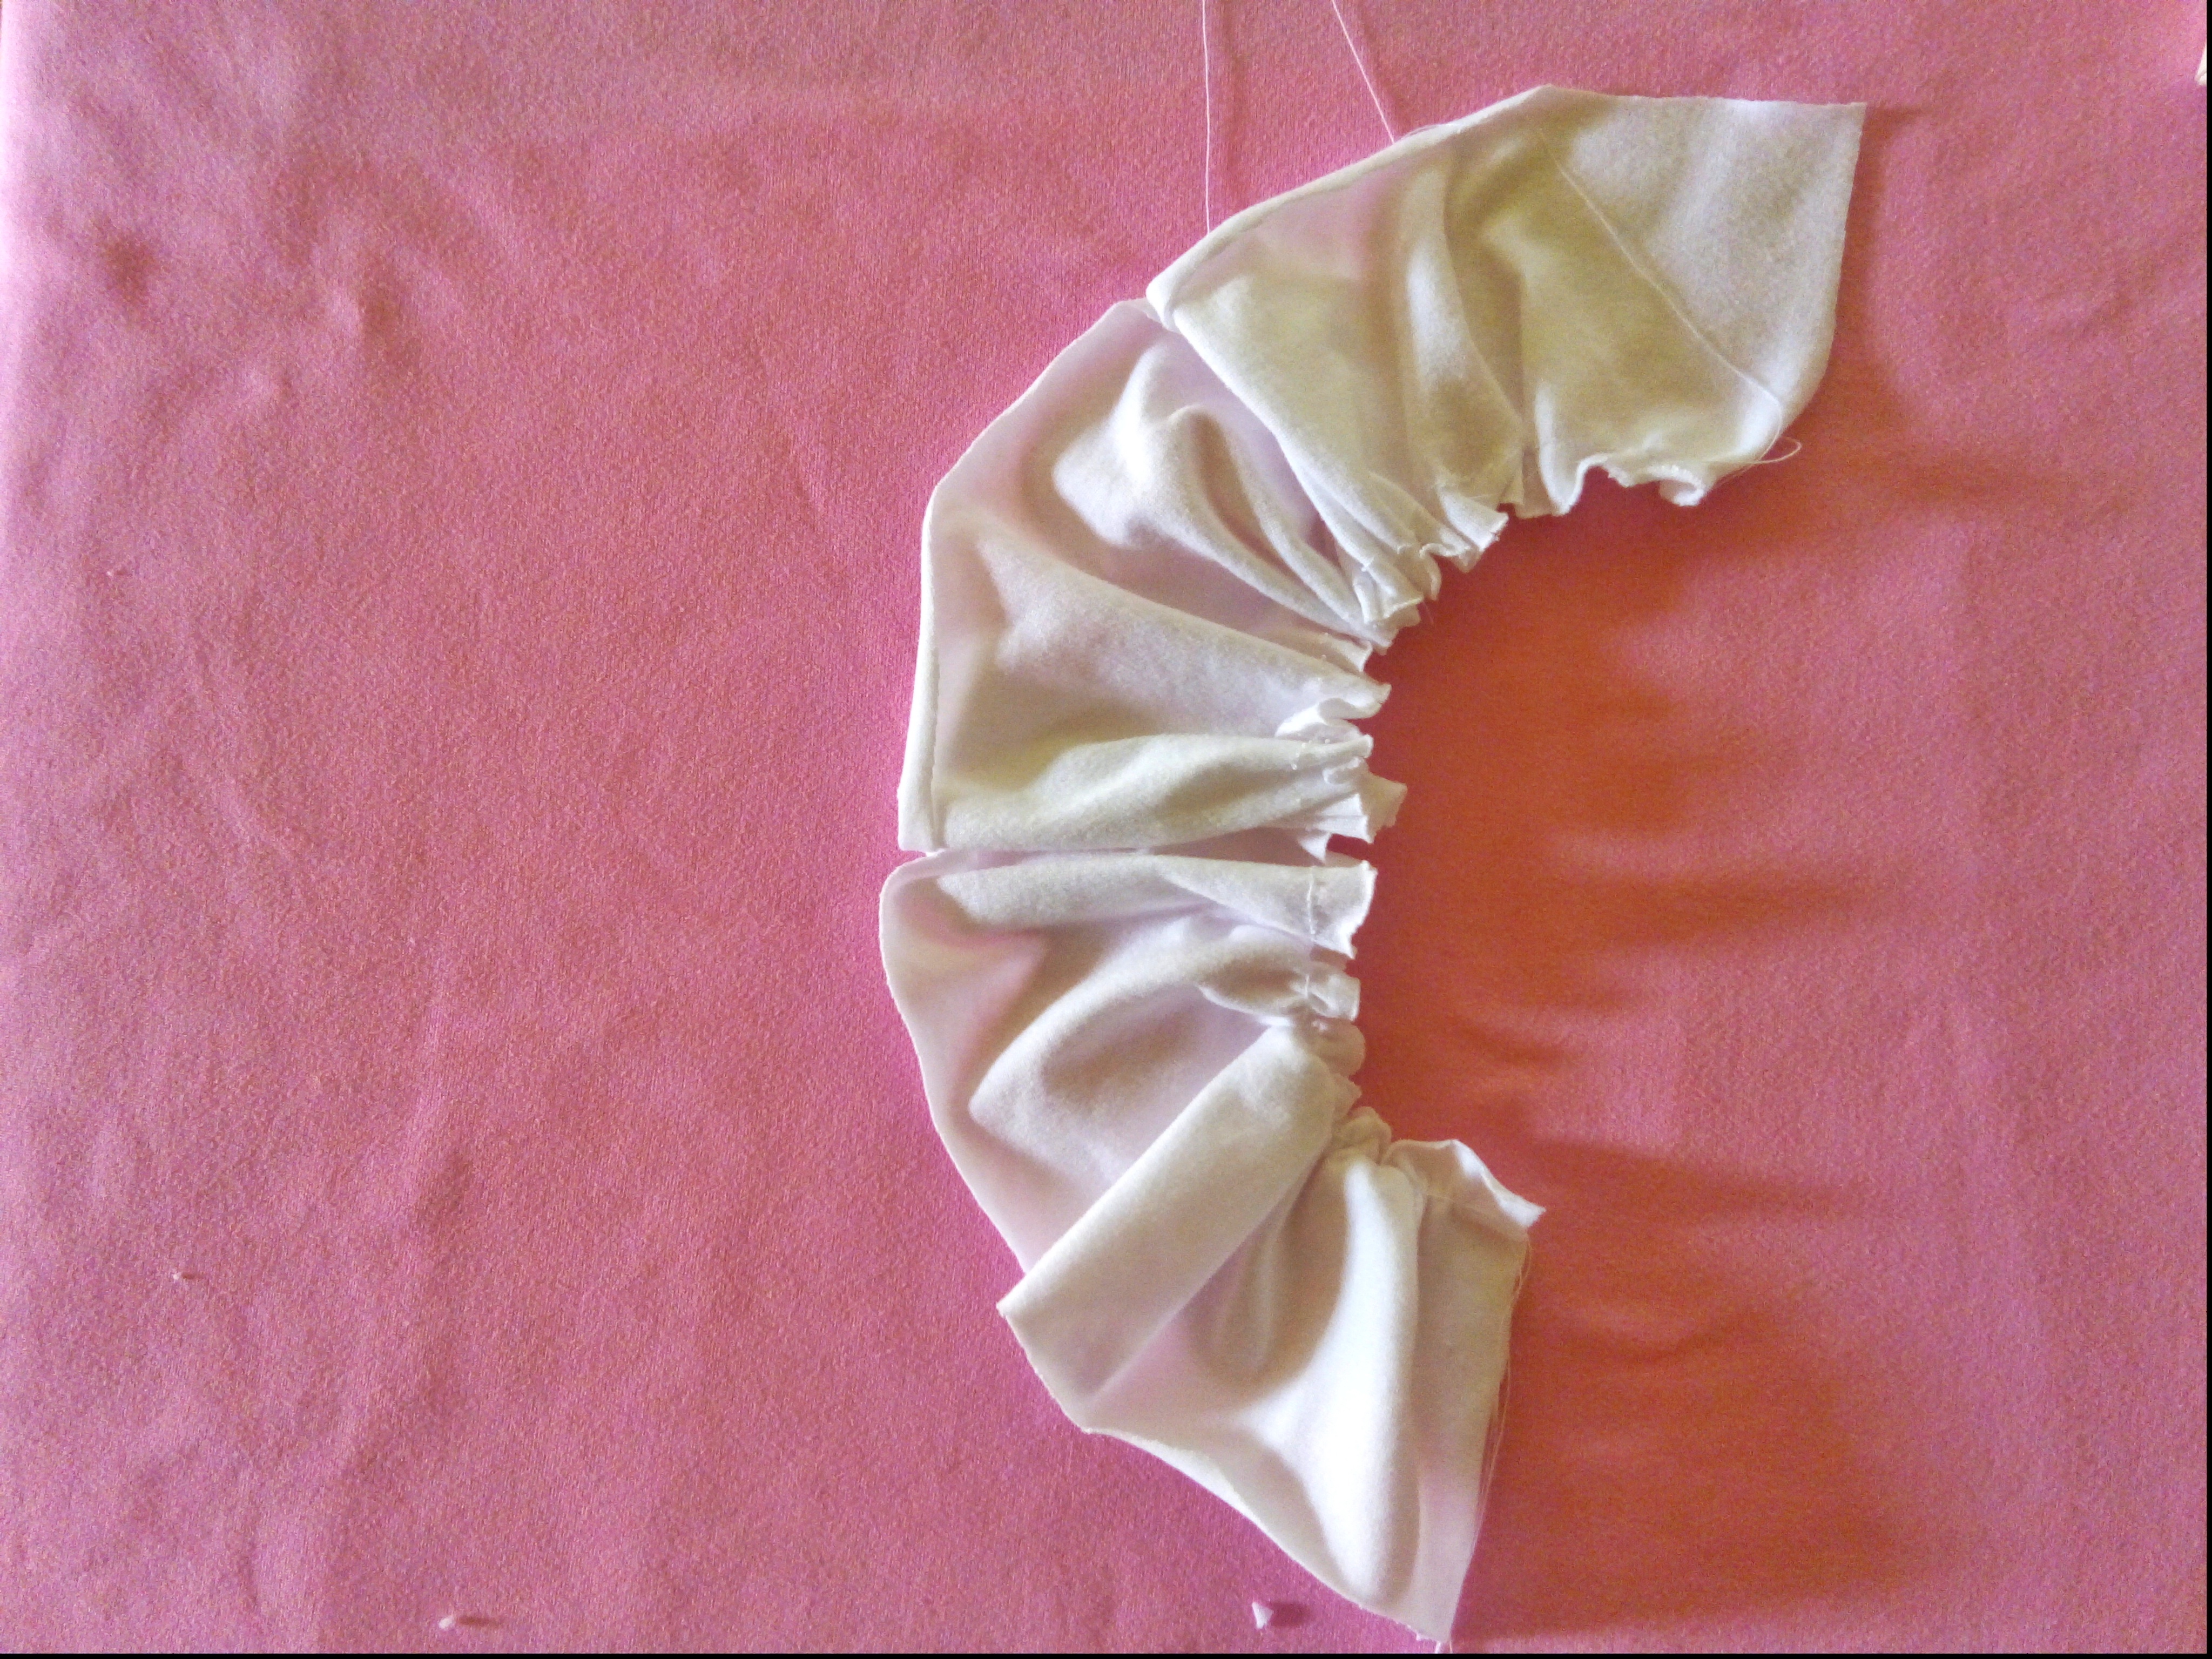
Ahora vamos a cortar otro pieza de tela blanca, vamos a medir con la cinta métrica 60 centímetros de largo y 7 centímetros de ancho.Luego con la máquina pase una costura recta, sin realizar el remate del principio ni el remate al final, después Hale uno de.los hilos y se realizó un arruche.
Sexto Paso:
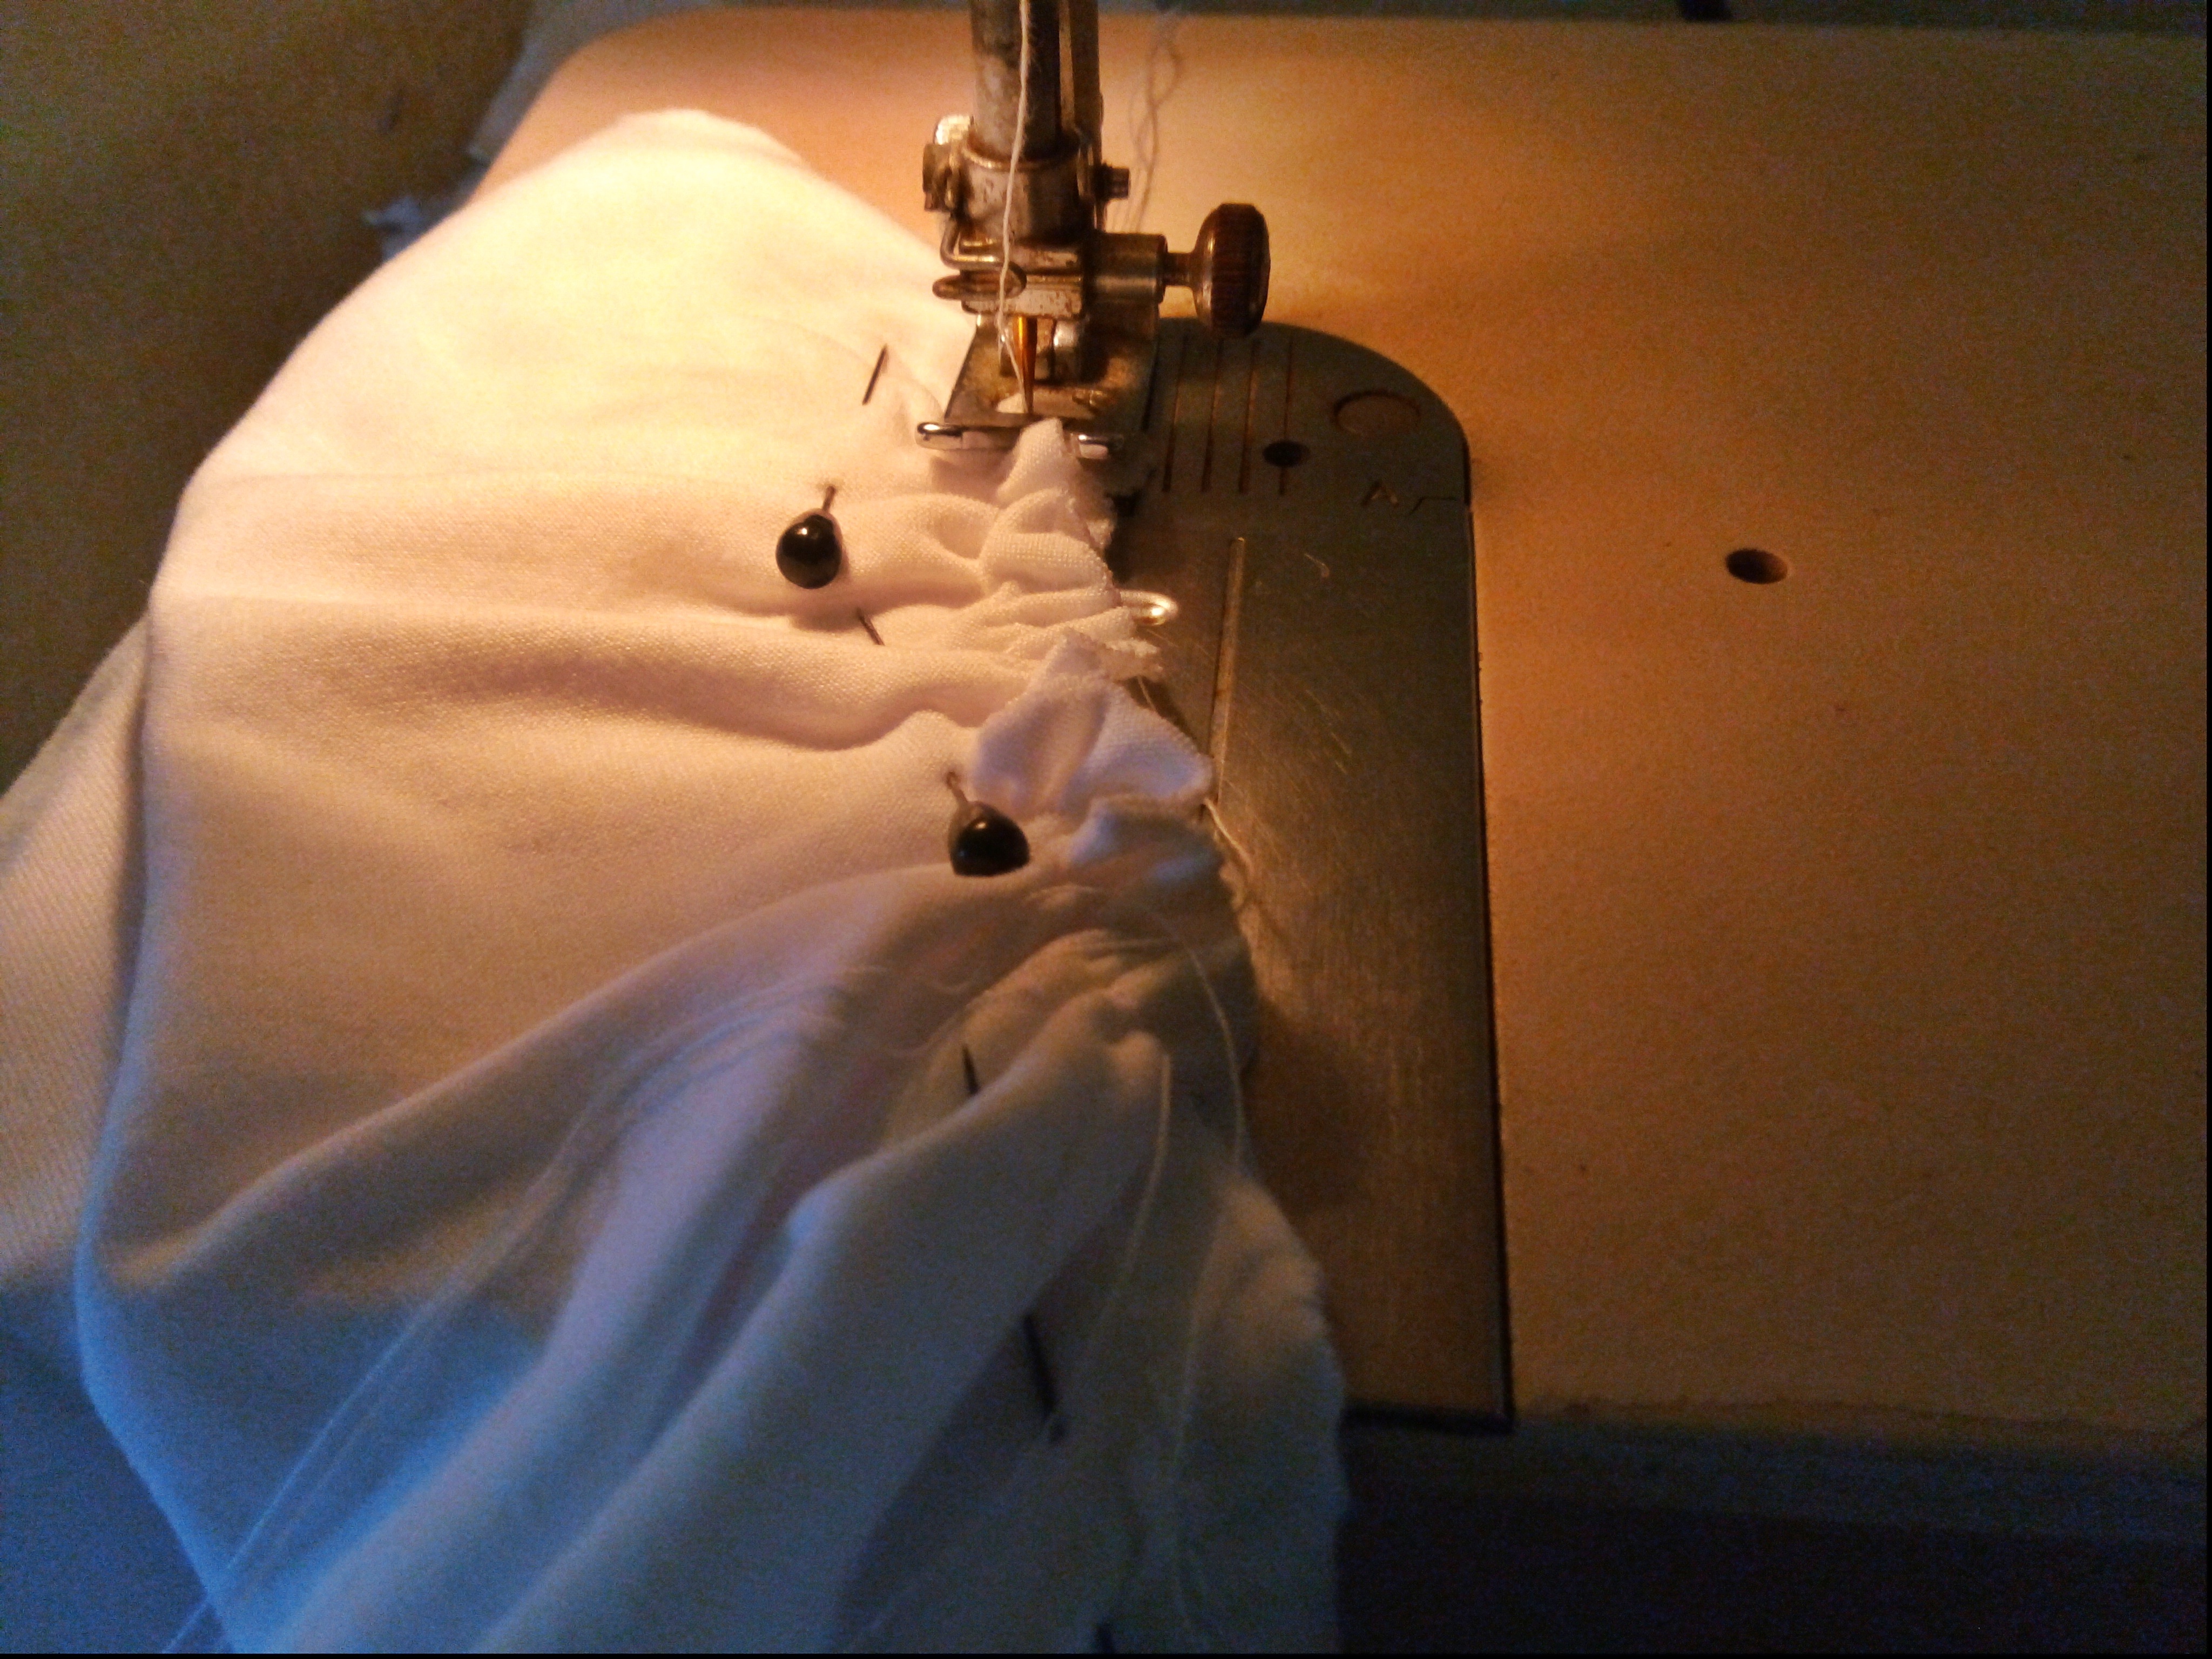
ahora vamos a realizar la costura de la manga , coloque nuestra pieza y pase costura recta para luego pasar costura zigzag.
Séptimo Paso
Ahora ambos laterales de la camisa. pase costura recta y luego costura zigzag.
Octavo Paso
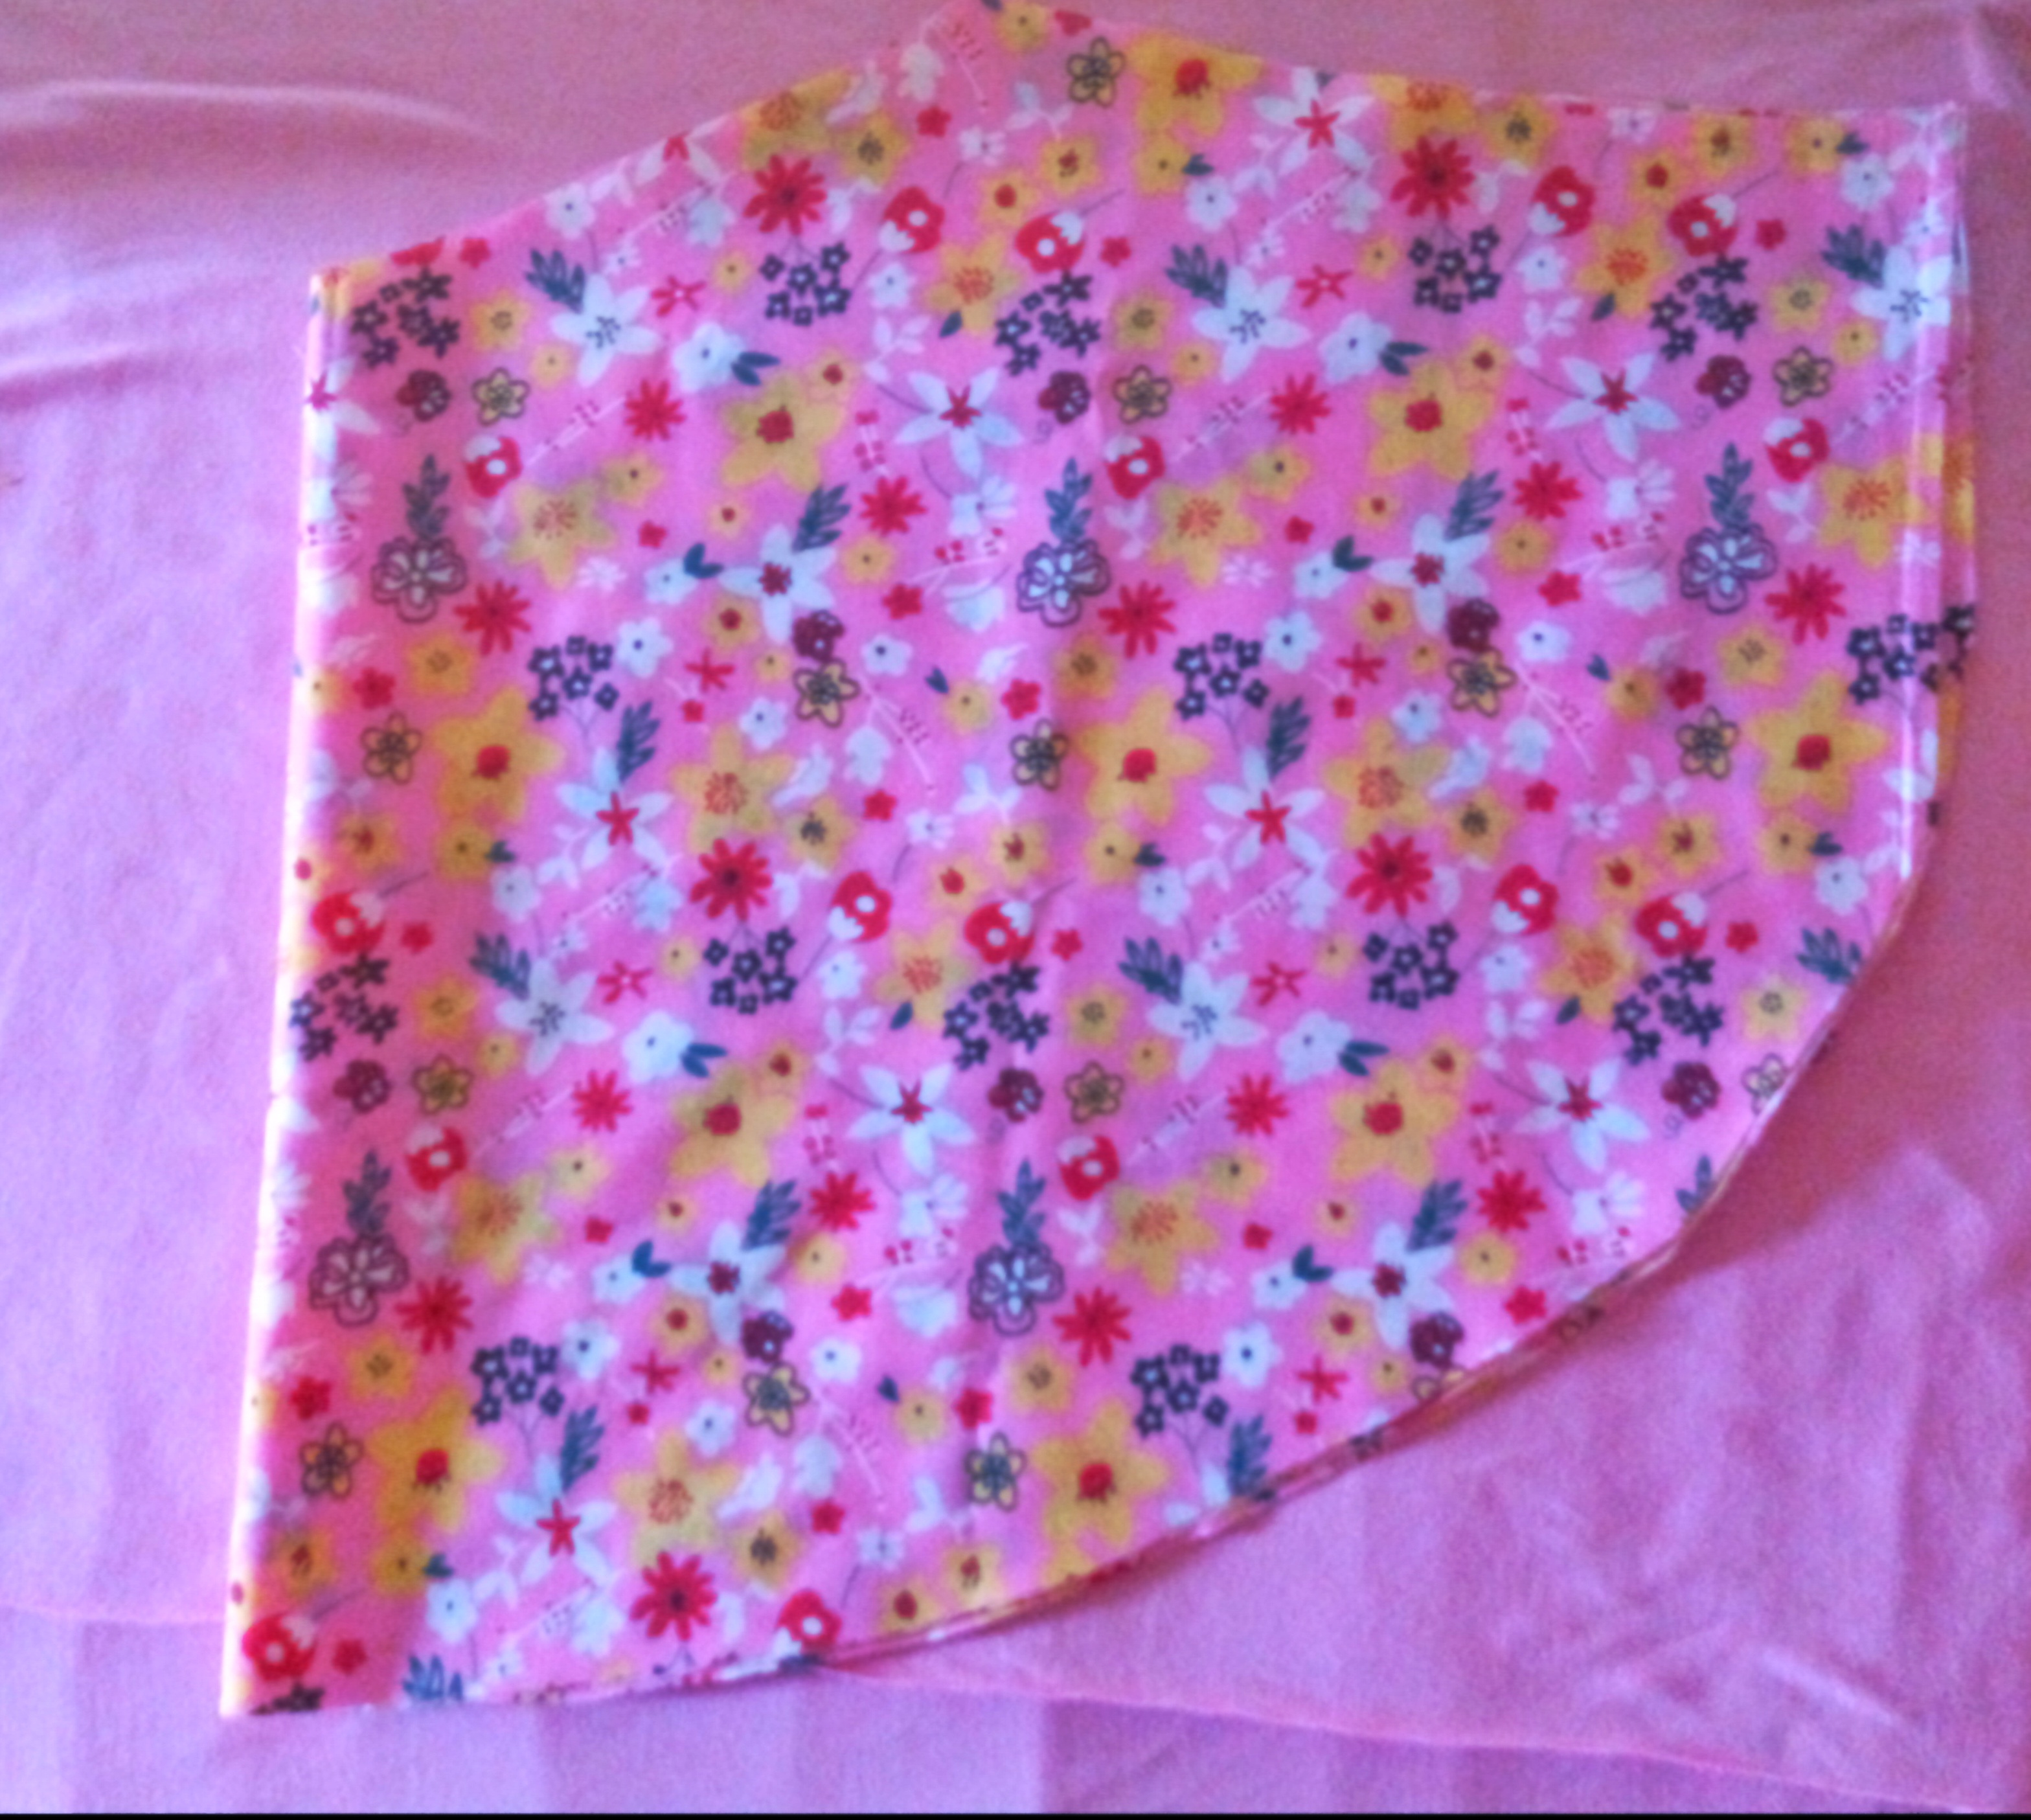
Para elaborar la falda del vestido, utilicé 30 centímetros de largo, el ancho es el que tiene de fabrica. Luego medi 25 cm en la parte lateral y corte en forma de circulo, para finalizar la falda corte la parte de la cintura 22 centímetros de ancho.
Noveno paso
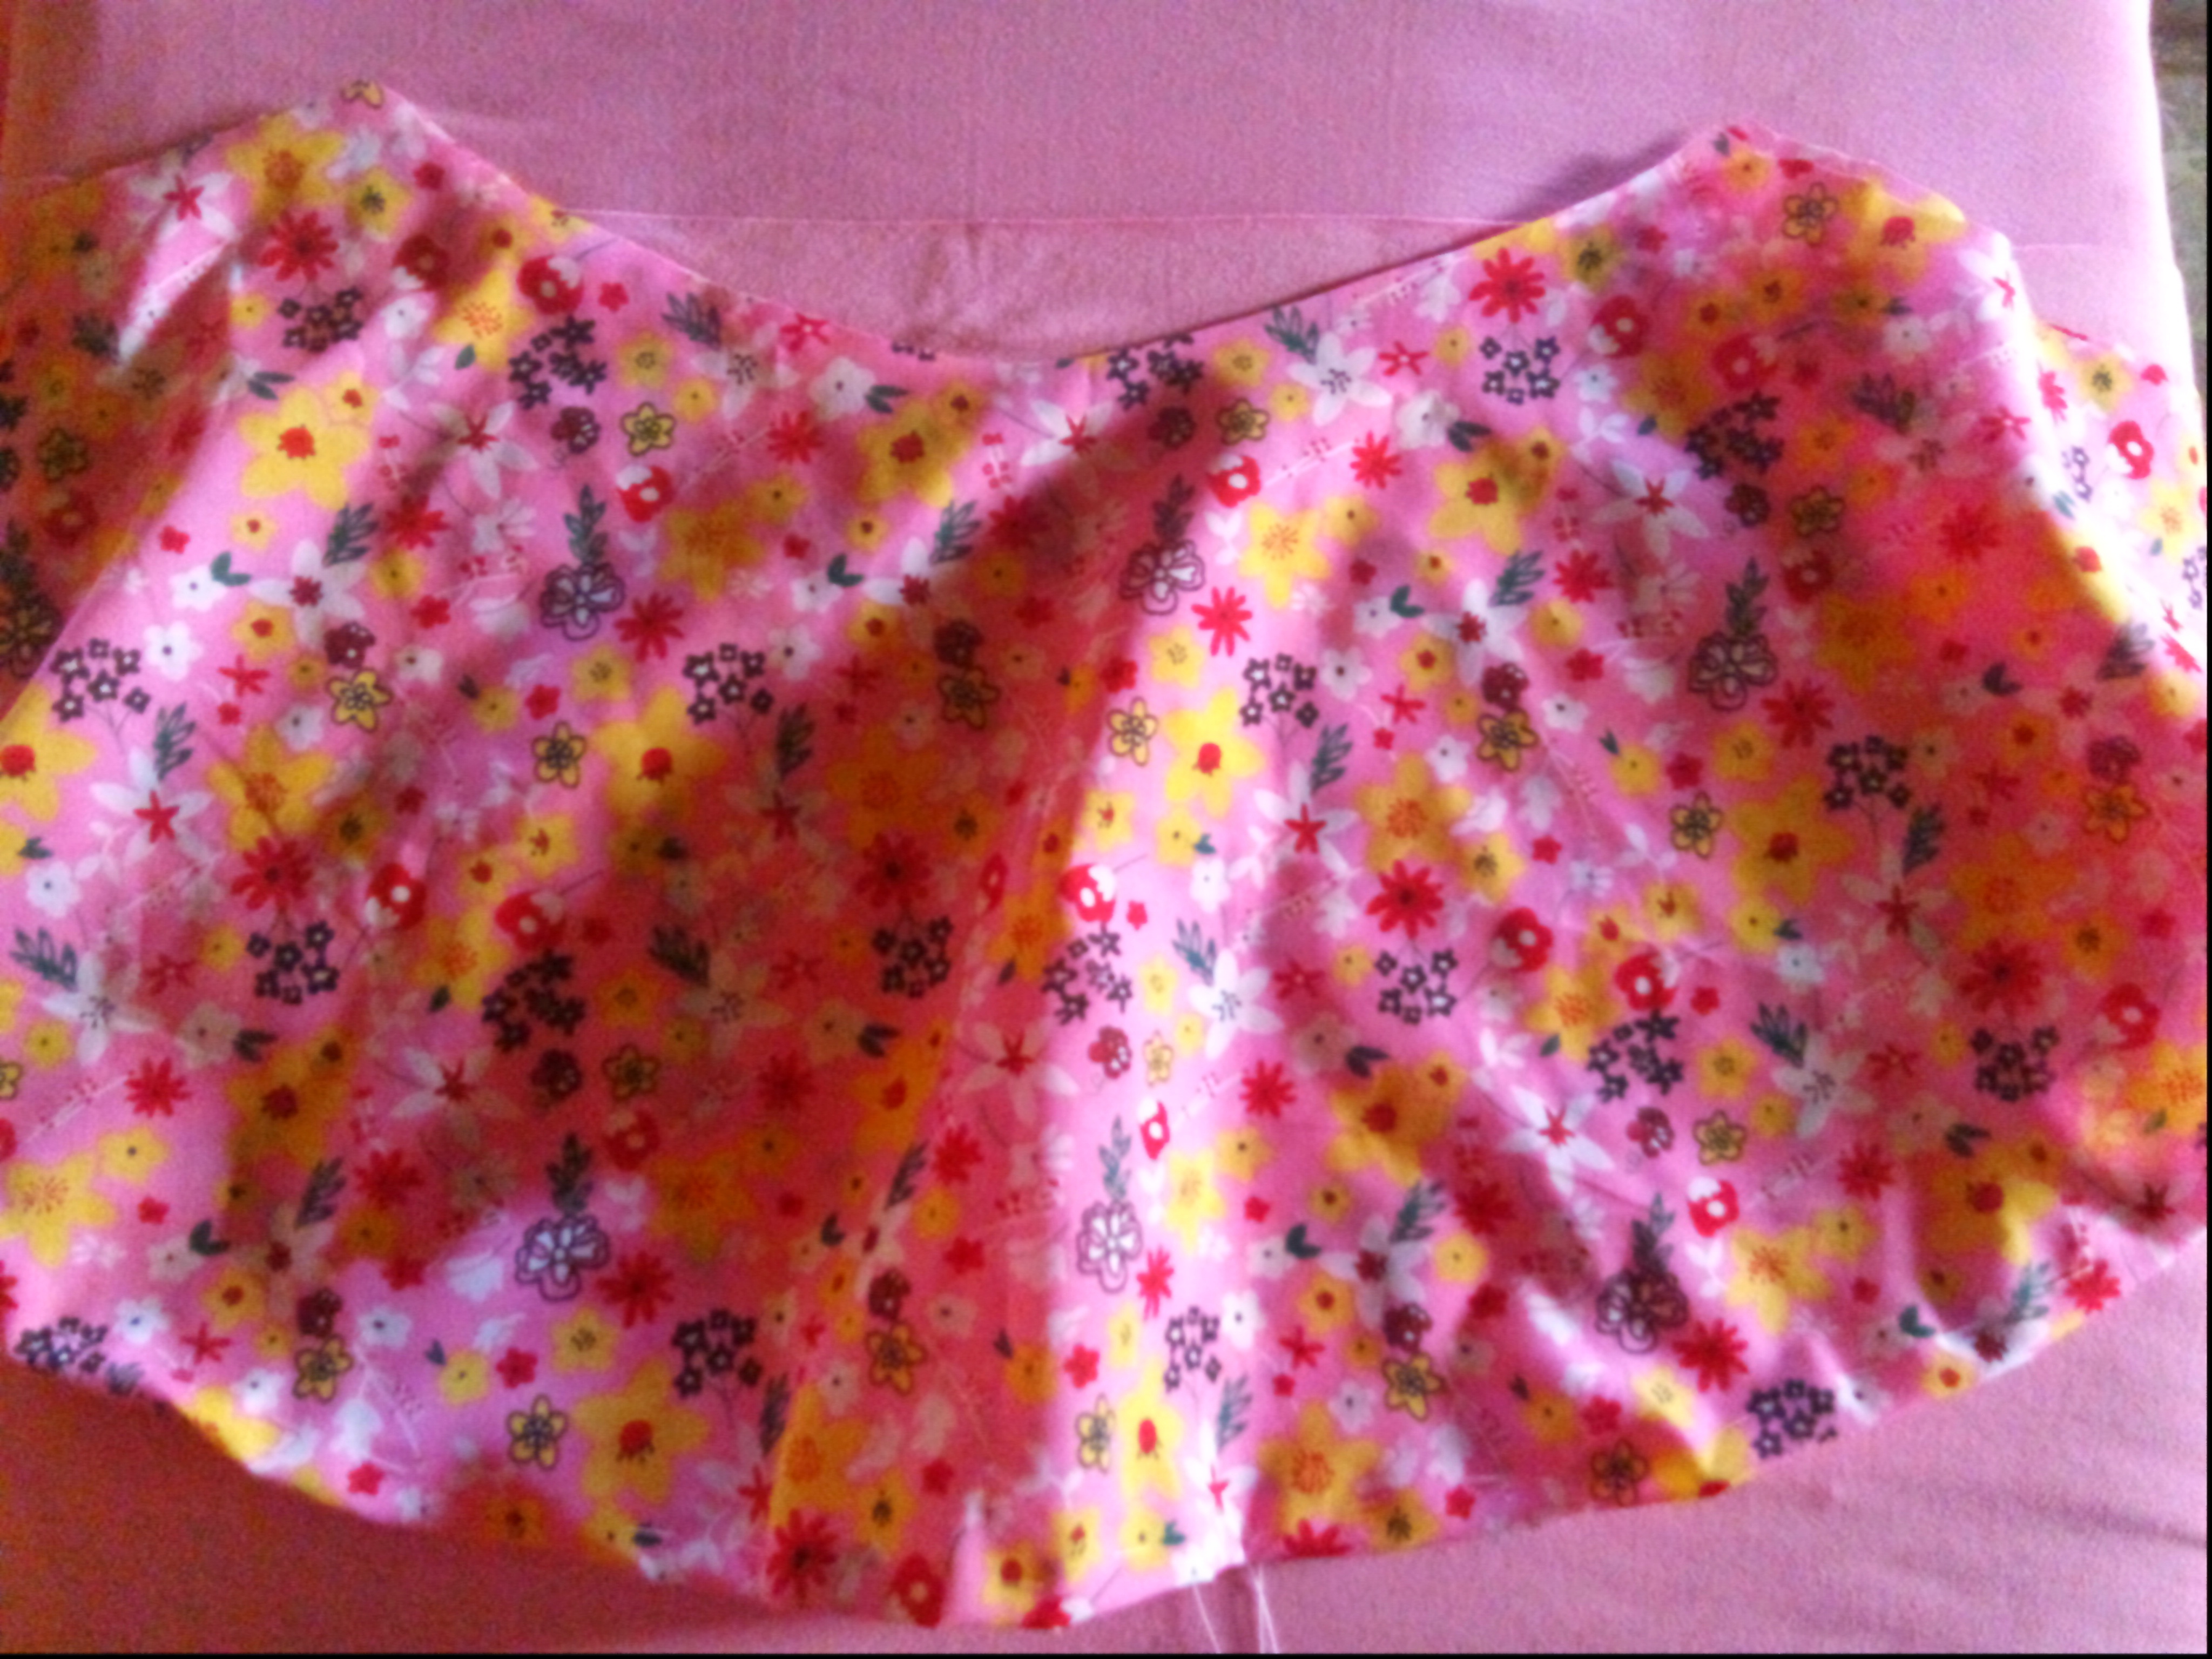
Doble los bordes de la falta 1 centímetros y pase costura recta, luego uni los laterales de la falda.

Décimo Paso
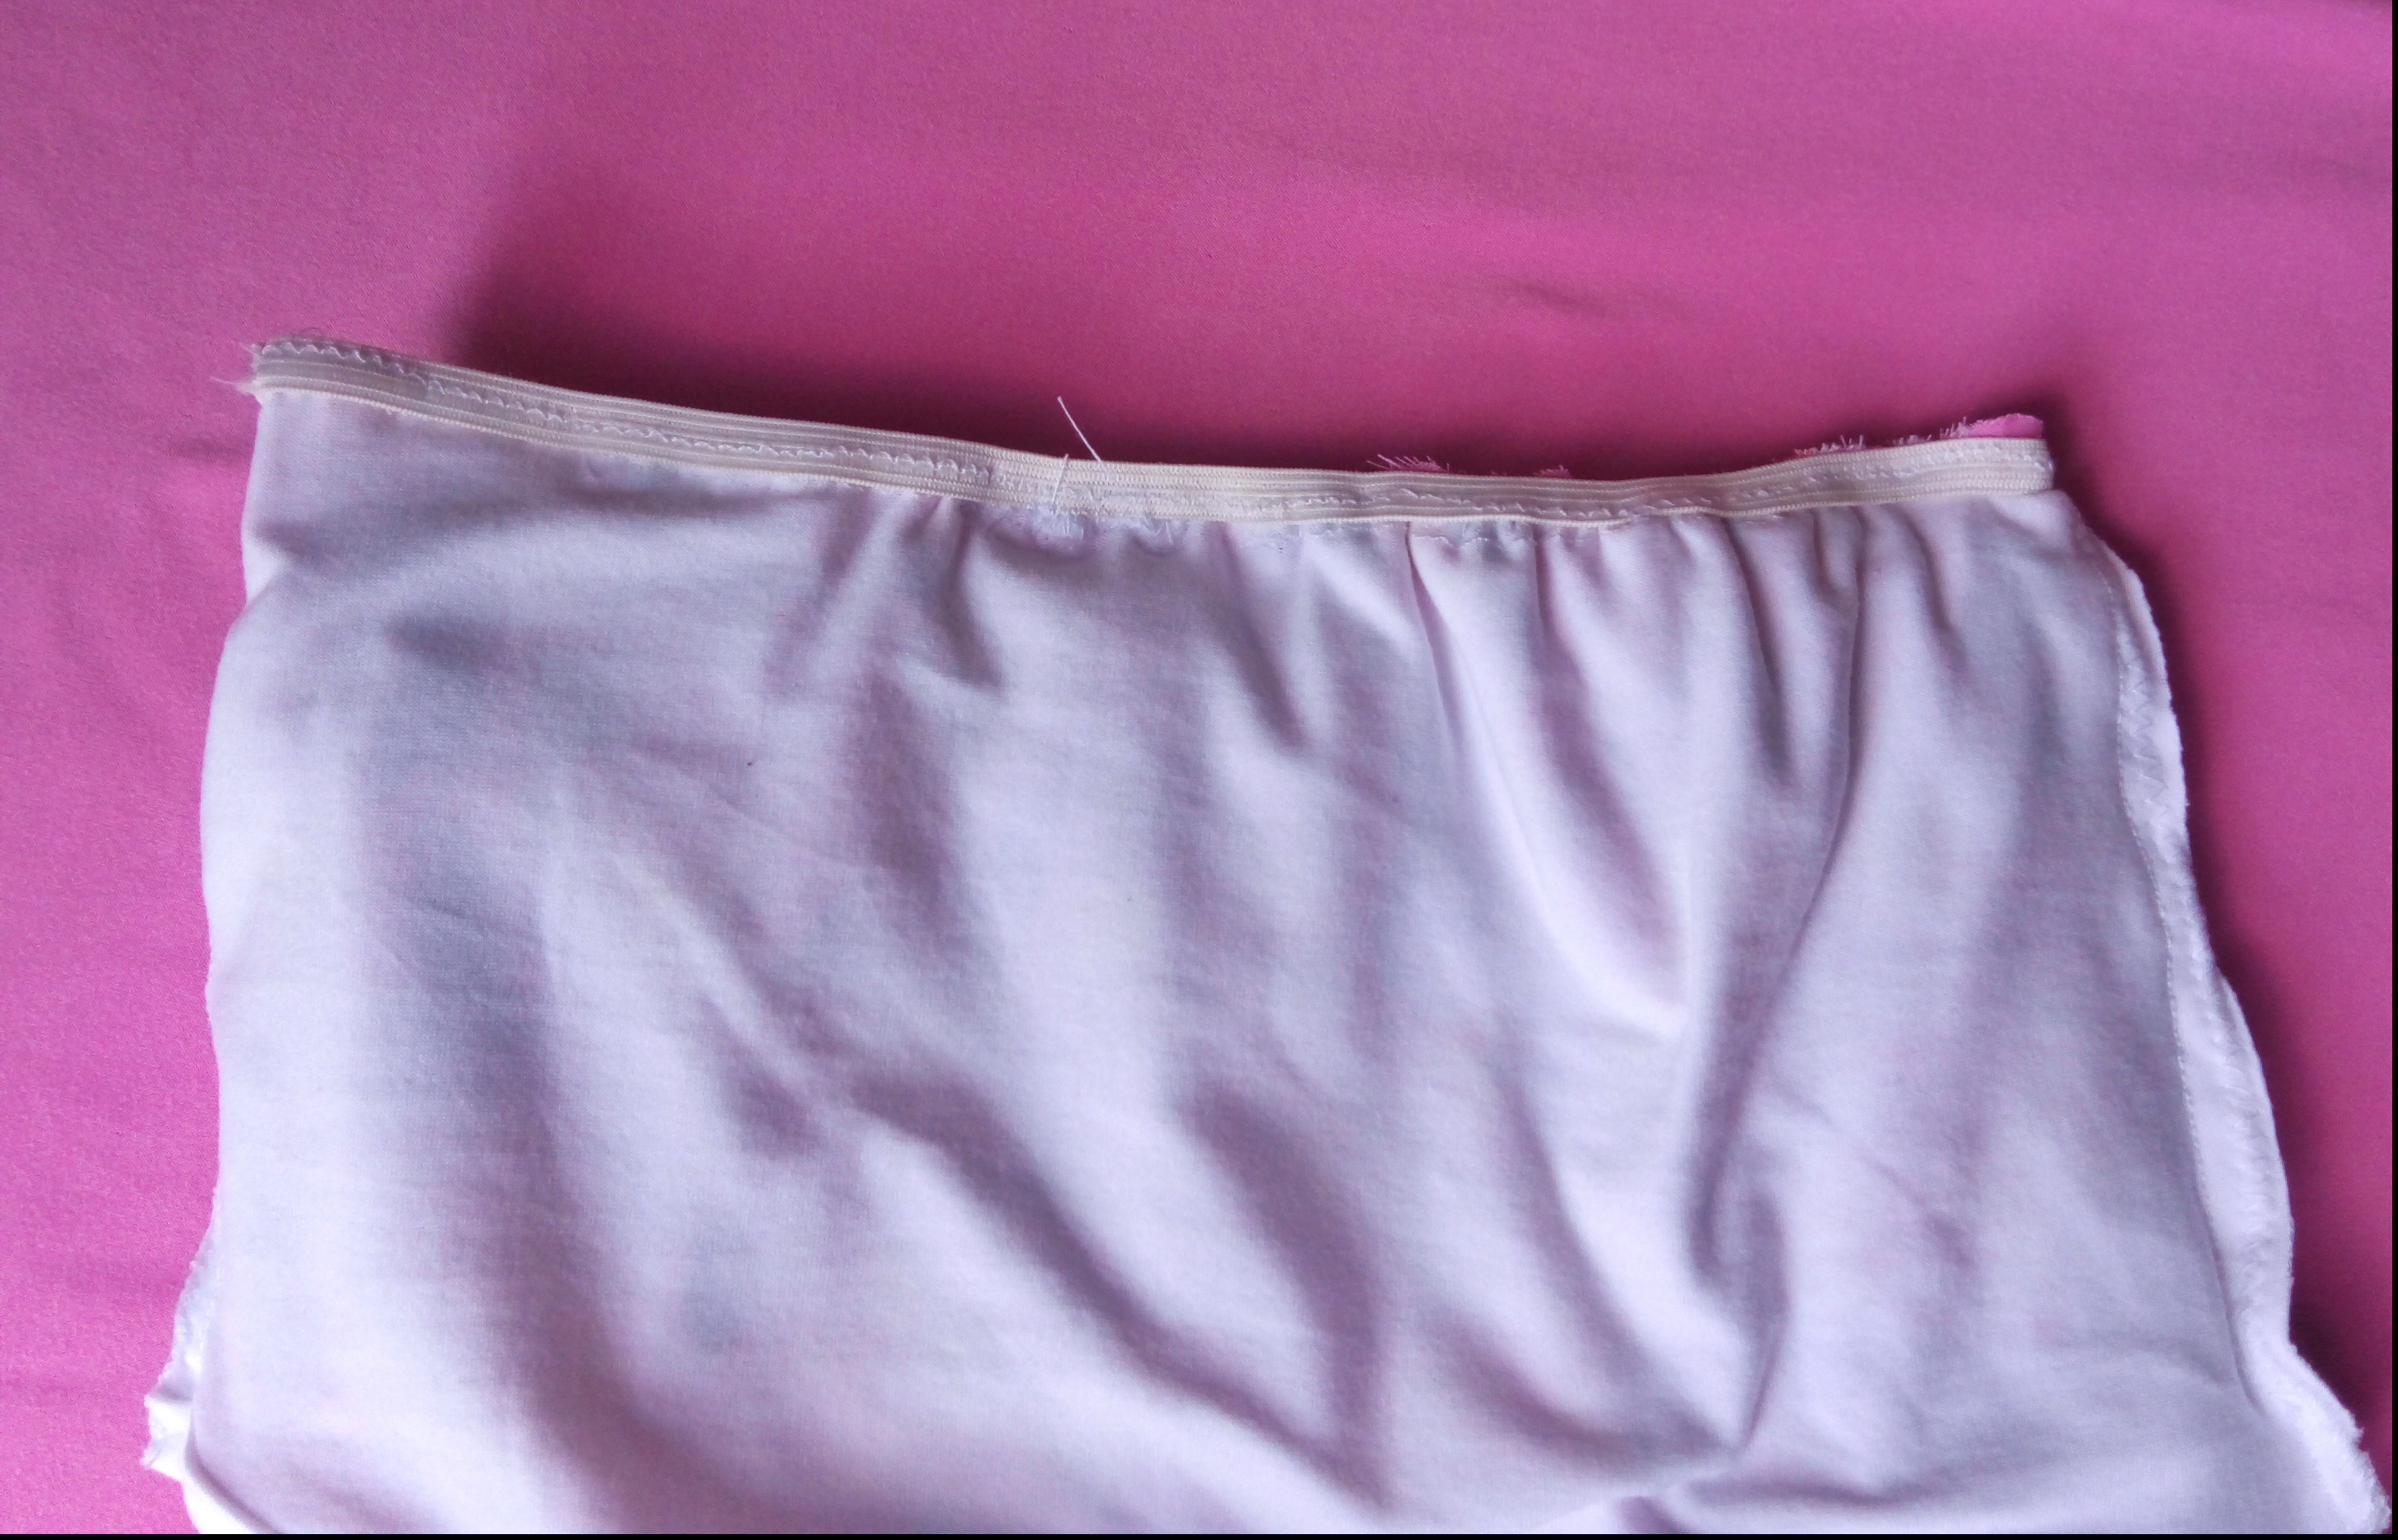
Ahora tome la parte de la camisa y pase costura recta para unir la pieza, después corte una cinta elástica de 48 centímetros de largo, esto es para coser con costura zigzag en la parte de la cintura.
Resultado
Espero que les haya gustado este trabajo, me ha gustado mucho el resultado, los vestidos son hermosos. 🥰❤️❤️

ENGLISH
Hello dear community, I hope you are very well, welcome to my blog ❤️ I hope you have the best energy to learn something new every day!
I love to learn how to make different models of dresses to make them for my 1 year old daughter. I used a piece of recycled fabric which I put to excellent use.
I always like to dress my daughter in dresses, they are very beautiful. ✨
Los Materiales que utilice
- 🌸 White micro-denim fabric
- 🌸 Rose dracon fabric
- 🌸 Crochet hooks
- 🌸Scissors ✂
- 🌸Sewing machine
- 🌸Tape measure
- 🌸Pencil
Steps to make the flower dress
First Step:
The first thing I did was to take the white fabric to take the mold of the shirt of the dress, the measures are 30 wide and 26 long, then with the scissors I proceeded to cut the square, then with the pencil I marked the measures to make the sleeves that measures 12 cm long, then I left 5 cm wide for the shoulder and I proceeded again to cut the neck in a straight way.
Second Step:
Then I marked with the pencil a line that goes from the neck to one of the sleeves, then with the scissors I proceeded to cut. Then I made a straight seam and then a zigzag seam to join the shoulder.
.
Third Step:
Now cut a strip of fabric to make the bias binding of the shirt, it measures 60 cm long and 3 cm wide. Then with the crochet hooks I was holding by the edge of the sleeve and neck, after this pass a straight seam with the sewing machine.
Fourth Step:
After double stitching to make the bias binding, sew a straight seam again.
Fifth Step:
Now we are going to cut another piece of white fabric, we are going to measure with the tape measure 60 centimeters long and 7 centimeters wide, then with the machine pass a straight seam, without making the auction at the beginning or the auction at the end, then pull one of the threads and made a ruche.
Step Six:
Now we are going to make the sleeve seam, place our piece and pass straight seam and then pass zigzag seam.
Step 7:
Now both sides of the shirt. pass straight stitching and then zigzag stitching.
Eighth Step:
To make the skirt of the dress, I used 30 centimeters long, the width is the one it has at the factory. Then I measured 25 cm on the side and cut in the shape of a circle, to finish the skirt I cut the waist part 22 centimeters wide.
Step 9:
Fold the edges of the seam allowance 1 centimeter and pass straight seam, then join the sides of the skirt.
Step 10:
Now take the part of the shirt and sew a straight seam to join the piece, then cut an elastic band of 48 centimeters long, this is to sew with zigzag stitching in the waist part.
Result
I hope you liked this work, I really liked the result, the dresses are beautiful. 🥰❤️❤️
Me gusto mucho tu paso a paso @dilianny20, muy bien explicado un proceso sencillo.
Excelente que reutilices material para hacerle ropita a tu bebe,
Saludos, éxitos y bendiciones✨
Muchas gracias por sus palabras, es un gusto leerlas!! Bendiciones✨❤️
#hive #posh
https://twitter.com/Darcy1387/status/1659432634718593031
https://leofinance.io/threads/view/dayadam/re-leothreads-2djsdfgy9
The rewards earned on this comment will go directly to the people ( dayadam ) sharing the post on LeoThreads,LikeTu,dBuzz.
That is a nice design and well executed as well.
TE QUEDO MUY BONITO, SEGURO LUCIRÁ HERMOSA TU PRINCESA. SALUDOS