Neutral Specialists
Hello, hello, Splinter fans!
Nothing revolutionary has happened to me on Splinterlands this week, although I finally managed to upgrade my Lobb Lowland to the second level. This has been somewhat of an eternity project for me since this Soulbound Earth summoner has been avoiding me for some reason.
What I'm going to write about is an exciting battle I just finished. Interesting for a couple of reasons:
- First of all, I lost 12 matches before this one, and my strategy finally worked out.
- Secondly, I got to use a couple of monsters I hardly ever use and they were fantastic!
This time I'm not going to give away the setup of both teams at first because I think it will be much more interesting for you to figure out if you would have made the same choices.
Rules

In this 28-mana battle, we had only two Splinters to choose from - Fire and Dragon. This obviously meant that there was a high probability of many Fire monsters being represented. In my opinion, Fire is a Splinter with a strong emphasis on Melee. With this in mind, I took a look at the rules.

Equalizer ruleset will increase the health of all monsters to the level of the monster with the highest amount of health.
So if I assume the opponent is going to use a lot of Melee, I think it would be wise to find units with a high amount of armour but a low number of health points. They would then be very well protected especially if my opponent would choose a monster with plenty of health.

Born Again gives give every monster the Rebirth which will give them "a second chance" although they are reborn with only one health point.
Then again, They are born with full armour, a fact that also speaks for choosing heavily armoured monsters.
Even though the temptation to choose monsters with Martyr ability is ever present, this time I decided to try something else.
Key Monsters

Let's start the analysis with two of my key units in this strategy:
DUMACKE ORC is a Melee monster with strong armour but very low health. On level 3 it is fairly good offensively and also good against other melee units as well as ranged units defensively since its Shield ability will reduce 50% of those attacks.
The main reason why I rarely use Dumacke Orc is indeed its low health. All it takes is one magic attack and no armour or shield will help.
However, in Equalizer battles the value of the Orc begins to rise and we can start to see it even as a tank unit. Also note that if and when it is killed, the rebirth is gonna bring the Orc back with full armour. Then it will again take some time for the opponent to go through the armour and shield assuming they'll use melee and ranged units.
And we will assume so. Therefore I placed Ducke Orc as a tank monster.

CLOCKWORK AIDE might also seem less awesome by the first look. Just like the Orc, it has only one health point but impressive armour.
While having no attack power at all, Clockwork Aide is an excellent defence unit, especially in Equalizer battles. I just recently upgraded it to level 2 which increased its armour to 8. Again, assuming my opponent would use melee and ranged attacks, there would be a lot of work to be done in order to destroy the Clockwork Aide. And yes, this little guy will also be reborn with a full set of armour.
In addition to that, it has a Swiftness ability which will increase the Speed of all my other monsters. This will hopefully give my troops the advantage to make the first strikes.
Fire Splinter has many useful Sneak monsters and that is why I put Clockwork Aide in the last spot to frustrate my opponent.
The Rest of The Squad

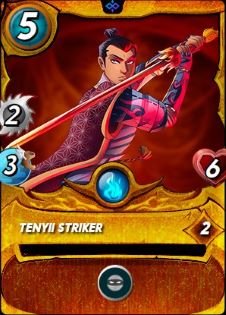
Both TENYII STRIKER and URAEUS are excellent Sneak monsters who will have powerful melee attacks when boosted by Tarsa's summoner buff.
They are also not very slow and will become even faster thanks to Clockwork Aide's little help.
My plan with these two is to start taking out enemy units one by one starting from the back.


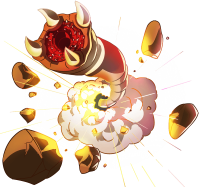
BATTERING RAM is a cheap and fragile unit but with Tarsa's melee buff and increase in speed, it becomes a monster that shouldn't be underestimated. It will use the Opportunity to spot and target any weak links among the enemy ranks.
Last but definitely not least, SPIRIT HOARDER is an important piece in my master plan.
Spirit Hoarder has a Triage ability which it will use to heal the backline monster who has taken the most hit. This will become a key factor if and when either Clockwork Aide or some other unit has been born again. The plan is to heal the Clockwork Aide while it is still under the safety of its newborn armour.
Entering The Arena
So, it looks like the monster who will define the health of all monsters is the opponent's Iidri Fyre with health points of 8(+1 from the summoner). I guess I ended up on the winning side here since I picked units with less health. Still, the battle is far from over.
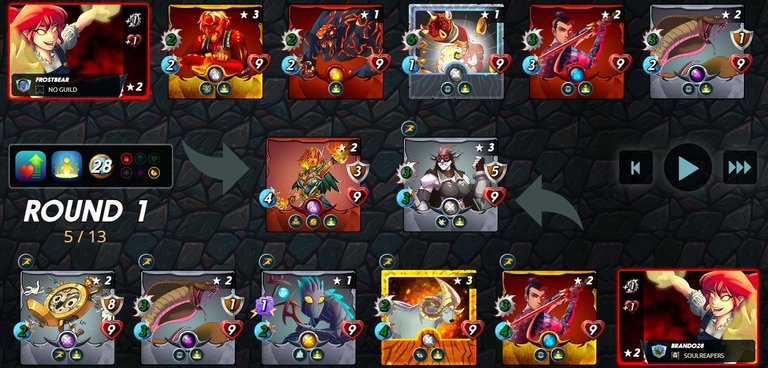
There are some pretty good picks on their side, one of them being the Sand Worm which in normal circumstances has quite low health even though it is very powerful offensively.
The other unit worth mentioning is already mentioned Iidri Fyre with her Redemption ability. If we get to destroy this tank unit, she will cause some damage to all of my units while dying - and she will do this twice because of the Born Again ability.
One more thing, you can see that the enemy has a total of three Sneak monsters which means it's gonna be a busy night for the Clockwork Aide...

The Battle
This is it, the mighty Iidri Fyre awaits and you can watch the whole battle HERE or/and continue reading my battle report below.
ROUND 1
Right from the start the battle seemed to follow the script: our units attack Iidri Fyre(because of her taunt ability) and the opponent Sneak monsters targeted my Clockwork Aide. The round ended with Iidri almost dead and the Aide without armour.
ROUND 2
The second round was even more eventful. We destroyed Iidri, she unleashed The Redemption, we killed her again, and she did it again. Spirit Hoarder did his job well and healed the Clockwork Aide but without armour, the enemy managed to kill it but the Aide came back with full armour.
ROUND 3
Without Iidri Fyre on the battlefield, we were now able to focus on the opponent's backline as was my initial plan. Clockwork Aide's armour was holding and Spirit Hoarder was able to heal it once again.

ROUND 4
In this round we got rid of Radiated Scorcher but unfortunately, lost the Aide for good.
ROUND 5
In the fifth we destroyed enemy Uraeus for the second time and shifted our focus on Tenyii Striker and Scorch Fiend which was now in the tank spot.
ROUND 6
The sixth round saw the rebirth of our Uraeus who fortunately came back with armour to defend itself against the powerful Sand Worm.
ROUND 7
At the very beginning of this round, we put down both Tenyii Striker and Scorch Fiend for good and now there was only The Worm left. It took us quite a few strikes but eventually Sand Worm was also down and the battle was finally over.
Conclusion
Interestingly enough, all three of my key monsters(Clockwork Aide, Dumacke Orc, and Spirit Hoarder) are actually Neutral units. This leads to the conclusion that this strategy could very well be used again with the Equalizer ruleset and also with other Splinters if they are available.
I've said this many times - trying old, rarely-used monsters with different rulesets is a great idea. You'll be amazed at what new use cases you might find along the way! From this battle, I learned to respect Dumacke Orc, remembered why I used Clockwork Aide at some point and strengthened my trust in Spirit Hoarder.
Thank you for reading!

Also Playing:
Overline
Dungeon Master
Terracore
Rising Star
Army of Crypto
Disclaimers:
Thumbnail background image made with Canva
Other pictures are screenshots from Splinterlands
Thanks for sharing! - @alokkumar121
