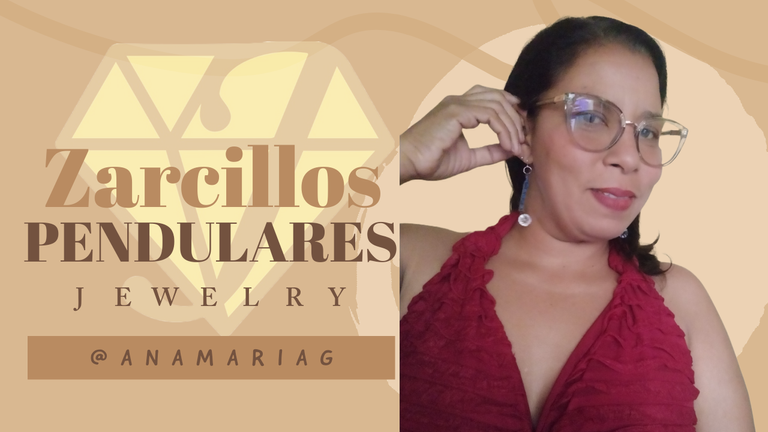
Zarcillos Pendulares ( Esp-Eng).
Un saludo cariñosos🦋! a los hivers creadores de #jewelry, esta extraordinaria comunidad que muestra, gran cantidad de talentosos artesanos dedicados a darle un toque especial a los accesorios.
Me encantó este modelo de pendientes, en forma de péndulo, me hizo salir de mi zona de confort y salir de lo habitual, para ir un poco más allá.
Descubrí como darle un nuevo uso, a algunos materiales que tienen un uso definido, poniendo a prueba mi creatividad.
Así que estoy muy ansiosa en contarles como hice mi pendiente, combinando materiales y colores que me encantan.
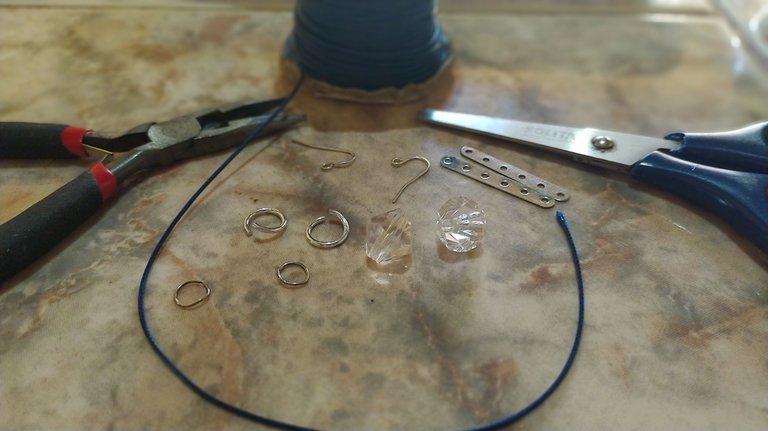
Para lograr esta creación usé los siguientes materiales e implementos:
- Dos placas rectangulares con hoyos, color plateado.
- 30 cm. de cordón acuerado color azúl rey .
- Dos cuentas transparentes, coronillas de san peregrino.
- Dos terminales de puntas.
- Dos aros pequeños .
- Dos ganchos para pendientes .
- Dos tapas para los ganchos .
- Silicón líquido .
- Tijeras .
- Encendedor .
- Pinzas .
Para darle forma a mis zarcillos, seguí los siguientes pasos:
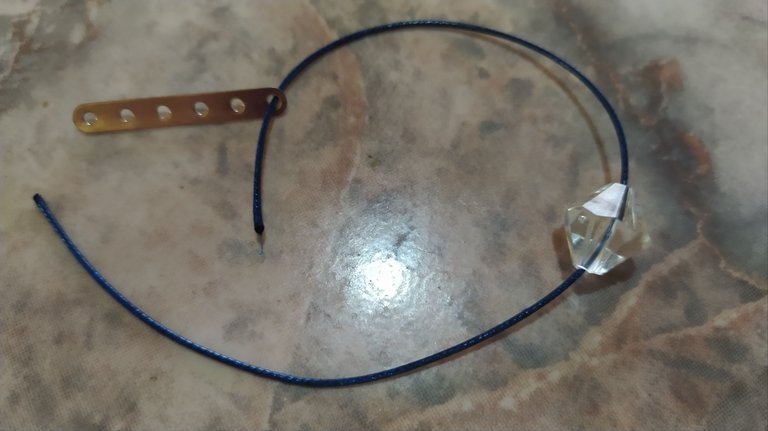
- Como primer paso, Junté algunos de mis materiales e implementos para usar.
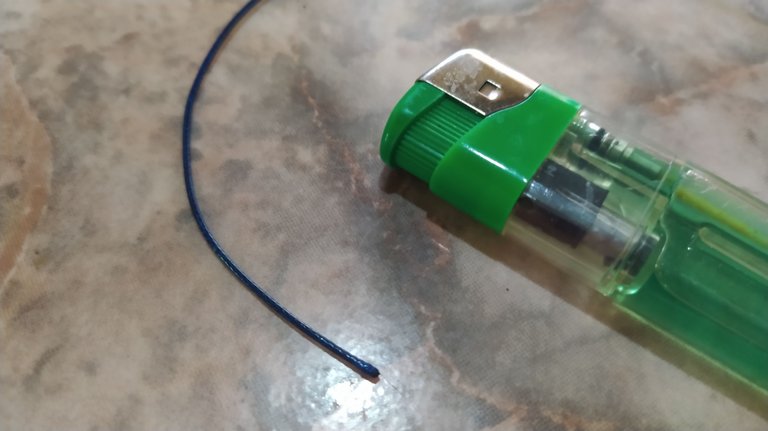
- Lugo con ayuda de la tijera, corté los 15 cm. de cordón azul rey.
- Así comencé quemando las puntas del cuero, para facilitar el pase por los agujeros y por la cuenta.
- Junté los materiales para esta primera parte de mi creación, para facilitar la elaboración .
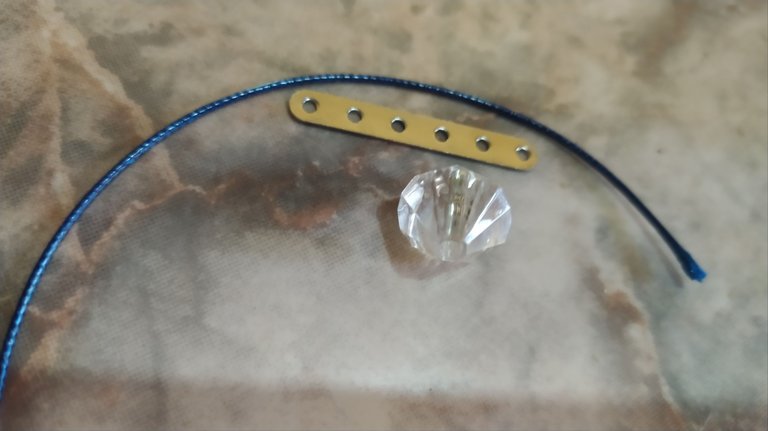
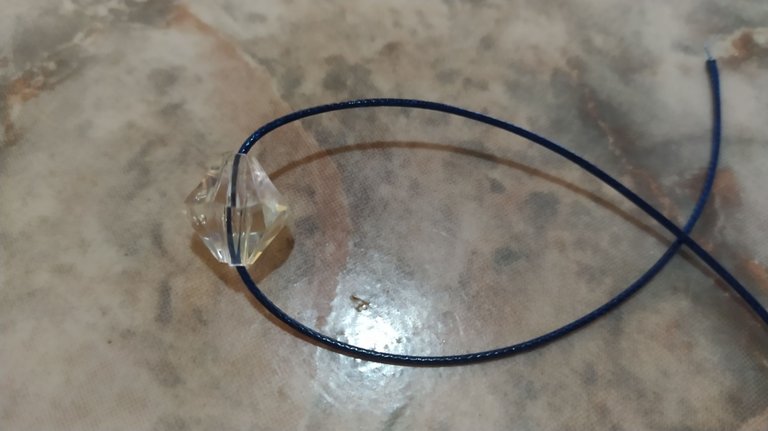
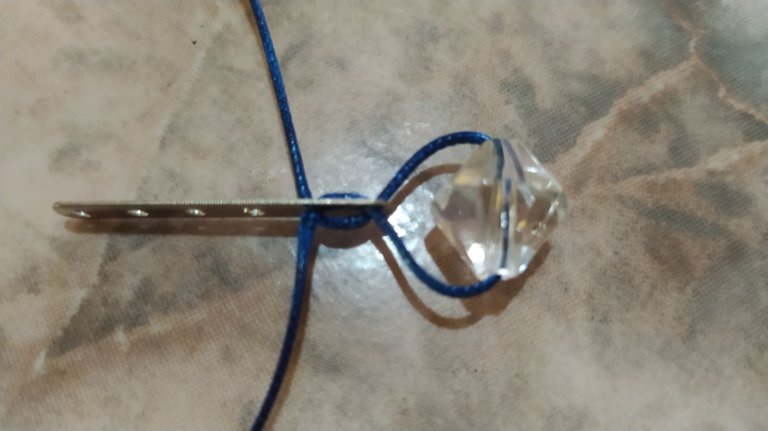
- Me puse manos a la obra y pasé el cordón por la cuenta transparente y lo ubique, justo en el centro.
Y así comencé de abajo, hacia arriba a introducir mi cordón, en los agujeros.
Introduje el cordón de derecha a izquierda, una punta.
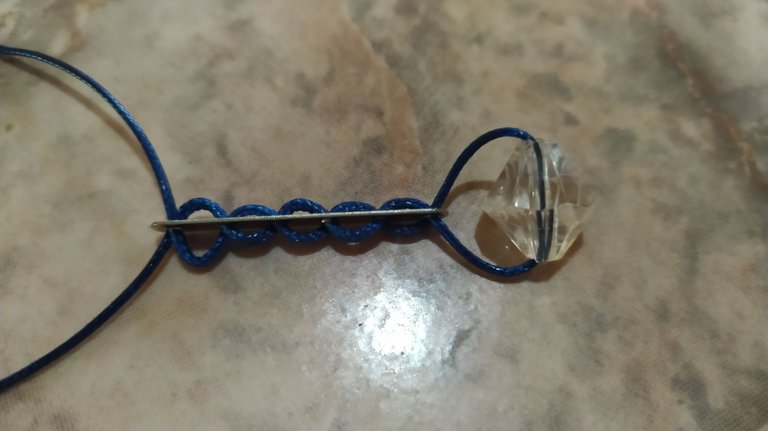
- Ahora por el mismo agujero, lo introduje de izquierda a derecha.
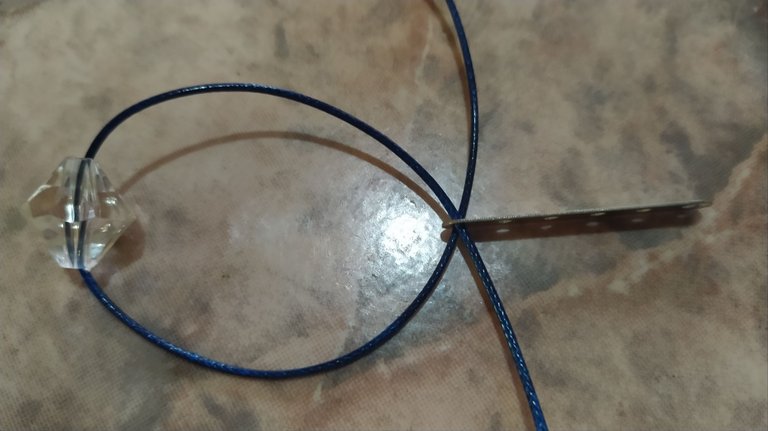
- Este procedimiento lo seguí, hasta llegar a la parte superior, a medida que se me dificulta a pasar el cordón por los agujeros , procedía a quemar su punta, para facilitar el trabajo.
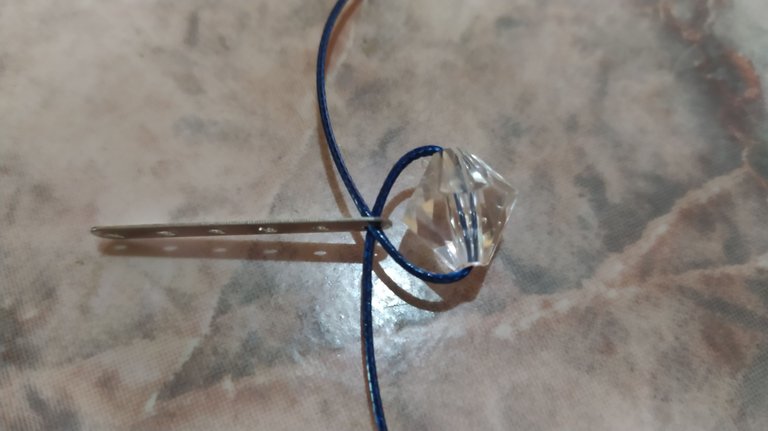
- Al llegar a la parte superior, corté el excedente de cordón.
- Aquí llegó el momento de colocar, el tapa puntas, pero antes coloqué un punto de silicón líquido, para fijar mejor mis puntas.
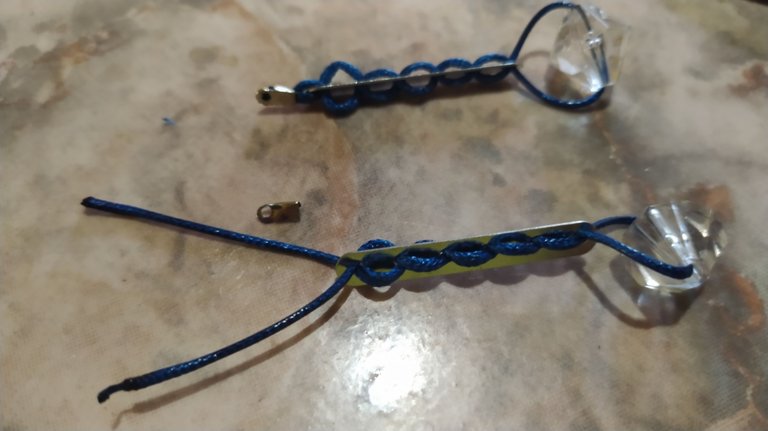
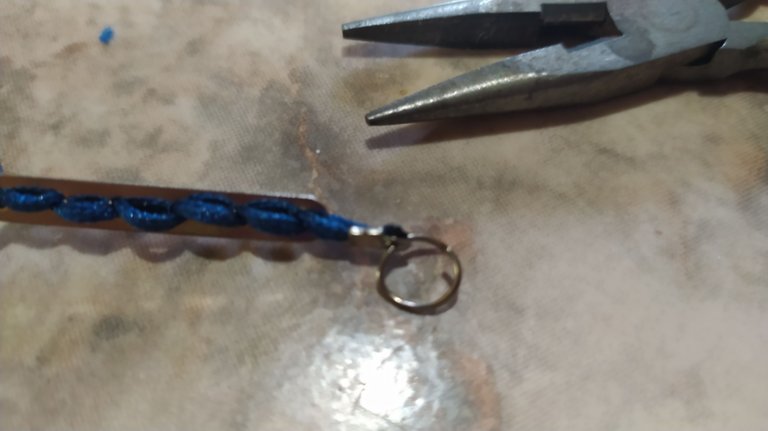
- llega el momento de colocar con ayuda de la pinza, el aro pequeño plateado, abriéndolo muy cuidadosamente, lo uni con el gancho para pendientes.

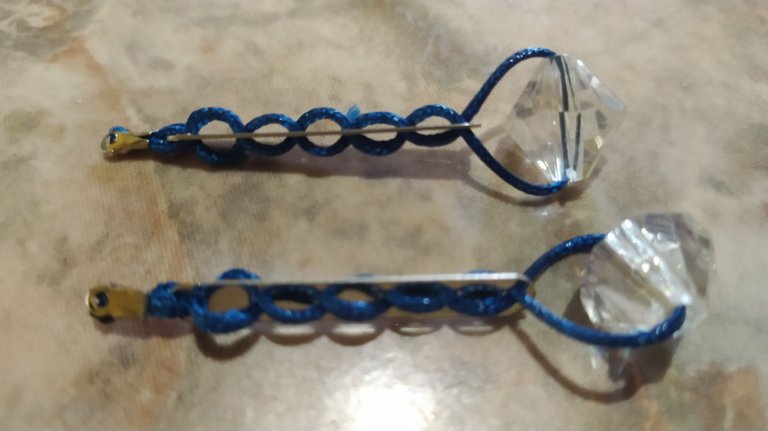
Listo! .

Mis hermosos zarcillos Pendulares, están terminados, listos para lucirlos.
Lo más interesante de esta creación, es su fácil elaboración y empleo de muy poco tiempo para conseguir su culminación, ideal para trabajarlos en serie, para algún emprendimiento.
Recuerda que esto fue una inspiración y con tu creatividad puedes darle , un toque personal, para verte reflejada en esta creación, esta es sólo una propuesta, ahora te toca a tí, hacer tu versión.
Ten en cuenta que las cosas hechas a manos, salen del corazón de su creador hacia las manos de quien va a recibir esta obra de arte y poseen un toque de originalidad.
Anímate a crear y comparte con nosotros tus proyectos.
Un Mega Abrazo 🤗, con mucho cariño🥰 .

Pendulum Stirrers .
A warm greeting🦋! to the hivers creators of #jewelry, this extraordinary community that showcases, lots of talented artisans dedicated to give a special touch to accessories.
I loved this model of earrings, in the shape of a pendulum, it made me get out of my comfort zone and go out of the usual, to go a little further.
I discovered how to give a new use to some materials that have a defined use, testing my creativity.
So I am very eager to tell you how I made my pendant, combining materials and colors that I love.
To achieve this creation I used the following materials and implements: **
- Two rectangular plates with holes in them
- Two rectangular plates with holes, silver color.
- 30 cm. of king blue cord.
- Two transparent beads, St. Peregrine's chaplets.
. Two terminals of points. - Two small earrings .
- Two hooks for earrings .
- Two caps for the hooks .
- Liquid silicone .
- Scissors .
- Lighter .
- Tweezers .
To shape my earrings, I followed these steps: **
- As a first step, I gathered some of my materials and implements to use.
- Then with the help of the scissors, I cut the 15 cm. of king blue cord.
- So I started by burning the ends of the leather, to make it easier to pass through the holes and through the bead.
- I gathered the materials for this first part of my creation, to facilitate the elaboration.
- I got to work and passed the cord through the transparent bead and placed it right in the center.
- And so I started from the bottom, upwards to insert my cord into the holes.
- I inserted the cord from right to left, one end.
- Now through the same hole, I introduced it from left to right.
- I followed this procedure until I reached the top, as I found it difficult to pass the cord through the holes, I proceeded to burn its tip, to facilitate the work.
- When I reached the top, I cut the excess cord.
- Here it was time to place the tip cap, but first I placed a dot of liquid silicone to better fix my tips.
- Now it is time to place with the help of the tweezers, the small silver ring, opening it very carefully, I attached it with the earring hook.
That's it! .
My beautiful Pendulum earrings are finished, ready to show them off.
The most interesting of this creation, is its easy elaboration and use of very little time to achieve its culmination, ideal to work them in series, for some enterprise .
Remember that this was an inspiration and with your creativity you can give it a personal touch, to see yourself reflected in this creation, this is just a proposal, now it's up to you, to make your version.
Keep in mind that things made by hand, come from the heart of its creator to the hands of the person who will receive this work of art and have a touch of originality.
Cheer up to create and share with us your projects.
A Mega Hug 🤗, with love🥰 .
Translated
Fotografías y texto propiedad de la autora.
Separadores libres, Pixabay
Banner y edición de fotos CC Express.
Te quedaron hermosos amiga me encanta el modelo bien sencillo y práctico. feliz día.
@tibisayq23 Gracias amiga, por tu comentario, Saludos 🤗
Fue un placer visitarte y gracias a ti por traer esa hermosa creación feliz día.